Printmaking is such a fun art process for our students to learn. It can be intimidating to think about doing printmaking with younger students, but it definitely can be done. One trick is to keep the materials and processes as simple as possible. I love to print with Gelli® plates because they are easy to use and fun for all of my students.
This time of year, many of my students are drawing things related to fall like leaves, scarecrows, haunted houses, and pumpkins. One way to bring those ideas into printmaking is to incorporate leaves. It can provide your students with a fun and timely art experience.
Check out these 3 easy steps to incorporate fall into printmaking with your younger students.
Step 1: Inspire your students.
While your students may already be thinking about fall, you can take their ideas to the next level with some specific inspiration.
Here are a few options.
- Read the book, Leaf Man, by Lois Ehlert.
- Have a class discussion about what fall looks and feels like.
- Show your students the video, Why Do Leave Change Color in the Fall, by SciShow Kids.
If you want students to expand their ideas beyond leaves, you can ask them to draw and cut out paper shapes like pumpkins or jack-o-lanterns to use later in the printmaking process.
Step 2: Demonstrate the printmaking process.
When teaching printmaking, it is important to model for your students. The process outlined below will work for a variety of monoprinting processes.
Looking for more in-depth information? We have the perfect resource for you! In the Creating with Gel Printing Plates PRO Learning Pack, you’ll learn everything you need to get started with the process
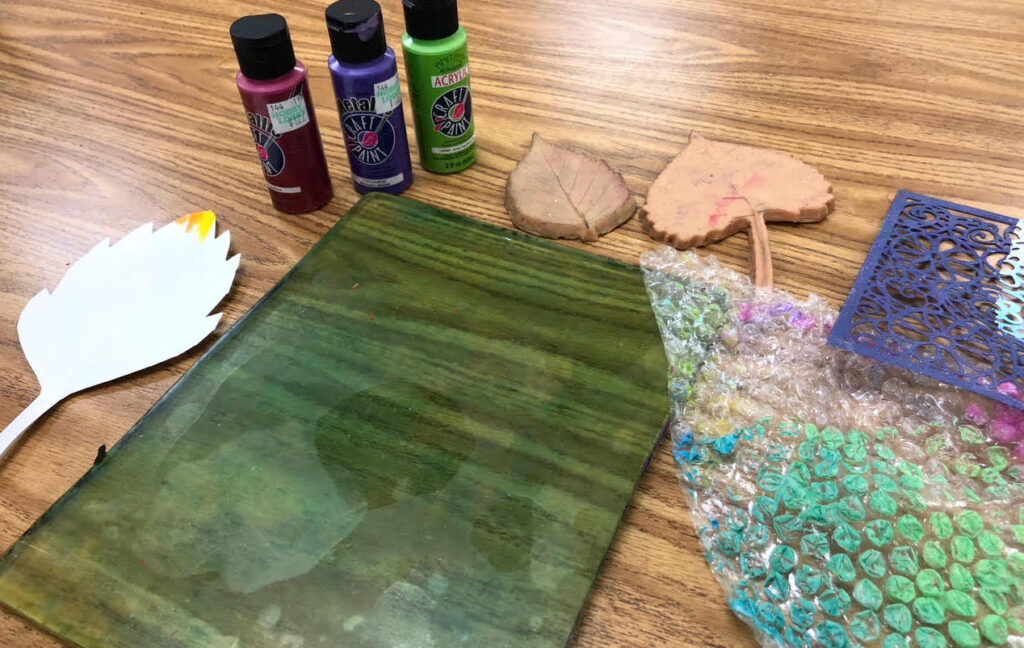
Materials
- Gelli® plates or another monoprinting surface
- Brayers
- White or colored construction paper
- Scrap paper
- Acrylic paint
- Wet wipes
- Texture materials like real leaves, rubber leaves, leaf stamps, bubble wrap, etc.
Procedure
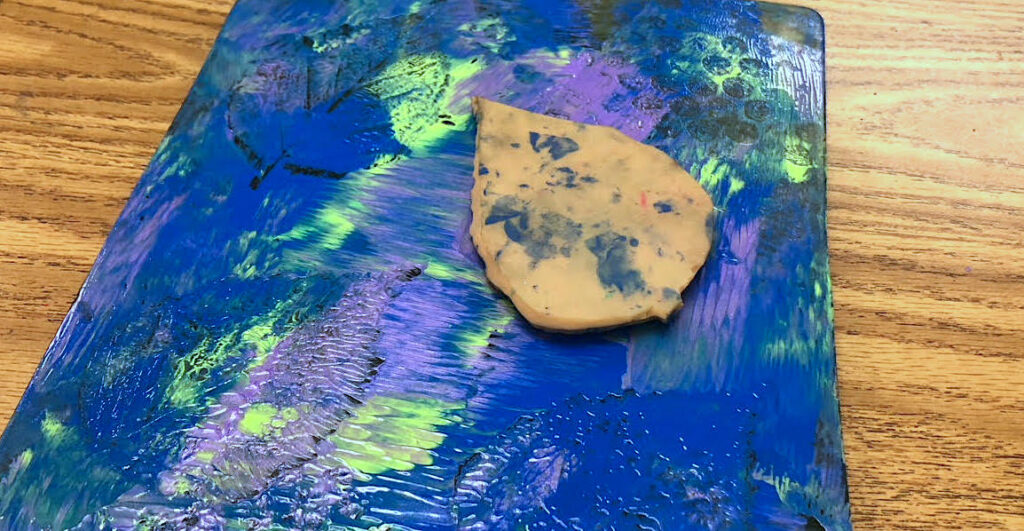
1. Roll Out the Paint
Have students put a few drops of two to three colors of acrylic paint onto the Gelli® plate. Fall colors would work well here! Then, have them take a brayer and roll over the colors until the plate is covered. After that, have students roll the brayer on a scrap piece of paper to help clean it. Be sure to keep the dried scrap paper as it makes fantastic collage material!
2. Add Texture
Now it’s time to add texture. Have them press leaves onto the surface and pick them back up to create a design. If you chose to read Leaf Man for inspiration, they might choose to create their own figure using leaves.
Be sure to remind students not to overdo it. You don’t want to lift off all the paint during this process!
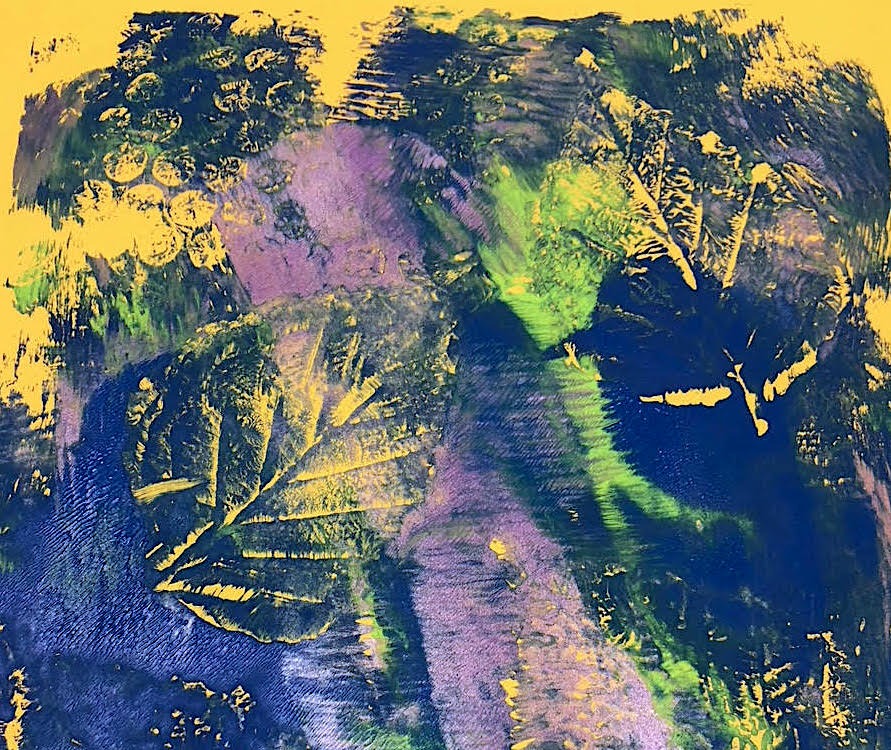
3. Pull the Print
Finally, have your students lay their paper onto the Gelli® plate and rub the back for about 30 seconds to transfer the design.
This is a great process to run in conjunction with other projects, especially if you do not have a class set of Gelli® plates. You might consider having students draw their favorite fall activity or do leaf rubbings while they wait to come to the printing station.
3. Give your students time to reflect.
Reflecting is such an important part of the art process. It allows even our youngest students to think about their work as well as the artmaking experience.
Here are a few ways to include reflection time for your students.
- Have students write what they learned on a sticky note.
- Let students share their work with the class.
- Ask your students to think about the process of creating their art and what they enjoyed about it.
Your students will have a blast and be so engaged while creating their own fall inspired print!
What is your favorite fall project?
How do you use Gelli® plates in the classroom?
Magazine articles and podcasts are opinions of professional education contributors and do not necessarily represent the position of the Art of Education University (AOEU) or its academic offerings. Contributors use terms in the way they are most often talked about in the scope of their educational experiences.