When lesson planning, I love taking an old technique and giving it a modern twist. What’s even better? Designing an art lesson where every student succeeds.
This trompe l’oeil lesson ticks both of those boxes. Students not only learn an impressive art technique, but they also get to practice their observational drawing skills. And they feel so empowered when they’re finished!
Read on to see how you can teach this fun lesson and watch your students soar.
This lesson has students using their observation skills to create drawings of paper objects. It’s challenging, rewarding, and the results make for an exciting hallway display.
Step 1: Introduce the idea of trompe l’oeil to students.
Before students begin this project, it’s vital for them to understand the history of the technique. If you’re not familiar, trompe l’oeil is French for “deceive the eye.” It is an art technique that uses realistic imagery to create an optical illusion showcasing an object.
One way to introduce this lesson is by having students consider the similarities and differences between trompe l’oeil and photorealism.
Here are 3 ways the two art techniques are different.
- The goal of a trompe l’oeil artist is to trick the viewer with an illusion. It’s critical to consider all of the particular small details to create a realistic effect. The goal of photorealism is to recreate an image. There’s no “trickery” involved.
- Because tromp l’oeil aims to fool the eye, the subject matter is limited to objects that might be on a wall or table. Playing cards, wood, paper, marbles, and things that have a specific texture, like insects, are often used. On the flip side, the subject matter for photorealism can be just about anything. There, the goal is to simply draw it realistically.
- Finally, photorealism is connected to photography while trompe l’oeil is a tradition that goes back in time before photography existed.
Step 2: Create a reference object.
The first step is to create an object students will reference for their drawing. Have students take out a piece of loose-leaf notebook paper, a piece of white copy paper, a ruler, a pencil, and a few colored pencils. You may also want to provide scissors for students who might want to cut their paper.
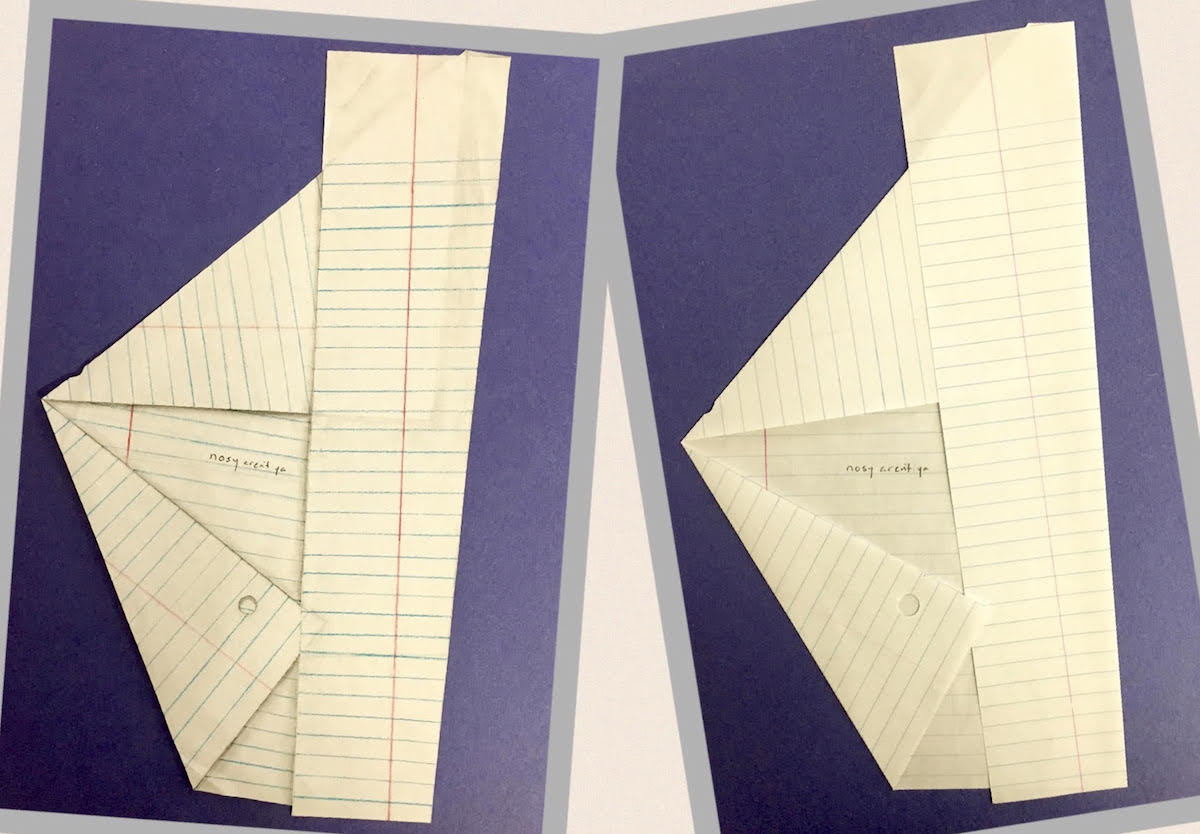
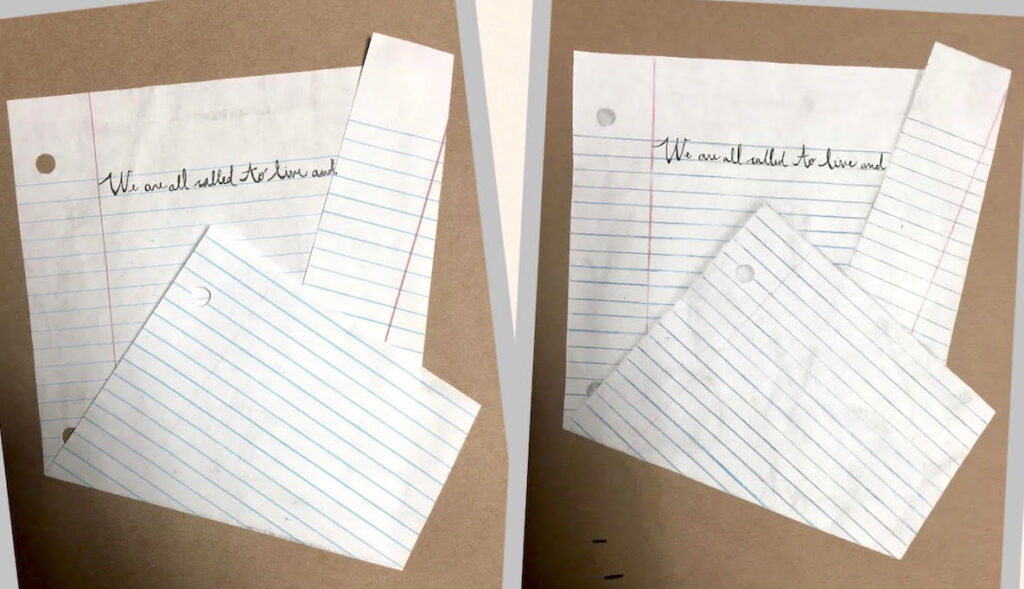
Once they have their materials, have students take their looseleaf piece of paper and manipulate it by folding it, tearing it, and maybe adding a mark or two. Text or images can be interesting additions, but remind students less is more. That long-term goal is to recreate the looseleaf paper in a drawing. The busier the piece of paper gets, the trickier it will be to successfully replicate.
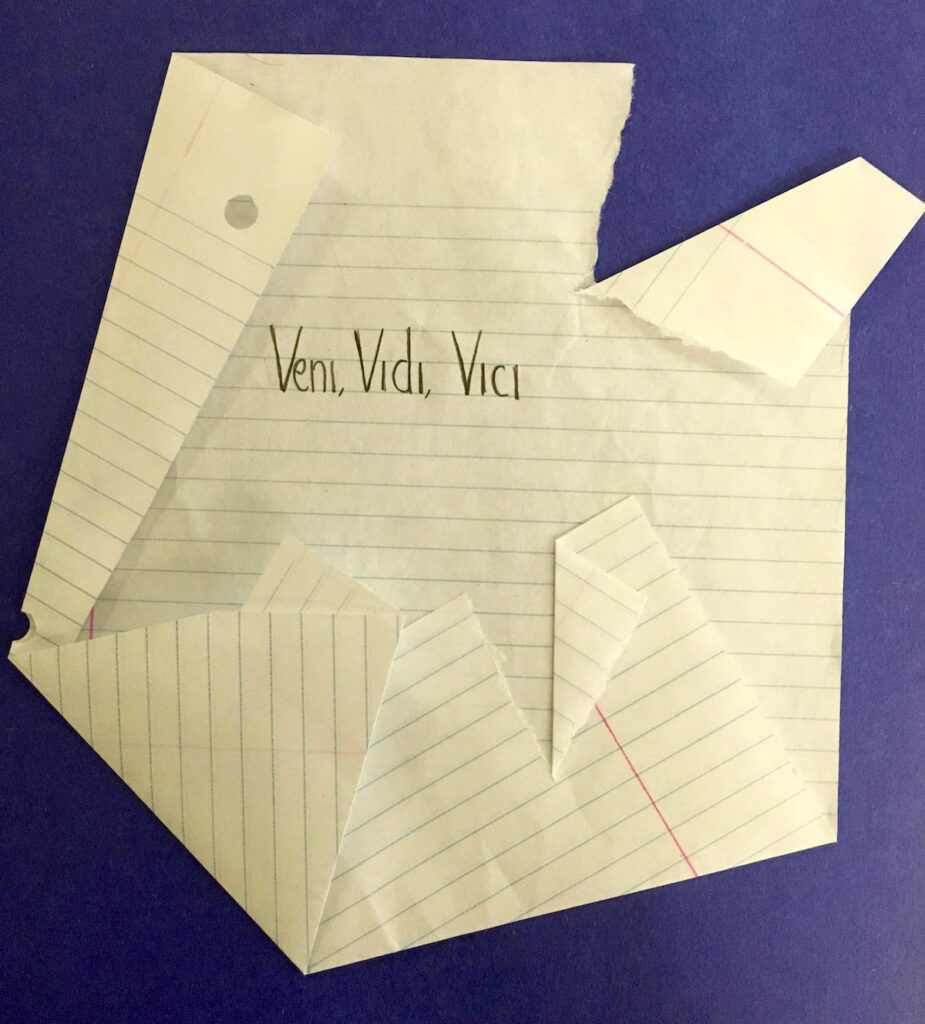
Step 3: Draw carefully to create the illusion.
After students manipulate their looseleaf paper, they are challenged with drawing an exact replica of it on their drawing paper. Encourage students to look carefully and measure so they are sure to be drawing precisely what they see—every little detail! Prompt students to use rulers and colored pencils to draw the horizontal paper lines. Remind them to look closely at the holes, the shadows, and any rips, tears, or folds. The subtle shadows are the key to making the paper look like it’s actually torn or folded.
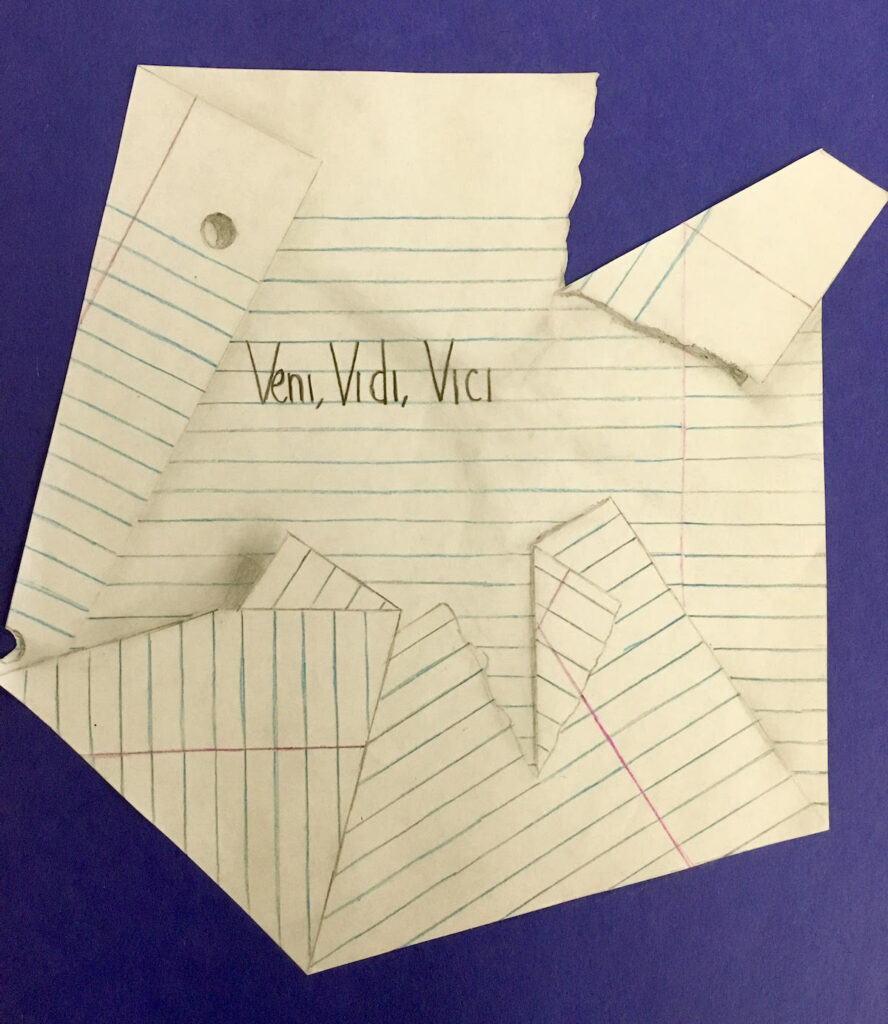
Step 4: Create a stunning hallway display.
After they are finished drawing, have students mount both their manipulated paper and their new drawing onto a piece of construction paper and present these to the class. I recommend displaying these in the hallway as well because they provoke some fabulous conversations around the school. Is it paper…or it is a drawing?! Tricking the eye through drawing has never been so much fun!
This is a wonderful lesson to help get your drawing students to believe in their abilities. Often they don’t believe they will be able to accomplish this type of detail work. But in the end, they do, and that is the best part! To see them get excited and believe in their abilities is what art class is all about.
Do you teach trompe l’oeil techniques in your art room?
What objects do you have your students draw and why?
Magazine articles and podcasts are opinions of professional education contributors and do not necessarily represent the position of the Art of Education University (AOEU) or its academic offerings. Contributors use terms in the way they are most often talked about in the scope of their educational experiences.