Portraiture can be tricky to teach. Not only is the human form difficult to draw, many students feel self-conscious when trying to capture their own likeness. Today, however, I’m sharing a lesson that will have all of your advanced art students succeeding—Pinspiration Portraits!
As art educators, one of our ultimate goals should be to find ways to help students thrive, and this lesson does just that. In addition, it’s a wonderful tool to help students reflect on all the work they’ve done throughout their art education.
Before starting, here are 4 ideas to try to make sure your students have a solid foundation.

1. Make drawing facial features part of your regular practice.
You might consider having them regularly practice drawing eyes, noses, mouths, ears, and hair in their visual journals.
2. Start with a more straightforward skill-building portrait first.
The lesson described in the article The Perfect Introduction to Portraiture for High School Students would be a great choice!
3. Review everything students have learned about portraiture up until this point.
Be sure to include the importance of measuring. In order to produce a realistic drawing, getting the proportions right is so important.
4. Discuss the importance of research.
Make sure students know it is vital for artists to engage with visual culture. You might have students use books, web searches, Pinterest, and more. Then, have students keep an online storehouse of images. In my class, students were required to use Pinterest to pin a minimum of ten inspirational images each week.
Creating Pinspiration Portraits
Once students have a solid foundation and a vast array of inspiration images, they’re ready to begin this project. Simply follow the steps below!
1. Discuss Inspiration
Make sure you begin by discussing inspiration. Springboarding from other artists’ ideas is much different than making a direct copy of their work. The goal is to create something new and creative.
2. Gather Ideas
Have your students go through their storehouse of images and select four to five of their favorites. Explain that students should be looking for pins resulting in a strong “aesthetic a-ha.” They might be inspired by the composition, media, color, texture, theme, or something else!
Once students have selected their favorites images, print them in color. These will be the visual references students use as they work. If you don’t have access to or funds for color printing, students could view the images on a device or create sketches to work from.
As they work, you might consider having students keep a “how-to” journal documenting their thoughts from planning through completion. In my room, we called these their “DYD” (Document Your Doings) Journals.
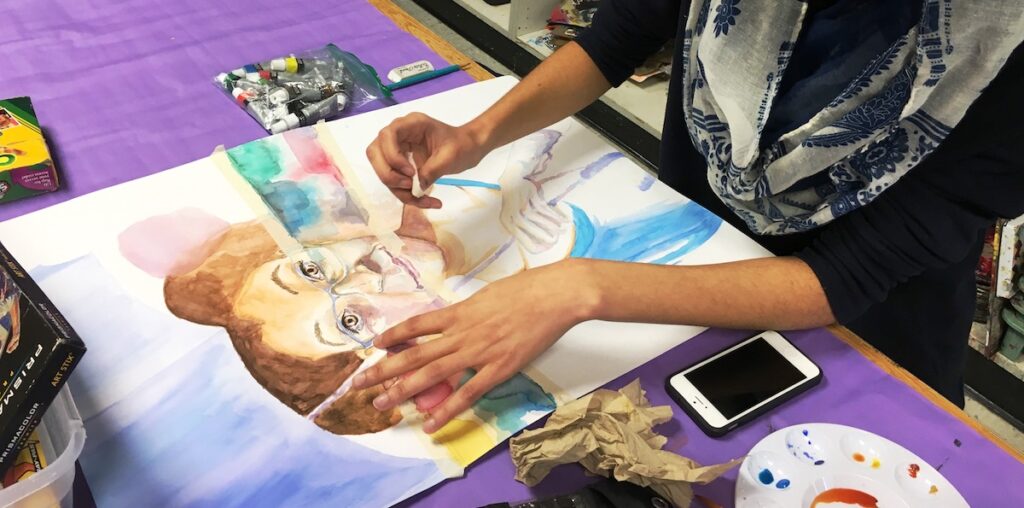
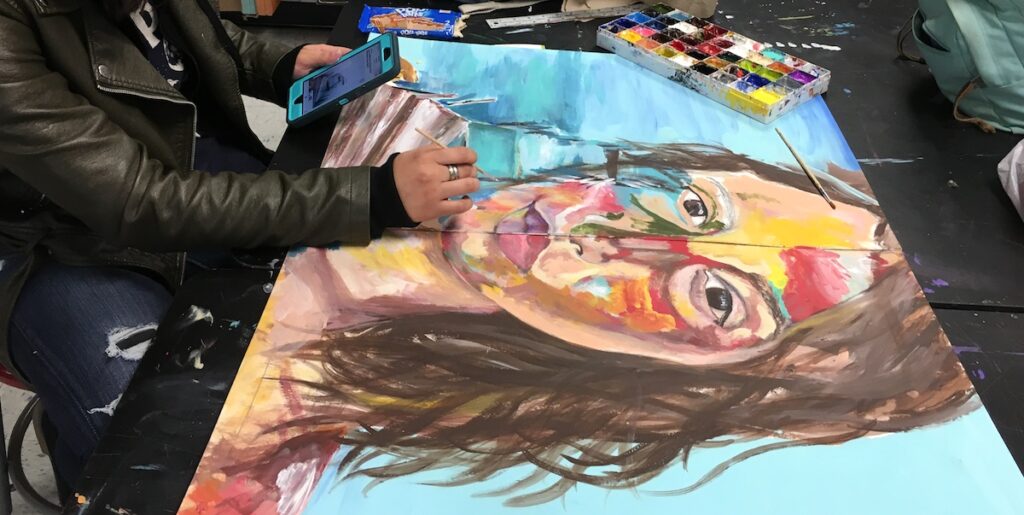
3. Plan the Final Piece
Encourage students to select their own surface area, size, and two-dimensional media with which to work. The objective is to draw or paint a self-portrait using their selected images for inspiration. You may consider having your students create an underpainting, selecting color schemes that show part of their personalities.
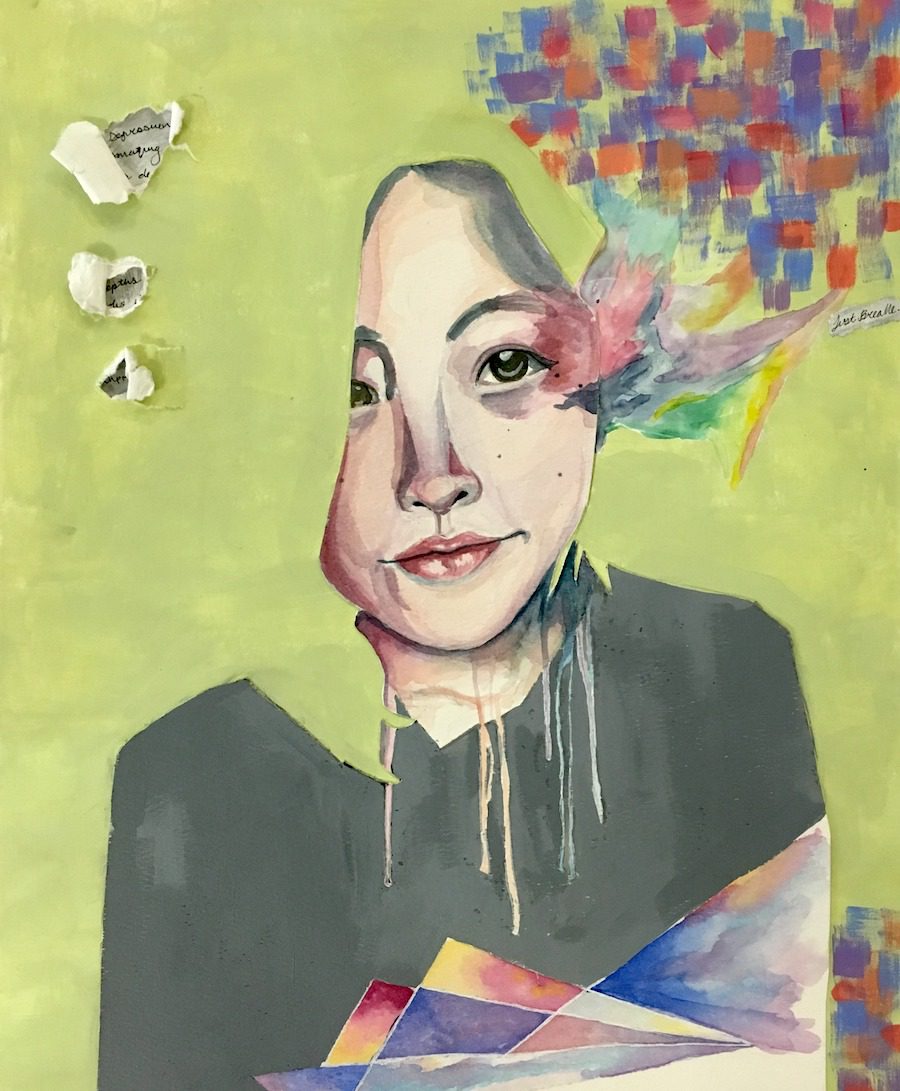
4. Layer Details
Working in layers, have your students add symbols, words, or other elements from their inspiration pieces. The goal here is to have students choose things that will enhance their final piece.
5. Add Facial Features
Finally, have students add their facial features somewhere in their composition, so it becomes the focal point. This step is exciting. Students enjoy incorporating the color schemes and elements found in their first two layers to create a unique portrait.
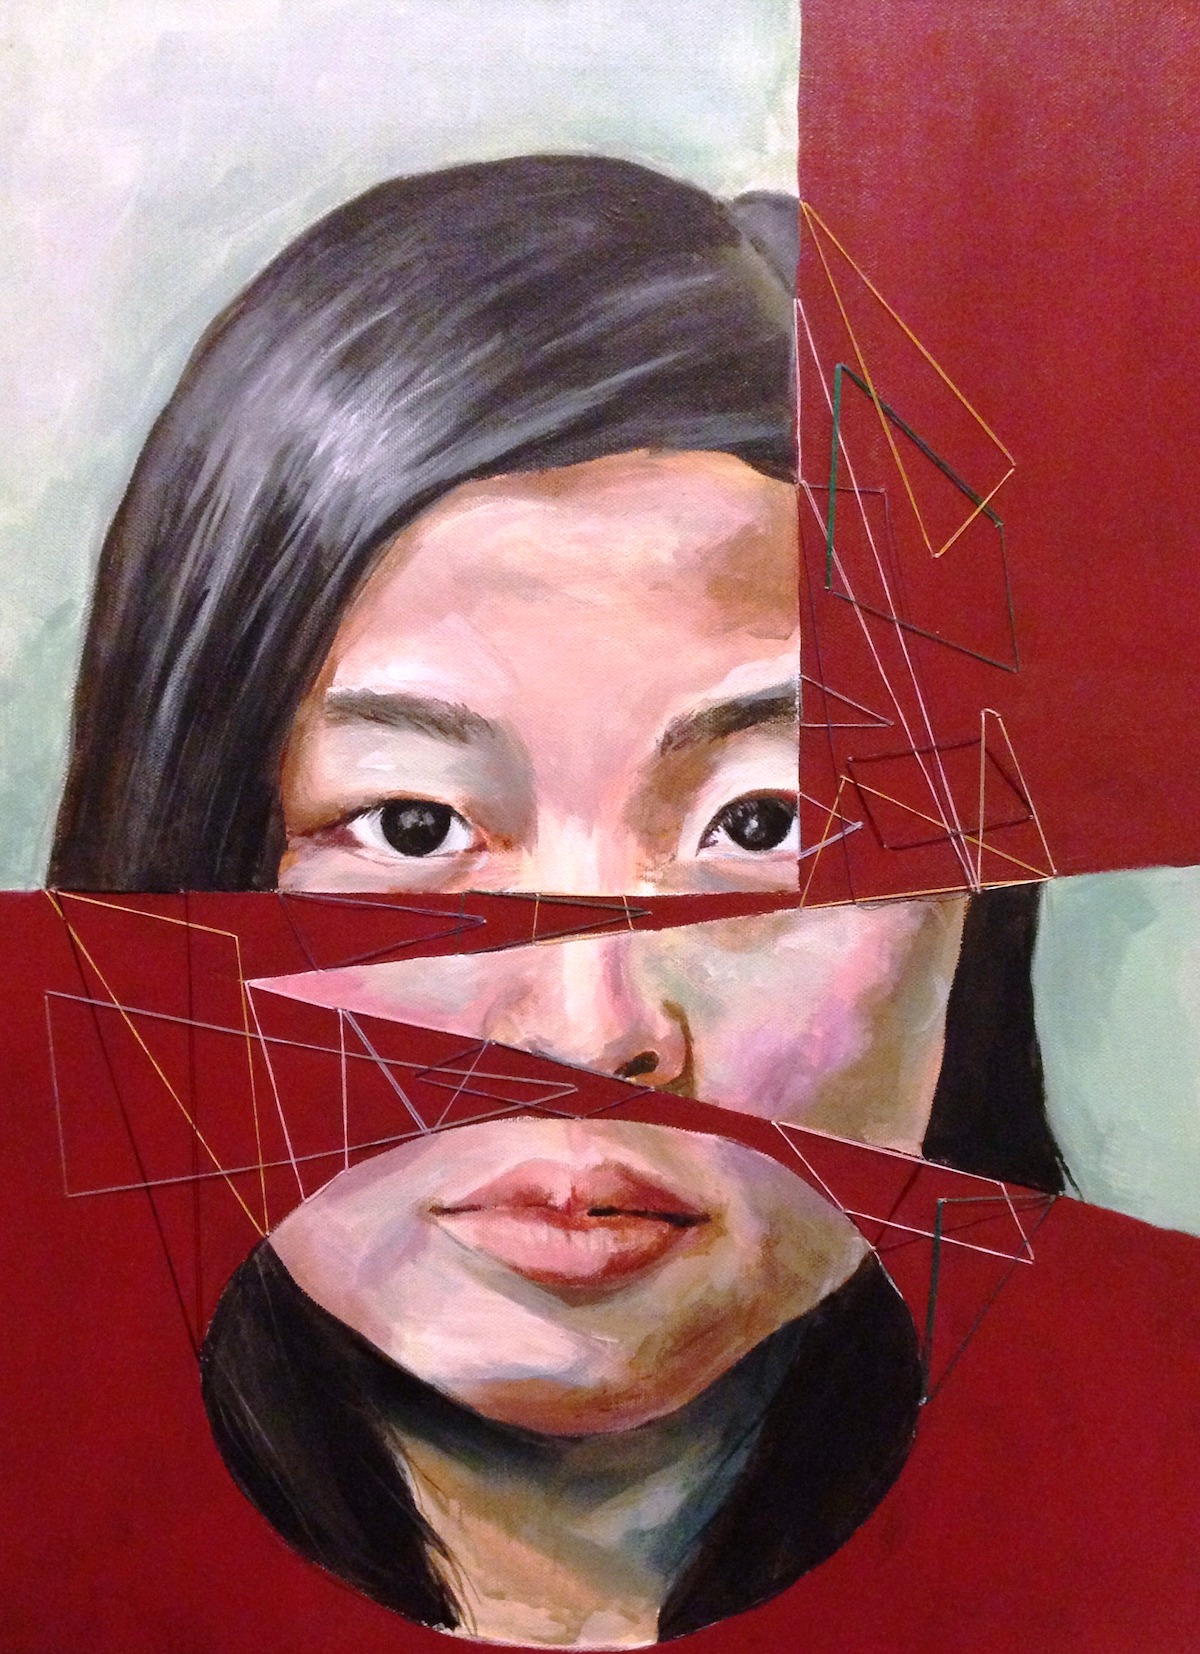
They also begin to realize how much they have learned and how they are now free to explore their new knowledge to take their portraits to a whole new level. Students love the freedom of this lesson and the fact that they can utilize pins they have been saving all year and incorporate them into their final piece. And the results are always outstanding!
As a teacher, my favorite part about this lesson is how you can actually see each students’ personality in their final work. Exhibiting these pieces in an end-of-year exhibit with other portraits and final works can help show the community how much each artist had grown over the year.
Learning portraiture is important. When students begin to realize that they can do it if they work carefully and methodically, they begin to believe they truly are artists. As important as these technical skills are, it’s equally important for students to be creative and divergent thinkers. Merging the two is essential to the overall growth of their learning, and this lesson does that perfectly! Not to mention this assignment is a perfect assessment tool. But then again, art often is!
How do you creatively teach self-portraiture to your students?
Do you utilize Pinterest in your teaching philosophy?
Magazine articles and podcasts are opinions of professional education contributors and do not necessarily represent the position of the Art of Education University (AOEU) or its academic offerings. Contributors use terms in the way they are most often talked about in the scope of their educational experiences.