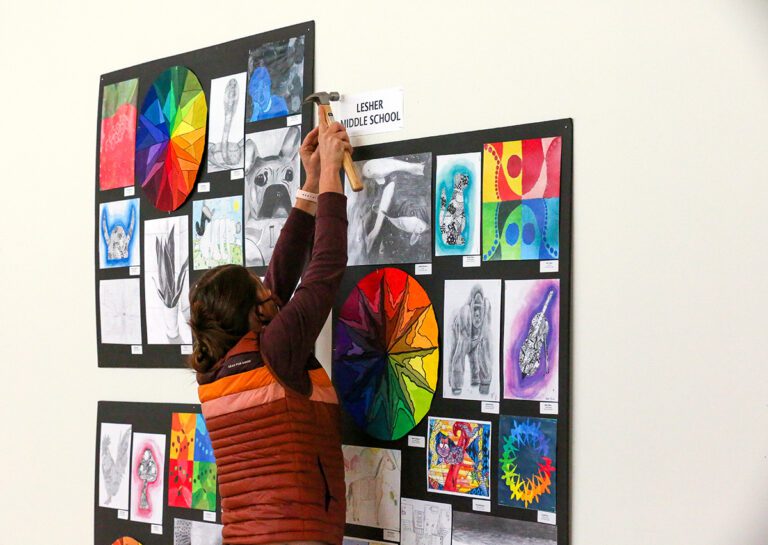
Can you feel the energy in the air? Flowers are blooming, and it’s getting warmer every day. Spring is in full swing. Art teachers are typically scrambling faster than bees, gathering staples, poster boards, and student work for grand displays around this time of year.
It’s art show season!
But, with all of the variables each state is contending with amidst the pandemic, a traditional in-person art show might not be possible just yet. If this sounds like your situation, have you thought about trying a virtual art show?

Virtual shows are a fantastic way to see and celebrate the successes of this historic school year. It’s a digital time capsule you and your students will cherish and revisit for years to come. Plus, there’s no need to worry about snacks, venue costs, or uncooperative staplers. Setting up a virtual show will take varying degrees of time, but once the platform is in place, you will have a base to use over and over in future years.
Here is how to set up a virtual art show in 2 easy steps:
Step 1: Collect student artwork.
No matter which model you choose, the first task is collecting and organizing student artwork. If you are teaching in person, you can photograph student work in the classic “birds-eye view” yourself. If you are teaching in a hybrid or remote setting, you’ll need to create a system for gathering photos. Email can work for receiving images, but keep in mind those files will take up space, and you’ll have a lot of inbox traffic. One solution is to create a separate email account for art show submissions only. Another option is to use Google Forms. Forms are super helpful because they automatically store submitted files in folders within Google Drive.
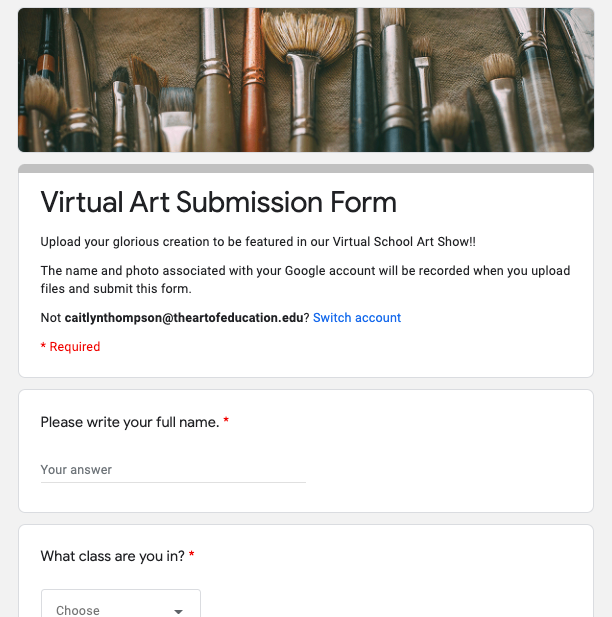
Here are some sample fields for a Google Form:
- Art Show Submission Form
- Name: Caitlyn Thompson
- Class: Dropdown menu selection
- Art Project: Dropdown menu
- Artist Statement: Optional.
- Upload photo here
- Upload video here
Once you have collected all student artwork, separate the photos into folders by grade. Feel free to take it one step further and create subfolders to keep each grade-level project separate.
Pro tip: If you choose to have students submit an artist statement along with their work, remember to label and keep those in the same folder as their project.
Now that everything is organized, it’s time to choose a virtual model.
Step 2: Choose a virtual model.
The following options require varying degrees of time spent compiling the elements, editing, and creating user interaction. Get creative and consider what fits your schedule and mental capacity before diving in.
Option 1: Create a Google Slides presentation.
Using Google Slides can be as fancy or simple as you make it.
Pros: High visual appeal and an interactive, user-controlled experience.
Cons: Complex assembly process, i.e., slides construction, image resizing, video embedding, etc., and greater time commitment.
The Bulletin Background
- Open Google Slides.
- Click the “+” to create a new slideshow.
- Click Slide->Change background->Choose image.
- Choose a fun wallpaper or bulletin board design.
- Duplicate this slide to make as many “bulletins” as you need.
- Add colorful shapes to serve as mats or frames.
- Click Insert->Image to add and arrange student work over the shapes.
- Optional: If your students have submitted videos, you can embed them on top of photos using the “link” feature. If the videos are saved in Google Drive, a link automatically connects to the video. Copy that link and embed it on top of the artwork for an interactive, user-controlled experience.

The Museum Background
The “Museum” layout involves using empty picture frames instead of bulletin board designs. Find some free images of empty frames and insert student work to give your presentation some museum-style pizazz.

There are many options to make this model even more immersive. You can create an entry slide where visitors can click a “button” (a shape) that leads to specific grade-level “collections.” Those collections can feature more buttons leading to “exhibitions” of each art project. Your platform becomes a clickable tour with free admission, unlimited viewing hours, and no bathroom lines. Do what feels comfortable and manageable for you.
Once you create this platform, you’ll always have the template to return to in future years. Imagine how cool it will be to have an ongoing digital display throughout a traditional school year!
Pro tip: When you complete the slideshow, Click File->Publish to the web. Scroll down and click Start Publishing. Copy and paste the link and share it with family and friends! When viewers click on it, they won’t see the editing format of Google Slides, only your beautifully finished showcase.
Option 2: Create an iMovie.
Pros: Simple assembly process.
Cons: Passive user experience and potentially long viewing duration.
For this option, all you need is access to iMovie.
There is no user interaction as they will “press play” to view it, but you can add a fun musical soundtrack to go along with the visual presentation.
- Open iMovie and create a new movie.
- Select the photos you wish to include, then click Create Movie.
- Click the “+” to add more photos, videos, or musical soundtrack. *If you are familiar with iMovie, you can use Cutaways or Picture-in-Picture additions featuring student statements or videos of students discussing their creative process.
- When you have completed your movie showcase, upload it to Google Drive and share the link with families and friends.
Pro tip: Make one movie for each grade level or class as viewers might not have the time to watch a video featuring art from hundreds of students. Sharing links to each showcase you create is a great way to give some control to the users who want to see what everyone has created.
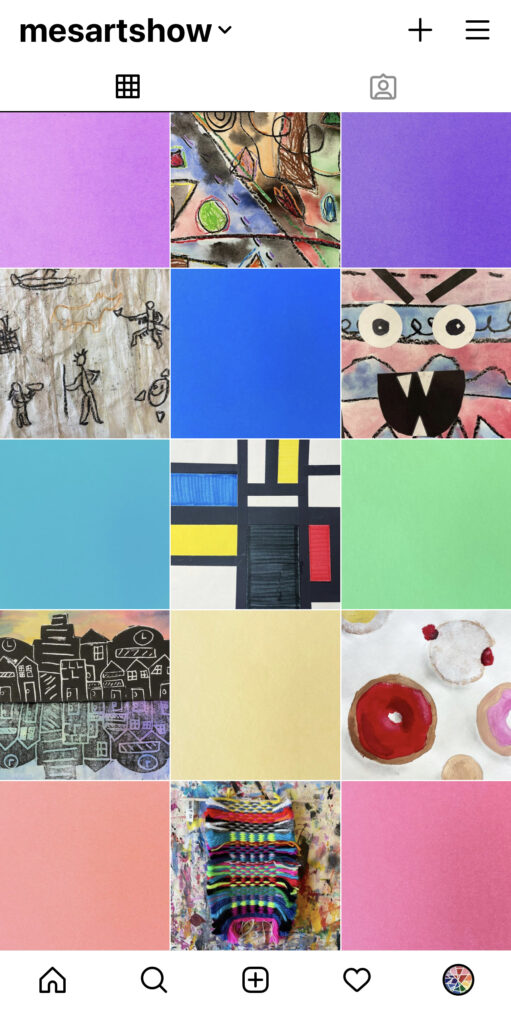
Option 3: Create an Instagram page.
Tapping into the magnitude of social media is easy when you use the Instagram platform.
Pros: Visually appealing layout and user-controlled experience.
Cons: Limited to IG users and complex assembly process.
- Create a new Instagram page dedicated to your school art show.
- Add student artwork as separate posts.
- Use the caption section to add artist statements and information about the project.
- Adjust your privacy settings. If public, share the Instagram handle with families and friends. If private, make sure you stay on top of accepting followers, so no one misses out on the showcase.
Pro tip: Consider creating a visually pleasing pattern on your art show feed by adding photos of color, textures, or even student quotes, in between each piece of artwork.
A virtual art show might be the wobbly cherry on top of this melted sundae of a school year, but it’s a gift that can keep on giving. The platform you choose will become a digital artifact you can revisit and revamp at any time. You have created a time capsule of memories for yourself, your school, and your local community. Take a few moments, recognize your hard work, and celebrate how you have gotten through this imperfect time.
What platform have you used to showcase student artwork this year?
How are you celebrating your and your students’ hard work through the pandemic?
Magazine articles and podcasts are opinions of professional education contributors and do not necessarily represent the position of the Art of Education University (AOEU) or its academic offerings. Contributors use terms in the way they are most often talked about in the scope of their educational experiences.