With the rapid pace and changes in technology, it’s hard to know what will stand the test of time, what’s more than a fad, and what’s something your classroom truly needs. 3D design tools and technologies have taken over the industry as they’ve become open-sourced platforms for everyone to create. The two main 3D design technologies schools are using are 3D printers and pens.
Having experience using both types of devices, I can attest that 3D pens work best for my students and have a place in the art room. The same can be said for 3D printers, but from the standpoint of the art room, I’ve found the 3D pen to be better suited.
Learn why you might consider using 3D pens in your classroom and discover the best way you can get your students using them.
The History of the 3D Pen
In 2013 WobbleWorks launched a Kickstarter campaign to earn $30,000 for the creation of a 3D pen. The campaign earned over two million dollars, and this is where the production of the first 3D pen, the 3Doodler came into existence. The pen was invented out of failure, after waiting fourteen hours for a design to print it came out with a gap. Creators Maxwell Bogue and Peter Dilworth thought, rather than waiting for it to print again, let’s manually fix it. Thus the 3D pen was born.
What is a 3D pen?

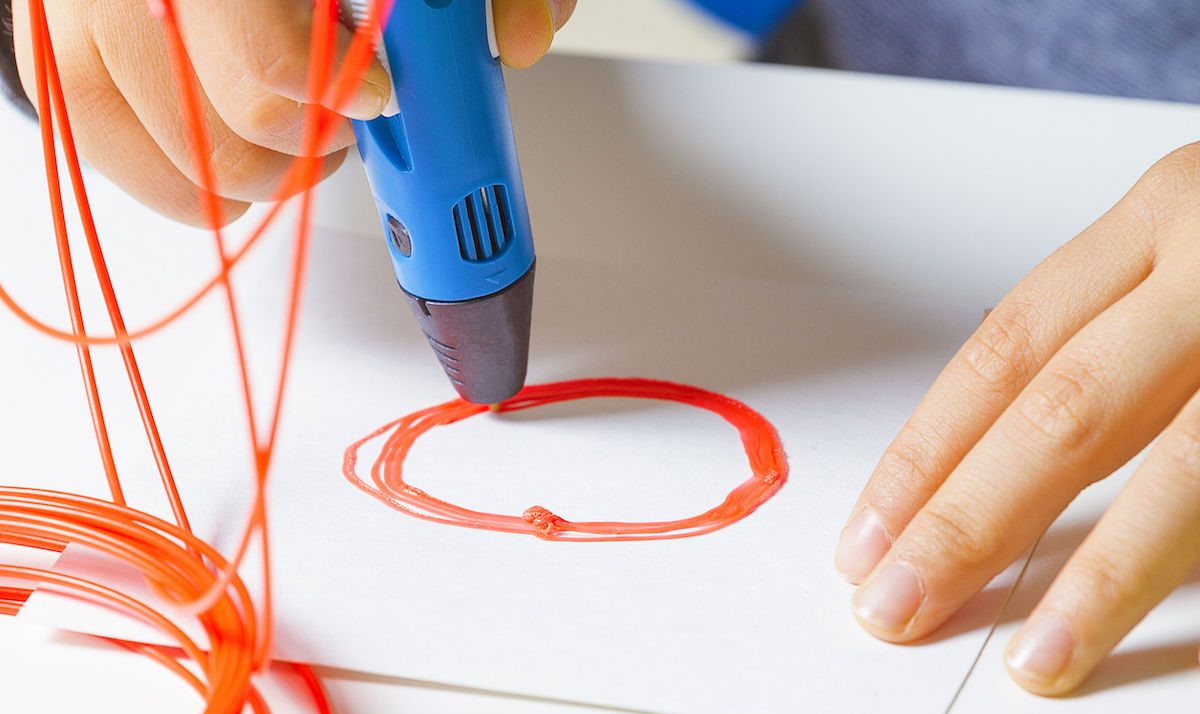
Think of the 3D pen as a larger version of a regular pen or mechanical pencil. Instead of using ink or lead, the pen extrudes plastic filament as a result of heat. It’s the ultimate drawing tool, and it can draw physical objects in thin air! Unlike its predecessor, the 3D printer, computers, and design software are not needed to create a design. Your hands are the guiding force in creating objects! Think of the 3D pen as another sculptural medium allowing students to showcase their innovation and creativity.
An effective project for students with 3D pens is the creation of cookie cutters. This project allows students to design, create, and even put their work to use!
Materials Needed to Get Started
1. 3D Pen
To make this project a success in your classroom, you will need at least one 3D pen. In my classroom, I have five pens students share. With the right planning and scheduling, you can make it work. There are a variety of pens you can purchase, but the 3Doodler Create+ is the favorite in my classroom. They even have special educational pricing.
2. PLA Filament
There are two types of plastic filament used with 3D pens, ABS and PLA plastic. ABS plastic is oil-based, PLA is made from sugarcane and cornstarch which are organic materials, and since it’s non-toxic, this should be used for anything food-related.
Want more information on 3D Printing? Check out 3D Printing Basics on Art Ed PRO.
Step-by-Step Instructions to Creating Cookie Cutters with 3D Pens
1. Create a contour drawing.
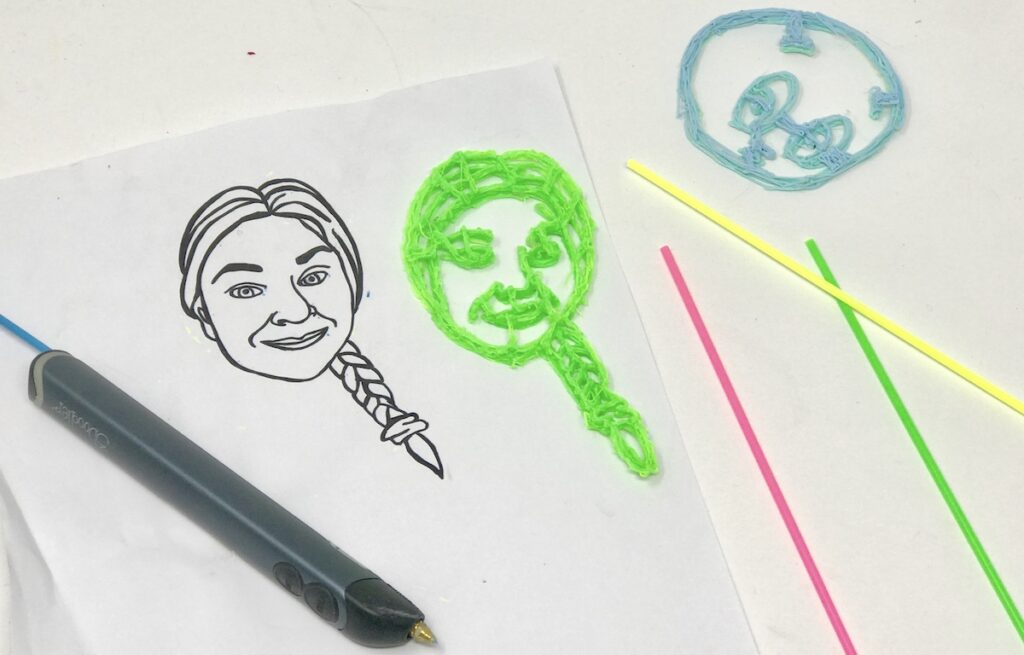
Before your students begin using their 3D pen, they will want a contour drawing of the image they want to turn into a cookie-cutter. The drawing can be done digitally or traditionally, but make sure your students keep in mind the size of a cookie.
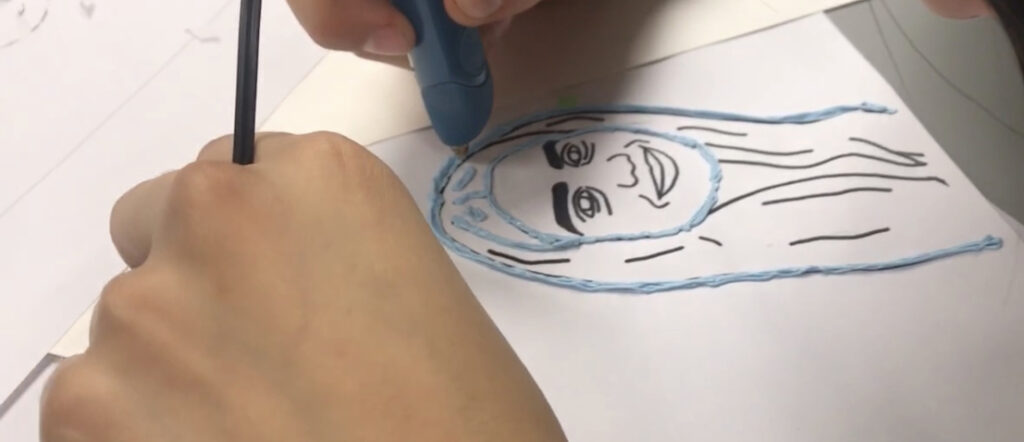
2. Outline the design.
When students have finished their drawing, they will begin tracing it with the 3D pen. Instruct your students to touch the nozzle of the 3D pen directly on the paper. The heated plastic will stick to the paper but will be peeled off later.
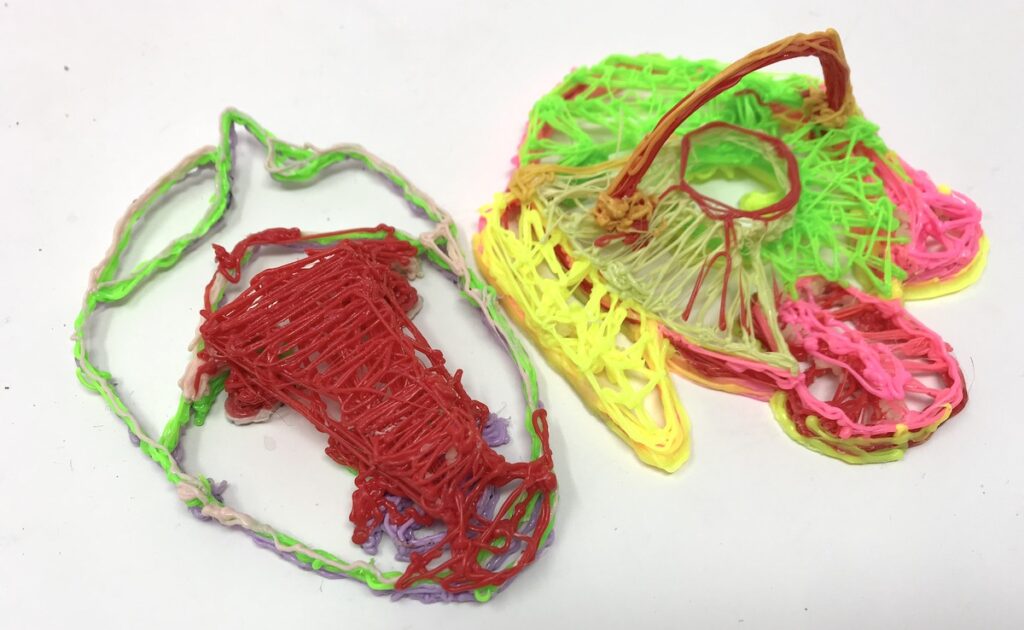
3. Build up the filament.
Depending on the amount of time and detail of the design, your students might need multiple class sessions to finish their cookie-cutter. The great thing about this is that the plastic filament will stay on the paper, and you can layer it to create a sturdier design. As students begin to layer and build up the filament, the design is going to start looking a little messy. This will be concerning to your students but reassure them when they take the design from the paper; the initial layer will be nice and smooth. I recommend creating three layers of PLA filament on top of each other, and at least doubling the outline. The important part is that the structure is strong and even.
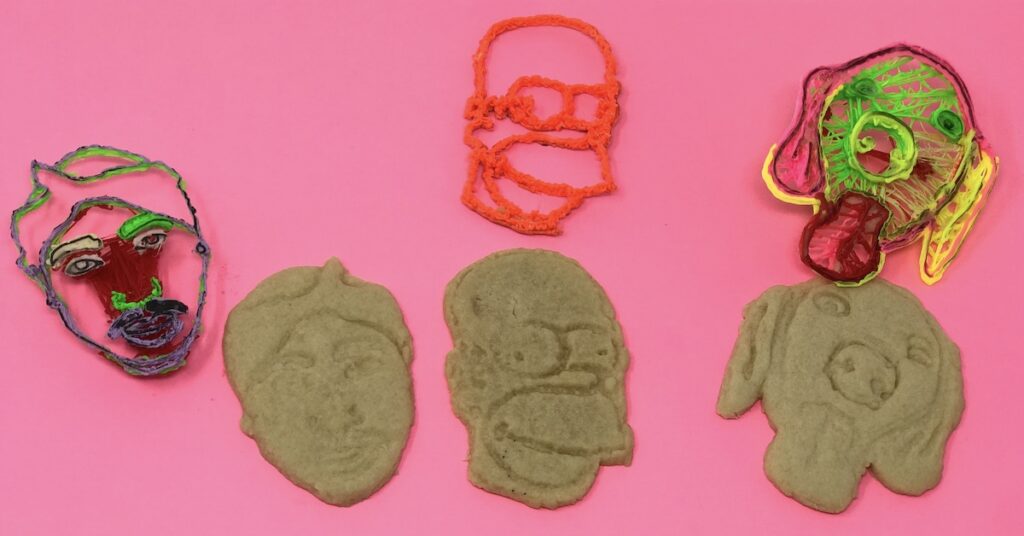
4. Connect all the pieces and create a handle.
Once the design is constructed, it is essential to connect all of the pieces. When you peel the plastic from the paper, anything not connected will be missing from the design. If your students are creating a self-portrait cookie cutter, they’ll probably be a little disappointed if their design comes out with only one eye because they didn’t connect everything! Creating a handle is optional, but might be preferred by your students. Having an area to pick up as students press into the cookie dough will make the cookie-making process a bit easier.
5. Peel the design from the paper.
When the design is complete, peel it from the paper. There might be some paper residue or pencil marks from the original drawing, but they will easily wash off. After removing it from the paper, if the design doesn’t seem structurally sound, students can go back in with the 3D pen to strengthen it.
6. Make Cookie Dough
Make the cookie dough with or without your students. You might even team up with your family and consumer science teacher! However you choose to go about making the dough, a no-rise cookie recipe is best, so the designs of your cookies can still be identified. Make sure you are aware of any food allergies to plan alternatives. If food isn’t an option for you at all, you might consider doing this entire process with clay instead.
7. Cut out cookies.
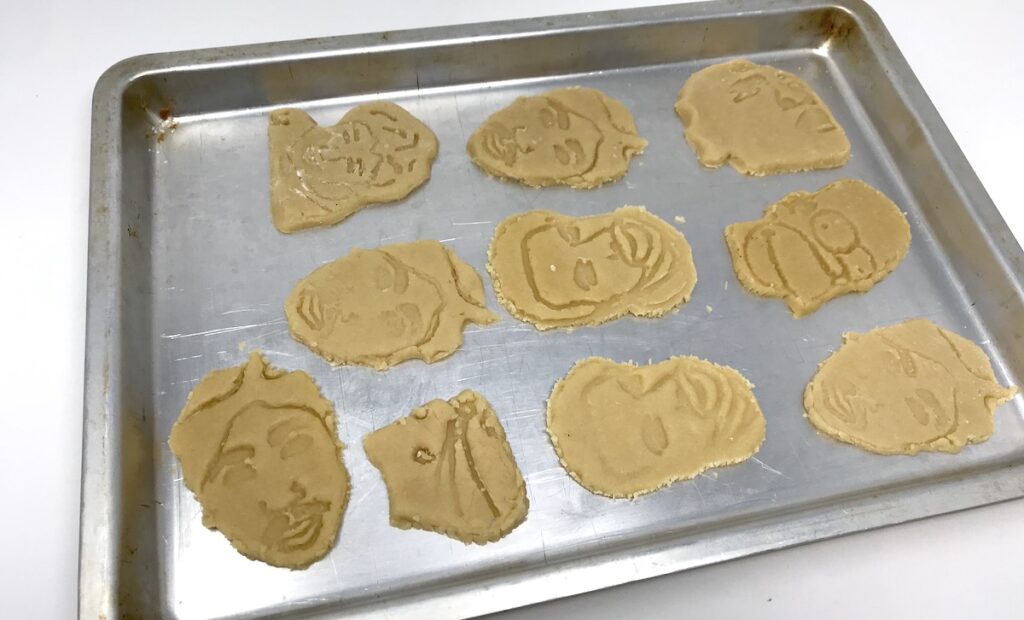
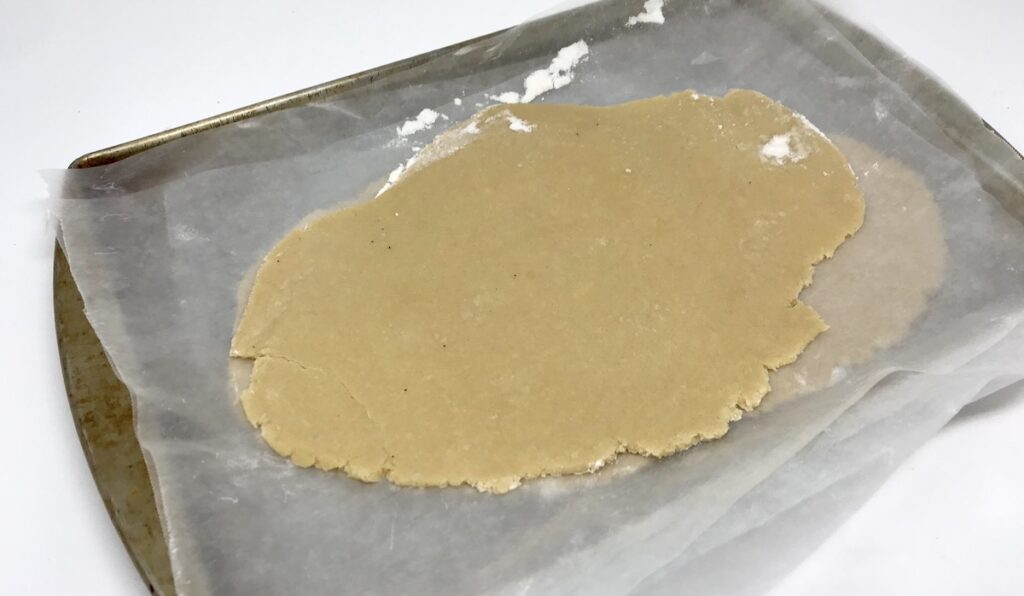
After the cookie dough is made, it’s time to roll out the dough and use the 3D creations! This step works best with refrigerated dough, so you might consider rolling out slabs of dough in preparation for your students. Depending on the depth of the 3D design, your students might just stamp an impression into the dough and cut around it with a toothpick. If the dough is sticking to the cookie-cutters, have students try wrapping the front of it with plastic cling wrap.
8. Bake and enjoy!
The final step of the process is to bake your cookies at the recommended temperature. If using the cookie recipe linked above, you can cover and leave your students’ cut cookies in the fridge for a day or two. This way, you might have the ability to bake the cookies while you’re at school, instead of taking them home. For an added element of fun, you might even have your students paint their cookies with a little frosting.
Trendy technologies do have a place in the art room. Sometimes it might take a little creativity to find the right fit. Allowing your students to explore design using the 3D pen will lead to a lasting experience they’ll never forget!
Do you use 3D pens in your classroom?
What else do you want to know about 3D pens?
Magazine articles and podcasts are opinions of professional education contributors and do not necessarily represent the position of the Art of Education University (AOEU) or its academic offerings. Contributors use terms in the way they are most often talked about in the scope of their educational experiences.