I am often looking for fun and quick ways to use formative assessments in my classroom. Recently the music teacher at my school was telling me about an app called Plickers that helps him test his students for understanding. He gains quick insight into what the students are learning and the students think they are playing a game! Sounds pretty good, right?
Read on to find out how I adapted Plickers for my elementary art room and how you might use it with any grade level.

Getting Started
Plickers works by giving each student a card with a different QR code. You can print cards for free on the Plickers website, or order a laminated version on Amazon. Students can then use the cards to answer true/false and multiple choice questions. Students rotate the card (each side of the card is marked with a different letter) to the answer they think is correct and then hold up the card. Using a smart phone or smart device, you can then scan the room to see what your students know!
Here’s how to set up.
1. Create an account.
Go to the Plickers website and create a username and password for free.
2. Make your cards.
Once you have an account you’ll see a link called “Cards.” Here you can choose which type of card will work best for your students based on your room size. I picked large font cards so my elementary students can see the letters more easily. Once you choose a size, print out a class set of cards. Tip: I printed mine on cardstock and laminated them so they last longer.
3. Set up your classes.
Go to the link called “Classes” and create a new class. After selecting that class, you can enter names for each card. To make things easy, I used my own last name for each card. However, you can also enter a different name for each student. From there, you can set up as many different classes as you’d like.

4. Create your questions.
Time for questions! In the link called “Library,” you can manually type in questions you might want to ask your students. Your questions can be multiple choice or true and false. Once you finalize a question you can choose which class or classes will get asked that question. This is helpful because some questions will work for multiple grade levels.
5. Download the app.
Download the Plickers app (here or here) onto your smart device and log in. You’ll see all the things you’ve already created, and you’ll be ready to use it with your students!
Playing the Game
1. Give each student a card and teach them how it works. As I mentioned, each card has a unique QR code on the front. In all four corners of the QR code is the number designating which card it is. For instance “Borel 3” has a 3 in each corner. On each side of the QR code is a different letter, “A”, “B”, “C”, and “D” which correspond to the answer the student wants to give. So if a student wants to give the answer “C” for a question, they just need to turn their card so the “C” is facing upright.
Here’s a close-up of one of the cards…
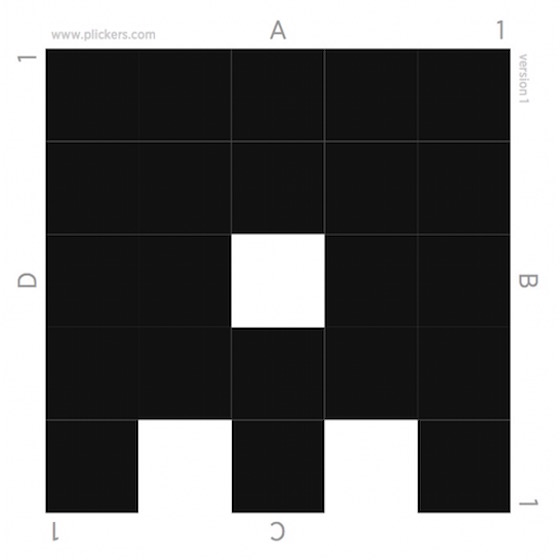
and what a student looks like holding one.

2. From your smart device, select the Plickers App and then select one of your classes. The questions will already be there waiting for you, and you can tap the one you want to start with. At the same time, on your computer, click “Live View” then turn on your projector. The students will then be able to see their first question. Every time you tap a new question on your smart device, it will appear on the computer screen automatically.
3. When your students are ready to give their answers, have them point their cards at you. Using your smart device, you will see a camera icon at the bottom of the App. Just select it and aim it at your students. Your device will automatically start collecting their answers as you scan the room, even if they are sitting at the back! (Tip: Keep your device vertical while capturing because if you put it horizontal it will change all the answers your students give.)
4. When the students are looking at the question you can choose to either let them see which students have submitted an answer or a graph of what answers have been given. I always stay on the student submissions option until all the answers have been given and then I show them the graph.
5. Finally, from your computer, choose “Reveal Answer” to show the correct answer to the students. Because answers are anonymous, students won’t be embarrassed to get a question wrong. However, you will know who answered correctly if you either made a list of which student had which number card or if you actually put in each of their real names.
All of the data will stay in Plickers until you clear it to ask the same question to another class. You can even review it online!

I use this as a review game with my 2nd-5th graders. Whenever the students are starting to get a little bit stir-crazy, I recapture their interest with this formative assessment game. They absolutely love it and I love that I am able to figure out who is actually learning and what concepts we need to brush up on. I have plans to pull Plickers out at the end of some classes, before breaks, and most certainly at the beginning and end of the school year.
What type of formative assessments are your favorites to use in the classroom?
If you have used Plickers, tell us how you use it during class!
Magazine articles and podcasts are opinions of professional education contributors and do not necessarily represent the position of the Art of Education University (AOEU) or its academic offerings. Contributors use terms in the way they are most often talked about in the scope of their educational experiences.

