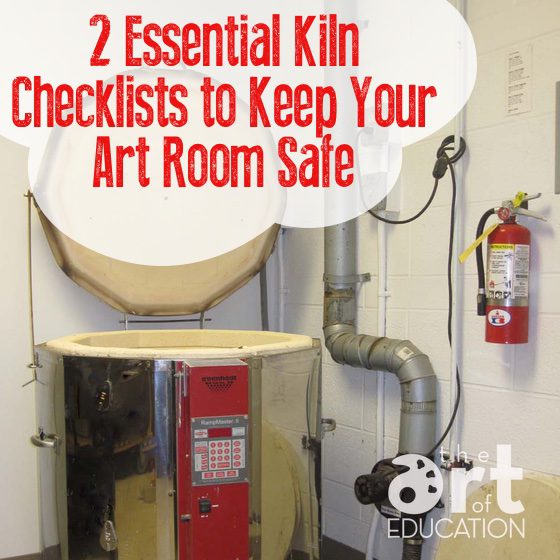
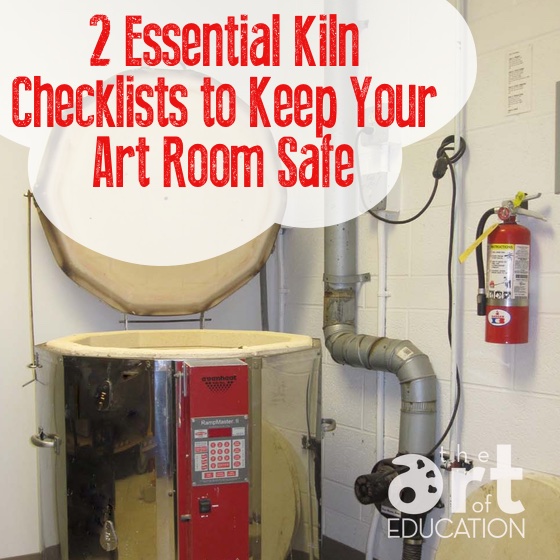
Have you ever had a kiln catastrophe? During my first year of teaching, my students and I partnered with a local artist to create a few clay tile installations for the new Children’s Museum in Madison, WI. Talk about pressure!
Although I made it through creating, drying and bisque firing the tiles without incident, when it came to glaze firing, something went wrong; fifty percent of my tiles ended up burnt to a crisp! The kiln had not shut off when it was supposed to, I failed to notice, and I almost singed my eyelashes off when I opened the lid. To say I was a kiln novice is clearly an understatement.
I was recently talking with clay guru John Post about how many art teachers come away from their teacher prep courses with little to no knowledge about how to fire a kiln safely.
This is unacceptable! John graciously put together two important checklists for any art teacher which are available for download below. Save them. Print them. Use them! But, before we dive into the lists, John has a few tips about choosing the right kiln for your needs.
Choosing a Kiln
If you’re in the market for a new kiln, John recommends ordering a kiln from the manufacturer that’s closest to you, as shipping can get expensive. Computer-controlled kilns from Paragon, Skutt and L&L brands all work well.
In terms of size, you want to make sure that the kiln is big enough that you can load and fire it less frequently, yet small enough that you can reach inside to load work on the bottom shelf. John has found the sweet spot to be a kiln that is 23 inches wide by 22 inches deep. If you go for a kiln that is 29 inches deep, shorter teachers may have a hard time reaching the bottom. According to John, “The best way to determine size is to visit a clay supplier or kiln manufacturer and see if you can reach in and load work at the bottom of it.”
Whether you’re in the market for a new kiln or just want to make sure yours is firing properly, the first checklist is for you.
John Post’s Kiln Set-Up Checklist

1. Check the wiring.
The kiln needs to be wired with the proper breaker using the manufacturer’s recommended wire size. If there is any doubt about this set-up, your electrician should consult with the kiln manufacturer and the kiln manual. Many times, electricians do not understand the requirements for kilns, so putting them in direct contact with the kiln manufacturer helps to avoid problems. My 39 Amp kiln requires a 50 Amp circuit breaker, but I ran into an electrician who insisted on installing a 40 Amp breaker. After the kiln repeatedly blew the breaker, I convinced him to talk with the kiln manufacturer. When he finally installed the correct breaker, the kiln began firing perfectly.
2. Choose a safe location.
Make sure the kiln is at least 18 inches away from any walls that may catch fire, such as drywall. (A foot is plenty of space if it’s next to a cinderblock wall.)
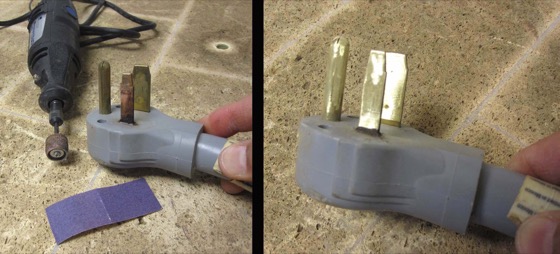
3. Inspect the prongs on the kiln plug to make sure they are shiny.
At the beginning of every school year, unplug the kiln and check the prongs on the plug. If they are not shiny, take a piece of sandpaper and sand them until they are. Electricity flows better through shiny prongs as there is less resistance.
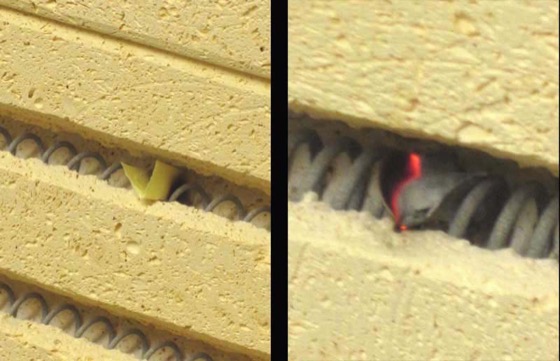
4. Make sure all the elements in your kiln are in working order.
If you have a kiln with individual switches, turn them on one at a time and listen for the hum or buzz of electricity. Kilns that are in good working order reach their temperature in a reasonable amount of time and do not stall before the end of the firing. Another thing you can do is to turn your kiln on with the lights off in the room and watch to see if the elements glow orange. Elements that do not glow orange may be burned out and not conducting electricity.
If an element does not buzz or hum or glow orange it is likely not working. You can check this by taking a very small scrap of paper, folding it in half and sticking it into the element while the KILN IS OFF. Then, turn on that element and if the paper burns, that element is working. You can do this for one element at a time or test them all at once. Elements that do not turn the paper brown or set it on fire need to be replaced.
5. Check the plug temperature.
While the kiln is firing, touch the plug and cord. It should feel cool to the touch. Slightly warm is OK. Hot is bad. If it is hot, do not fire the kiln until you have an electrician or kiln technician inspect it to figure out what is not right.
Once your kiln is set up safely, you’re ready to begin firing. Use John’s tips below to make sure everything goes off without a hitch.
John Post’s Firing Checklist

Before Firing
1. Check the bottom shelf position.
Make sure the bottom shelf sits on three, 1/2-inch supports above the kiln floor so that air flows freely under the kiln shelf and into the kiln vent holes.
2. Make sure flammable materials are away from the kiln.
Check to see that there is nothing under or around the kiln that will burn. Many kiln rooms are full of paper and cardboard boxes which can catch fire if they fall onto or up against a kiln while it is firing. The outsides of kilns get very hot.
3a. If using a kiln with a kiln sitter:
1. Double check your cone.
Make sure you have the correct cone for your desired temperature.
2. Make sure all switches are “off” to start.
Make sure all switches are set to “off” at the beginning of the firing so you can turn them on when you need to. Starting with them all on at once will cause pieces to explode in a bisque firing. It is important that the temperature rises slowly in your kiln during a bisque firing.
3b. If using a computer-controlled kiln:
1. Double check the firing profile.
Verify that you are using your intended firing profile.
4. Turn on the kiln vent.
After Firing
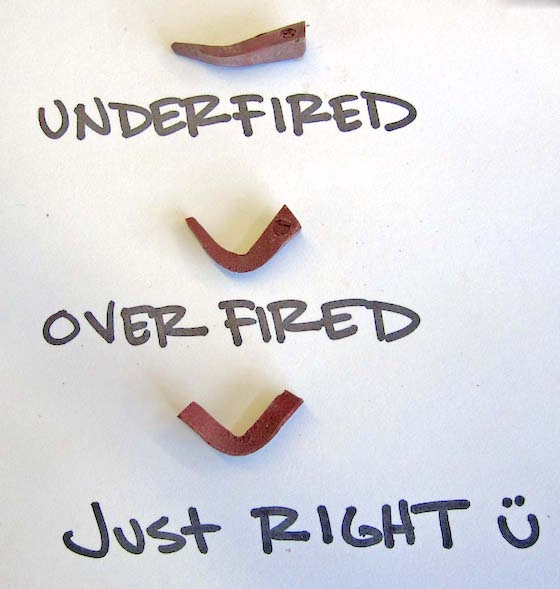
1. Look at the cones.
Look at the cones after a firing if you are using a kiln with a kiln sitter. They should be bent into an L shape. Cones that are bent into a U-shape mean you are over-firing the kiln. Cones that are hardly bent at all mean that you are under-firing your kiln.
2. Look at your results after a firing.
Bisqueware
Bisqueware should feel porous enough to absorb glaze that is dipped or brushed onto the work.
Glazeware
Glazeware should have the look that you expect it to have. If it does not, it may be the result of over-firing or under-firing. If this is the case, you can make adjustments by selecting a lower or higher cone for the next firing or by making changes to your kiln firing profile.
With these lists, you will be off to a fantastic start to firing your kiln safely and effectively. Of course, make sure to give that kiln manual a read through to make yourself aware of any special circumstances your particular kiln might have.
A huge thanks to John Post for sharing his extensive knowledge with us! If you’d like to see more from John, head over to his comprehensive website.
What safety questions do you still have about firing your kiln?
What size and type of kiln do you have in your room? How is it working for you?
Magazine articles and podcasts are opinions of professional education contributors and do not necessarily represent the position of the Art of Education University (AOEU) or its academic offerings. Contributors use terms in the way they are most often talked about in the scope of their educational experiences.