I was first inspired to explore stop-motion when I met influential art ed dude Mark Jones. He’s the genius behind some of the best stop-motion animation videos designed, written, and created by kids. I was lucky enough to see him at my state art ed conference a few years back. If you haven’t seen these videos – watch them before you go any further!
- The Robot and the Butterfly
- Stand Up Tall
- Stand Up Tall: Behind the Scenes (to help visualize the process)
See more on Mr. Jones’ YouTube channel.
After seeing the potential, I asked myself: How do I do this with MY kids?
As with many great collaborations, I initially worked with one of my colleagues to bring this idea to fruition. Below are the documents and adaptations that have worked well in my classroom. Each year I tweak or change something to make the project more successful for my students. I encourage you to build on the foundation I’m providing here! Let’s go!
Teacher Prep
Note: Many of the resources listed are available for download further down in this post!
Below are the steps that you can take if you’d like to try this project with your students.
Of course, this is just a starting point. Change and adapt these steps to fit your teaching style, timeline, and students.
1. Prepare a PowerPoint to introduce the project.
2. Choose a theme…or not.
Depending on your preference, you can narrow the topic to something such as “color theory” or “transformation.” But, keep in mind… some of the best videos have come from having no parameters at all!
3. Create a playlist of stop-motion video examples to show your students.
Use YouTube, Pinterest, or a bookmarks folder to help you organize!
4. Make and print worksheets to guide students through the process.
5. Make a list of what materials you will make available to students.
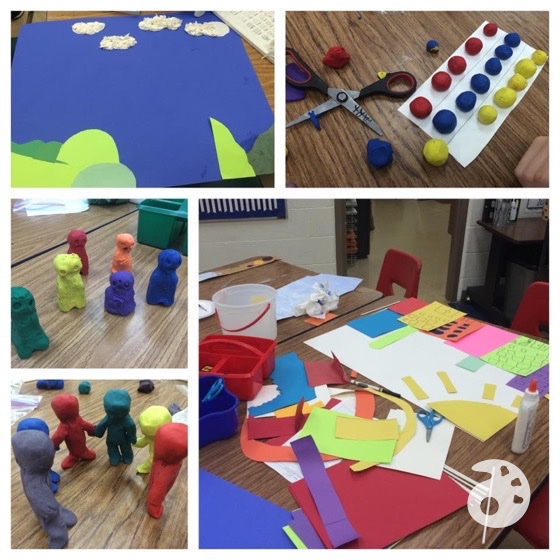
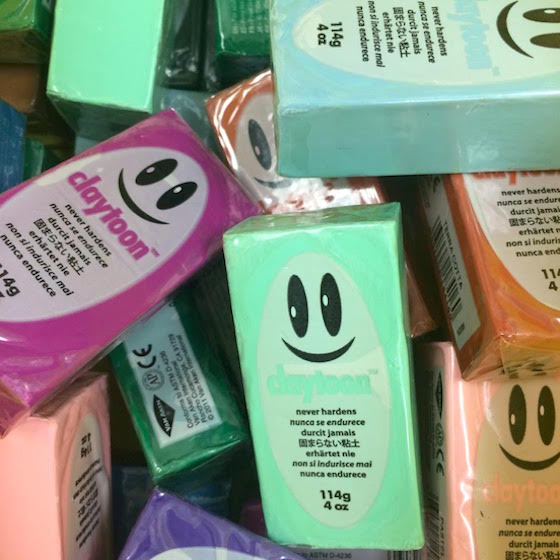
Consider everyday materials like markers, crayons, scissors, and glue. I also provide my students with poster board, construction paper, and modeling clay.
6. Develop groups of students with the classroom teachers.
7. Familiarize yourself with iMotion, and prepare a mini-lesson where you make a short video as a demo for your students.
8. Introduce and launch the project!
Student Prep
The worksheets I reference in the list below are grouped as a packet for downloading. I recommend printing off a large number of each page. Each student and group will use a varying number of these worksheets throughout the unit. I have my students check in with me after each step so that I can ensure that they are on track. Before they can start to build their sets, they pitch me their movie idea! This step makes for a fun check-point.
Here are my students’ steps throughout the project.
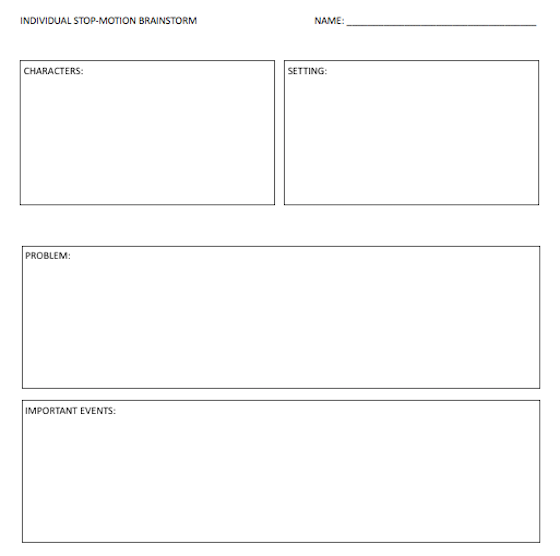
- Brainstorm stories individually
- Brainstorm stories in groups
- Come up with a story as a group and propose it to me
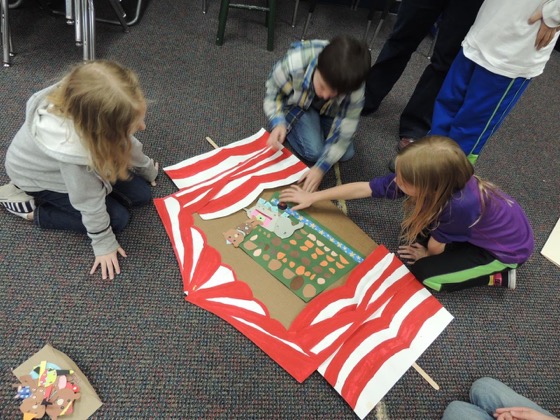
- Build sets and props
- Shoot movie
- Finalize and export
- Share with others
- Fill out rubric
Helpful Hints
Doing stop-motion in the art room is a big undertaking. Here are a few helpful hints I’ve learned over the years.
1. Keep your students on track with a PowerPoint slide featuring the daily goal.
2. Make room to store the extra materials you will have, and create, with this project.
3. Check out Nic Hahn’s unbelievably amazing posts about technology and animation on her blog Mini Matisse for inspiration.
4. Be prepared to keep some groups more on track than others.
5. Have an iMotion exploration day so students can familiarize themselves with the app and the stop-motion process.
6. This year, we chose to do movie awards. It was a fun addition to the process. Students were able to practice their critiquing skills and recognize each other’s work.
Downloads/Resources
Prepping the students and keeping them on track are keys to this project’s success. Below are 3 resources I’ve created to help. I hope they work in your room as well!
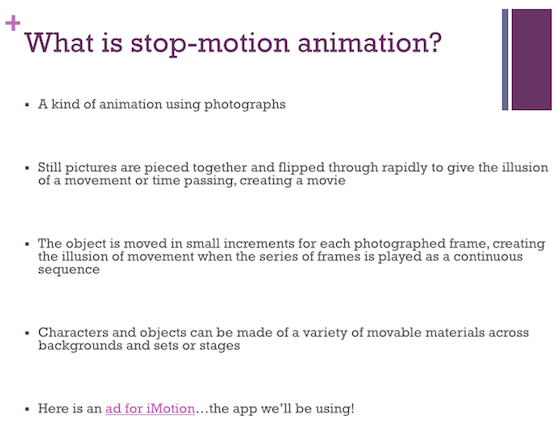
1. Power Point Presentation
You can download the PowerPoint presentation that I use to introduce the lesson by clicking the image below. It contains a brief overview of stop-motion animation, key vocabulary and more!
2. Packet
Here is a packet that includes worksheets, storyboard tools, and rubrics. Download away!
3. Stop-Motion Animation Examples
Below is a list of my favorite stop-motion examples to show my class. As always, preview them yourself to determine if they are appropriate for your students. Keep an eye on YouTube’s sidebars as well.
- Sesame Street: OK GO – Three Primary Colors
- The Robot and the Butterfly by Mr. Jones Art
- Stand Up Tall by Mr. Jones Art
- Frictions by Burayan
- Western Spaghetti by PES
- Game Over by PES
- Fresh Guacamole by PES
- Creativity by Tiny Circus (anything Tiny Circus does is pretty awesome!)
- Elephant Trap by Tiny Circus
- The Art Classroom by Tiny Circus
As with any project, it is most successful when you make it your own and adapt it for your students’ needs and interests. Please feel free to use and adjust the documents I’ve included to implement your own stop-motion animation unit. Students get extremely excited about this unit. So much so, that many begin to make these animations outside of the art room. Encourage them to share these. Who knows? Maybe you’re teaching the next Walt Disney!
Do you do animation with your students? What are YOUR helpful hints?
What videos would you add to the list of examples? Do you have any of your students’ videos to share?!
Magazine articles and podcasts are opinions of professional education contributors and do not necessarily represent the position of the Art of Education University (AOEU) or its academic offerings. Contributors use terms in the way they are most often talked about in the scope of their educational experiences.