If there is one thing I have learned in all my years of teaching, it is that technology rules. I could give a fifteen-minute spiel on one-point perspective to my fifth graders and slowly watch their eyelids begin to droop. Or, I could hear them exclaim, “Ohh!” and, “Ahh!” when they get to watch a time-lapse video of an artist utilizing one-point perspective. I’m okay if technology reigns supreme, as long as my students remain engaged.
Maybe you’re like me and you’ve found that on the first day back to the art room your students want to know what you’ve been doing all summer. I could spend a few minutes talking with students about what I did over break, but that would be boring. So, I started to utilize a bit of technology to actually show my students what I’ve been up to. The students love it because they actually get to watch a video on the first day of class. I love it because it makes me more human and personable to my students.
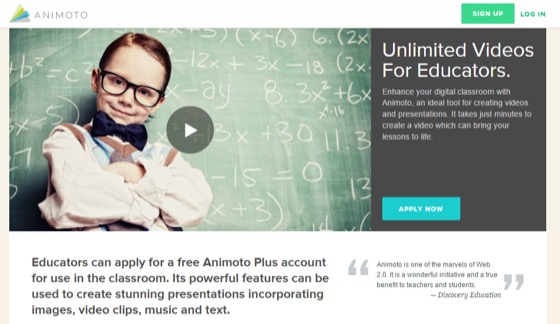
My go-to online video application is Animoto. They offer free educational accounts to teachers who are wanting to use technology in their classrooms. All you have to do is apply! You can use Animoto to create videos, presentations, and other educational materials. Plus, they allow you to add videos, pictures, text, and music.
How to Set Up Animoto
1. Visit the Animoto Educational Site
2. Apply for your free account
3. Start creating
How to Create a Back-to-School Video
1. Choose a Style
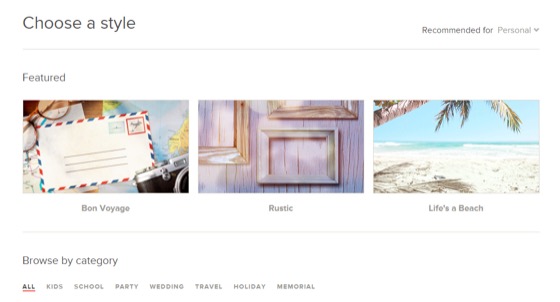
Once you have your educational account you must first choose a style for your video. If you select one and decide later that you want something different you can easily change it. (Tip: Some styles require you to upgrade your account, so make sure you pick one that is free.)
2. Import Pictures and Videos

You can choose to add pictures and videos that you already have on your computer, or you can link your account to a social media site and pull images from there. Once you’ve added them you can rearrange them in whatever order you’d like.
3. Add Text
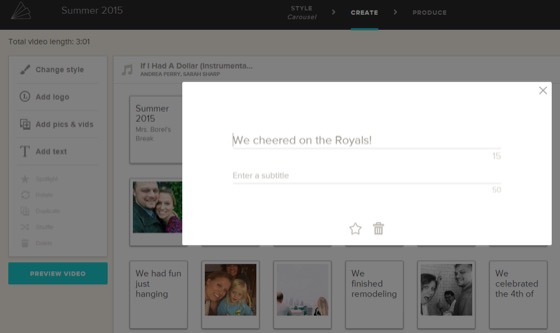
Add text slides that go before and after the media. This can be helpful to explain different things you did this summer, so you don’t have to narrate during the movie.
4. Add Music

One of the best ways to personalize your video is by adding music. Animoto automatically chooses a song, but you can change it if you want. They offer their favorite suggestions for your style of video, but you can also browse their full library of songs. If none of those work then you can also upload your own music to the video. (Tip: Choose a longer song to fit in more photos.)
5. Preview and Produce
Once you’ve finished creating your video, you can preview a low-resolution version. If you like what you see, then produce it into the final version. When showing my students, I usually pull up the video in full screen from the Animoto website and let them watch it via the overhead projector.
Here’s the video that I created for this school year.
Do you use technology on the first day of school? How?
How have you used Animoto in your classroom?
Magazine articles and podcasts are opinions of professional education contributors and do not necessarily represent the position of the Art of Education University (AOEU) or its academic offerings. Contributors use terms in the way they are most often talked about in the scope of their educational experiences.