Foreground, middle ground, and background seem like easy concepts to teach our students, but it’s often a bit trickier than you would think.
Over the years, I have played around with creative ways to help kids better understand this critical art concept. I finally figured it out with my Environmental Boxes!
Introducing the Lesson
To begin the lesson, I have students consider foreground, middle ground, and background in a real-world setting. I have them stand up and point out what is closest to them and how large it is. Then we do the same thing with middle ground and background. We discuss the size of the school bus across the street from the art room and have them measure it from where they are standing. They quickly realize that background objects are small, while foreground objects are large. Then the real challenge begins as your students start making beautiful art that teaches them a valuable concept!
7 Simple Steps to Create Environmental Boxes
Step 1: Obtain Shoeboxes
Have students bring in a shoebox, or provide a shoebox to each student. I have found Payless and Walmart are often happy to donate shoe boxes to school projects. It never hurts to ask!
Step 2: Choose an Environment
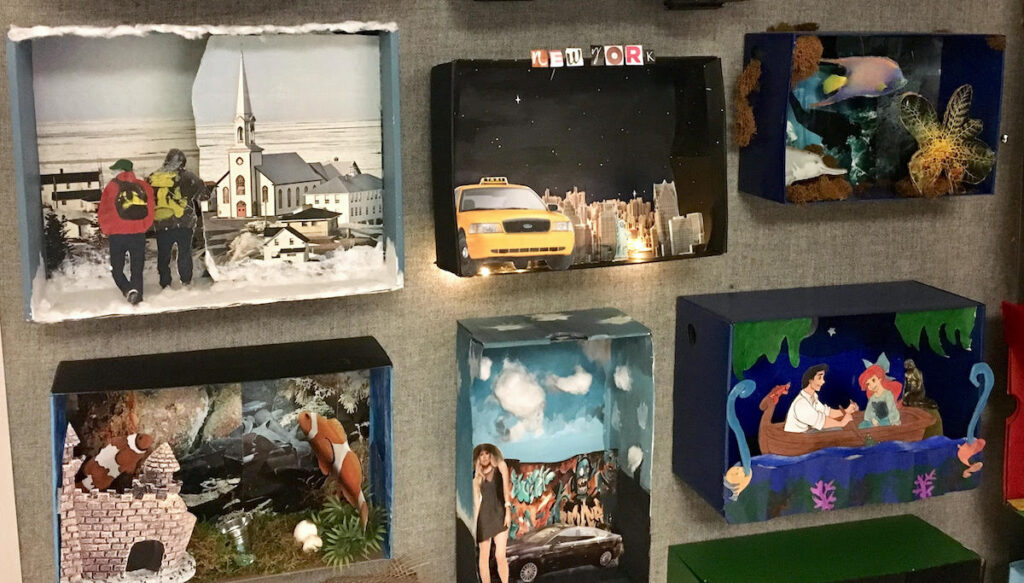
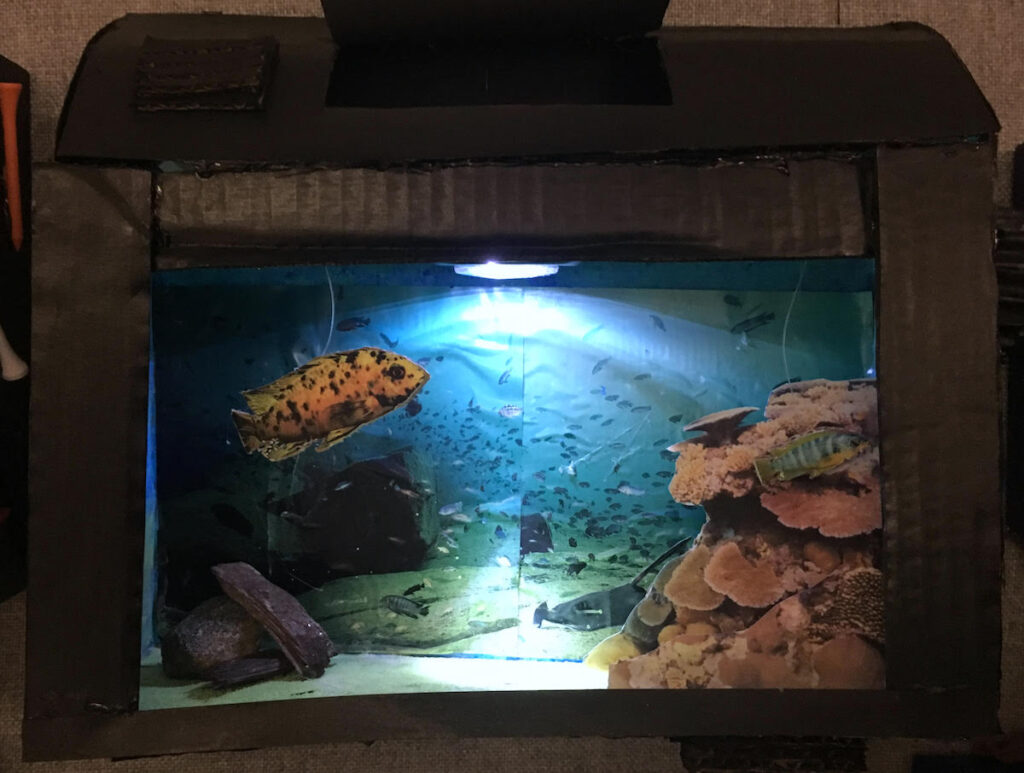
Have each student decide on an environment to create inside their shoe box. This brainstorming often takes a bit of time, so you can begin Step 3 to help get the ideas flowing. I have had students create everything from NYC, to outer space, to a fish tank! The ideas are endless.
Step 3: Pass Out Collage Materials
Give students a stack of approved magazines to look through that will serve as part of the imagery for their environments.
Step 4: Collect Imagery
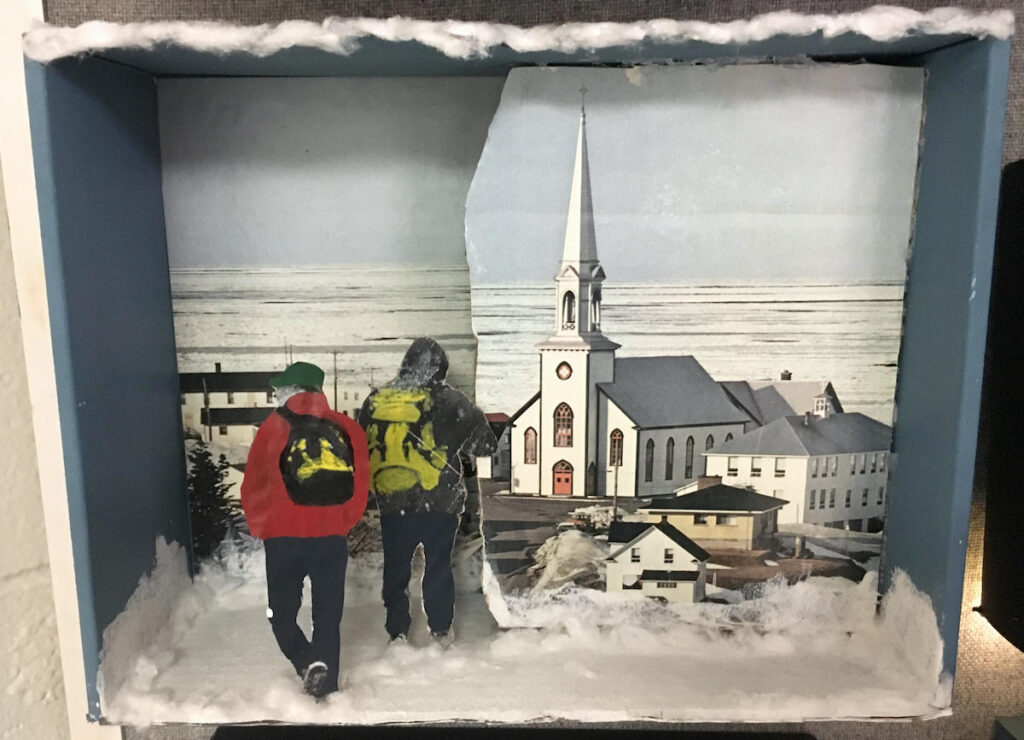
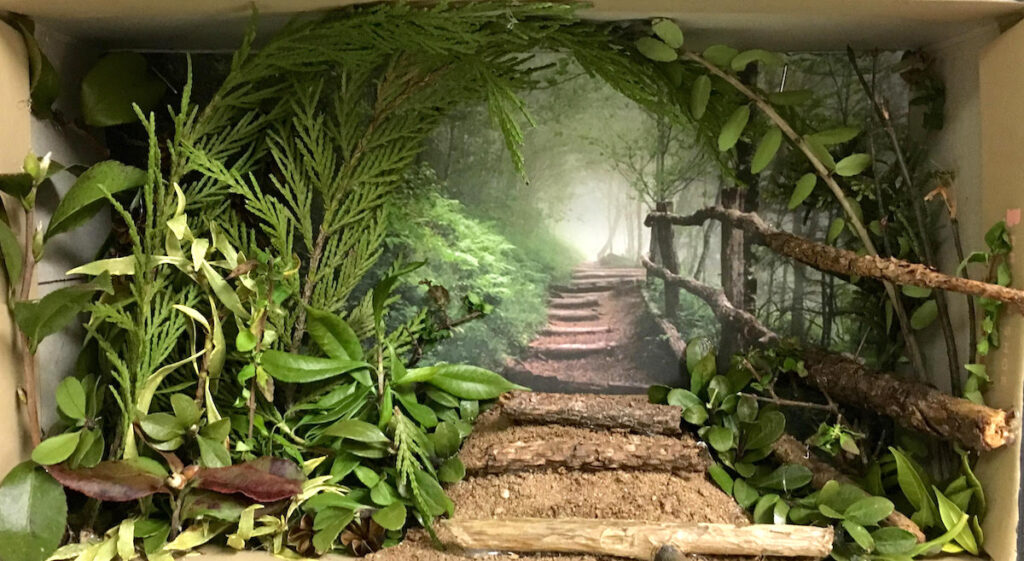
Have students cut out the images neatly, considering the visual story these images will tell. Remind students they are required to show they understand foreground, middle ground, and background with this project. Therefore, they must have their largest images in the front of their box. This is the challenge (and my favorite part) because seeing the student’s creativity as they work through this challenge is incredible!
If students have a difficult time locating all of the imagery they need, have them go to the computer lab and find their images online and print them in color. Or they can take their own photos, print them, and cut those out as well.
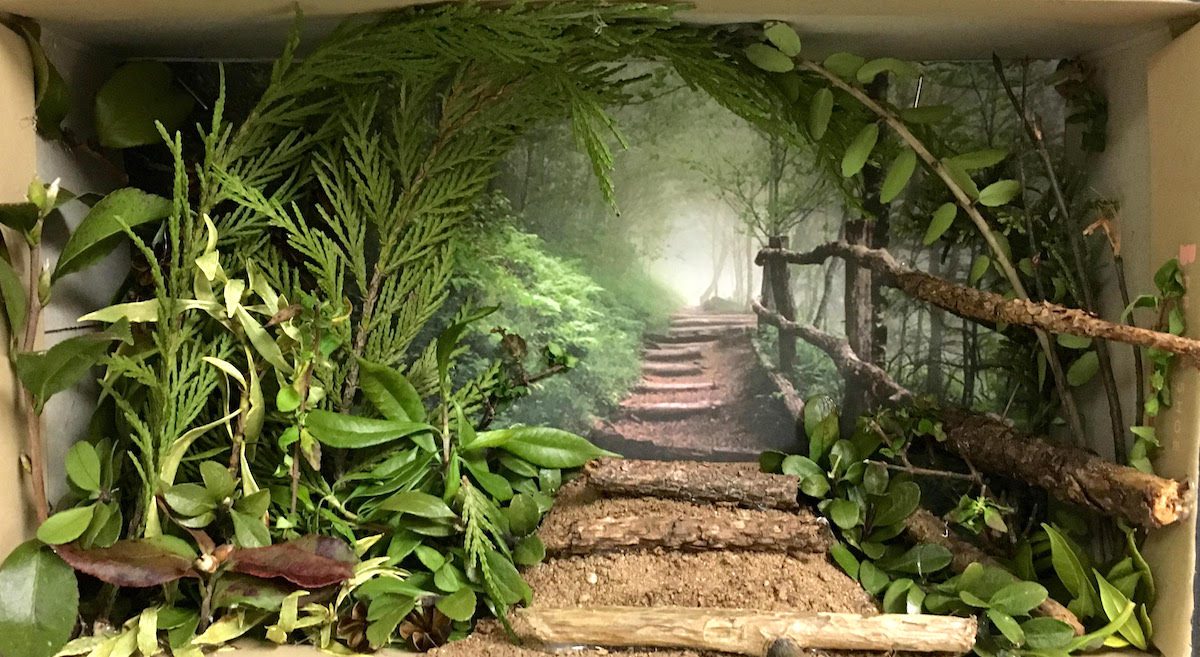
Step 5: Arrange and Glue
Have the students arrange the images in the box and consider the methods needed to ensure the images stand up. I have found that backing images with cardboard or poster board and using various types of tabs works well. Fishing line is a good choice for flying or hanging objects.
Step 6: Add Finishing Touches
Paint or collage the areas of the box that are still visible so the original shoe box disappears and the box becomes part of the environment. I also encourage students to bring in objects from home that may enhance the overall environment. Often, there will be some exciting additions such as lights or small toys that work well in the environments they have created.
Step 7: Tell the Story
When finished, have students add a title to their piece. You could also have them write a story to go along with their piece to bring in a literacy component.
Finally, I love to have my students exhibit these 3D artworks in the hallway for the community to see! This lesson not only teaches my students about foreground, middle ground, and background but it has them working their fine motor skills through the art of collage, their creative skills as they peruse the magazines, and their craftsmanship skills as they turn an everyday shoe box into an incredible piece of art! Not to mention they are recycling these boxes and saving our landfills one art project at a time!
How do you teach foreground, middle ground, and background concepts?
Do you use recyclable materials in your art curriculum?
Magazine articles and podcasts are opinions of professional education contributors and do not necessarily represent the position of the Art of Education University (AOEU) or its academic offerings. Contributors use terms in the way they are most often talked about in the scope of their educational experiences.