One of the unique challenges of an art room is the amount of scaffolding and learning that must take place before students can effectively perform an artistic task. For example, our students don’t come to us knowing how to shade three-dimensional objects without knowing which value is first. The order in which we teach our students new concepts and ideas matters. But, sometimes breaking sequential order is necessary and you might even try teaching a lesson in reverse.
Backward might work better.
Begin with the End in Mind
An architect doesn’t just build something immediately. It takes countless conversations and planning with clients and contractors. They look at what they want to build, then form the path to get there. This same scenario can be tied to the way art teachers plan their curriculum.
The methodology is called Backward Design. The Backward Design model, created by Grant Wiggins and Jay McTighe, focuses on the desired result. Instead of starting a new lesson or unit with supporting activities and exercises, you are focusing on what your students should be able to do after instruction. You are beginning with the end in mind by determining where your students should be at the end of instruction, and you are helping forge the path to get there.
Understanding the Backward Design Method in the Art Room
Using this reverse methodology of planning curriculum comes naturally in the art room. We know process and product are both important in artmaking. Although this method of instruction seems to rely on the final product heavily, it is your goal as the facilitator to help show your students the process to reach the desired result.
To better understand how this might look in the art room, we are going to look at a concrete example. In this example, we will be looking at how to achieve the desired outcome using a ceramic lesson that focuses on building a vessel with surface treatment and texture.

How the Backward Design Process Works
Have you ever had your students spend weeks creating a beautiful clay form only to slap on one coat of glaze and call it good? Yes, you gave them proper glazing and coverage instructions, but they are just ready to be done with it. So often this scenario plays out in the art room, ultimately leaving our students dissatisfied by their final results. Which also means you’re probably adding to your collection of unclaimed artwork. Let’s look at how to solve this problem using reverse planning.
Backward design planning is broken down into the following three stages. Remember, this is not how a lesson is delivered to your students, but this is the order in which you plan your lesson.
Stage 1: Identifying Desired Results
To solve this clay conundrum, you must first identify the desired learning outcome of your lesson. In this example, the end goal is to create a 3-D clay form that has quality surface treatment or texture added to the clay vessel. Think of this method of planning instruction as a logical approach. It is not content-focused, but instead result focused.
Stage 2: Evidence of Student Learning
In this stage, you are asking yourself, “How do I know if students have met the desired result?” This is where you determine how you are going to assess your students. In the art room, this will most often be through formative assessment and performance tasks. In the example of our clay lesson, we know our students have met the result if they have a 3-D form that effectively uses texture or surface treatments and has a quality finish using the glaze or color techniques they’ve learned.
Stage 3: Plan Activities and Instruction
In this step, it’s often helpful to look at the performance of your students in the past. If you’ve done a lesson before and are looking to revamp it, target the problem areas your students had, and begin finding a way to solve them. Ask yourself, “What are the key concepts and skills my students will need to know to achieve the desired results?”
For example, if you’re trying to solve your students lack of effort to add glaze or color to a clay piece, let’s address this area first! Instead of teaching your students a hand-building technique to build their clay piece first, begin by focusing on adding color and surface treatments.
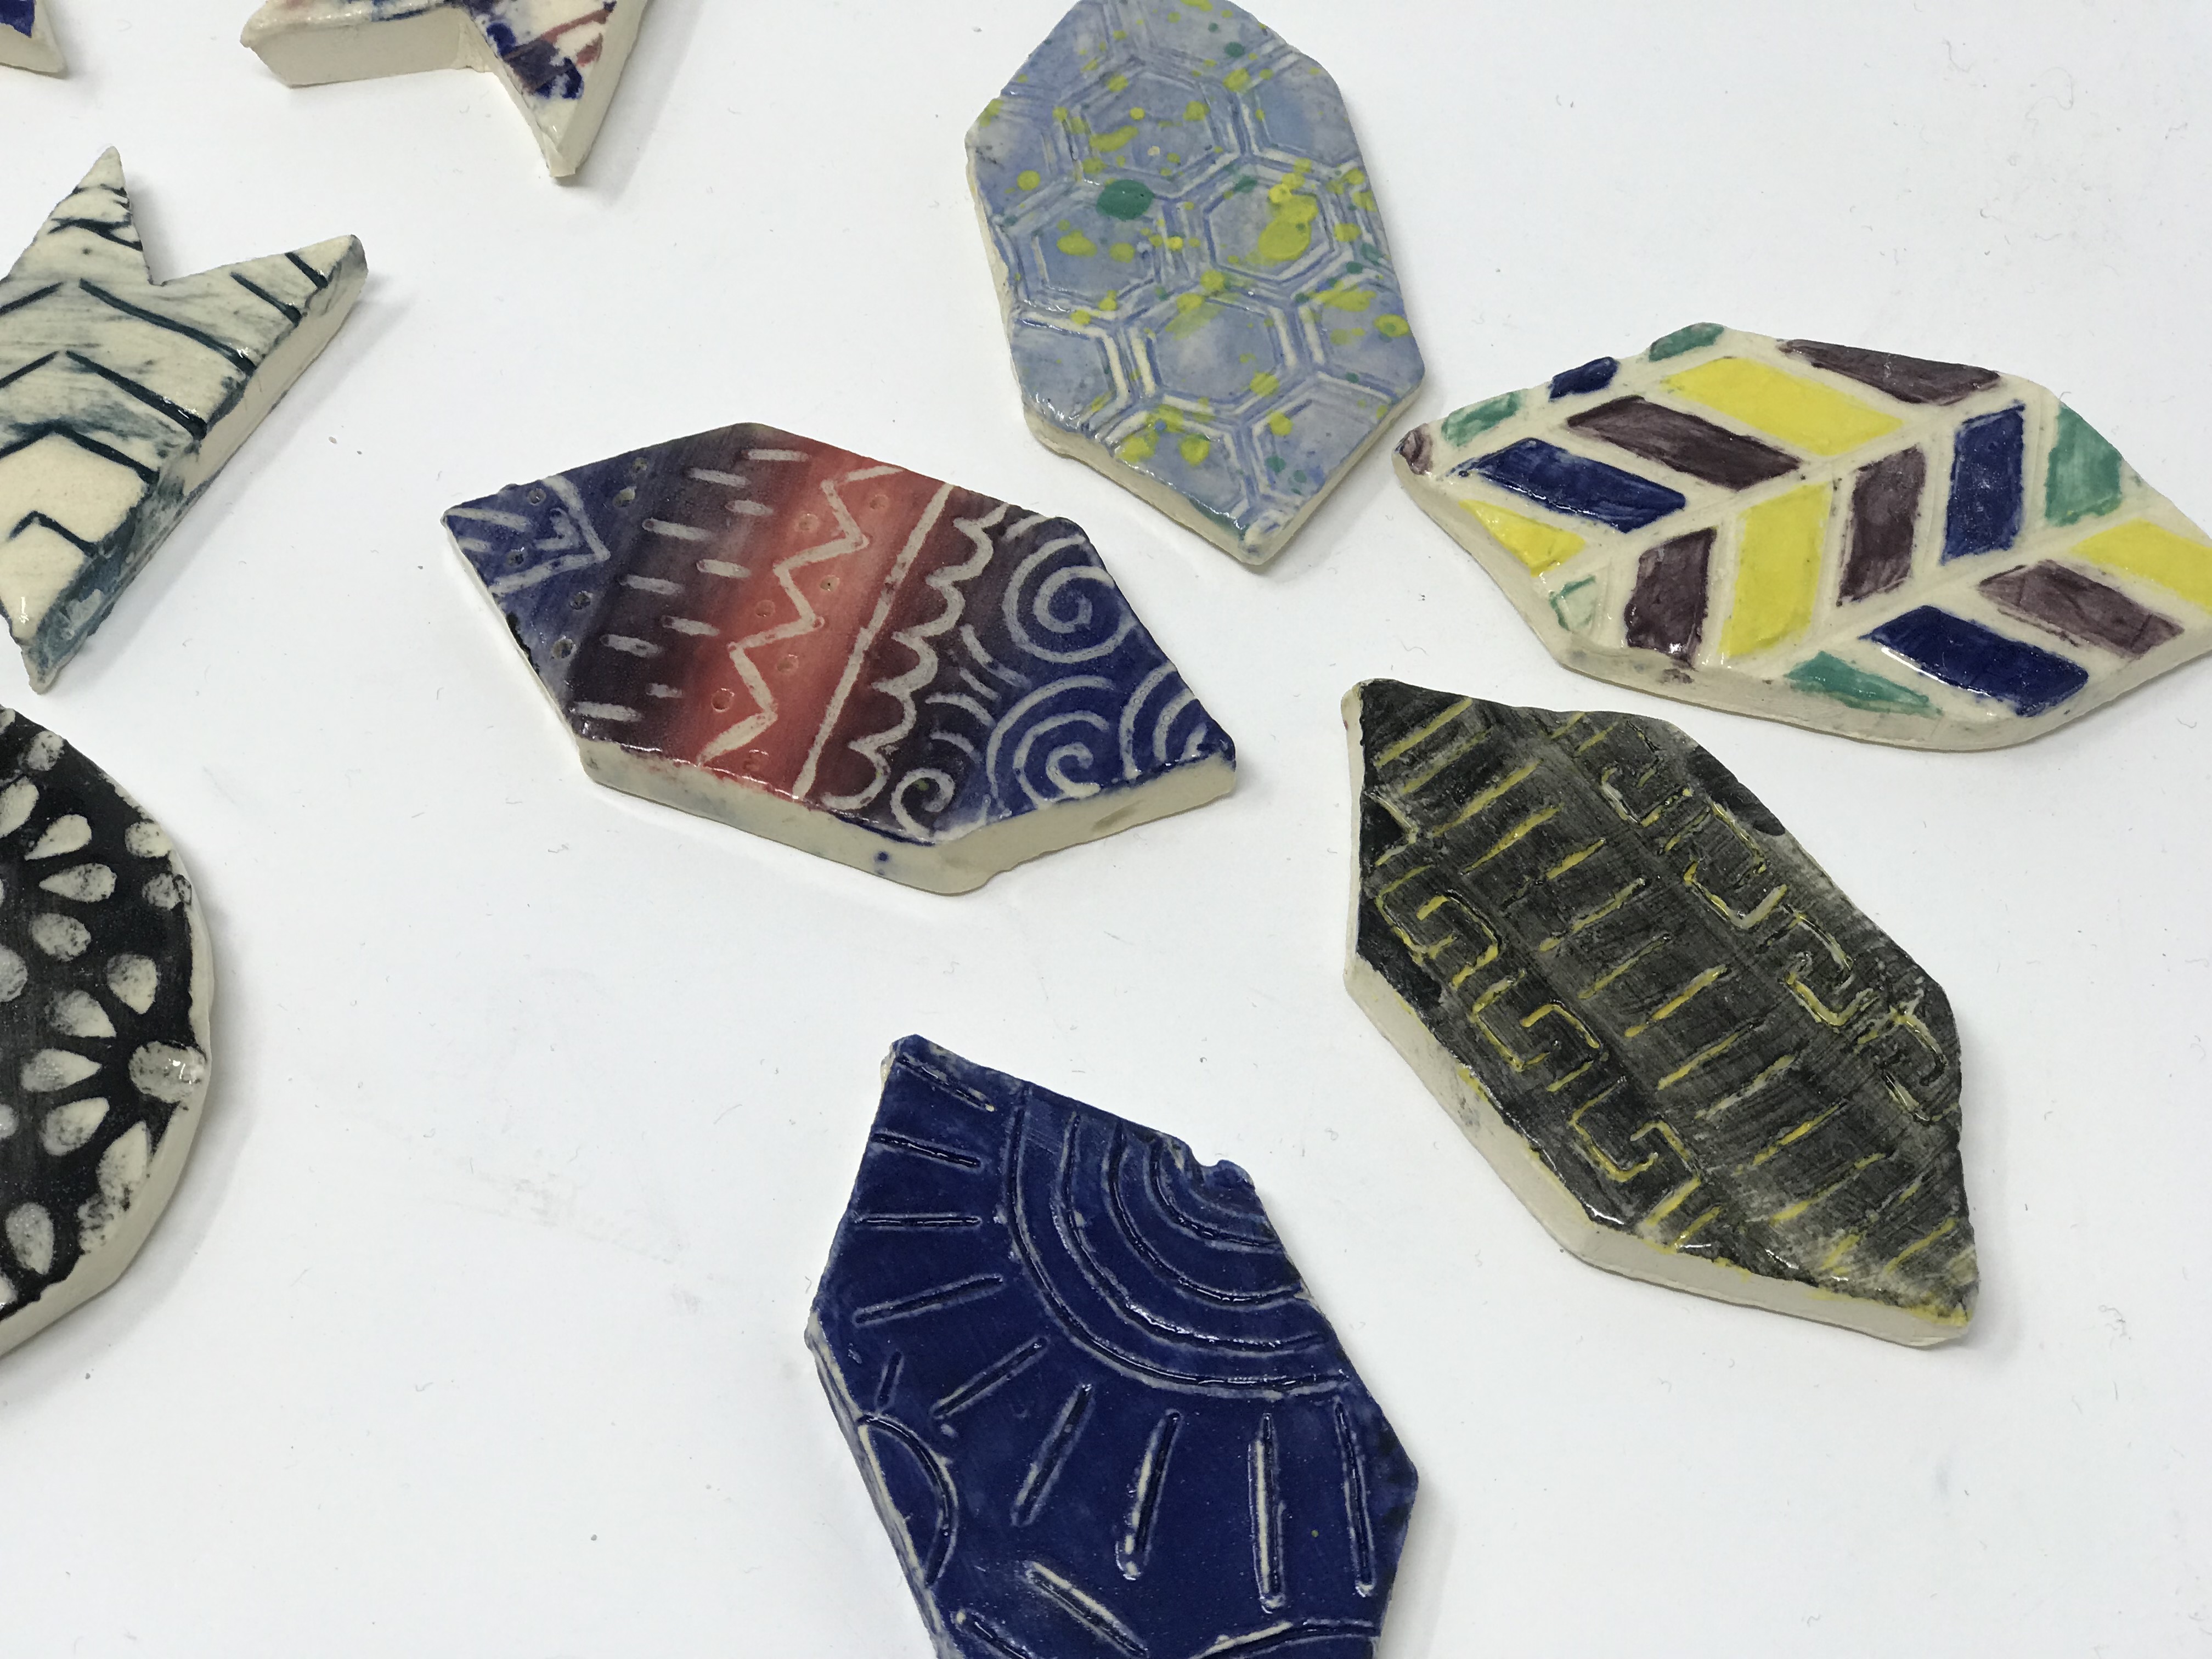
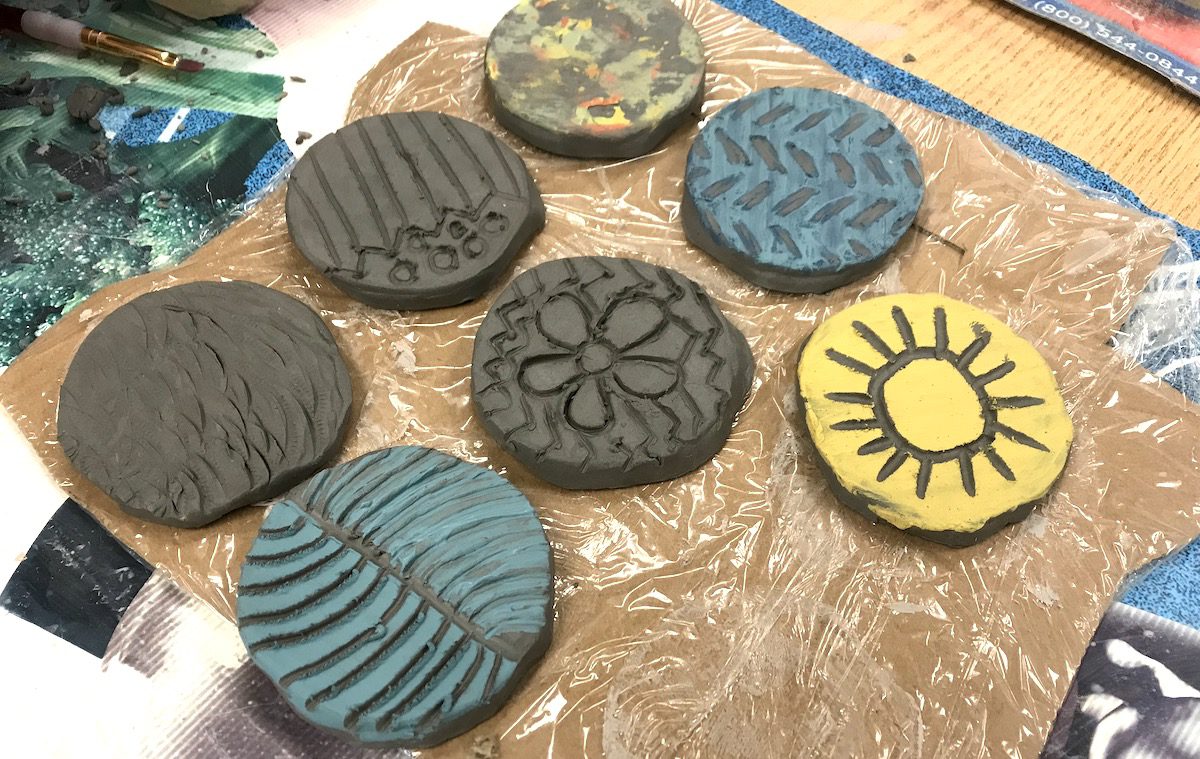
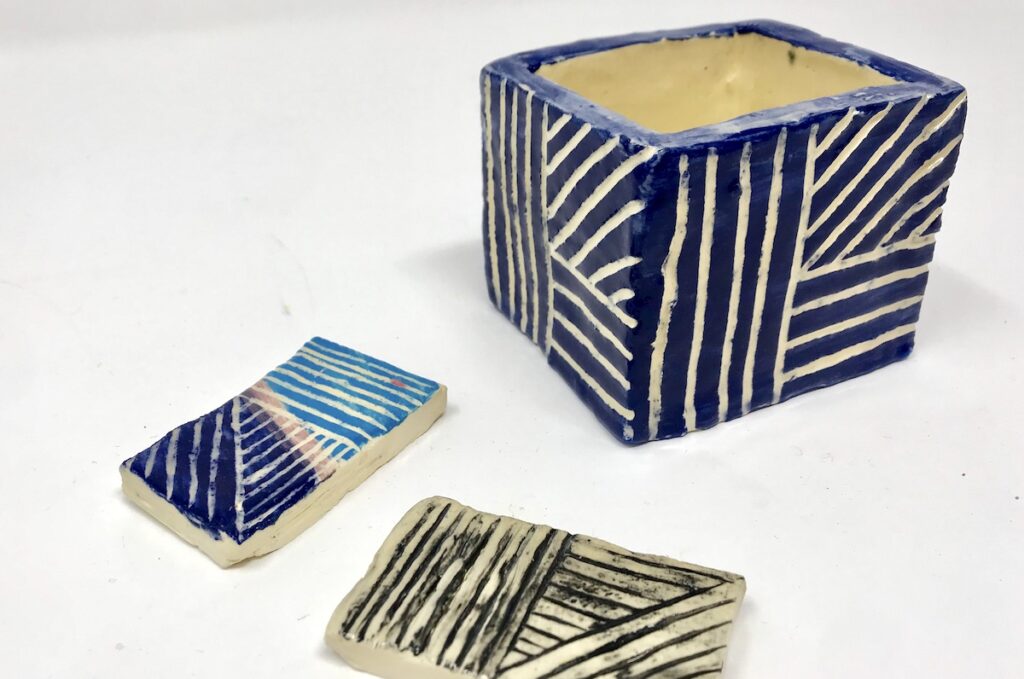
An easy way to do this is to create a series of small test tiles that explore different techniques. These small pieces can be used later on as magnets or pins. By allowing your students to practice how they want their finished piece to look, they won’t be intimidated to take risks. Many times students have created a nice clay piece, and they are afraid they are going to ruin it.
When they have the opportunity to practice before building their clay piece, they know what to expect. So, even though adding color is typically the last step in finishing a clay piece, by doing this first, your students’ desired result will be achieved. We’ll call this a double reverse in backward design instruction!
Throughout your time teaching, you’ve probably come across a few lessons that have failed. These lessons can often be the ones we’ve spent a lot of time developing content to teach our students, yet they don’t yield the desired results. If you find yourself in these situations, try out this backward method of planning.
Do you use the backward planning method to design lessons?
How do you ensure your students meet the desired results of a lesson?
Magazine articles and podcasts are opinions of professional education contributors and do not necessarily represent the position of the Art of Education University (AOEU) or its academic offerings. Contributors use terms in the way they are most often talked about in the scope of their educational experiences.