We all have rolls of tape stored away in our classrooms, waiting to hang artwork or fix random mishaps like rips and tears. It’s affordable, easy to store, and readily available. However, most of the time, it just sits there and collects dust on its sticky edges. As art teachers, we are pros at taking excess supplies and reinventing them into meaningful tools. As such, extra tape should be no exception. Take out your tape stash and think about all the artistic possibilities! It can be an art medium, an artmaking tool, or part of an artistic game.
Keep reading to discover three unexpected ways to use packing tape and four unusual ways to use painter’s tape.
Packing Tape
Packing tape’s uses go well beyond shipping boxes and are a great medium in the art room. At first glance, packing tape is tricky to use as an art medium because of its transparency. However, its transparency and wide width are what make it useful.
1. Window Art
You can play on the transparency of packing tape by layering it on a backlit surface, such as a window or lightbox. The more layers, the less transparent the tape becomes, allowing you to create highlights and shadows. To show this technique to your students, introduce them to Miami-based artist Max Zorn. Check out this time-lapse video of Zorn in action.
2. Image Transfers
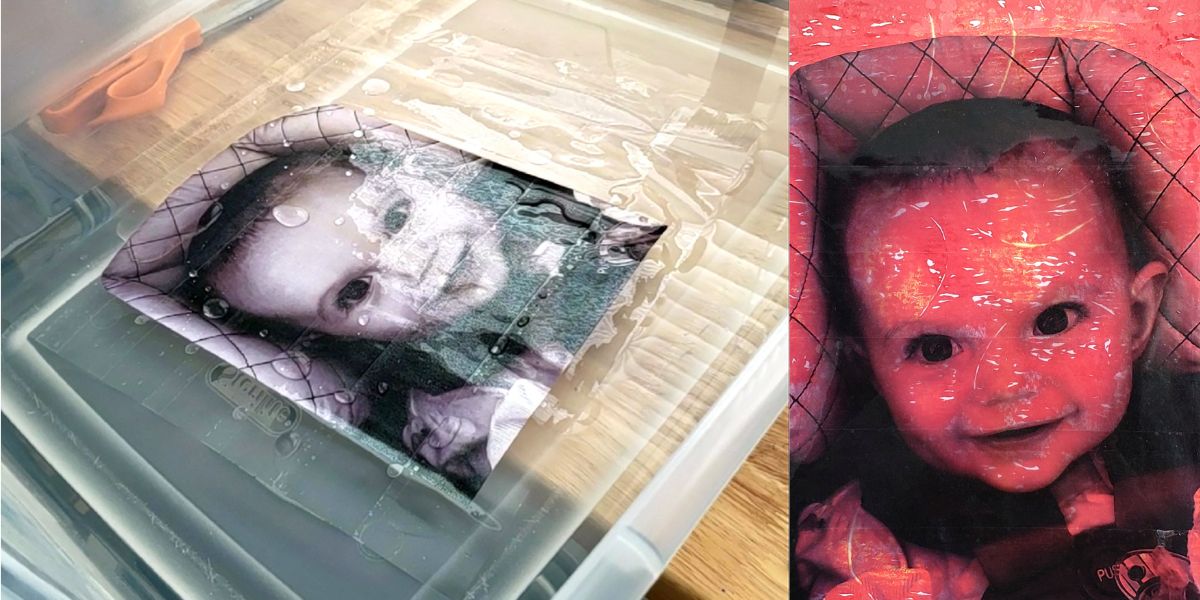
Adding images onto backgrounds is a wonderful way to extend a tabletop printmaking lesson or combine printmaking with photography. Packing tape makes image transfers easy and accessible in the classroom. Check out the Transfer Printing Pack in PRO Learning for more details on clear-tape transfers, a tape-transfer anchor chart, and information on other transfer methods!
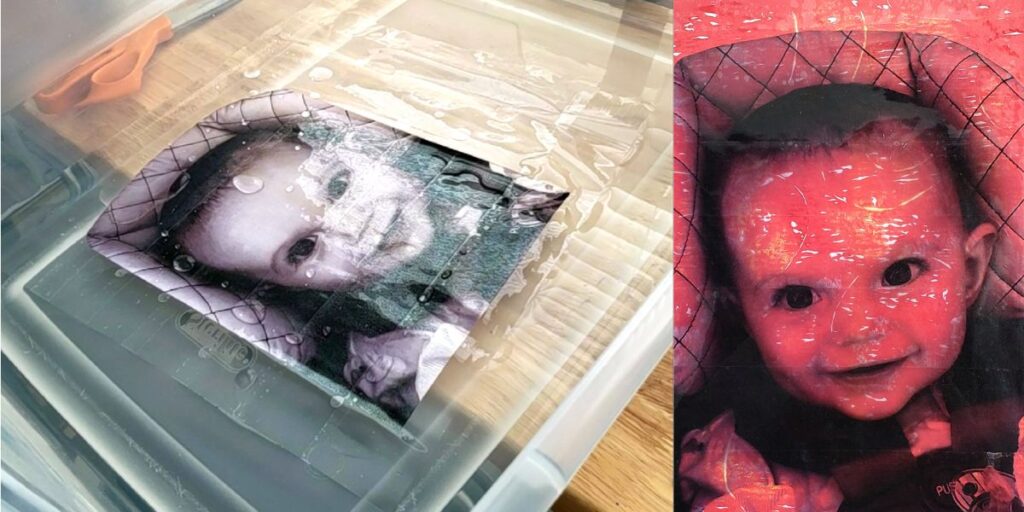
Stick to these steps to make image transfers using packing tape:
- Use a LaserJet printer or a toner printer to print your image.
- Place packing tape sticky side down on top of the image. Cover the image by overlapping the tape.
- Soak the image in water for at least five minutes.
- Gently scrub the paper off of the tape, being careful not to remove the ink.
- Let dry or lightly dab the tape to get the water off.
- Place the tape on top of your background.
3. Tape Sculptures
Packing tape sculptures are a student favorite. They can look like pretty much anything, including the students themselves! To go for a spooky or ethereal look, place battery-powered LED candles inside and hang them from the ceiling. Students can also paint select parts or fill them with small objects.
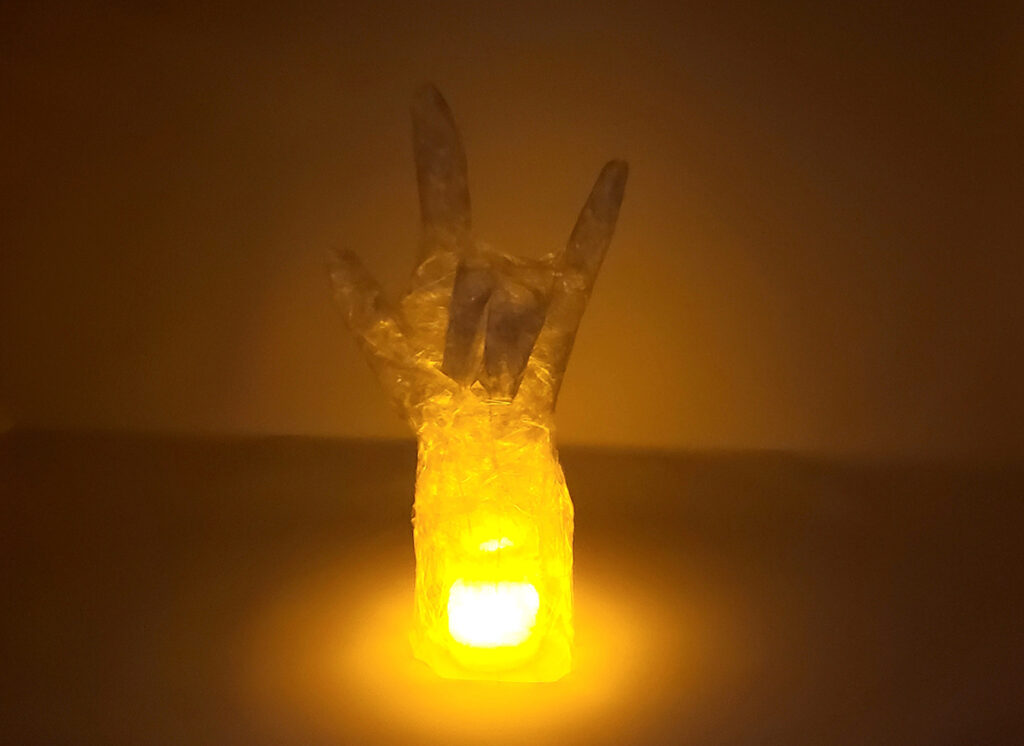
Follow these steps to make a tape sculpture:
- If working on a large or full-body sculpture, work in small, manageable sections each class period. Tape the finished components together to create one large sculpture.
- Wrap the object (or person) in plastic wrap. If you don’t have plastic wrap, start with a layer of packing tape with the sticky side out.
- Wrap the object with packing tape sticky side down.
- Continue layering the tape until it is stiff enough to stand up on its own.
- Remove the tape from the object. If it’s difficult to remove, use scissors to cut the tape off carefully.
- Use more packing tape to seal any cuts or holes.
Painter’s Tape
Painter’s tape is a different type of tape, but it has just as many uses in the art room as packing tape. Unlike packing tape, which is clear, painter’s tape comes in a solid color. It is very sticky yet removes cleanly from most surfaces. Painter’s tape creates sharp, crisp paint lines and comes in an assortment of widths to make any project possible!
1. Tape Murals
Add tape in your next lesson on perspective. Teach your students about one-, two-, or three-point perspectives. Students demonstrate perspective directly on the wall with tape. Because tape has straight edges, it helps students align their orthogonal lines correctly. Using tape also requires collaboration and communication, making this a fun team-building activity.
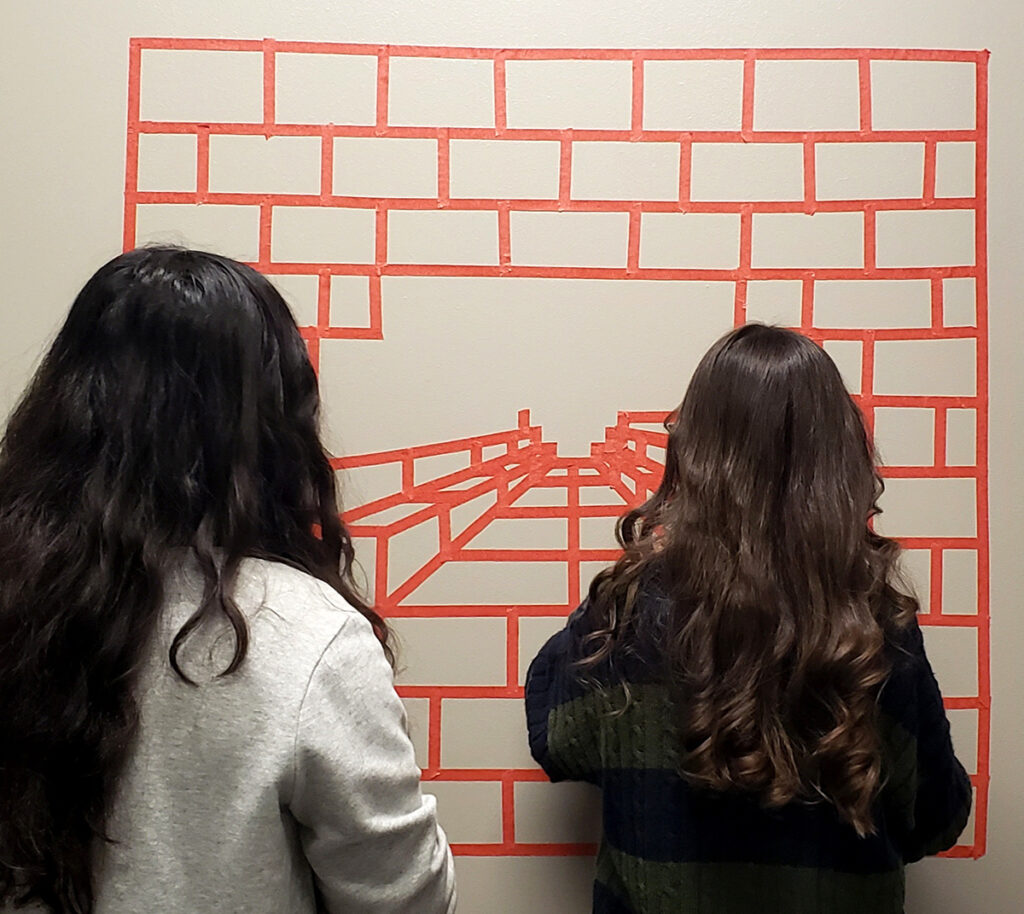
For more advanced wall art, try a tape mural. Tape murals are a low-risk, temporary option for classes unable to paint on interior or exterior walls. Tape murals are useful because students can easily correct mistakes by peeling the tape off the walls and re-sticking it correctly. Alternative tape mural projects can include Cubism-inspired designs or motivational messages.
2. Handmade Stencils
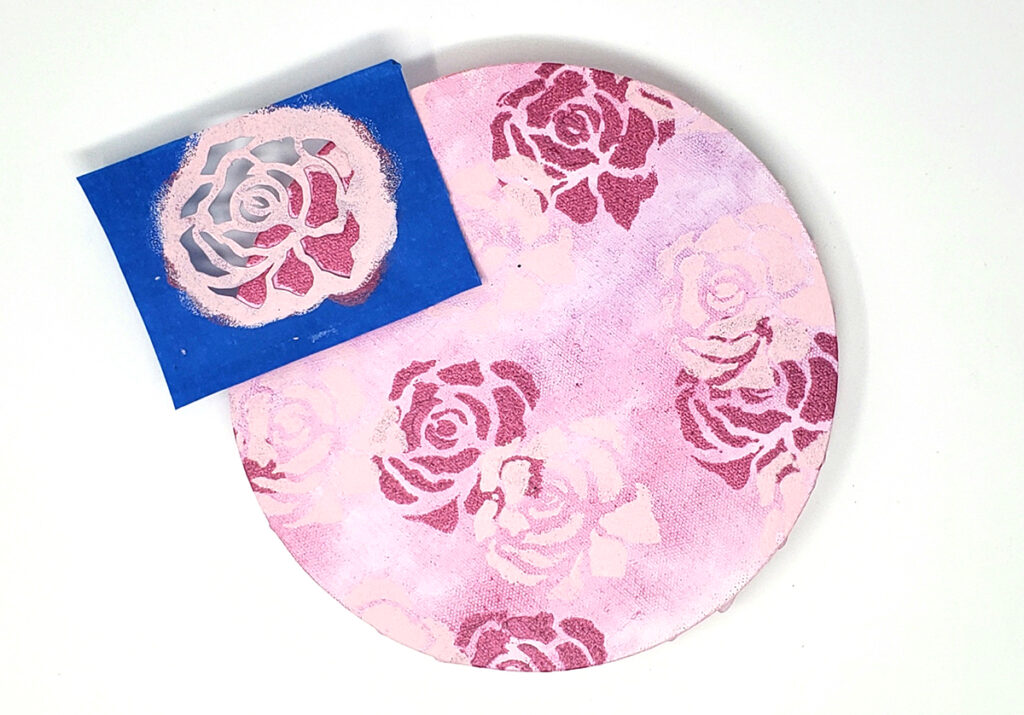
Stencils come in handy for many projects. Unfortunately, there isn’t always the perfect stencil for every art piece. A simple solution is to use packing tape to create a custom DIY stencil. For another idea on how to use stencils, check out the article An Easy Way to Teach Your Students About Positive and Negative Space.
Create a painter’s tape stencil with these steps:
- Layer painter’s tape sticky side down on a cutting mat. Be sure to cover enough area so there are at least two inches around the design.
- Add two more layers of painter’s tape on top of the initial layer.
- Peel off the painter’s tape from the cutting mat.
- Flip the tape over.
- Place a layer of tape over the sticky side so that the sticky sides of each are touching.
- Place the tape back on the cutting mat and secure it with tape on the corners.
- Trace or draw your design onto the painter’s tape.
- Cut out the design using a craft knife.
- Remove the tape securing the stencil to the cutting mat.
3. Tape Paintings
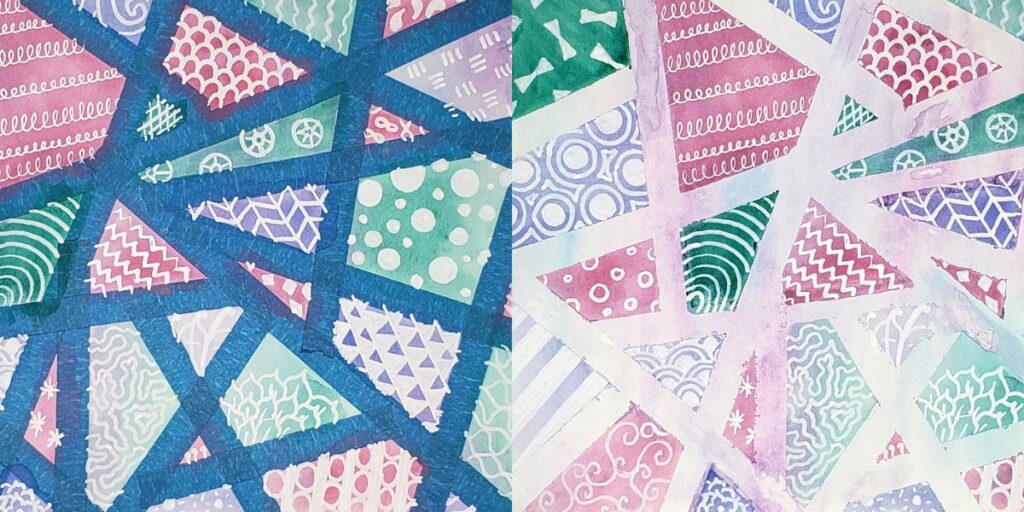
If you don’t have wall space for a tape mural, try tape paintings. They are a good introduction to abstract art because they are easy, quick, and hard to mess up. Place tape on a painted background. If using watercolor paper, try washi tape instead. If you don’t have washi tape, remove some of the tape’s stickiness by pressing it onto a piece of cloth and pulling it off a few times. Paint directly on top of the entire painting, including the tape. Once the paint is dry, carefully remove the tape. Repeat the process as many times as desired to create a multi-layered effect.
4. Abstract Art Games
Speaking of abstract art, sometimes it’s hard to get students to step away from representational objects. Let’s look at three games using painter’s tape to help students grasp abstraction in a fun way that also adds an unpredictable twist! For more ideas on games in the art room, check out the podcast episode “Ideas for Art Room Games (Ep. 331).”
Use these three painter’s tape games to help your students make abstract art.
1. Painter’s Tape Maze
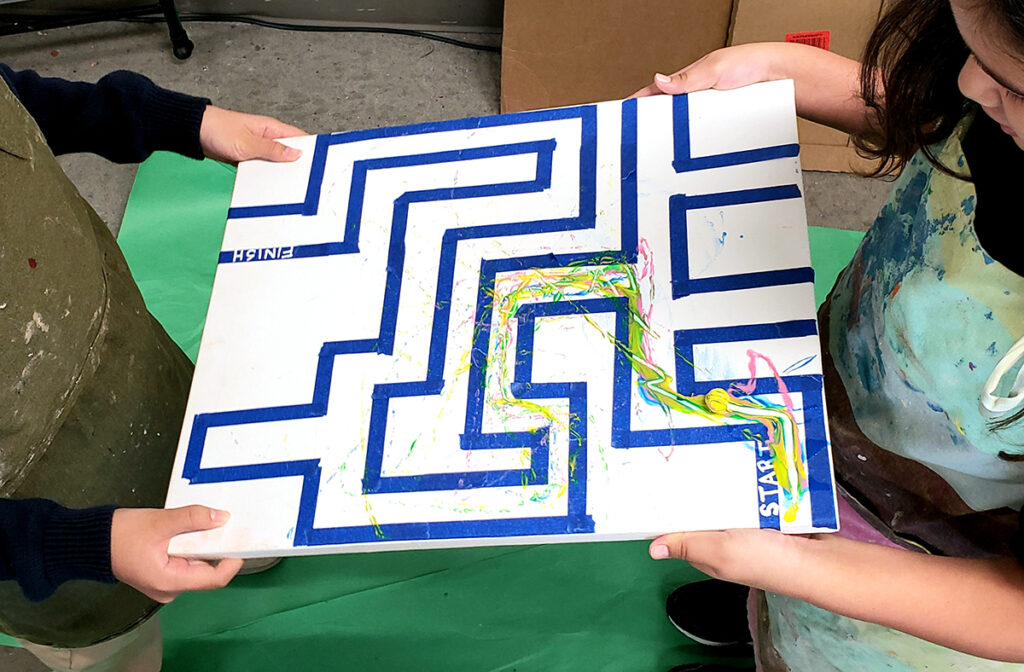
This activity is a spin on tape paintings. Use painter’s tape to create a maze on top of a canvas. Thin out brightly colored tempera paint and dip a marble into the paint. Place the marble at the “start” of the maze. Have students blow on the marble to get it through the maze without touching the masking tape. Alternatively, students hold and tilt the canvas to move the marble through the maze. Play the game over a large box to catch any drips or rogue marbles. The first group to get their marble through the maze wins. It’s a fun way to add some abstract pizazz on top of a background!
2. Shuffleboard Art
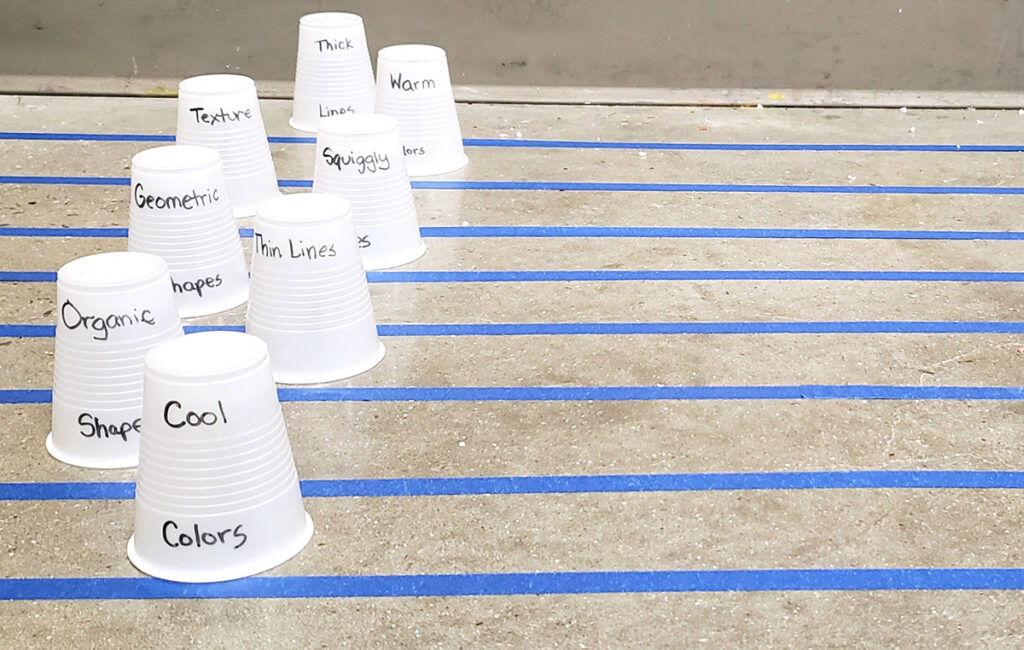
Use painter’s tape to make different sections at the end of a long hallway or the edge of a table. Label each section of the painter’s tape with a different abstract art element or challenge. For example, the labels can include: paint splatter, geometric shapes, marks made in the paint with a toothpick, oil pastel swirls, etc. Students roll a ball or puck at least three times. Whatever sections their ball stops on are the elements they have to include in their abstract art piece.
3. Sticky Ball Game
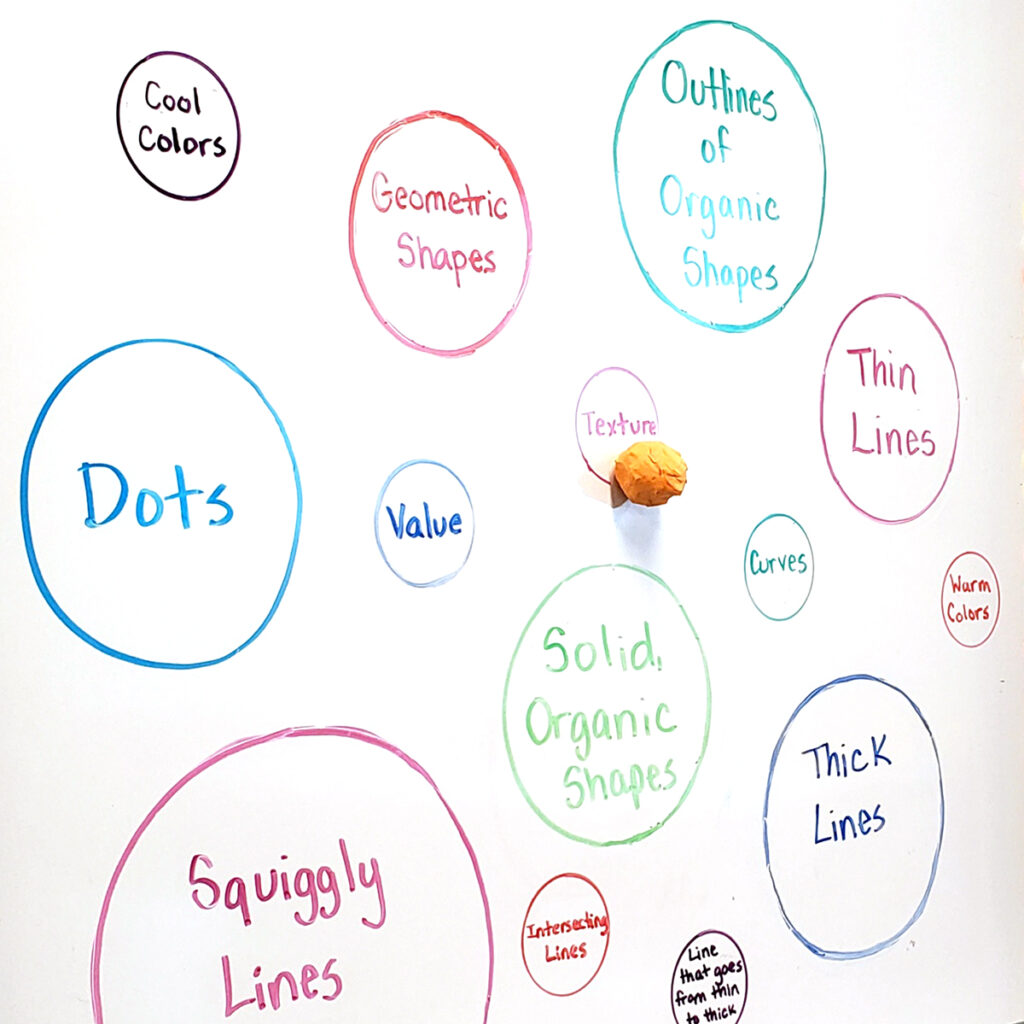
One of the simplest painter’s tape games is using the tape as a ball. Roll up the painter’s tape with the sticky side out. Draw circles on a dry-erase board and label them with different abstract art elements or prompts. Have students throw the sticky ball at the board. Whichever circles the ball lands on are the components they have to include in their artwork!
There are many potential uses for packing tape and painter’s tape in the classroom. Packing tape can become window art, image transfers, or tape sculptures. Painter’s tape can become tape murals, stencils, tape paintings, or a part of abstract art games. These ideas are only the beginning, especially since there are many other types of tape with unique uses in the art room. Whatever the type of tape, there are ways to transform it into art, use it as a tool in the artmaking process, or incorporate it into artmaking games. Tape isn’t just tape—it’s a sticky roll of possibilities!
What is your favorite kind of tape and why?
How do you use tape in your classroom?
What supplies do you use in creative ways?
Magazine articles and podcasts are opinions of professional education contributors and do not necessarily represent the position of the Art of Education University (AOEU) or its academic offerings. Contributors use terms in the way they are most often talked about in the scope of their educational experiences.
