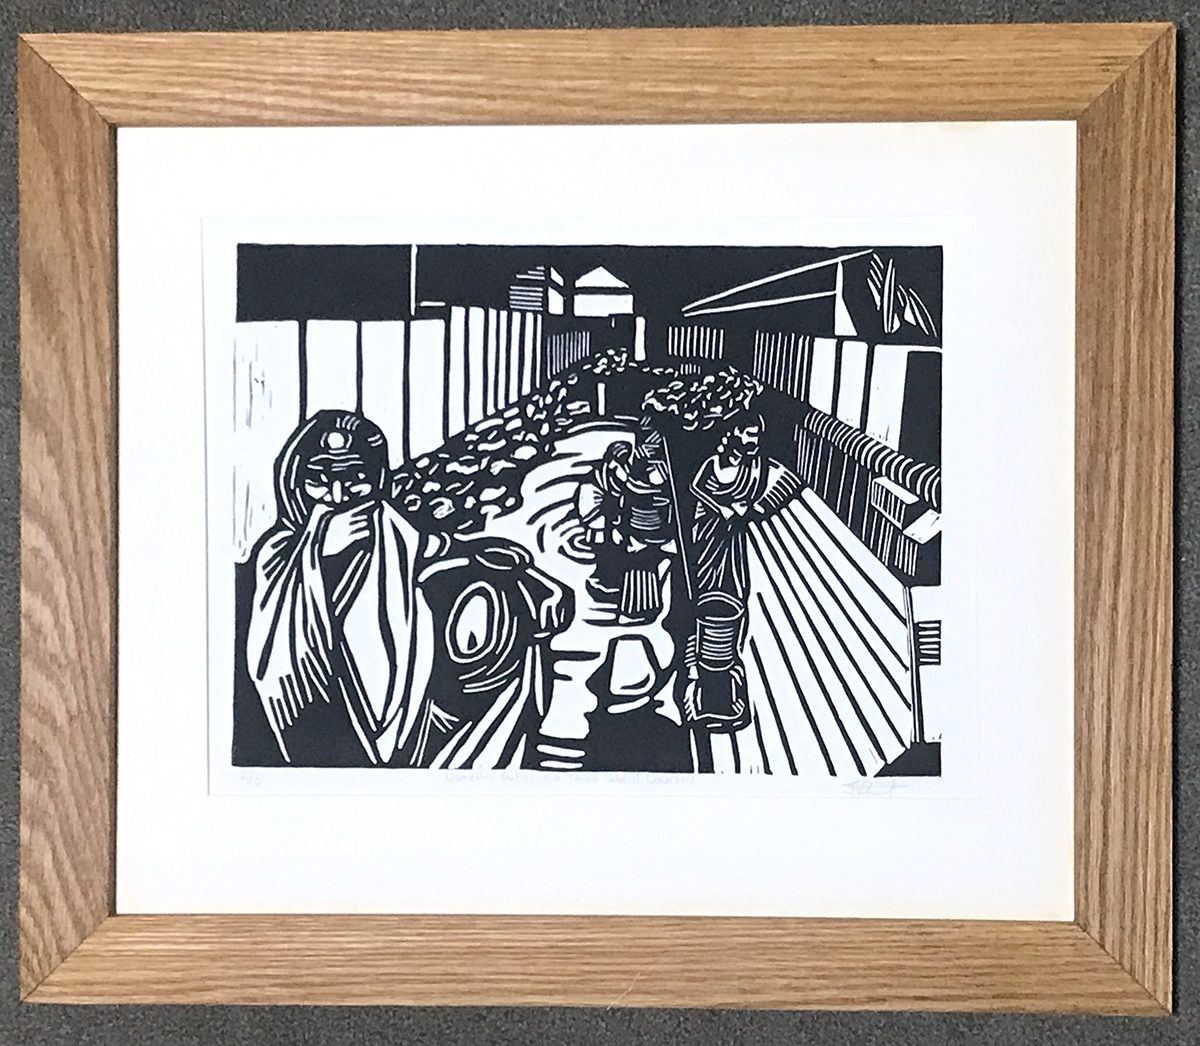
Making your own custom art frames is easier than you think—all it takes is a few simple hand or power tools and basic building supplies. Cost varies depending on size and materials, but you’ll save at least half the cost compared to professional framing. In nine simple steps, you’ll have the skill and confidence to fit a frame for any artwork.
Here’s why you should DIY your own frames, plus nine steps to build your first one.

Why build your own frames?
Artists incur many expenses when creating each piece. For example, when starting a painting, you have to buy (or stretch) a canvas. You also have to purchase the paint, brushes, solvents, and other mediums like Liquin or thickening gel. If you exhibit the piece in a show, it will most likely need matting and/or framing. Depending on the size of your piece, it may not be worth the added expense, especially if it does not sell.
One alternative is to go thrifting for frames at second-hand stores. While a budget-friendly option, finding an exact fit can take time, and the found frame may not speak to the piece. Building your own frames allows them to be specific to the work at hand in the style and color you like.
Here are the supplies you’ll need to frame:
- 1” x 2” strips of wood (enough to frame the outside of your piece)
- Trim or molding at least 2-2.5” wide (depending on how much overlap you want)
- Wood glue
- Paint, stain, or oil finish
- Sandpaper
- Tape measure or ruler
- Eyehooks and wire or sawtooth hangers
- Glazier points, brad nails, or staples
- Plexiglass (optional)
And here are the necessary tools:
- Miter saw or miter box and saw
- Clamps or a framing strap
- Heavy objects (ie books, weights, or paint cans)
- Brush or an old rag
- Pliers
- Wire cutters
- Drill
Once you have all of your supplies and tools, you’re ready to start framing.
Note: Follow best practices regarding safety such as eye protection and tool maintenance. Adhere to your district and school’s policies if involving students in this project.
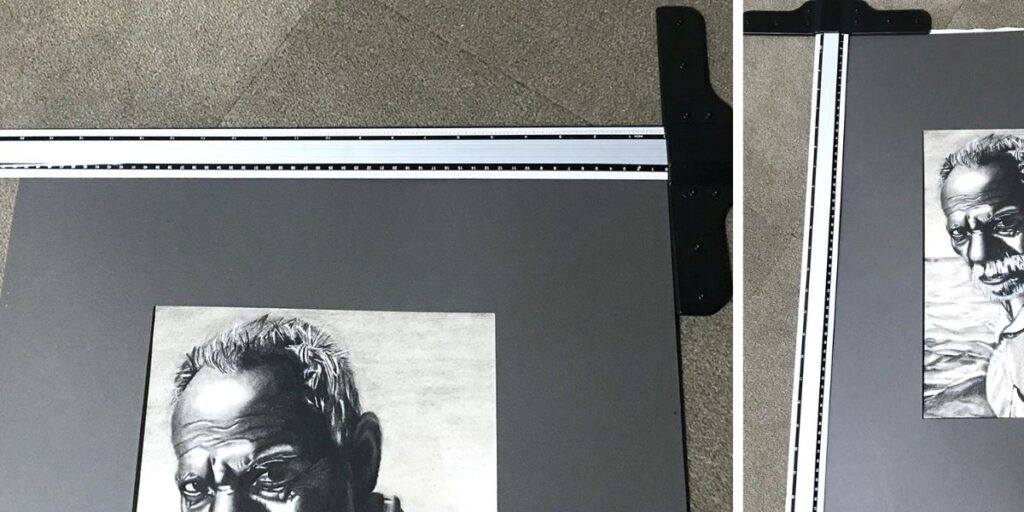
1. Measure the artwork.
Grab a tape measure or ruler and get the length and width of your artwork. If it’s a matted drawing or print, take measurements with the mat in place.
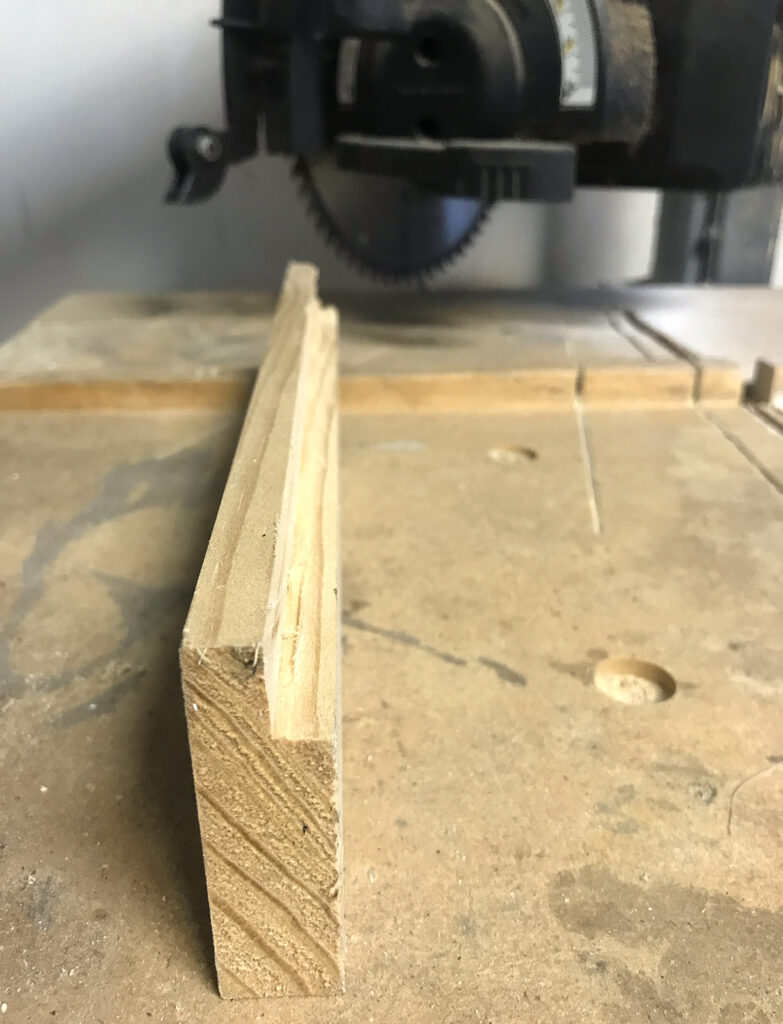
2. Cut the 1x2s for the frame base.
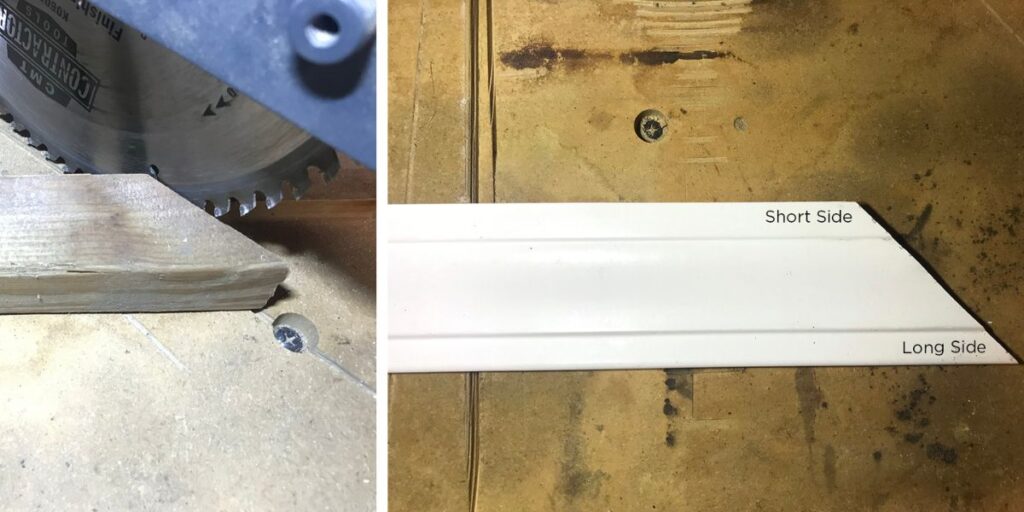
Lumber can be tricky because it goes by its nominal, or common, name—1×2 in this case. It is important to note later that a 1×2 is actually a .65″ x 1.5” piece of wood.
Cut the wood to the size of your work. Position your miter saw to a 45° position. When you cut a 45° angle, you will have two corners to measure from, a long one and a short one. Always use the shorter corner for the inside of your piece.
For example, when both ends are mitered to fit a 10″ x 12″ piece, it should measure 10” from the short corner to the short corner for width. It should measure 12” from the short corner to the short corner for length.
Always pay attention to the direction of your miters. When two 45° angles meet, they create a 90° angle which gives the “L” shape for the frame corners. Who knew your high school geometry class would come in handy?
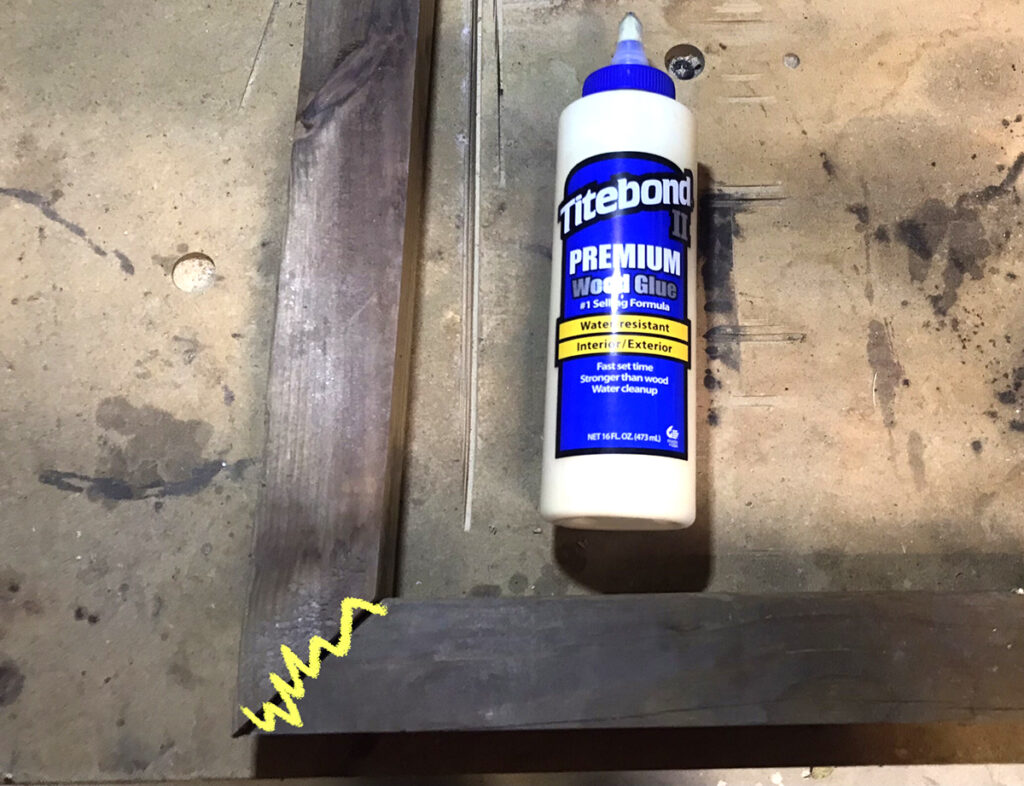
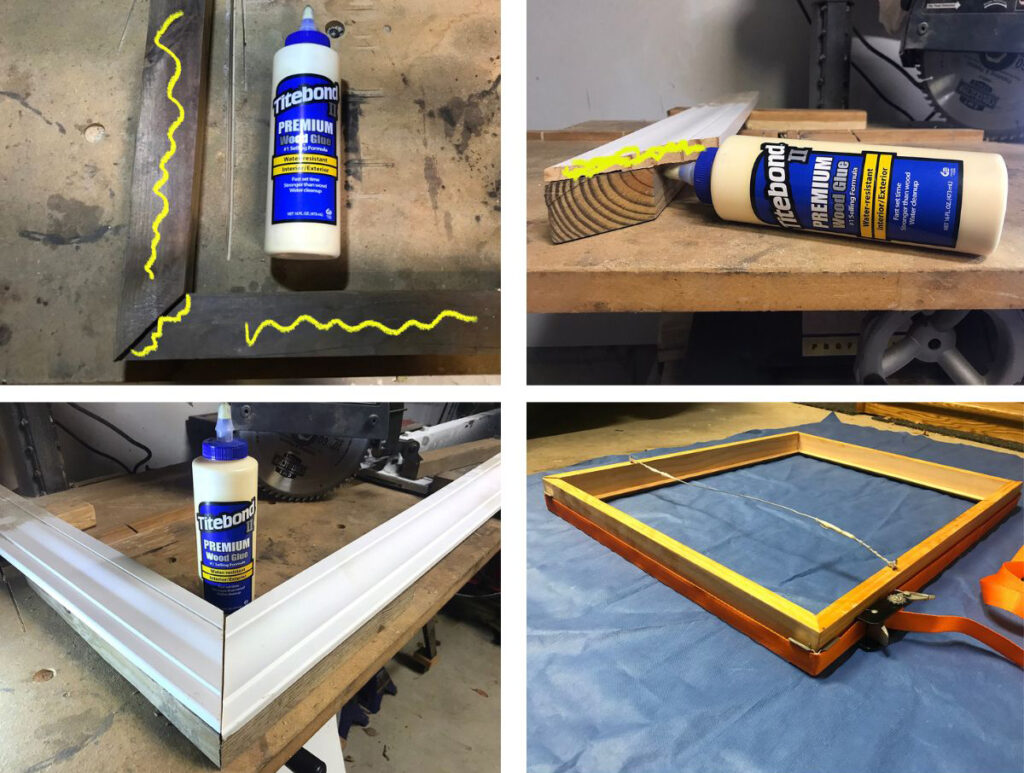
3. Glue together the 1x2s for the frame base.
Dry fit your pieces together to make sure they align properly. If there is a small gap when matching them up, try making a skim cut on one of your mitered edges. A skim cut is when you take off a fine shaving of wood to make it fit better. When the dry fit is good, apply a small bead of glue to each mitered angle and hold them together using clamps or a framing strap. It is also recommended to place a heavy object such as a book, weight, or paint can on each corner to keep it from warping. Wipe off excess glue with an old rag.
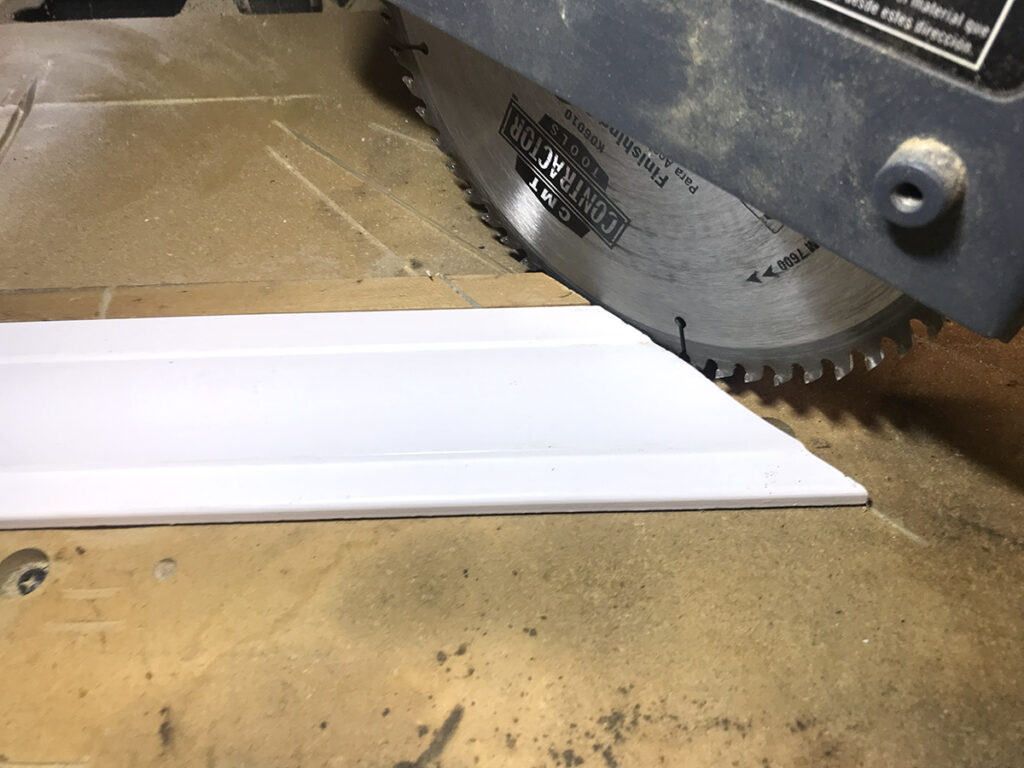
4. Cut the trim pieces.
While your 1×2 frame base is drying, cut your trim pieces to size. Measure the length and width of the 1×2 frame base. For example, 11.5″ x 13.5″.
Cut a miter on each trim piece the same way you cut the 1x2s, but measure from the long corners instead of the short ones. The long corners will be the outside edge of your frame.
Some DIY framers skip the trim step and only use the 1×2 frame base as their frame. To pull this off, cut a recessed edge (known as a rabbet) in the wood. This method is more like matting your work with wood. The task requires a radial arm saw, table saw, router, or rabbet plane.
5. Glue the trim pieces to the 1×2 frame base.
Dry fit the trim pieces by placing them on top of your 1×2 frame base. Again, the longer corners of the trim pieces should end up on the outside edge of your frame and fit the edge of your 1×2 base. If you notice a slight gap in the corners when dry fitting, skim-cut the molding to fit better.
The trim pieces should be wider than your 1x2s. It will create an overlap on the inside of the frame for your art to rest against so it does not fall out.
Apply glue to the mitered corners of your trim pieces, as well as the bottom of your molding. Clamp or strap together and place something heavy on each of the corners to prevent warping. Wipe off excess glue with an old rag.
6. Sand all surfaces.
Once dry, unclamp your work and sand all surfaces with 220 or 150-grit sandpaper to help the finish adhere.
7. Apply the finish.
Wipe down the work with a damp rag or feather duster. Use brushes or an old rag to apply the paint, stain, or oil finish of your choice.
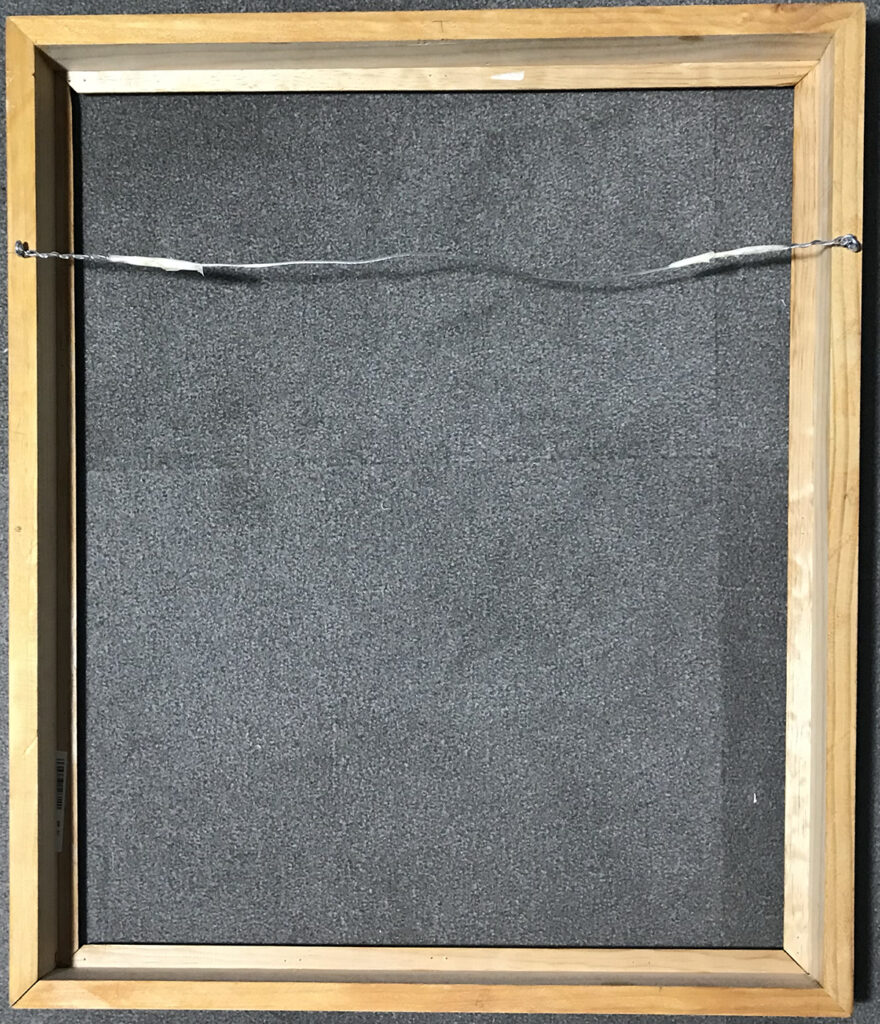
8. Attach a wire and insert plexiglass.
After the paint or stain is completely dry, attach eyehooks and wire or a sawtooth hanger on the back of the work. If using eyehooks, insert them in about a quarter or a third of the way down the piece and connect them with wire. A sawtooth hanger may require a drill to insert the screws.
A piece of plexiglass is optional. Ask your hardware store to cut it to size and insert it into the frame before the work. Make sure to clean the inside of the plexiglass before placing your work on top.
9. Assemble with your work!
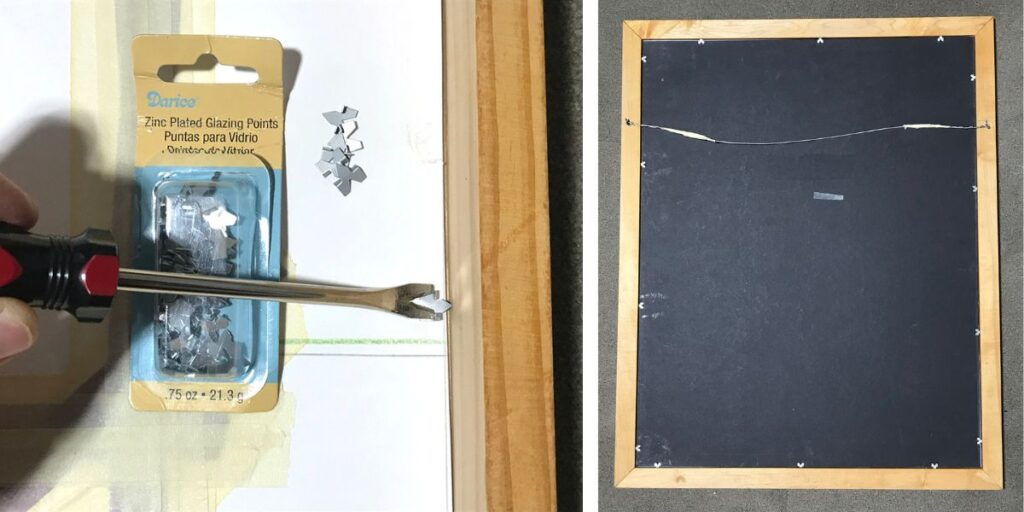
The final step is placing the artwork into the frame. Secure it in place by attaching glazier points, brad nails, or staples around the edge of your piece. Now you’re ready to hang the piece in a gallery show or put it up in your home somewhere for you to enjoy.
With some simple tools and basic geometry, you can frame personal or student artwork for a fraction of the cost of a professional framing shop. Be proud of your handiwork and paint it to your liking. You could even team up with your school’s shop teacher or local woodworker to involve your students in this process at the high school level.
Frames are a great introduction to woodworking and tool use and can open your students up to a wide range of job possibilities. No matter how you slice it, this art teacher DIY provides relevant expertise and saves you money in the process.
Do you feel confident framing your own work?
How do you frame students’ work?
Magazine articles and podcasts are opinions of professional education contributors and do not necessarily represent the position of the Art of Education University (AOEU) or its academic offerings. Contributors use terms in the way they are most often talked about in the scope of their educational experiences.