Let’s face it; drawing is a difficult concept to teach. Drawing takes a lot of practice, patience and students tend to get frustrated easily. How many times have you heard the phrase “I can’t draw” in your classroom? Probably too many times to count.
I help build students confidence by providing them drawing assignments where they can be successful. A strategy I use in my classroom is drawing with a grid. Using a grid helps break down the drawing into smaller sections. Chuck Close once said, “If you’re overwhelmed by the size of a problem, break it down into many bite sized pieces.”
Breaking the drawing into “bite sized pieces,” or small squares, helps students feel less overwhelmed.

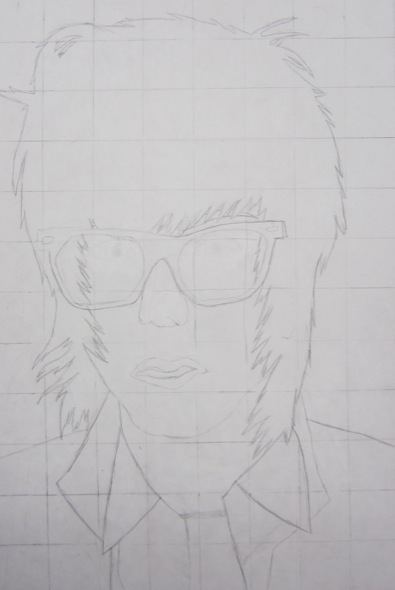
The grid technique can be used to create drawings from a photo. The subject of the photo can vary. Some common subjects include animals, people, flowers, and landscapes. Using a grid from a photograph allows students to create an accurate and proportional drawing. Students focus on their observational skills while incorporating the mathematical skills of measuring, drawing straight lines, and proportion into their art.
Use these steps to create a grid drawing lesson plan.
 1. Choose a photograph.
When my students choose a photograph, I make sure I print them as a 4×6 photograph.
2. Choose a final piece of paper.
I use 8×12, double the size of the photograph.
3. Grid the photograph.
My students’ grid their 4×6 photograph into ½ inch by ½ inch squares.
4. Count the number of boxes in the photograph and the final paper to make sure they match.
5. Number the boxes on the photograph and final paper.
Make sure the numbers coordinate. My students number 1-8 on the top row, and 1-12 on the left row.
6. Start drawing the contour lines of the photograph.
Be sure students are look at each individual box as they draw.
With these simple steps, your students are sure to be successful.
What are other “tricks of the trade” you have for drawing with a grid?
Magazine articles and podcasts are opinions of professional education contributors and do not necessarily represent the position of the Art of Education University (AOEU) or its academic offerings. Contributors use terms in the way they are most often talked about in the scope of their educational experiences.


