In my art room, I chose to start the majority of my clay projects in January. It was great to come back from winter break to something fresh and exciting. Plus, there’s no better way to warm up than loading and unloading a kiln!
Here is a smattering of quick clay tips that kept me safe and saved my sanity when firing over 600 clay projects in a very short amount of time.
1. Give students less clay.
You can keep your project objectives the same, but fit more items in the kiln. It’s a win-win situation. With two schools and hundreds of students, it’s how I survived.
2. Don’t set a glove on the kiln.
Just don’t. I walked in to see my principal stomping out my fiery glove in high heels. That baby gets hot.
3. Invest in a good pair of kiln gloves after your first pair burns.
It will be worth it!
4. Don’t fire the kiln on the weekend.
Firing on the weekend always made me nervous, and I’d find myself running to school time and time again to check on it. It ruined my weekend! Instead, start the kiln early in the morning, so it’s done before you leave for the day.
5. Wear an apron.
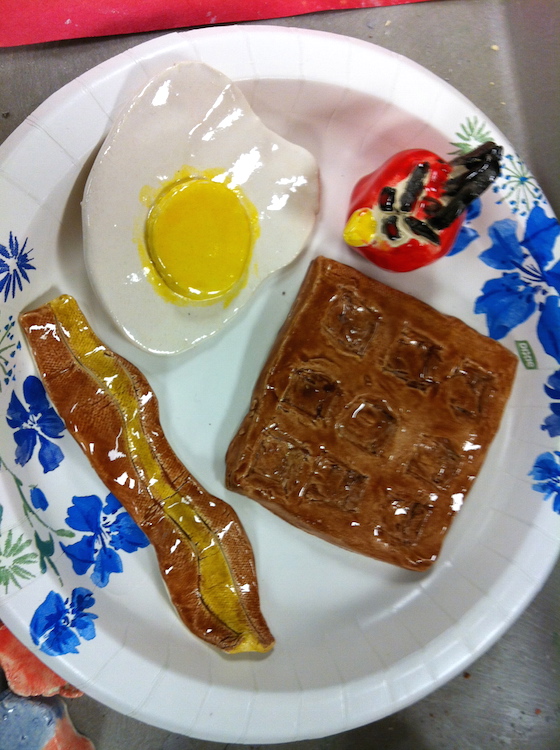
Bending over the kiln can snag your clothing and get it all dusty. (Ok- maybe it’s just a short person problem.) Side Note: Once when I was unloading the kiln, I looked down to see a little red “Angry Bird” that had snuck is way into the kiln (see below). It was a funny site among the clay food!
6. Invest in a good cart if your kiln isn’t near your art room.
I found a great Rubbermaid cart with ledges, but the media center also might have an old media cart that would work well, too.
7. Speaking of carts, make sure you have a good way to organize yours.
If you’re going to store clay projects on the cart, I suggest using tape to label which grade level and class you have on each shelf. Misplacing clay pieces stinks! If you keep a consistent labeling strategy, you’ll be less likely to lose something.
8. Use techniques besides glazing to add color to clay pieces.
Only use glaze with some of your classes. Have other students color their pieces with other media, such as metallic paint or oil pastels. Reducing the amount of glaze you use not only saves money, it helps save time spent firing the kiln.
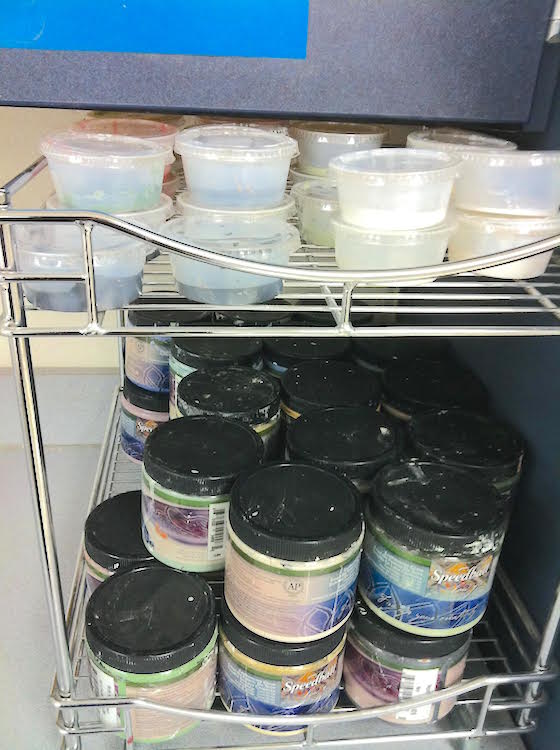
9. Stretch your glaze by diluting it.
Many thicker low-fire glazes can be diluted up to 50% to make them go on smoothly and also stretch the budget. See how I organized mine below. For another distribution system, see here.
10. Keep a few sets of clay wire cutters at you desk.
It’s one of those things that tends to get lost easily. You won’t want to be without one!
Clay can be stressful and tricky to manage. Hopefully these tips will help you remember the little things that can make a big difference. For more clay tips and tricks, check out some of our past articles.
- How to Teach Hundreds of Students While Staying Organized
- The Secret to Successful One-Day Clay Projects
- The Clay Storage Solution You’ve Been Waiting For
- The Only Online Clay Resource You’ll Ever Need!
- Teaching Clay Without a Kiln: An Art Teacher’s Resource
What are some tips you would add to the list?
How do you keep clay manageable in your room?
Magazine articles and podcasts are opinions of professional education contributors and do not necessarily represent the position of the Art of Education University (AOEU) or its academic offerings. Contributors use terms in the way they are most often talked about in the scope of their educational experiences.