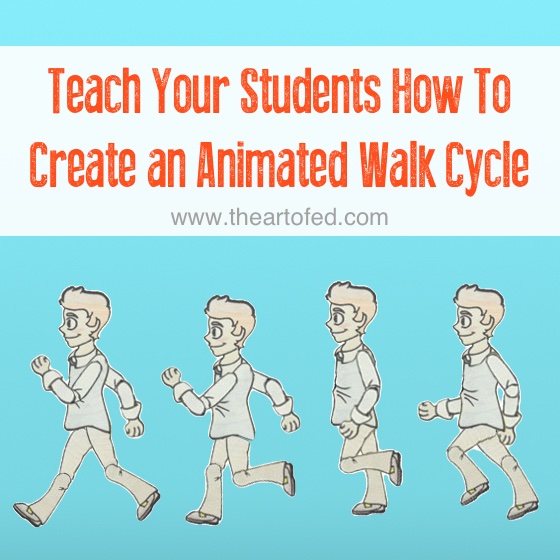
Today we will look at the step-by-step process to complete an animated walk cycle. Creating a walk cycle in animation is rather simple. There are only eight images, drawn in sequence, that when looped create the illusion of forward motion. With today’s technology, especially phone and iPad apps, an animation project like this is no longer limited to those with computer labs and expensive software. In fact, digital animation is something we specifically cover in our Advanced iPads class.
Any class can create walking animations. However, there are a few tips and tricks that can help to make sure the animation runs smoothly.
Preparation
The first step should be to have the students design the character they will animate. The character can be a person, animal, tree or potato as long as it can walk. The character should be drawn in profile, that is to say, as a side view. The character will walk, so it has to have knees.
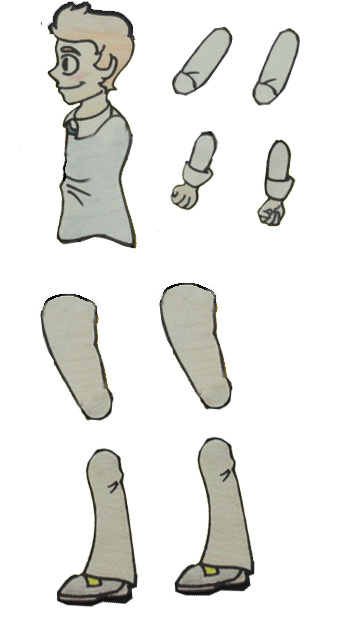
It is possible to complete this project by hand drawing the character eight times with different leg positions. However, since this project is about animation and not drawing, I find it easier to create the character once, as a paper doll (see below). Each of the parts can then be cut out, moved and filmed separately.
The Steps… Literally
1. Filming
Once the characters are designed and cut out, students will need to capture the paper dolls on film. It is important that the camera stay stationary during this time. I highly recommend using a tripod or document camera.
Not only should the camera hold still but the paper doll’s body should remain in location as well. While a slight bounce in the character is ok, you only want the arms and legs of the character to move, not the body. You might consider having the students lightly tape down the body or mark the location so this piece of the character can be placed back into position if it is moved.
2. Arrangement
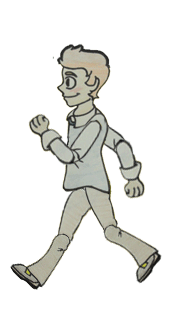
There are eight steps in a walk cycle. You can even get away with four steps if you are unable to tell the difference between the left and right legs.
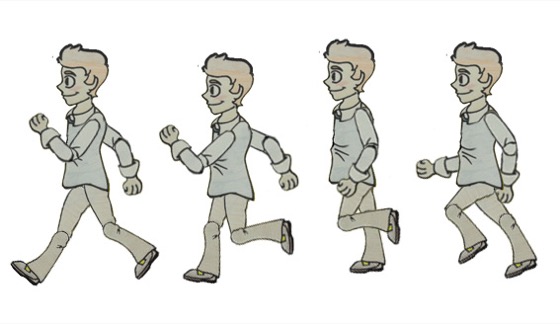
To create the animation, move, and then capture an image of the cut out paper doll in each one of these eight positions. Below are the first four steps.
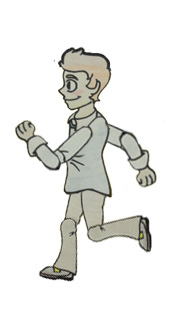
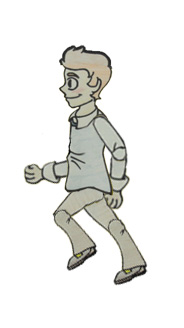
1. In the first position, the front foot has made contact with the ground. The back foot is also on the ground but is about to be lifted.
2. In the second position, the front foot is now firmly on the ground, supporting the weight and the back foot is being lifted.
3. In the third position, the back foot is passing the front foot.
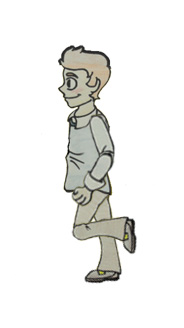
4. In the fourth position, what started as the back foot is at its highest point and is about to come down to make contact with the ground.
The next four steps repeat this process only using the opposite feet. In this manner, it is four positions with the right foot, then the same four positions with the left foot.
3. Final Animation
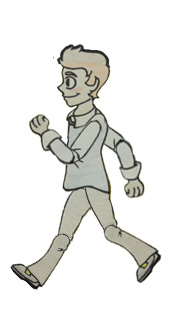
Once you have all the images, the only step left is to compile the eight photos into the animation. For those with more advanced computer skills, Photoshop has a decent, built-in animation function. For a simpler technology solution, search for stop motion apps on your students’ phones or class iPads. You will want to make sure the app can create loops so the eight photos continue to cycle through.
Most students in your class should be able to complete a bipedal walk cycle. If you have more adventurous students, you might consider having them try a four legged animal like a horse or a dog. For the truly inspired student animator, a flight cycle animation might not be out of the question.
Tell us, have you ever worked with walk cycles in your classroom?
Do you have any favorite apps to recommend?
Magazine articles and podcasts are opinions of professional education contributors and do not necessarily represent the position of the Art of Education University (AOEU) or its academic offerings. Contributors use terms in the way they are most often talked about in the scope of their educational experiences.