Jewelry making is one of those art-making processes often passed by in the art room. It may be “too crafty” for your taste or fail to generate the higher interest of other media.
If you’re looking to incorporate jewelry making into your classroom and don’t know where to start, this guide to resin jewelry is just for you! Don’t let the notion of kitsch jewelry scare you. This process can be engaging for all students; I recently used this process with a group of high school students and was shocked to see the boys just as engrossed in the making as the girls!
Here are some tips to make resin jewelry making a possibility in your classroom!

Step 1: Gather Materials
To begin the process you will need these materials:
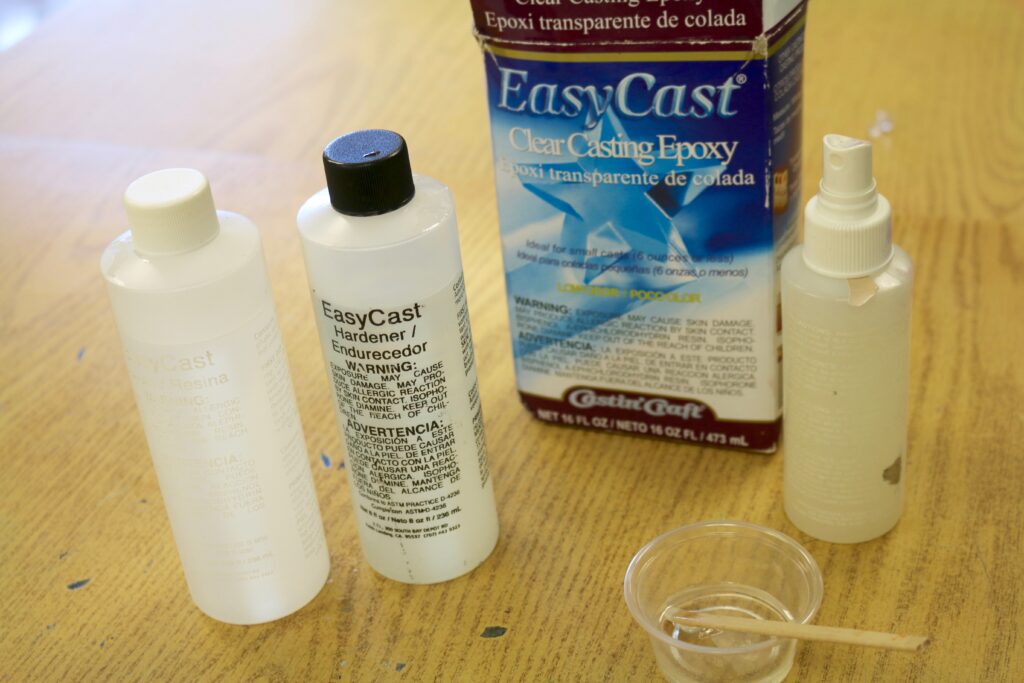
Epoxy Resin
Mold Release and Conditioner
Plastic or Silicone Molds
Wax paper
Tablespoon (for measuring)
Mixing Cup
Popsicle sticks
Objects to set in resin (candy, glitter, sand, drawings, photos, yarn, etc.)
Tweezers
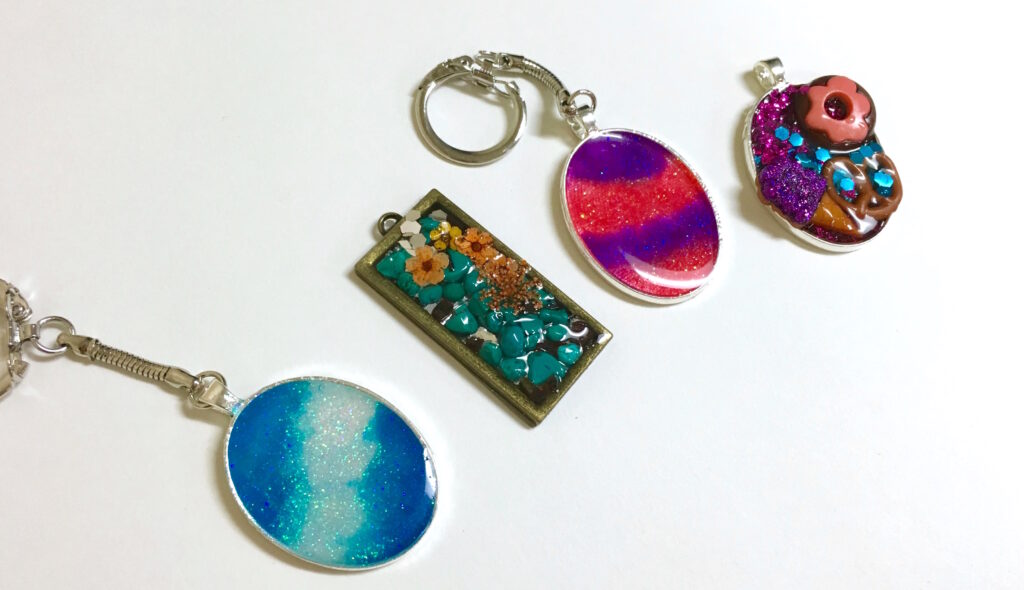
Pendant Trays
Jewelry Findings
Needle Nose Pliers
Quick Hold Adhesive Glue
Blow Dryer (optional)
Wire Cutter (optional)
Step 2: Prepare the Mold
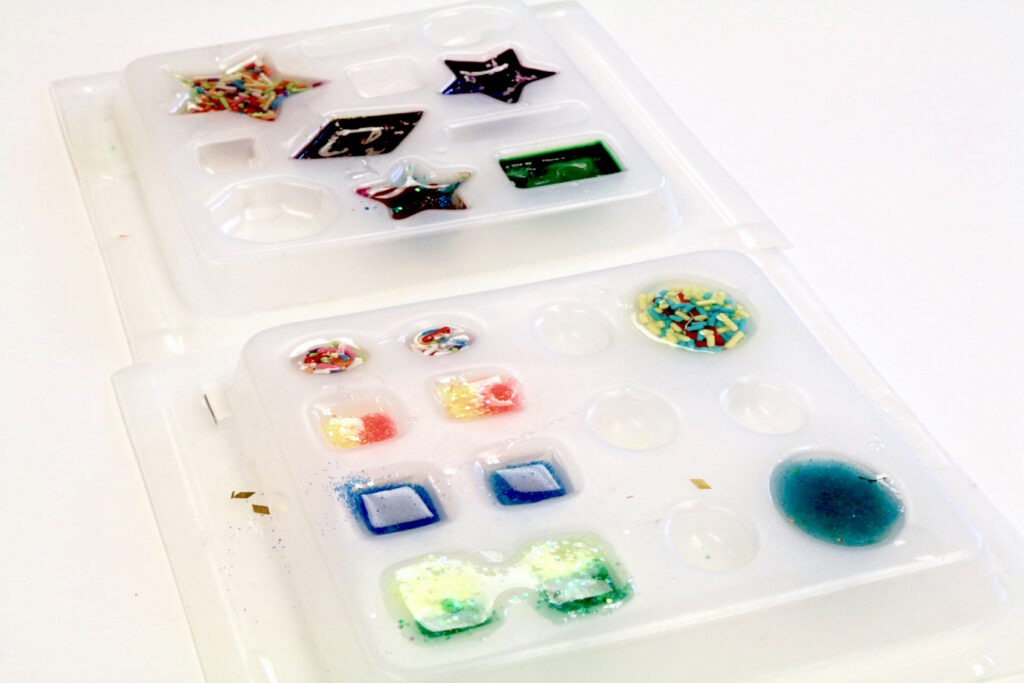
One of the great things about working with resin molds is they can be reused as long as they are properly cared for. Before you begin the resin curing process, the molds will need to be cleaned and prepared. Do this by simply washing them with soap and warm water to make sure no particles are left behind. Use the mold release and conditioner to spray your molds–this will enable an easier release when you’re ready to remove the shapes. You will want to make sure the molds are dry before placing any items or resin inside.
You can use a variety of molds. Make sure they are a flexible plastic or silicone for easy release of resin shapes when cured. If you are using another surface to fill with resin, like a trivet, the release and conditioner spray is not necessary as you want the resin to cure and permanently stay!
Step 3: Mix Resin
Although several different kinds of resin can be used, I would recommend EasyCast Clear Casting Epoxy because it has a slower drying time. Generally speaking, this brand of resin allows students a 30-minute time frame to work until it starts setting. To mix, you will be using two different bottles: resin and hardener. Measure equal parts of both and mix together. You’ll want a tablespoon students can use to measure equal parts of both solutions.
Once measured, students will mix with a Popsicle stick in a small plastic cup. Encourage students to mix at a slow, steady pace for two minutes. I generally have students stir one direction for one minute and switch directions to finish the second minute. It is essential to stir slowly to minimize bubbles in the resin mixture. Once the resin is mixed, students will have a 30-minute window to begin pouring and setting their objects.
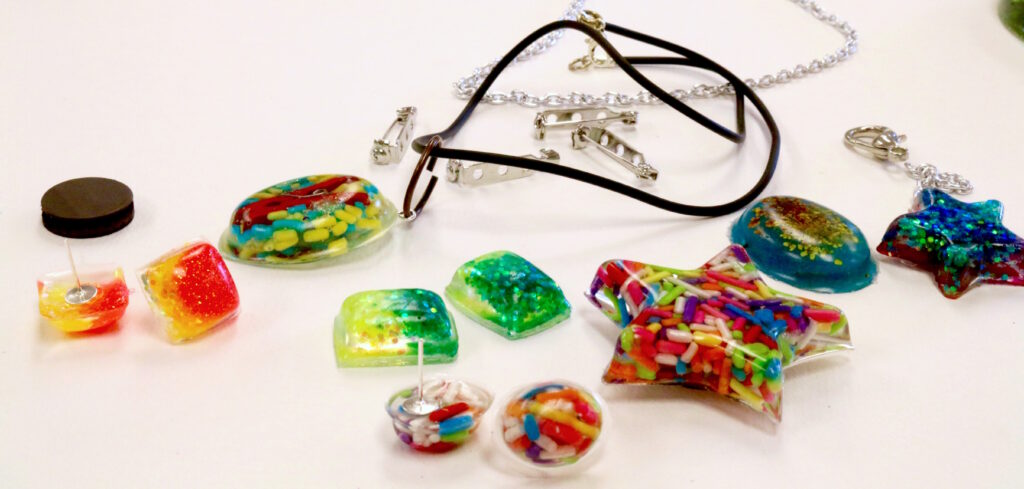
Step 4: Fill Molds and Pendant Trays
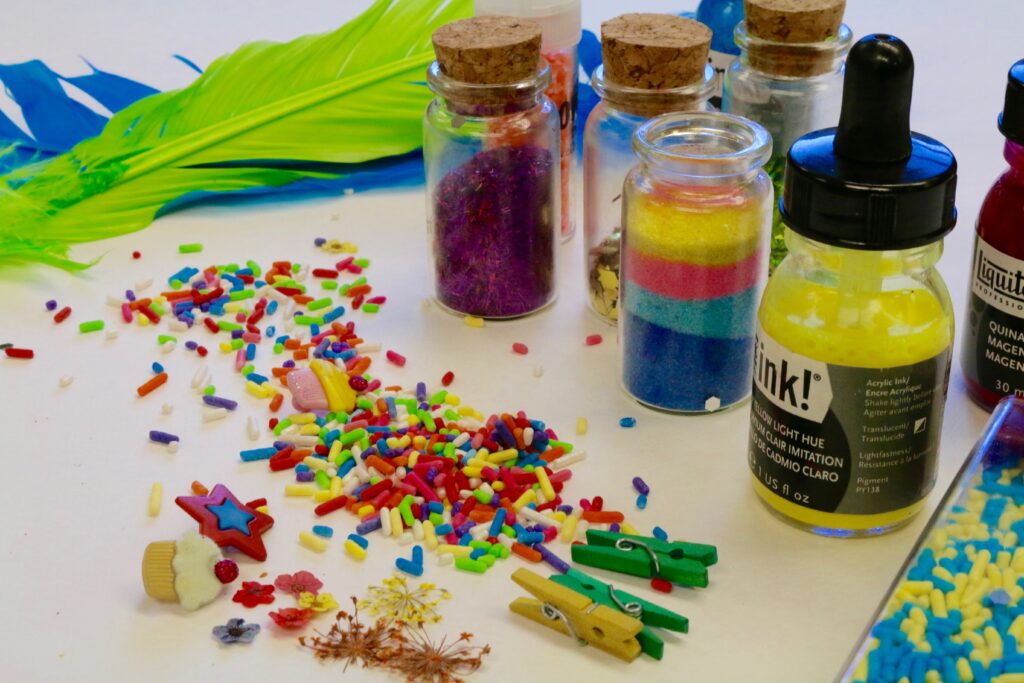
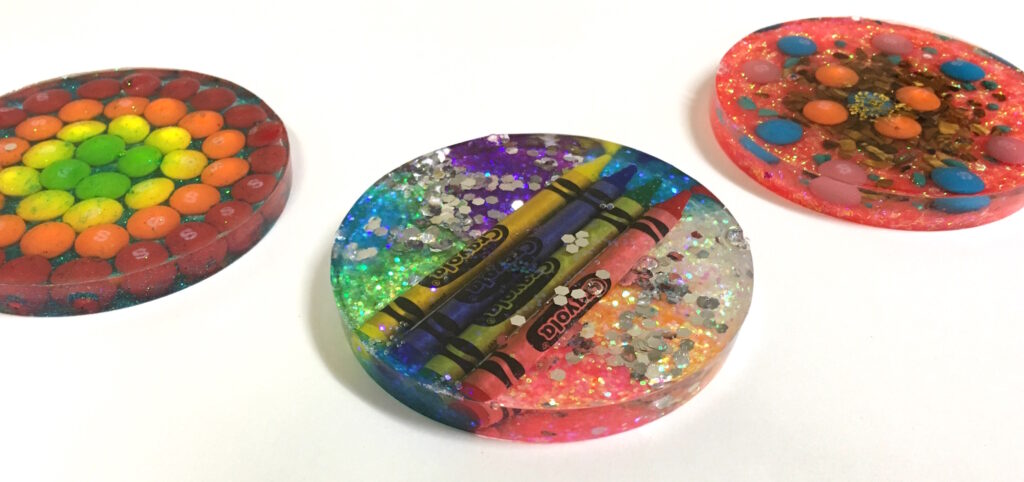
Before resin can be added to cure, objects need to be added to the mold or pendant tray. This is the fun part! Almost anything can be cured in resin. Since most of the molds are small, you will want to find small objects that will easily fit. Having a few pairs of tweezers will prove beneficial since students will be working at such a small scale.
Here are some of my favorite fillers:
-small candies like Skittles or M&M’s
-glitter
-pressed flowers and leaves
-sprinkles
-colored sand
-yarn
The best part about this step is that if the object fits, it will work! Encourage your students to bring in some of their favorite mini objects they can turn into wearable art. You can also have students create mini paintings or drawings that can be used in the molds as well.
Step 5: Pour Resin
Make sure the surface you are working on is covered with wax paper. Once objects are arranged in the molds, simply pour resin over the top. You may want to encourage your students to put a tiny bit of resin in the molds, then fill with objects, and finish by pouring more resin on the top. This allows for a more even distribution of resin.
For a more precise application, resin can be placed in a condiment container. At times when resin is poured, tiny bubbles may appear. To get rid of these bubbles, students can use a toothpick to pop the bubbles or the heat from a blower dryer.
For a more advanced approach, students can work in layers. Students may fill the bottom of the mold with objects, set with resin, wait for it to dry, and then begin repeating the process.
Step 6: Wait and Reveal
Once resin objects have cured for 24 hours, they will be ready to pop out of the molds! If using the mold release and conditioner, these objects should come out rather easily. If the objects feel sticky or wet, this probably means the ratio of resin to hardener was not 1:1. If you run into this situation, sometimes letting it cure longer will help. If it still feels sticky after 48 hours, however, it will, unfortunately, remain that way.
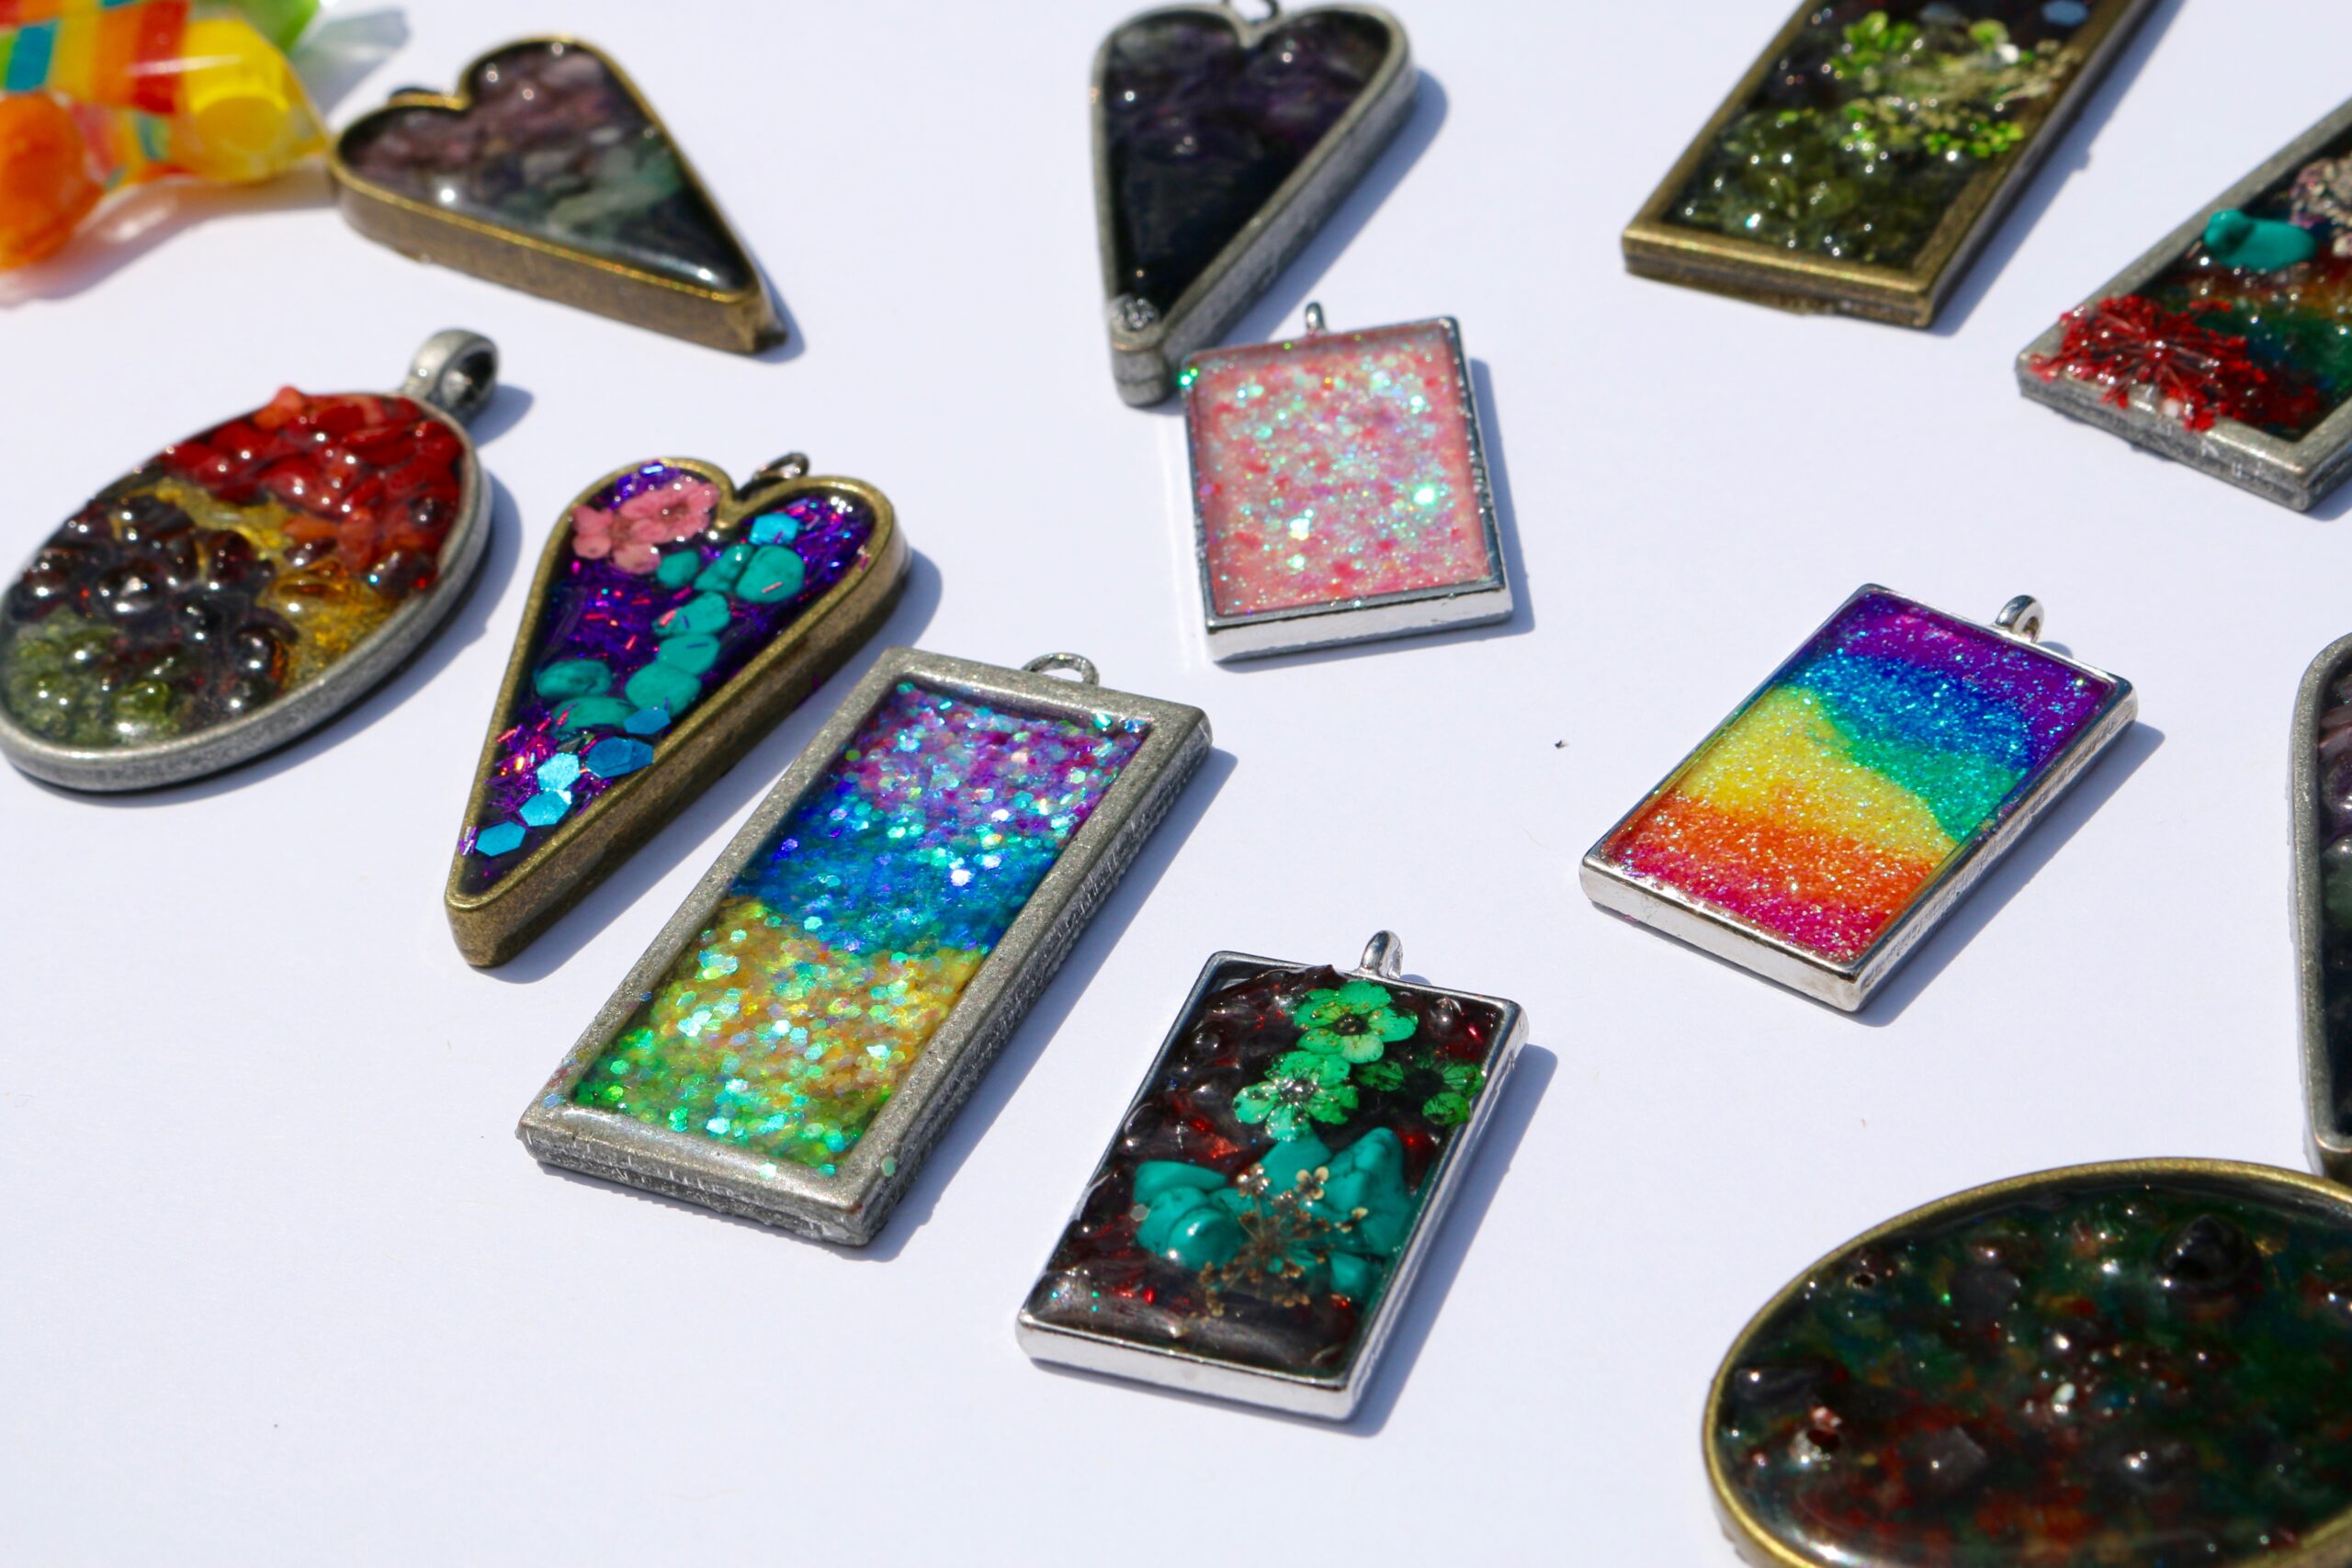
If you have students work with pendant trays, nothing more needs to be done! It is finished, since the resin object will remain in the tray as the finished piece.
Step 7: Add Finishing Touches
After objects are removed from molds, some final touches might be necessary. Excess resin around the objects can be easily cut or sanded down. Students can use jewelry findings to finish off the resin objects. Having a variety of findings like earring posts, necklace chains, clasps and closures will allow for many different pieces to be made. Simply attach the findings by pouring a small amount of resin and allow it to set, or use a little adhesive to lock it in place.
Step 8: Wear and Enjoy
When all of these steps are complete your students will have beautiful pieces of wearable art they’ll be proud to show off!
Step 9: Explore More Options
One of the best things about exploring resin objects with your students is that they can be turned into almost anything. Often times art teachers may be discouraged to do jewelry projects with students fearing not all students will be engaged. This process can go beyond just jewelry, and students can create a variety of fun, usable items. To appeal to the crowd that isn’t necessarily interested in jewelry, turn your resin objects into key chains, pins, magnets or even coasters. There are so many possibilities to explore!
Working with resin does take a little practice, but once you start and share the process with your students they will be eager to create! It is a process that provides students a sense of accomplishment and success while also letting them wear their masterpieces!
Have you ever used resin with your students?
What jewelry making processes do you explore in your classroom?
Magazine articles and podcasts are opinions of professional education contributors and do not necessarily represent the position of the Art of Education University (AOEU) or its academic offerings. Contributors use terms in the way they are most often talked about in the scope of their educational experiences.


