Think of a time you intended to have a heartfelt and meaningful conversation with someone. As you planned to meet and talk, did you choose to sit in uncomfortable chairs with a large table between you? Probably not, but this is the forced seating arrangement most art teachers have to use in their classroom.
Your room is probably ideally set up to MAKE artwork. But is it ideal for TALKING about art?
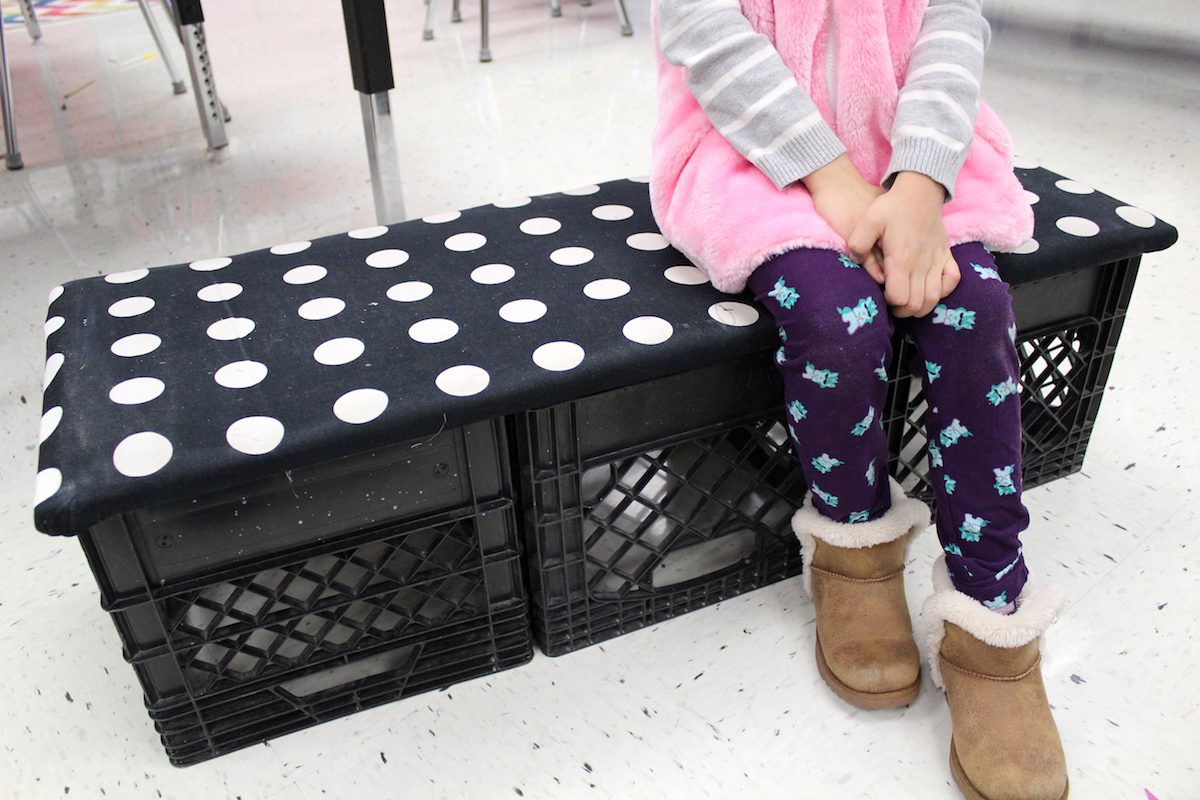
Five years ago, inspired by Pinterest, I installed a milk crate stadium seating system in my art room and it has been a game changer for my students. Instead of feeling stifled by the normal work tables of an art room, my students and I can move these benches to accommodate any activity we may be doing; discussion, critique, demonstration, etc.

When I originally created this new classroom furniture, I pieced together information from a variety of Pinterest sources. Lots of classroom teachers were trying versions of this project to promote the flexible seating model in their classrooms, so a lot of great strategies were available. But, the projects I was seeing were designed to serve groups of twenty-five… I needed a version that kept nearly six hundred kids comfy all year!
Here is a step-by-step tutorial of what has worked for me, so you can make your own.
Step 1: Gather Materials
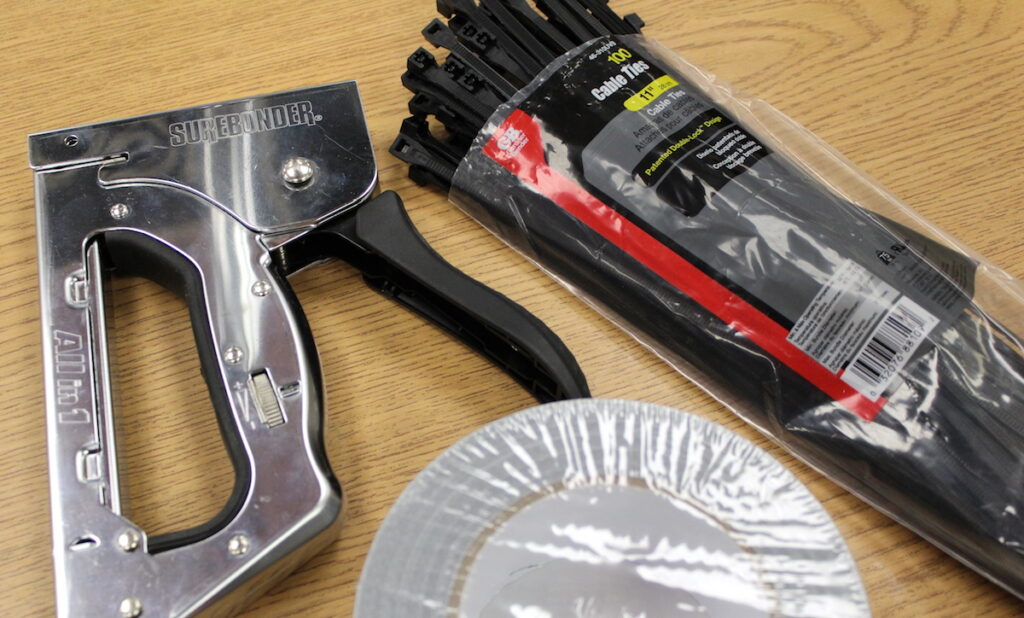
You are going to need the following supplies…
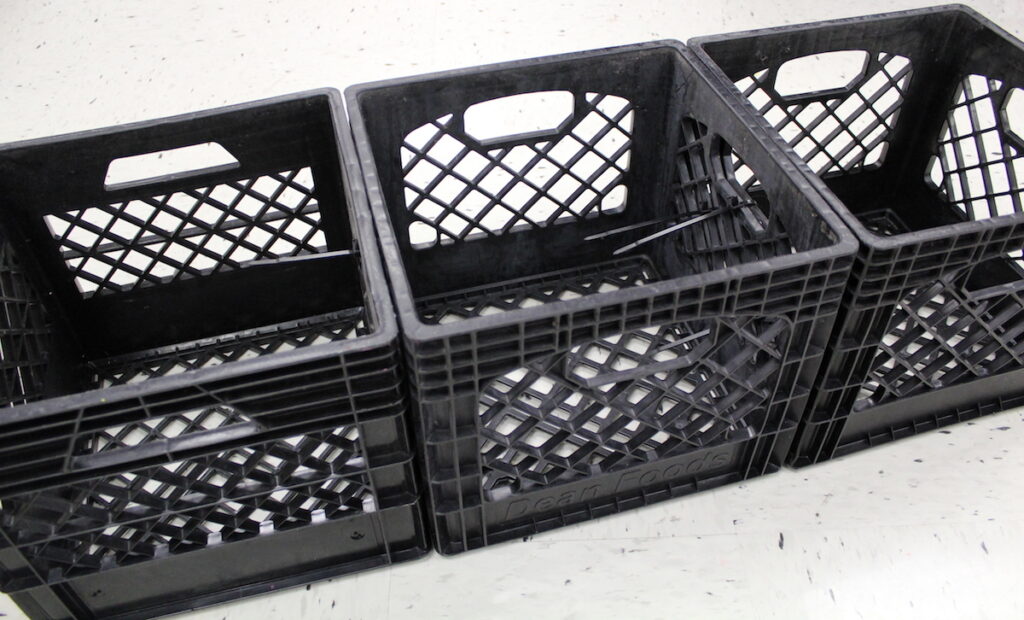
- A LOT of Milk Crates
You do NOT want the cheap plastic ones from the big box stores, but legit milk crates because they are much stronger. Mine came from a defunct dairy farm, but you might even be able to score these through your school food service manager. - Wood Cut to Fit the Top of Your Milk Crates
I cut my wood into a long rectangle, to accommodate three milk crates being attached together. - Tools
I used a drill, a staple gun, and staple gun refills. - Duct Tape
- A Big Bag of Zip Ties
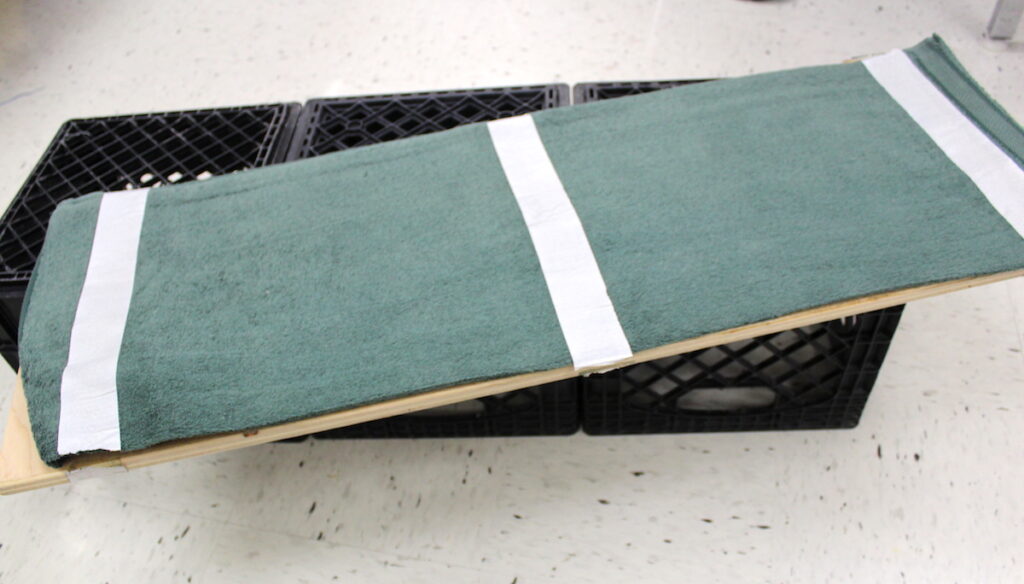
- Something for Padding
I used old towels, but there are lots of options. For example, instead of upholstery foam which can be pretty expensive, try looking for a foam camping mat to cut up instead! - Heavy-Duty Cloth
The first year I tried this, I made the mistake of buying cute cotton fabric. My kiddos are sweethearts, but they totally destroyed that fabric in the first five months. The second time around, I used a thicker decorator canvas fabric I found at Ikea, and it has withstood the test of time.
Step 2: Assemble
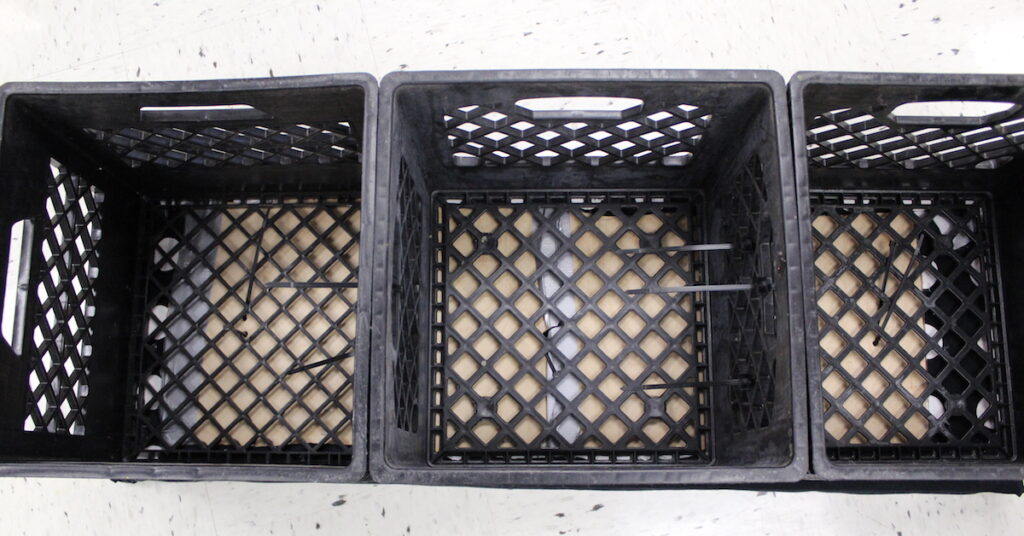
First, use the zip ties to attach three milk crates together in a row. Just reach through the sides and tie the crates to one another.
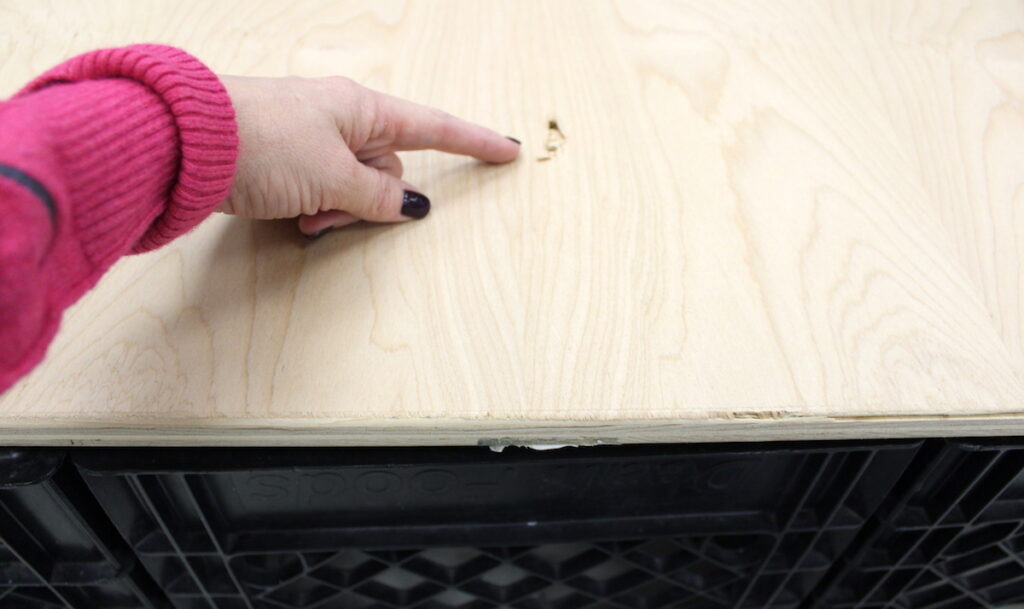
Second, place the wooden rectangle on top of the row of milk crates, and drill pairs of holes in the wood over the center of each milk crate. (Yeah, you could probably measure, but this is faster!)
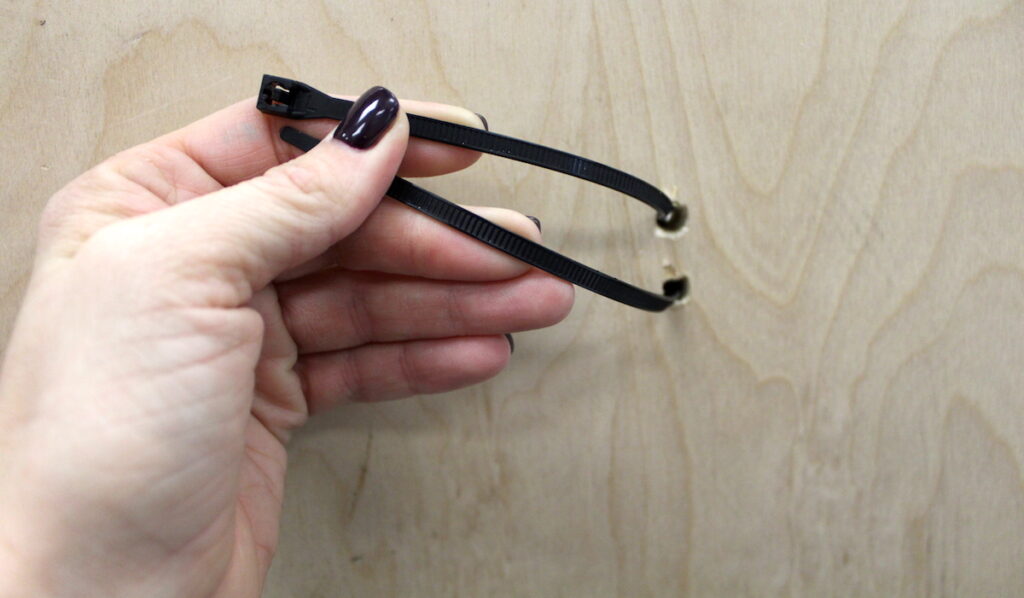
Third, run a zip tie through each pair of wooden holes but don’t tie them yet… you’ve gotta attach the padding!
Fourth, use the duct tape to “MacGyver” whatever padding you have to the wood.
Fifth, stretch the fabric over the wood and staple gun it to the back so it is tight. Hey, this doesn’t need to be a Martha Stewart-caliber upholstery project, your kids will probably get paint on it the first day, so staple it down even if it’s a little wonky!
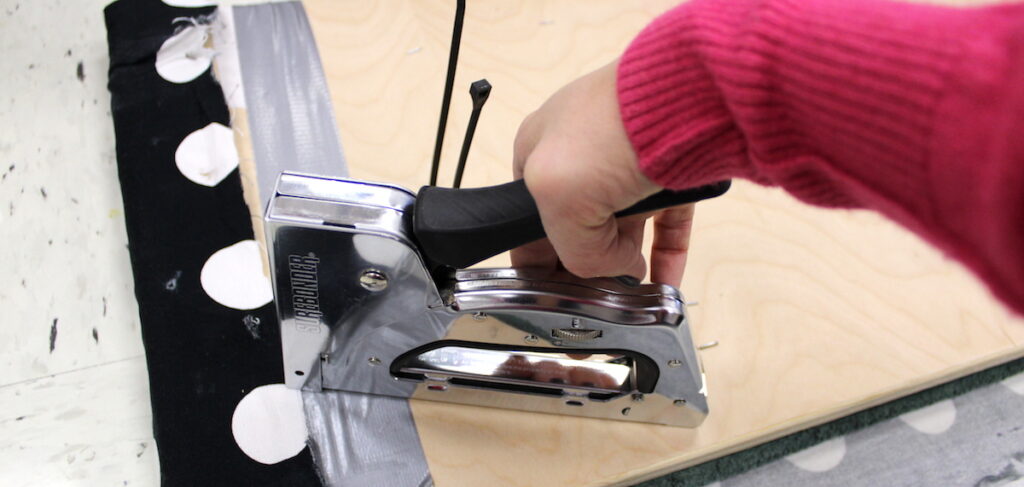
Last, put the upholstered contraption on the floor and place the milk crates upside-down on top of it. Reach through the holes and pull the zip ties through, securing them. You are all set!
Step 3: Present the New Arrangement to Your Classes
I wish I could tell you that having benches in my art room is ALL sunshine and rainbows… but it is not. Don’t get me wrong, I love having the flexibility to make a more informal discussion setting for my kids, but you DO need to be prepared for a couple inevitabilities.
- Kids are going to try to walk on them/jump over them.
- Sitting on the carpet is no longer cool… at all.
As soon as you set this up in your classroom, talk to your kids about walking on the benches AND hurtling over them. Both of these scenarios are unsafe, but super tempting. I model appropriate and inappropriate bench behavior at the start of each new year in art. Also, no one will want to sit on the carpet if you have benches, so either create enough bench space for your largest class or plan some type of usage rotation. Otherwise, you will have some sad kiddos.
Step 4: Enjoy the Endless Possibilities of Your New Furniture
The beauty of these benches is the flexibility they offer. Students can arrange them to make a circle for classroom discussions or critiques. I can pull them into a “u” shape and sit on the floor for a demonstration everyone can see. They can be moved into rows for a movie or video clip. I can even stack an extra set of milk crates underneath to change the height and create impromptu stadium seating. When I am returning student work, I can use the benches as a giant table. The possibilities are endlessly flexible, so make yourself a set and see what you can do with them!
What types of creative seating arrangements do you have in your classroom?
How does the design aesthetics of your classroom positively or negatively affect your students’ discussions?
Magazine articles and podcasts are opinions of professional education contributors and do not necessarily represent the position of the Art of Education University (AOEU) or its academic offerings. Contributors use terms in the way they are most often talked about in the scope of their educational experiences.