It’s easy to fall into the trap of offering the same kinds of projects, themes or centers year after year. After all, when you find something that works, why switch things up? However, if you’re seeing your numbers decline or the students in your classes becoming more homogeneous, it might be time for a change.
I found myself in this situation a while back. Students were telling me things like, “I don’t like the projects,” and, “I’m not interested in painting lilies,” as reasons they weren’t signing up for art class. After some reflection, I realized I needed more diversity in the media I offered in my classroom.
My reflection led me to add wood burning to my curriculum. While it may sound scary, wood burning can be an amazing addition to your curriculum. In my case, it brought brand new students to the art room and increased student motivation across the board.
Here are some tips and ideas for getting started with wood burning in your classroom.
Don’t Be Afraid
Adding a new medium to your curriculum can be intimidating, especially if you don’t have a lot of experience with it. However, wood burning equipment is fairly easy to keep up, and safety measures can easily be taught to students. In fact, I think it’s important for students to handle tools and materials that are somewhat dangerous to help them develop responsibility and respect.
If you’re nervous about bringing some of these more “dangerous” tools into your classroom, take a walk down to your industrial tech department. When I saw how those teachers handled safety demos all the way up to using table saws, it eased any fears I had about wood burners and Dremel tools.
Types of Wood Burning
There are two basic types of wood burning, additive and subtractive. We do both in my classroom. Read on to discover what might be the right choice for your classroom.
Additive Wood Burning
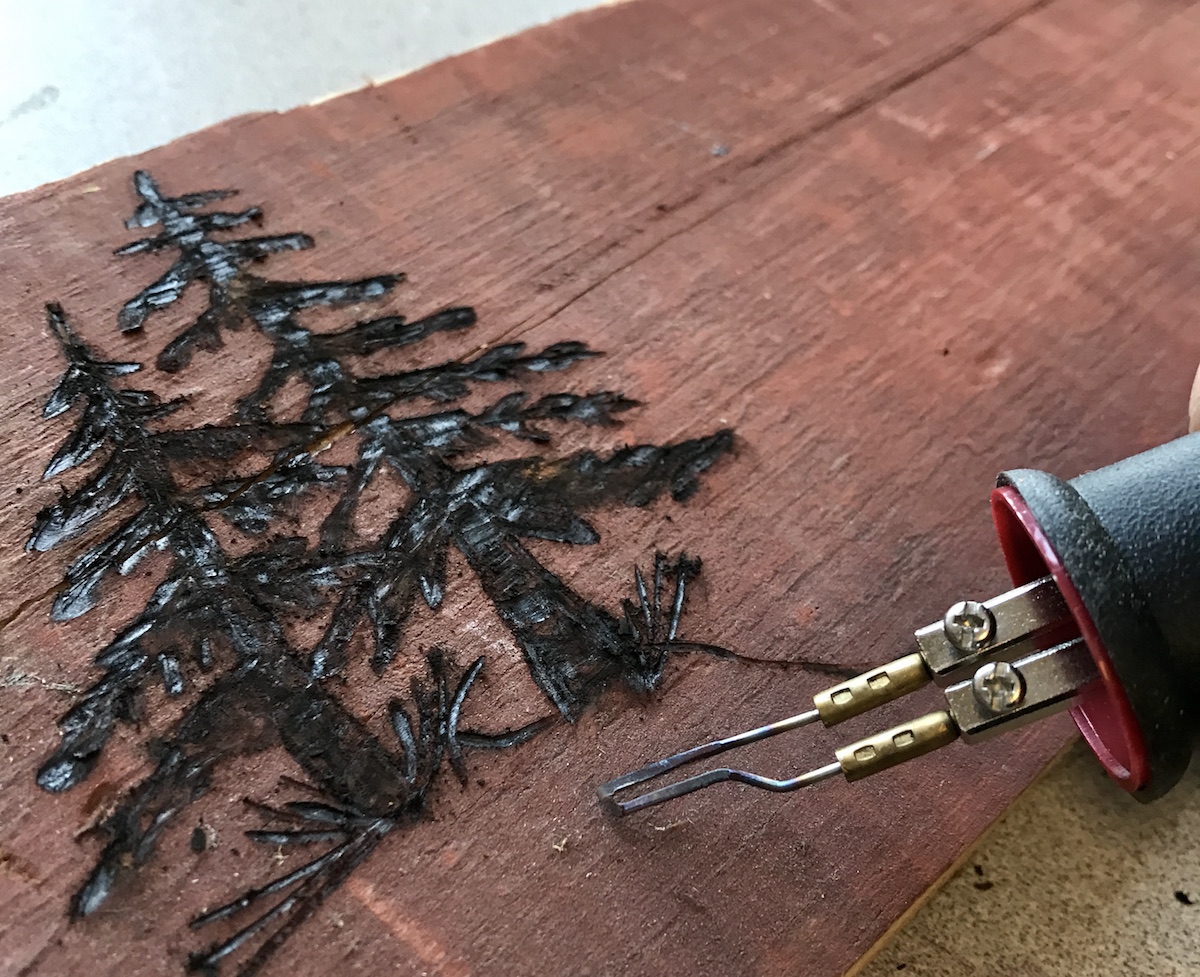
The idea with additive wood burning is to use a wood burning pen to add burnt lines and shading to a piece of light-colored wood.
Supplies Needed
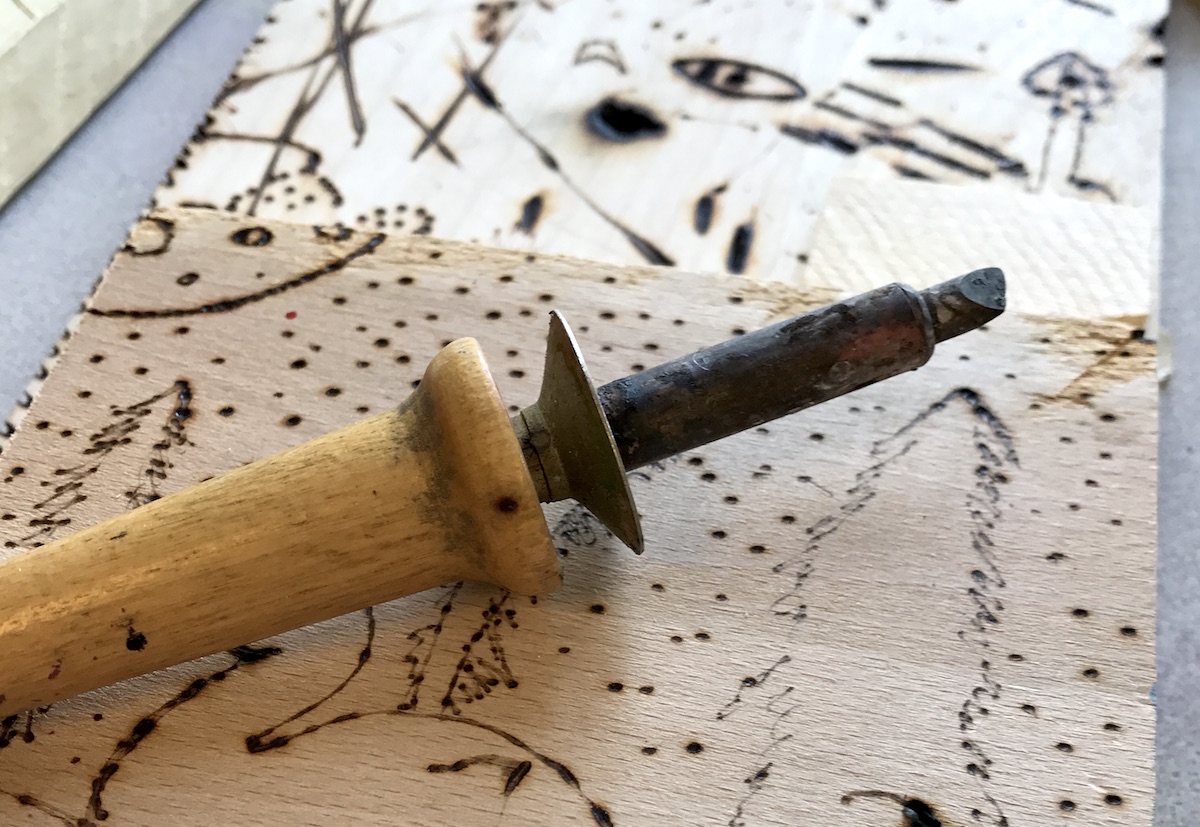
- Wood Burning Pen
The main tool you’ll need for additive wood burning is a wood burning pen. There are many different kinds. At the high school level, wood burners with wire tips work well. For younger students, I recommend solid tip wood burners as they are sturdier. - Wood Scraps
You should be able to get almost all of these donated by asking around your community. Don’t forget about your own industrial tech department. They have really good scraps! - Sand Paper
- Bandsaw (optional)
Method
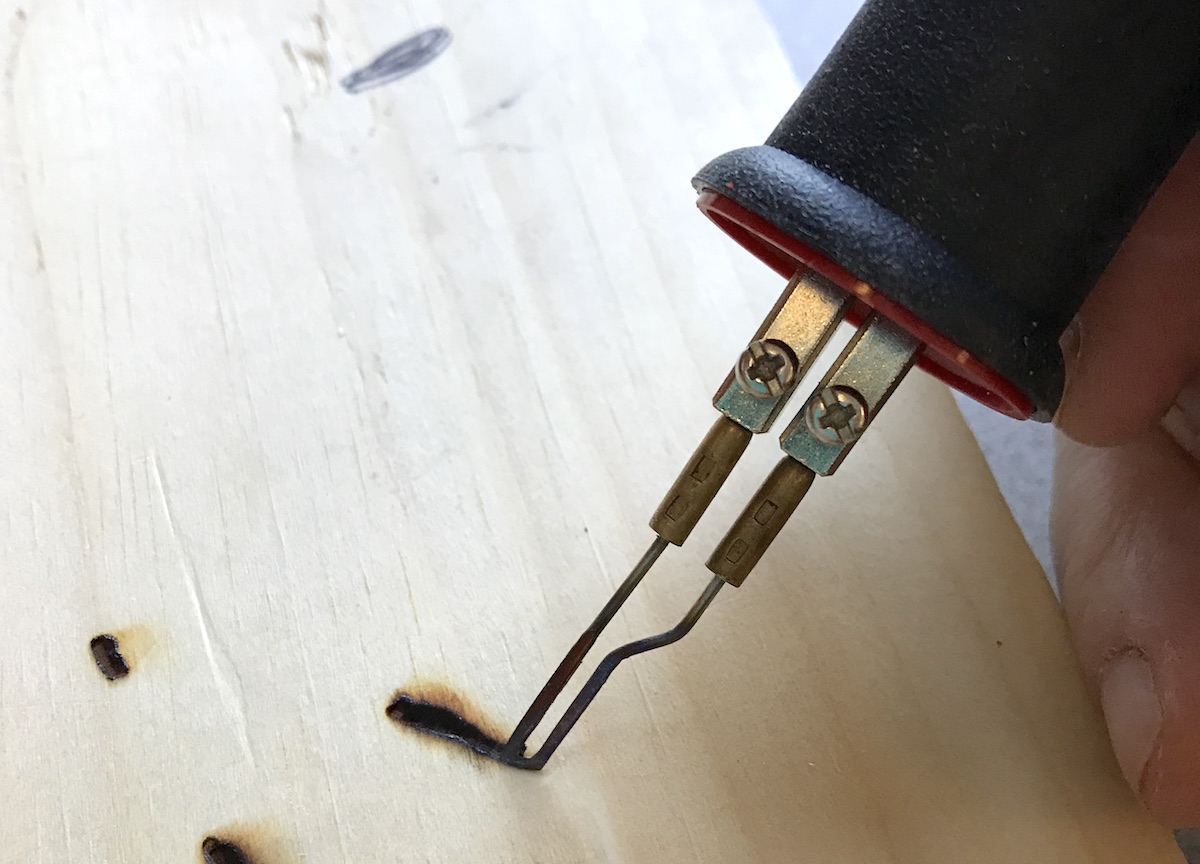
1. Fire Up Your Wood Burning Pens
Solid Tip: Plug them in, and wait a few minutes for them to heat up.
Wire Tip: Plug them in, turn the dial to the desired setting, and wait for them to heat up. You may need to play around to find the ideal setting. In my classroom, we use ours on setting “5.” Anything above that and the tip gets red hot and will easily bend or break.
2. Go Over Safety Tips
Discuss which part of the tool gets hot and how to set the pen down without melting the cord. In addition, demo how to keep their fingers clear of the elements and how to immediately run their fingers under cold water should they accidentally touch the hot tip.
3. Demo How the Tool Works
Remember, a wood burning tool is not the same as a pencil! With a pencil, the harder you push, the darker the mark. This is not the same with a wood burner. If you push hard with a wood burner, it breaks. To make something darker, move slower and leave the wood burner in one spot longer. Getting the hang of this generally takes a while, so keep a few extra tips on hand.
4. Sand
Wood burning works best on smooth wood. Make sure to have students choose something that’s not too rough and do some sanding to create an ideal surface.
5. Create the design!
Depending on their comfort level and the look they’re going for, students can either freehand the design or transfer a pre-made drawing onto the wood. In my room, students use homemade image transfer paper which they make by scribbling on the back of their images with graphite.
Subtractive Wood Burning
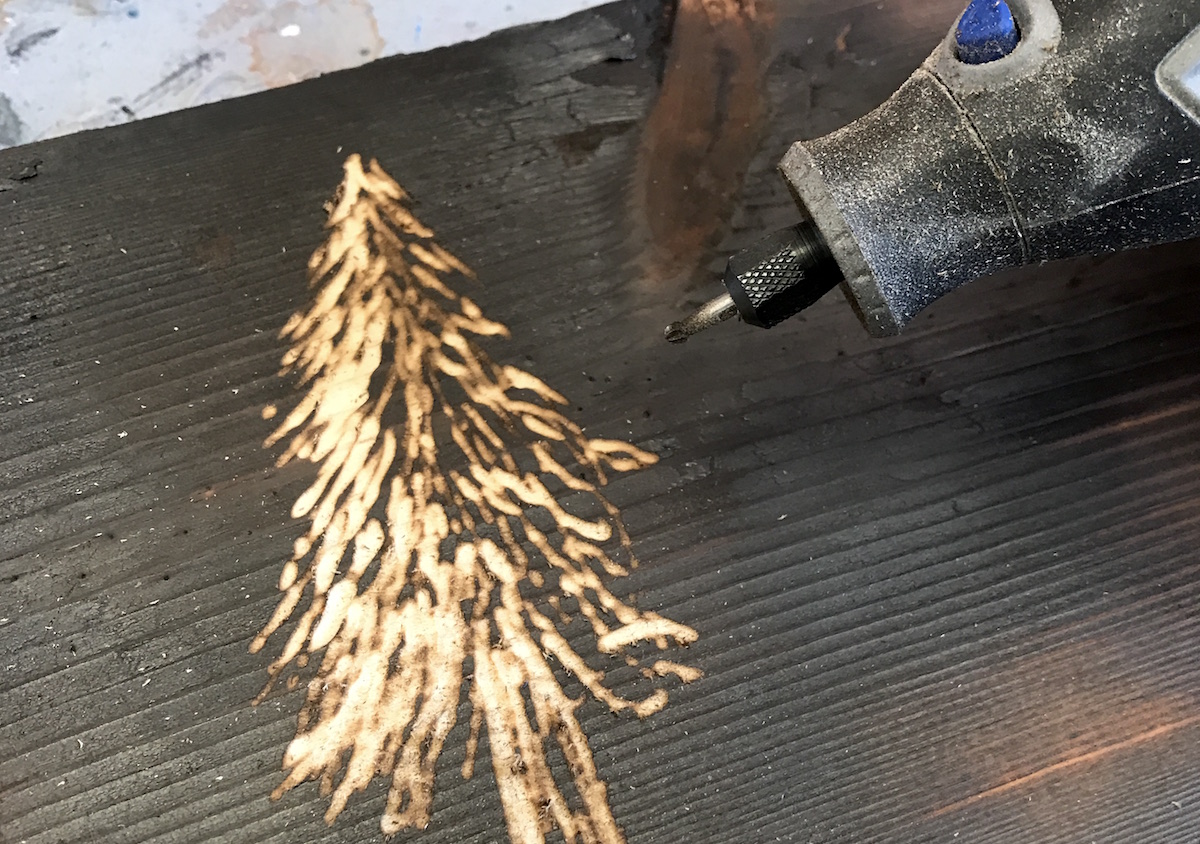
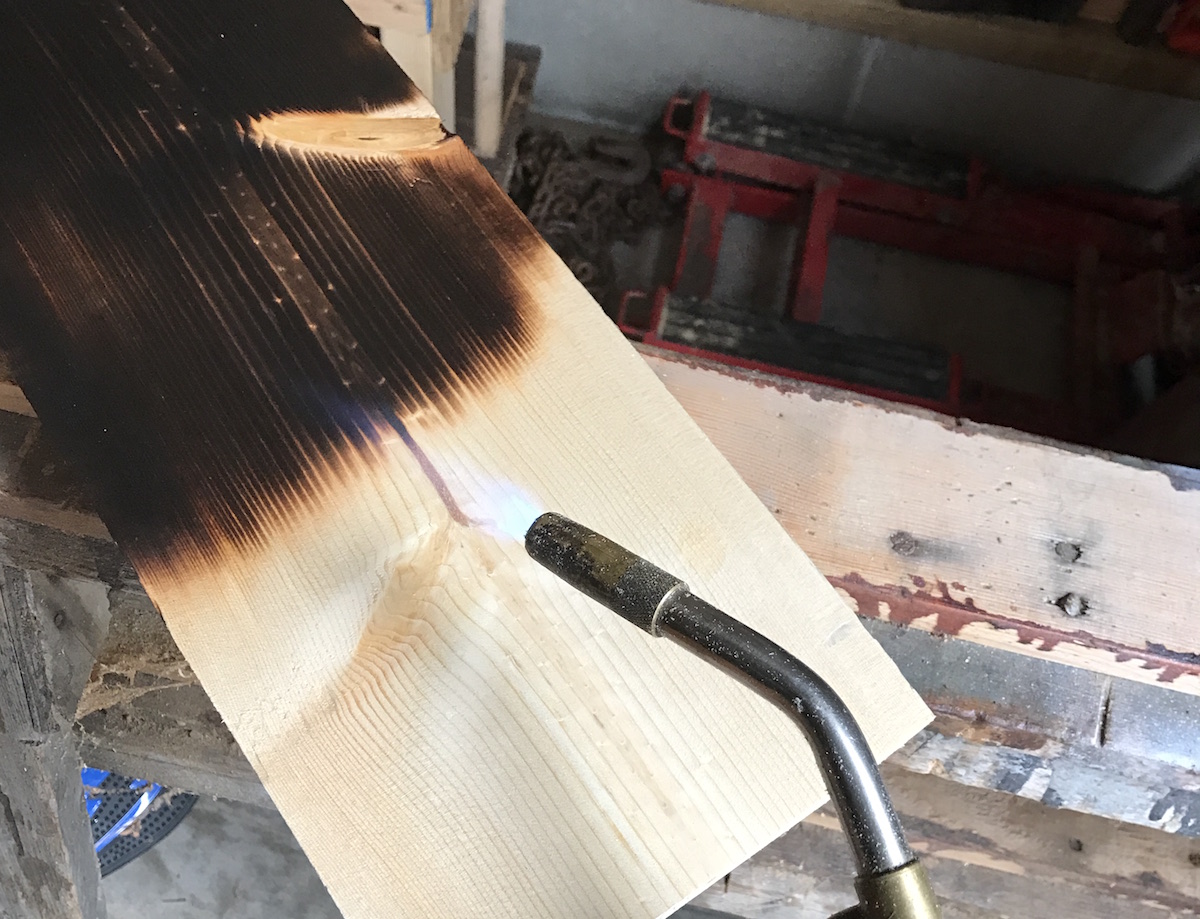
The idea with subtractive wood burning is to torch a piece of wood and subtract burnt areas by sanding to reveal the lighter color underneath.
Supplies Needed
- Wood Scraps
- Sandpaper
- MAPP Gas Torch
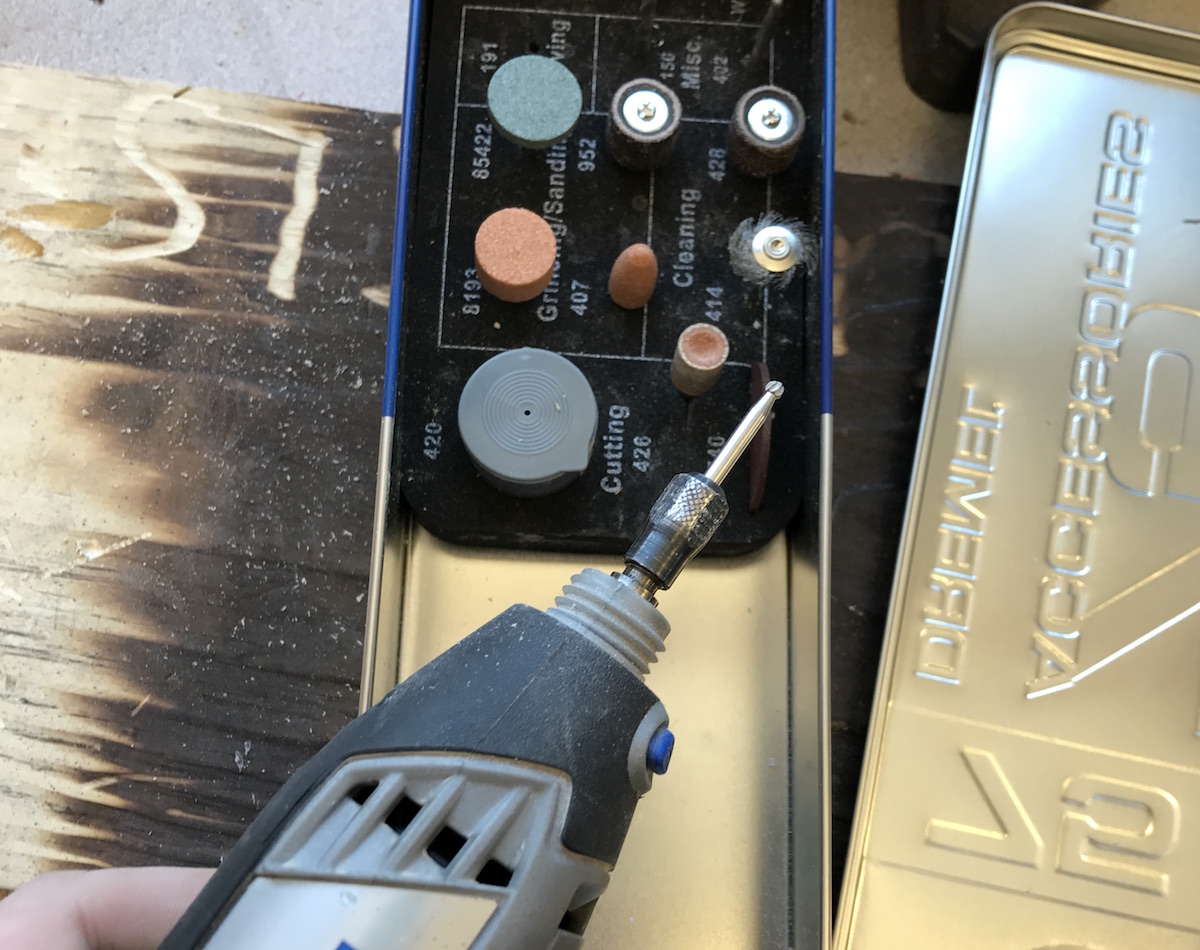
- Dremel Tool with different tips
- Safety Glasses
- Gloves
Method
1. Go Over Torch Safety Tips
Make sure students know to wear safety glasses and gloves while using the torch.
2. Prepare the Surface
Have students choose a piece of wood that is fairly smooth and have them sand it more. Then, have students use the torch to burn most of the piece black. Make sure to tell students to keep their hand below the torch because heat rises.
3. Sketch
Have students sketch their design in chalk on the burnt surface of the wood.
4. Use the Dremel Tool to Create the Image
Students should use the Dremel to remove the burnt wood where they want the highlights to be. Dremels can jump a little, so show them how to place their hands away from the tip.
If you’re looking for a new way to engage students, give wood burning a try! The natural material and use of power tools appeal to many students. In my case, students feel an extra connection to the medium because we are surrounded by beautiful wooded areas. It really has brought a lot to my art program!
Have you ever tried wood burning in your art room? If so, what tips do you have?
Do you have a project or material that helps you reach more students? Tell us about it in the comments below!
Magazine articles and podcasts are opinions of professional education contributors and do not necessarily represent the position of the Art of Education University (AOEU) or its academic offerings. Contributors use terms in the way they are most often talked about in the scope of their educational experiences.