For beginning ceramics students, throwing anything on the wheel feels like an accomplishment. And it should! Throwing for the first time can be a nerve-racking experience.
But, in my experience, that fear quickly dissipates, and students feel motivated to hone their skills. So why aren’t we presenting them with more advanced techniques from the start?
This is the question I found myself asking as I took the AOE Studio: Ceramics course. I realized I was doing my students a disservice and worked to make my curriculum a little more challenging. The results were exciting!
Here are 6 advanced techniques all beginners can try!
1. Use Mason Stains to Create Colored Clay
Creating colored clay can be labor intensive, but can create some pretty magical effects when throwing on the wheel. To create colored clay you will need to use mason stains. You can read more about the process here. Note: This process works best with white-bodied clay or porcelain.
Once you have created colored clay, you can use it on the wheel in two different ways. The first is to take a piece of the colored clay block and a piece of the clay body with no added color and slightly wedge the two clay pieces together. You do not want to over mix them, but if you were to cut the block in half, you’d see the two clay bodies marbled together. The second way to use colored clay on the wheel is to simply use the solid stained clay by itself. As the stained clay dries, you will notice it dries very light. Sometimes the color is so faint you can’t even tell the clay body is colored. However, upon firing and adding a clear coat of glaze, the stained clay brightens up!
2. Add Designs and Details with Slip Trailing
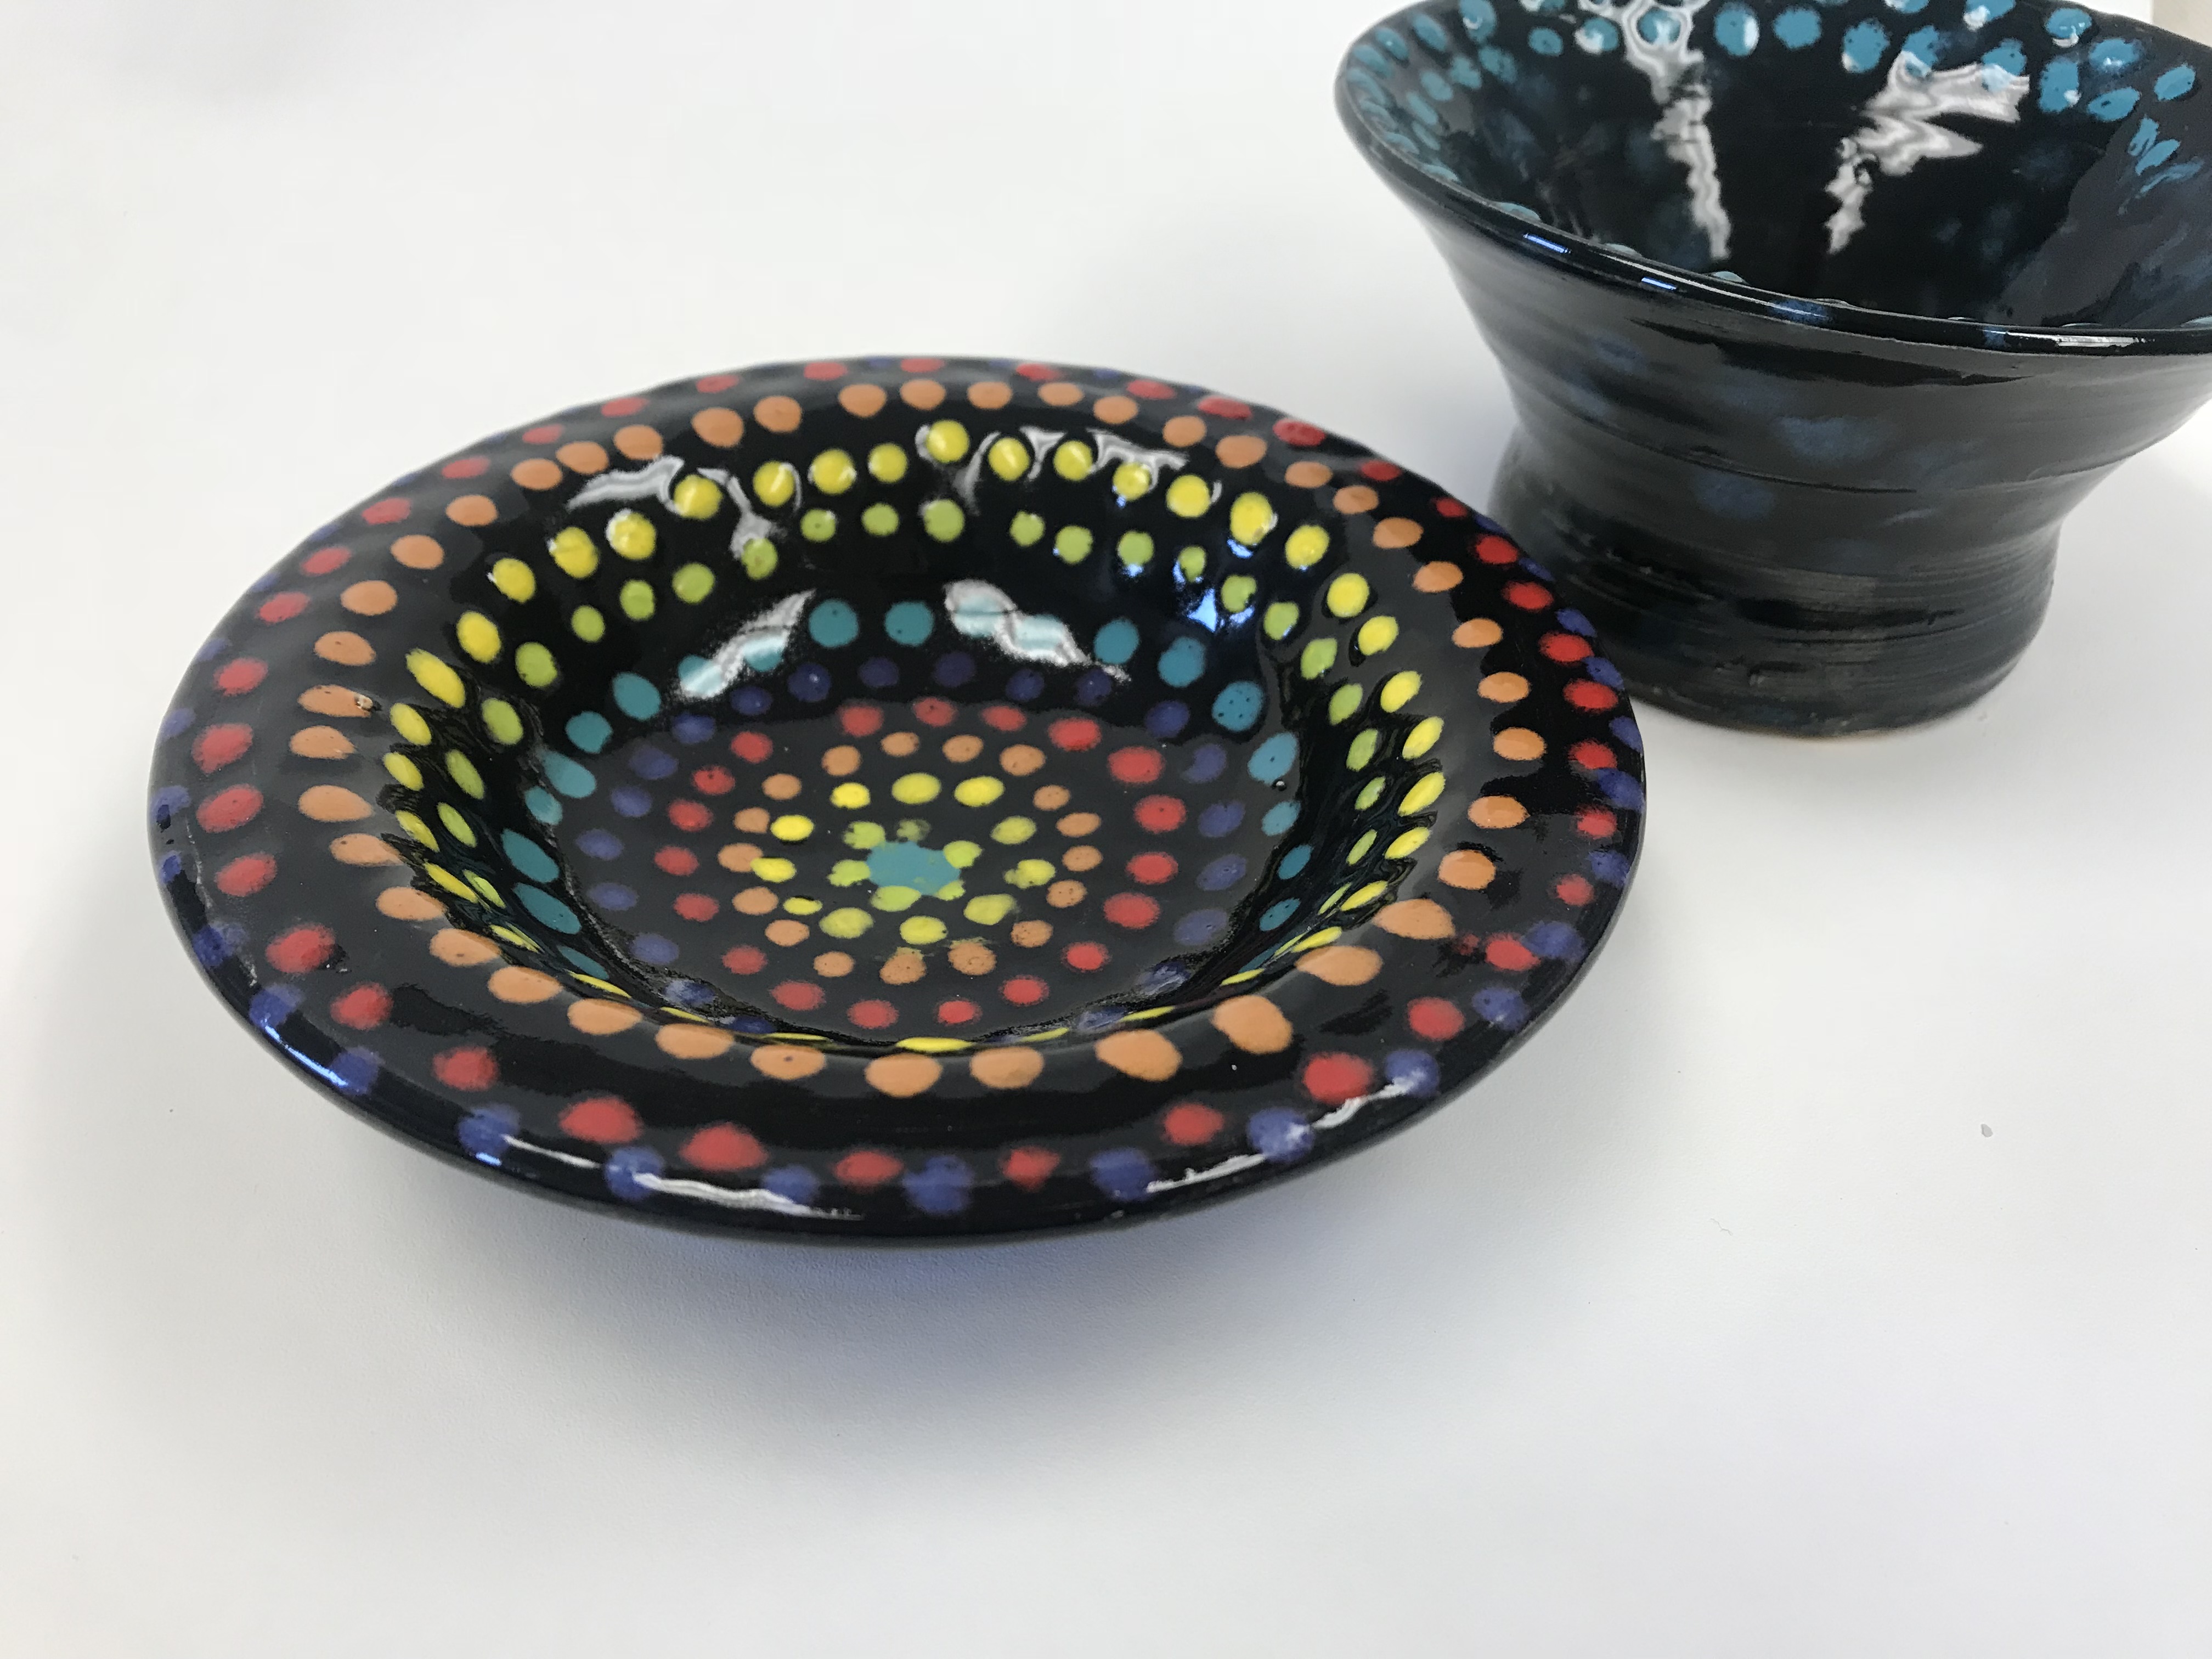
If you’ve never tried slip trailing before, now is the time! It’s the perfect technique for your students who love to draw because it is like drawing with clay. To begin, you’ll need slip that’s the consistency of a milkshake, fluid enough to flow, but stiff enough that it won’t spread easily. You can either buy this or make it from a clay body you have in your classroom.
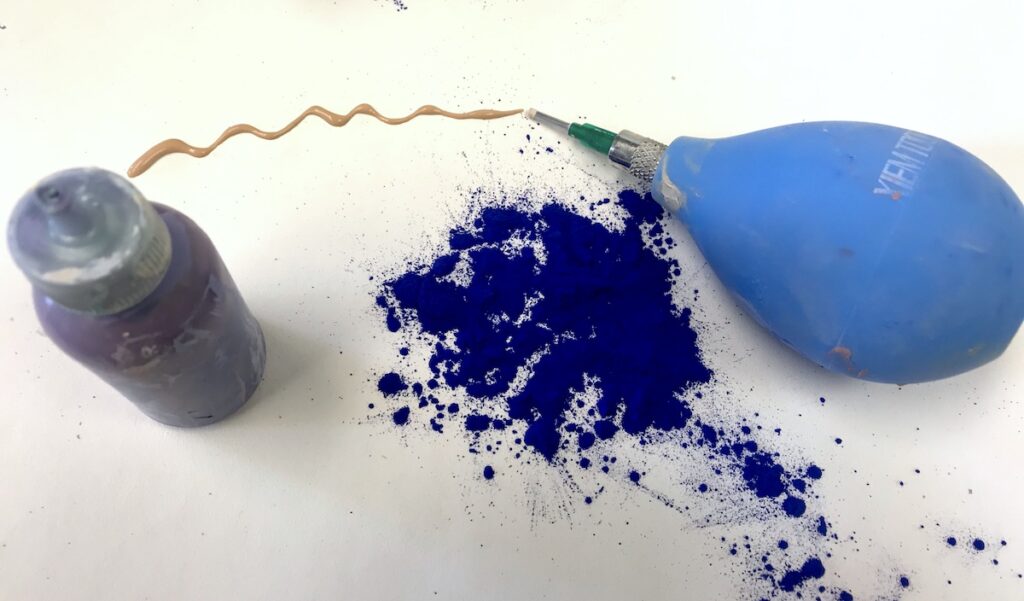
A small squeeze bottle works best to apply the slip. If students make a mistake, they can simply wipe off the design before it dries. Make sure students are applying slip trailing details to leather-hard clay. If the clay body is bone dry, the slip trail details tend to fall off. For an added bonus, try adding mason stains to your slip to create colored clay as mentioned above.
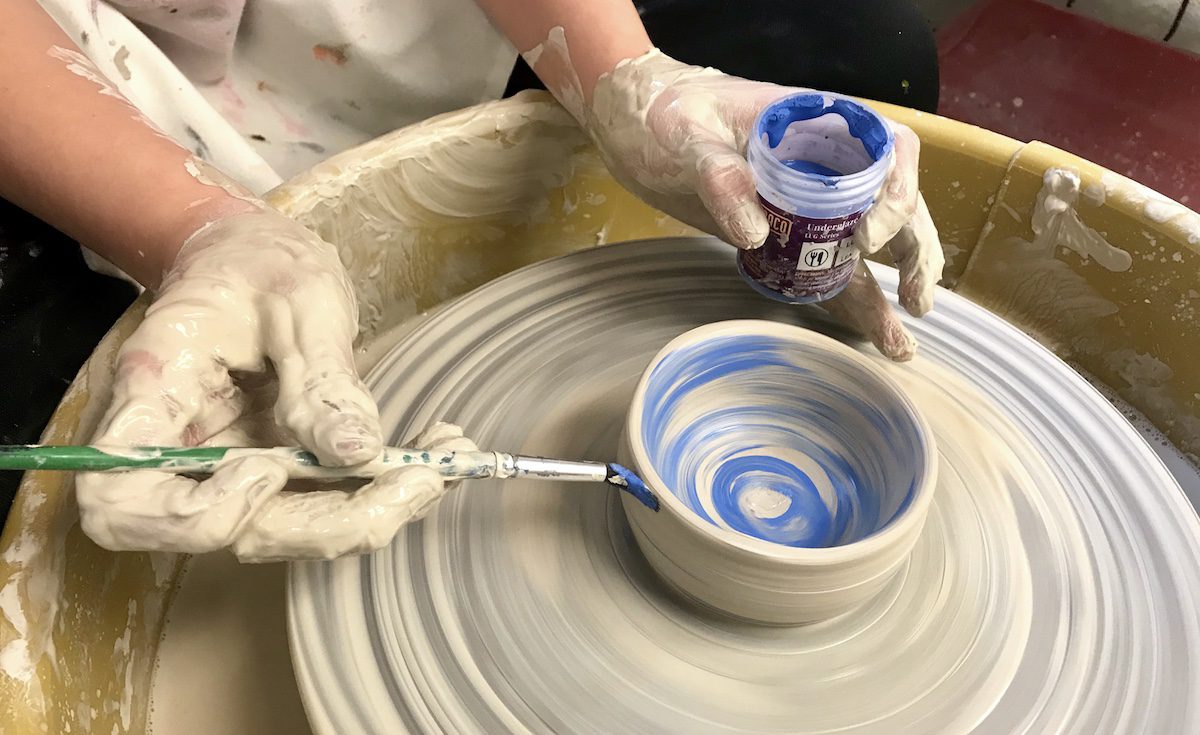
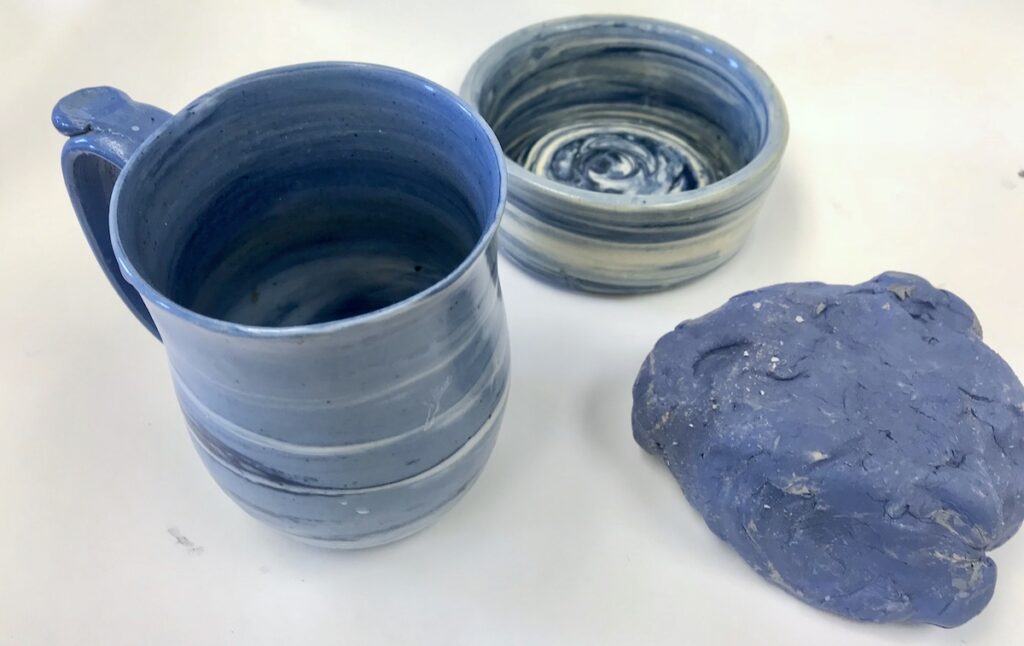
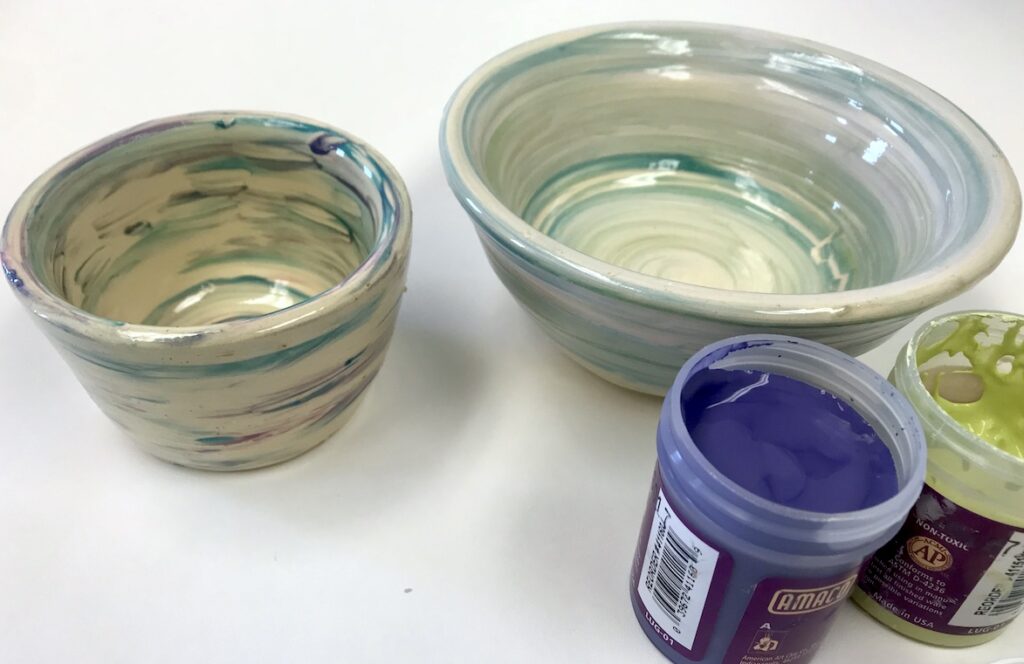
3. Use Underglaze on Wet Clay

If you’re not quite ready to try out colored clay, using underglazes on wheel-thrown pieces can create a beautiful finish. While the clay piece is still on the wheel, students can either use their fingers or a brush to apply underglaze to the vessel. The effect creates a marble-like finish on the surface. Once the pieces have been bisque fired, apply a coat of clear glaze to brighten and bring out the colors of the underglaze.
4. Create Cutouts
Another excellent way to add variety to wheel-thrown pieces is to create designs by piercing or cutting out shapes. Students can explore a variety of techniques, but sticking with large geometric patterns will probably work best for beginning students.
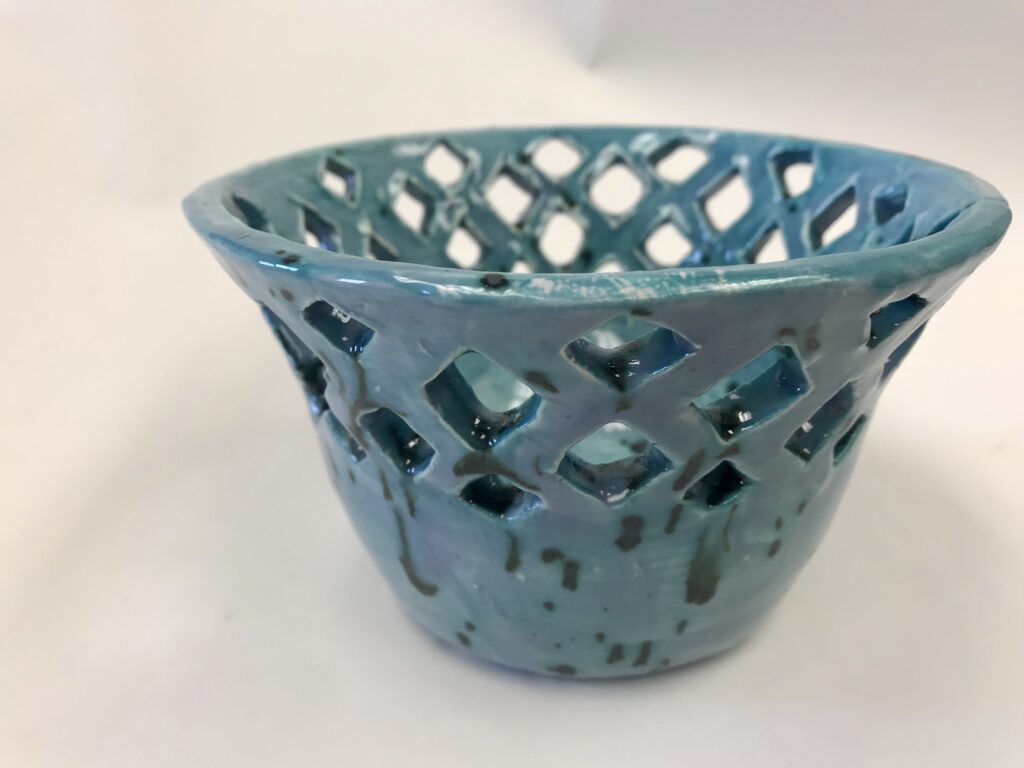
Make sure to allow students to practice on a test piece of clay first. When the clay is at a leather-hard stage, have students lightly draw their designs with a needle tool. Then, have them use an X-ACTO knife, to smoothly cut out their designs. To learn more about this process, check out the artwork by Eric Stearns and Elizabeth Borowsky.
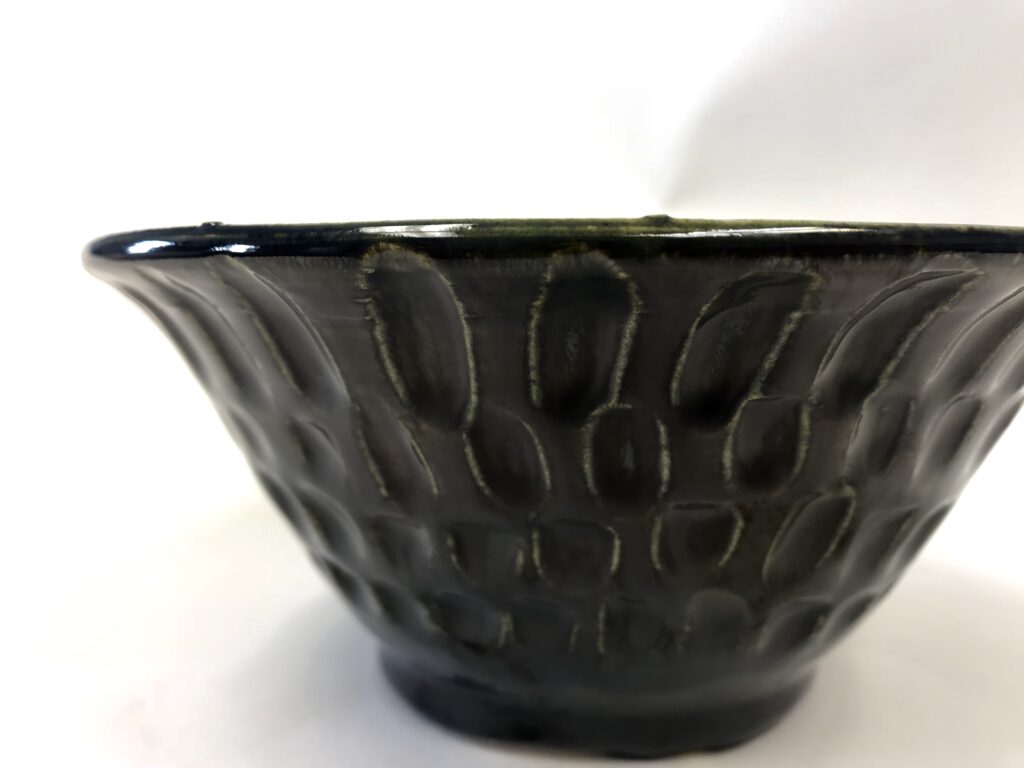
5. Use Stamps to Create Designs
Stamping is a fun way to add designs to a wheel-thrown vessel. You can add texture with found objects, rubber texture mats, or hand-made bisque fired stamps.
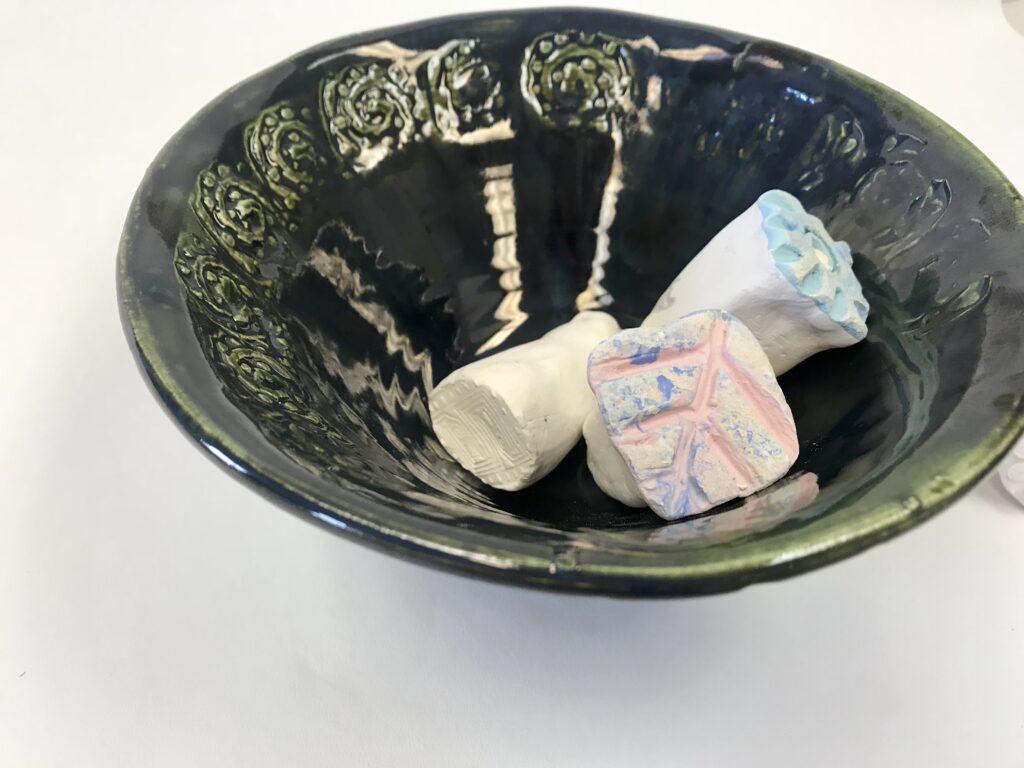
It is important to do the stamping at the right drying stage. If the clay is too dry, the stamp can cause the form to crack. The best time to add texture is when the clay is not quite leather-hard. As a bonus, any texture you add will make for a more interesting finish once you glaze!
6. Add Details with Subtractive Carving
One of the simplest ways to add detail to thrown pieces is through subtractive carving. Clay loop tools will make this process easy for any beginner. When pieces are at the leather-hard stage, students can explore a new way to add design by carving in details.
Even though throwing on the wheel for the first time can be a challenge in itself, some of your students will be itching to advance their practice. Try one of these techniques to add more variety to your clay curriculum.
And, if you’re looking to bring even more innovative and engaging techniques into your classroom, be sure to check out Studio: Ceramics. Push your practice to the next level, while revamping your ceramics curriculum!
What is your favorite thing about teaching students to throw on the wheel?
What technique would you add to this list?
Magazine articles and podcasts are opinions of professional education contributors and do not necessarily represent the position of the Art of Education University (AOEU) or its academic offerings. Contributors use terms in the way they are most often talked about in the scope of their educational experiences.


