Have you ever had a student spend weeks building a clay piece only to slap three messy coats of glaze on at the end? Sometimes, the finishing techniques our students use just don’t do their pieces justice. Maybe we are putting too much focus on the building phase instead of allowing students time to explore different finishing options.
One of the most versatile mediums for students to work with is underglaze. In particular, students can use underglazes to transfer intricate designs to almost any surface, including those that are irregular or rounded.
Use this step-by-step guide to walk you through the process.
How to Create an Underglaze Transfer
1. Gather Materials
- Leather-hard clay
- Newsprint
- Underglaze
- Precision squeeze bottles
- Paintbrushes
- Sponges
- Spray bottles with water
2. Prepare Newsprint
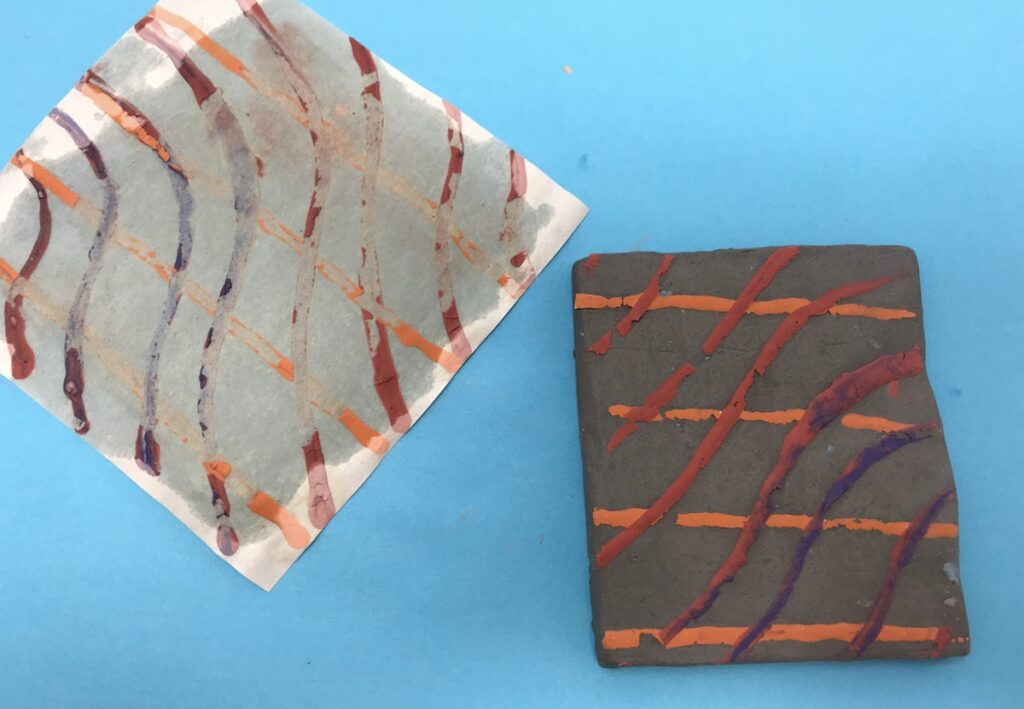
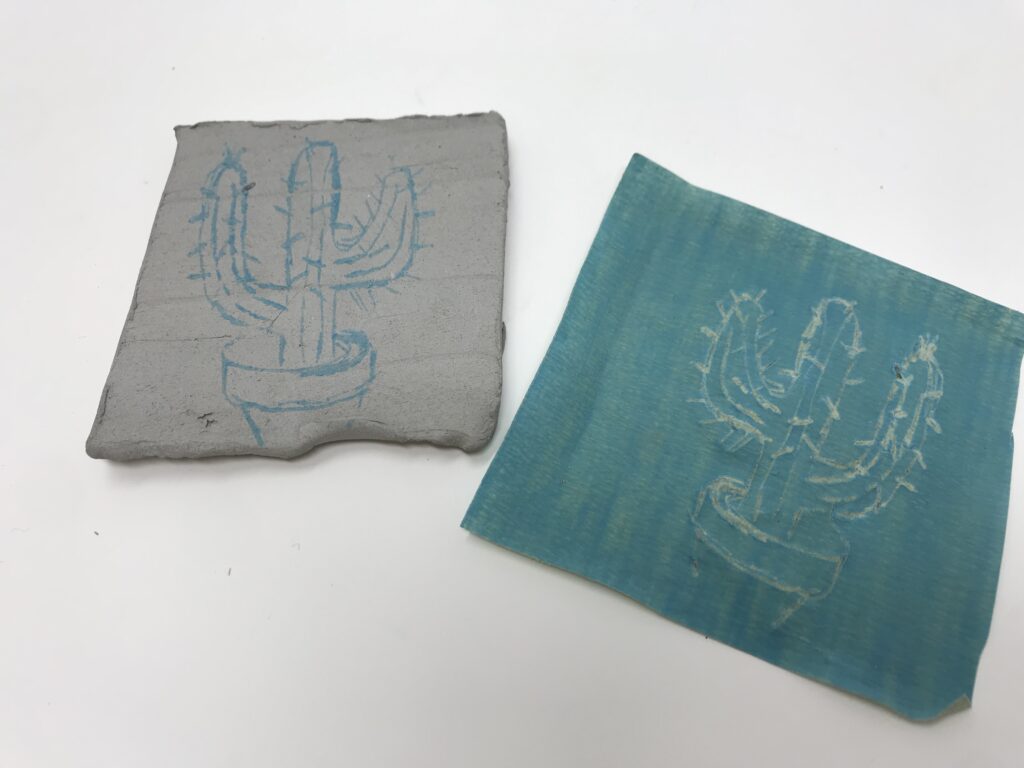
In order for this process to work, it’s essential to start with a thin paper like newsprint or rice paper. Otherwise, the design will not transfer to your clay piece. Cut the newsprint slightly larger than the clay piece you plan to transfer your design to. This way, you have a little wiggle room when transferring the design.
3. Start Designing
Once your newsprint is cut, you can begin adding the underglaze design to it. You can do this in a variety of ways including using a brush or small precision squeeze bottles. If choosing to create with squeeze bottles, make sure the underglaze is not too thick. If areas get too thick, the underglaze will crack off.
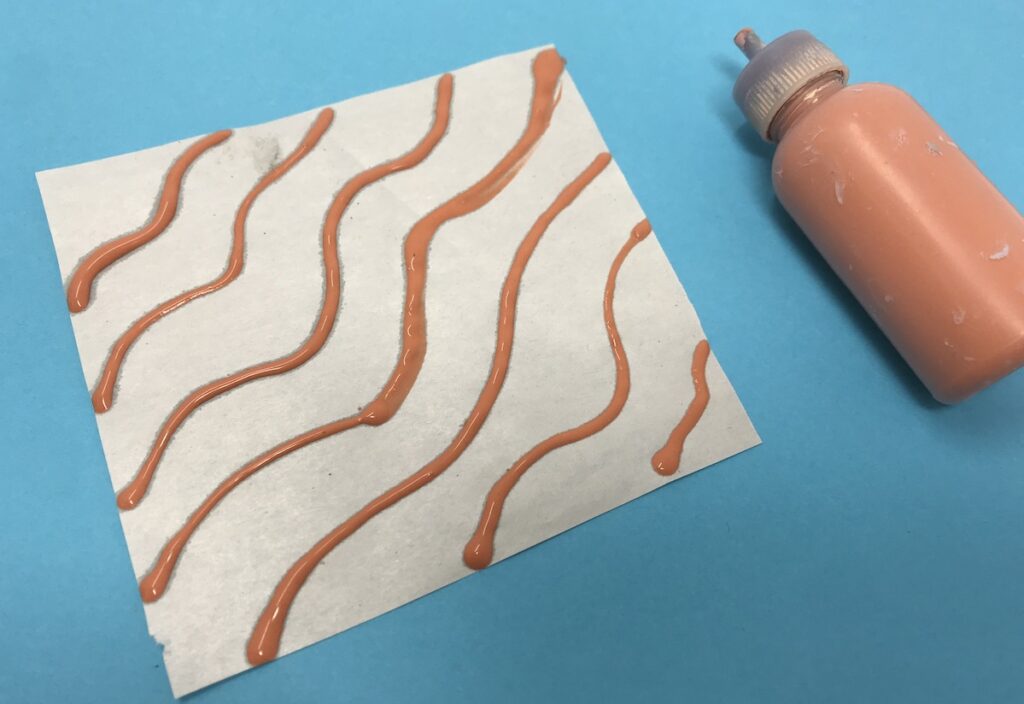
Before they begin, remind your students they will be working in a backward process. The colors they first put down on the newsprint look like they are on the bottom, but when transferred onto the clay piece, will actually be on top. Also, if students are planning on using letters or words remind them they will have to create them in reverse, so they print correctly.
4. Continue Layering
After they have one layer complete, students can add another. However, be sure to take drying time into account. Students will not want to put on another layer until the first has dried. A blow dryer can help speed up the process.
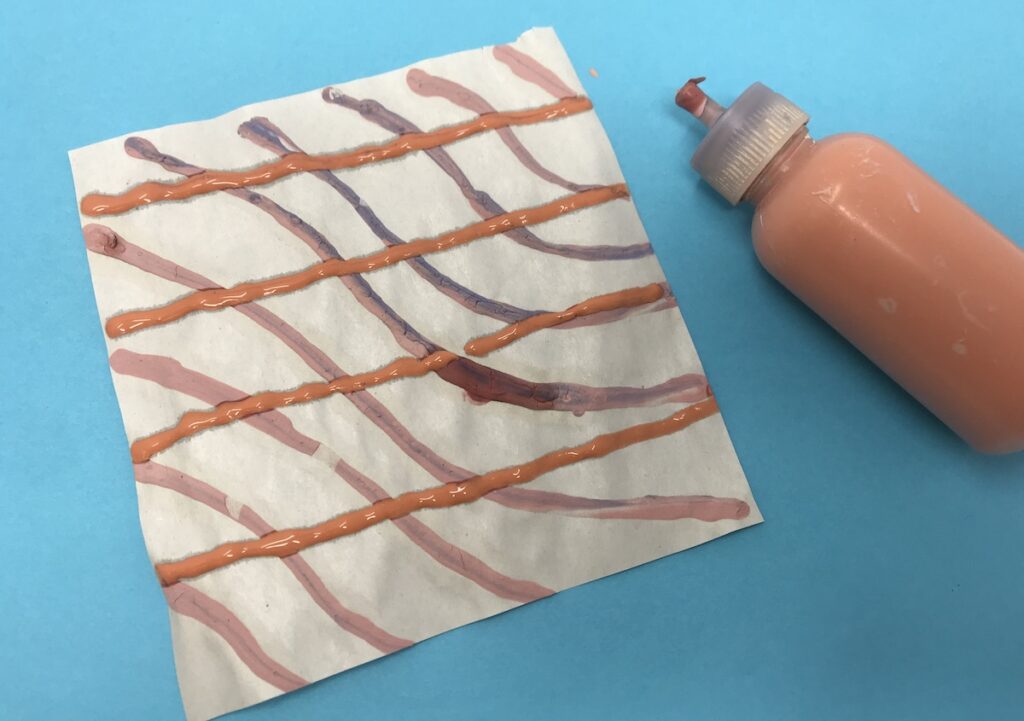
As layers begin to dry, students will continue the process of adding underglaze. Students can repeat and add as many layers as they like to achieve their desired design.
5. Transfer the Design
After the underglaze design on the newsprint is fully dry, it can be transferred to the clay. This process works best on leather-hard clay.
Start by spritzing the surface of the clay piece with water. This layer of moisture will allow the newsprint to adhere. Next, lay the newsprint, glaze side down, onto the clay. Take a sponge and start lightly pressing the newsprint onto the clay surface. In order to create a successful transfer, the newsprint should be fully saturated with water. This usually requires passing over the surface with the sponge several times.
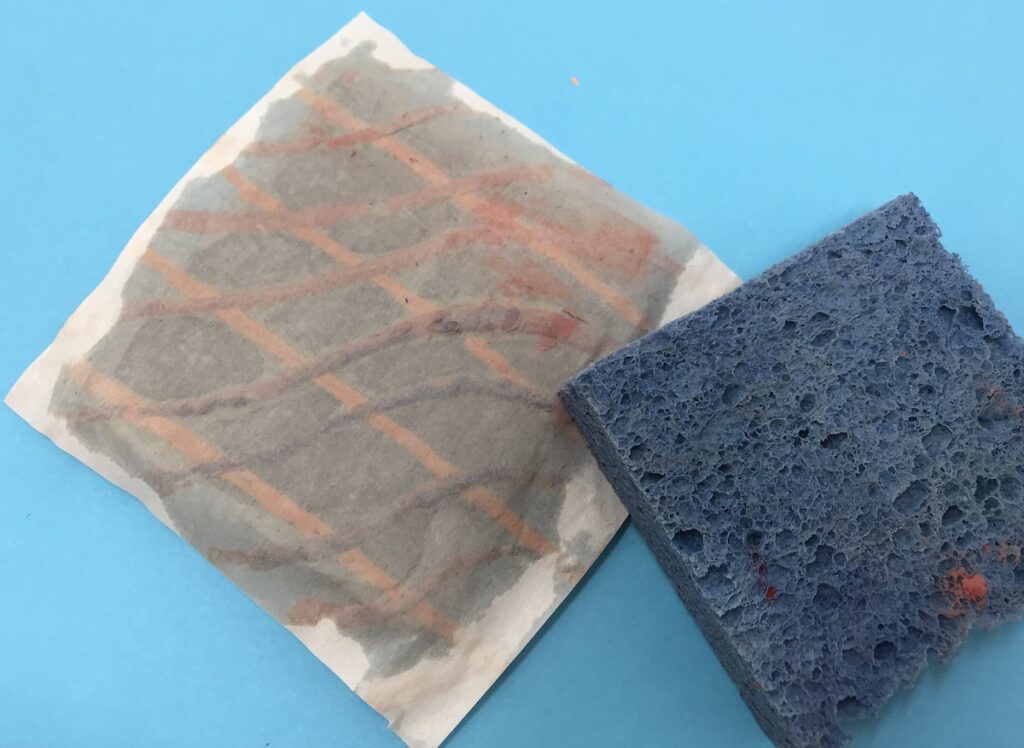
Once the design looks like it is beginning to transfer, peel a corner of the newsprint to check on the process. If the design is transferring, go ahead and pull the newsprint off. If not, take another pass with the sponge. Once the newsprint is peeled off, your transferred design will appear.
6. Finish the Design
From here, clay pieces can be fired and treated normally. Adding a clear glaze over the underglaze transfer is the perfect way to finish these pieces. However, depending on your students’ knowledge of color and surface treatment, they might want to continue to explore. Or, if students aren’t happy with the way their underglaze transfer turned out, they may choose a variety of ways to use overglazes to hide their design.
If you’re looking for even more ways to creatively finish ceramics pieces in your art room, be sure to check out the Studio: Ceramics class. There is an entire week dedicated to helping you explore underglaze and slip techniques to use with your students!
4 Other Ways to Work with Underglaze Transfers
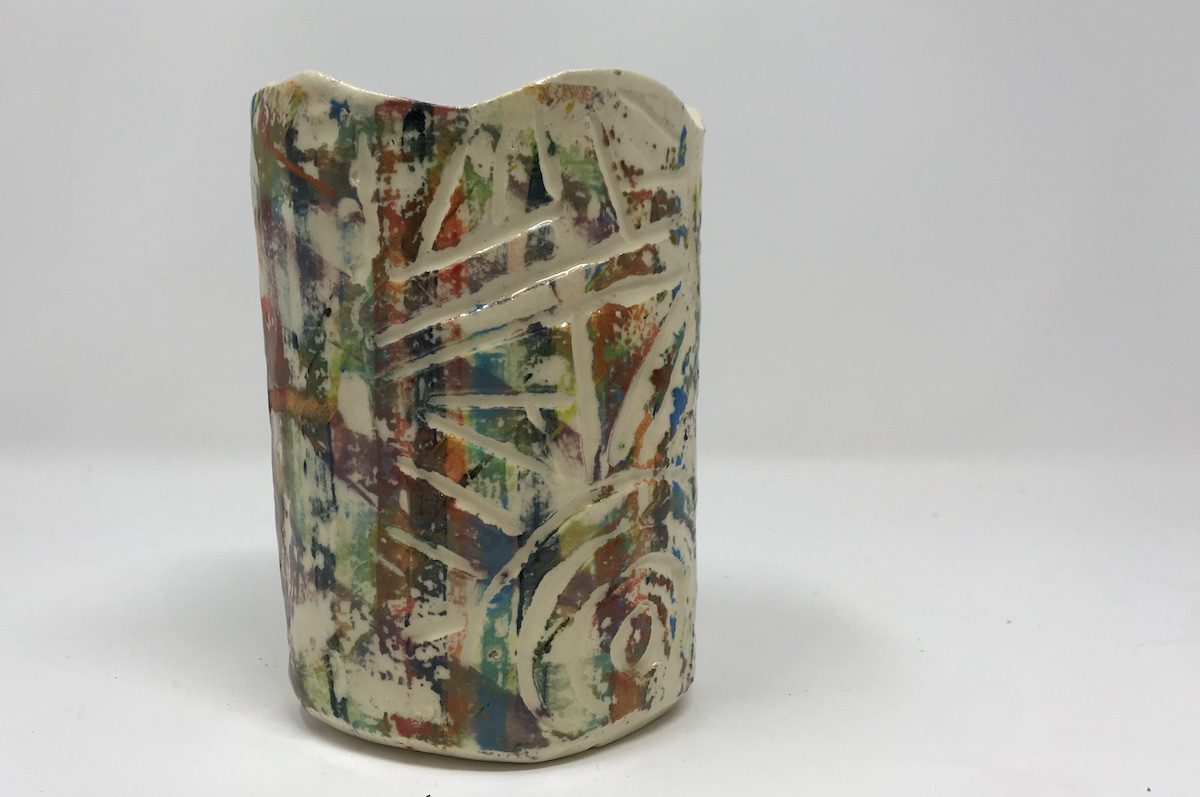
1. Transferring to Textured Vessels

It’s typically best to use underglaze transfers on smooth surfaces. However, they can yield some exciting results on textured surfaces. By following the process outlined above, you can create a transfer on a textured clay piece. Keep in mind it will take a bit more effort to transfer the design, and the design won’t transfer fully on subtractive areas.
2. Drawing with Underglaze
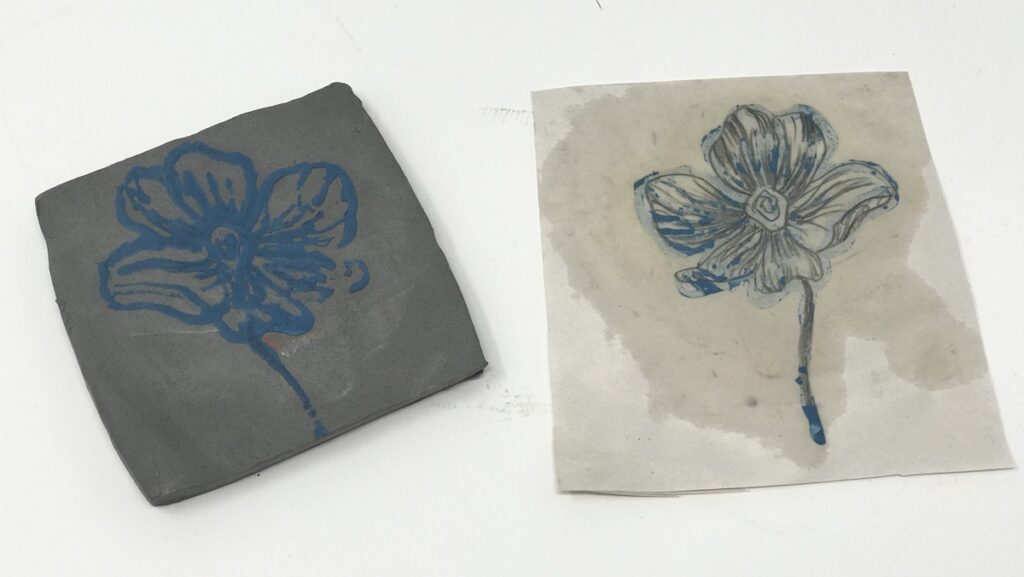
One of the benefits of creating an underglaze transfer is that students have more control in their design. If they make a mistake on the newsprint or aren’t happy with their design, they can start over without harming the piece. This is the perfect way for your students who love drawing to combine their drawing and ceramic skills. Once again, using the above process students can use underglaze to trace their drawings to be later transferred onto a clay piece.
3. Monoprinting with Gel Plates

Using gel plates to create monoprints is a fascinating process for students. Generally, acrylic paint is used for this process and can be used for ceramics as well.
However, you can also use glazes on gel plates to monoprint onto clay surfaces! Use stencils and tools to create interesting designs and textures and transfer them to the clay surface. Layer prints for even more unique results.
4. Using Graffito Paper
Graffito Paper, created by Minnesota Clay Company, is another way you can create an underglaze transfer on clay. This product is basically a sheet of paper covered with underglaze that works exactly like carbon paper. To create the transfer, the underglaze side faces the clay. Then, using a pen or pencil, you can draw on the paper and your drawing will be transferred to the clay. You can find the detailed steps of this process here.
How students finish their ceramic pieces shouldn’t be an afterthought. There are so many exciting ways designs can be added to clay pieces. The next time your students are planning a clay project, try one of these underglaze transfer techniques to see the unique results they will create.
Do you use underglazes in your classroom?
Have you ever used the underglaze transfer process in your classroom?
Magazine articles and podcasts are opinions of professional education contributors and do not necessarily represent the position of the Art of Education University (AOEU) or its academic offerings. Contributors use terms in the way they are most often talked about in the scope of their educational experiences.


