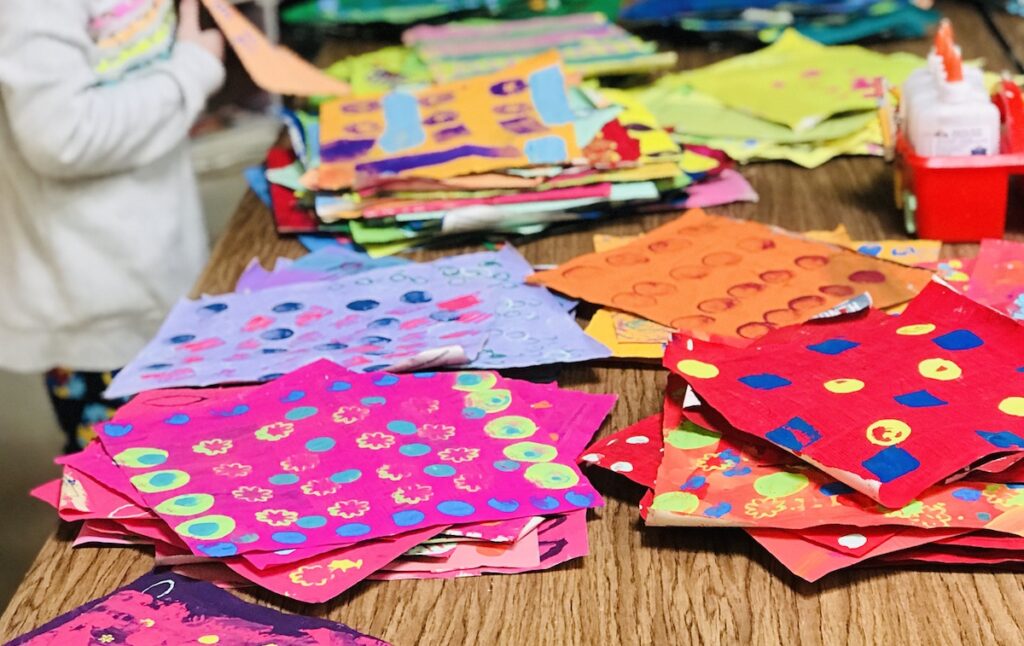
Adding artful marks to projects using paint or ink teaches students how to layer, pattern, and compose a beautiful piece of art. The most important part of the process of mark-making comes down to the tools. With many awesome texture tools already available, adding to your collection will only strengthen the variety of tools your students can access. A great resource to check out for creating and collecting your own mark-making tools is this Print and Stamp Lab Book. The book emphasizes that the best tools can be in the most unconventional places.
The best places to search:
- Kitchen aisle
- Thrift store
- Garage sales
- Craft stores
- Local art supply shop
- Hardware store
What to look for:
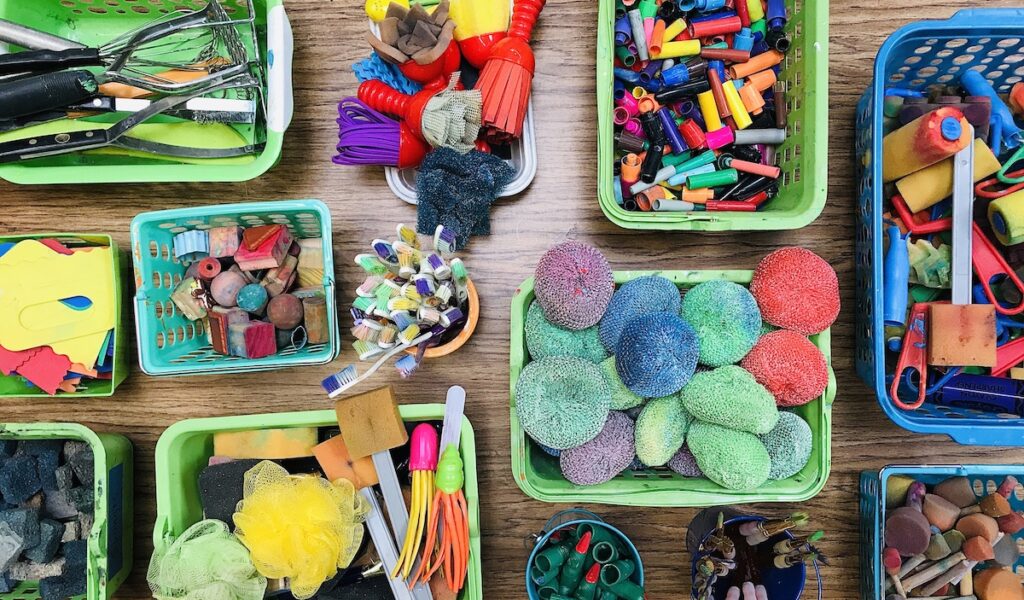
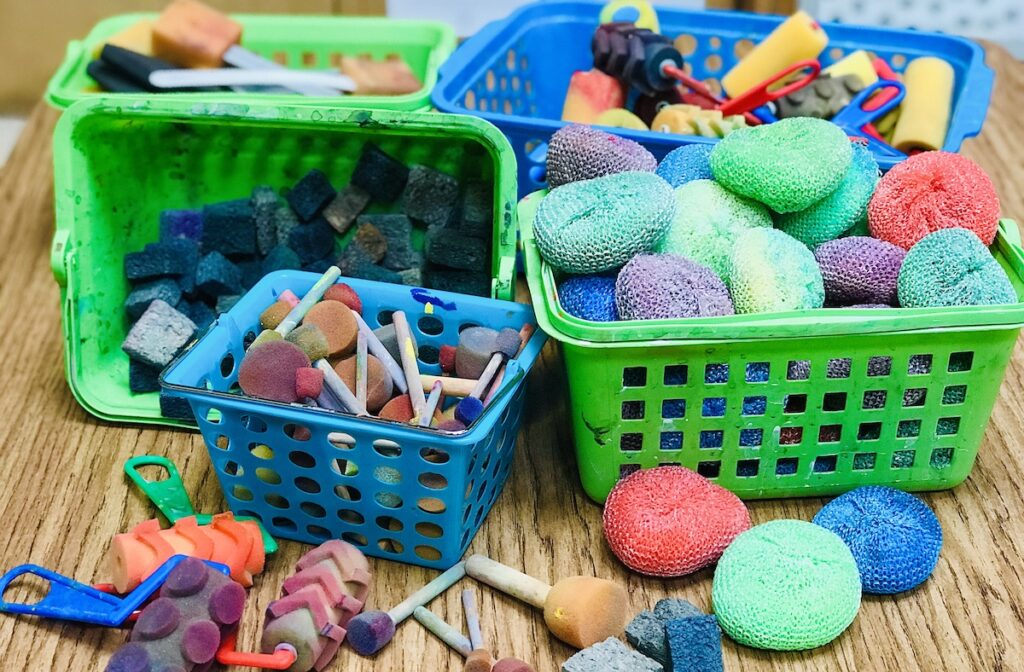
1. Sponges
With so many styles of sponges available, collecting sponges for printmaking and mark-making can be a great start to your collection.
Think instructional tools. Hands-on learning. Process boards. Lesson plans. Browse Graduate Courses.
What kinds of sponges should I collect?
- Traditional sponges (cut into smaller shapes)
- Dish sponges (plastic circle sponges, stainless steel washing sponges, etc.)
- Foam rollers (with raised patterns)
- Foam stampers (circles or cut shapes)
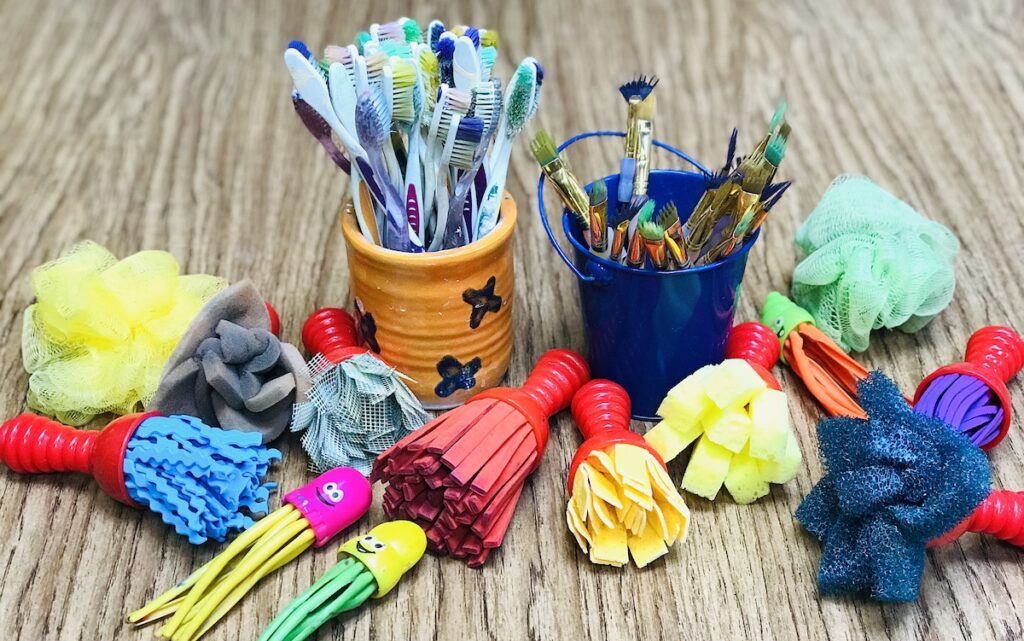
2. Brushes
Mark-making brushes can be made or purchased. Larger brushes are especially useful to use with students in adaptive art classes to assist with fine motor skills because of the larger grip handles.
What kind of brushes should I collect?
- Toothbrushes (great for splatter painting)
- Eyelash brushes (cut sections out of old brushes to make yourself)
- Body loofahs (great for painting large areas)
- Pre-made texture tools (large handles perfect for all students)
- Diving toys (fun for students to spread and dab paint)
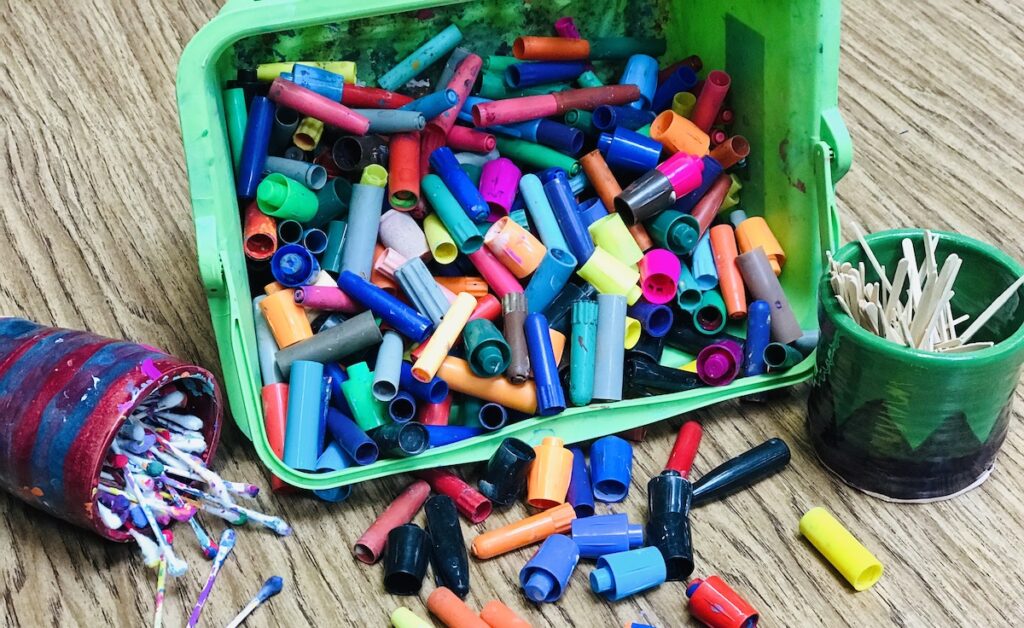
3. Dotters
Small dotters are fun for lessons such as Dot Day creations or adding texture to various projects. Many of these mark-making tools can be scavenged from your own art room.
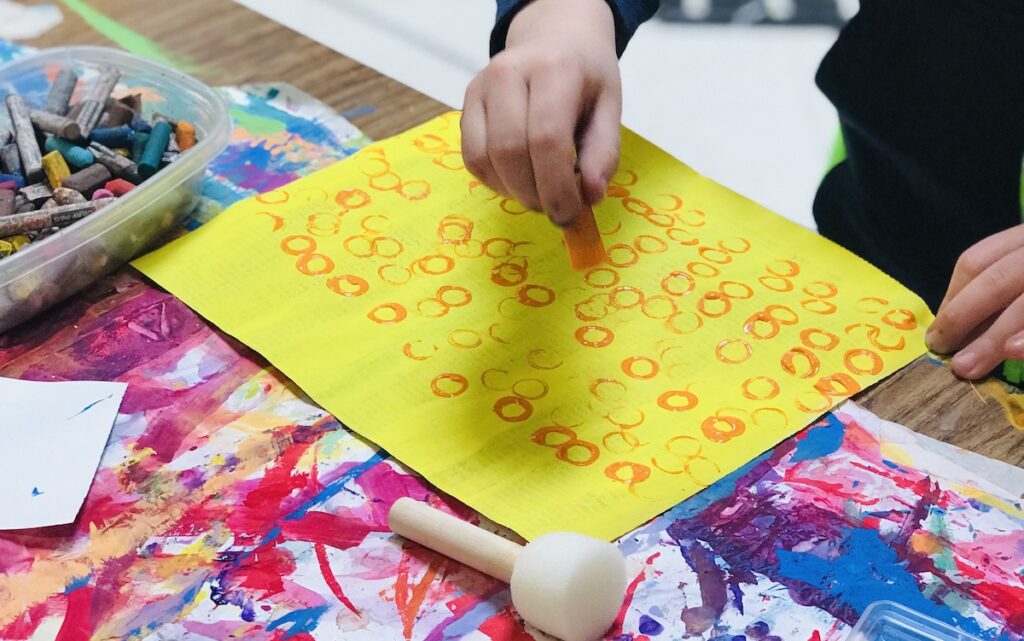
What kinds of dotters should I collect?
- Marker caps (save from old and expired markers)
- Cotton Swabs (let paint dry after use and reuse to avoid waste)
- Toothpicks (use small toothpicks or cut dowels and wood scraps for size variety)
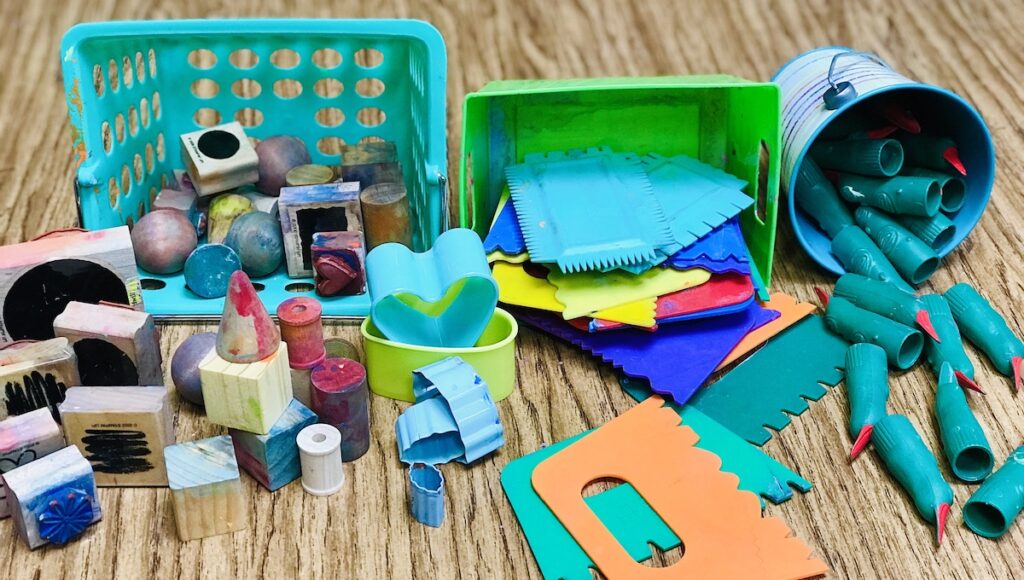
4. Texture Tools
Add to your texture tool collection by always being aware of the kind of mark an item might create. Typically, you may walk right past a shelf of cookie cutters or silly witch fingers in the store. However, constantly thinking about how a mark-making tool could be used with your students will help make your collection grow.
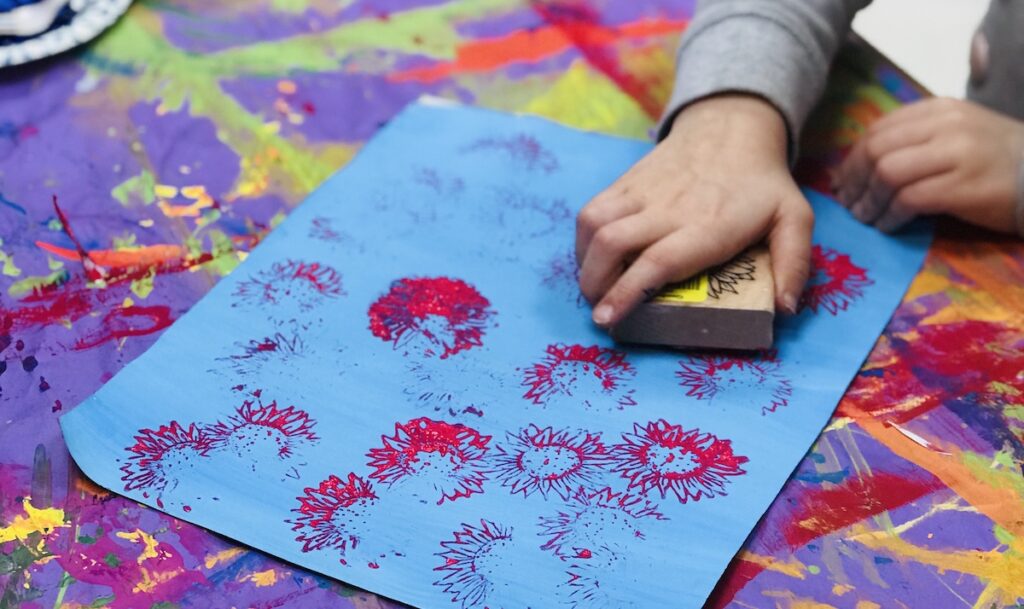
What kinds of texture tools should I collect?
- Stamps (hand-carved stamps or rubber stamps collected from thrift stores)
- Finger applicators (witch fingers were collected after Halloween)
- Texture scrapers (can also create DIY versions from cardboard or wood)
- Cookie cutters (multipurpose tools for your classroom)
- Wood blocks or wooden spools (great for pattern making with simple shapes)
- Decorated wood blocks (wrap wooden blocks in chord or yarn)

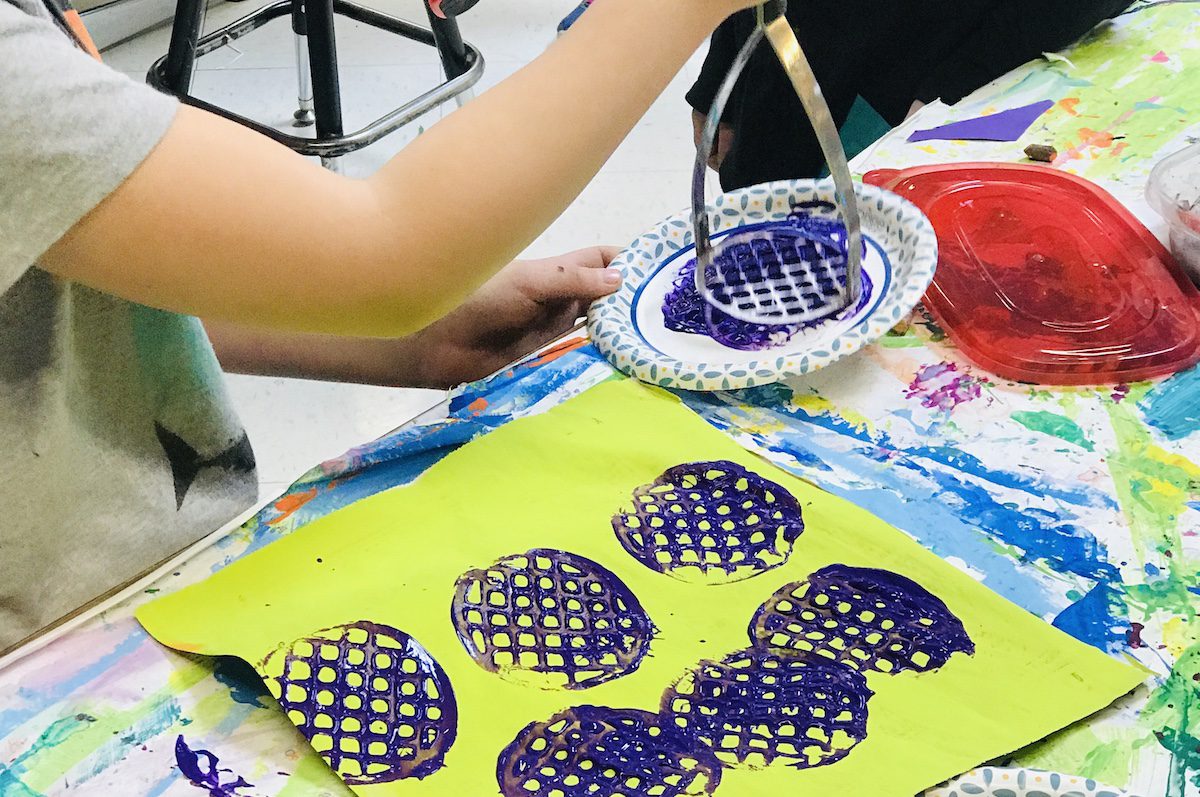
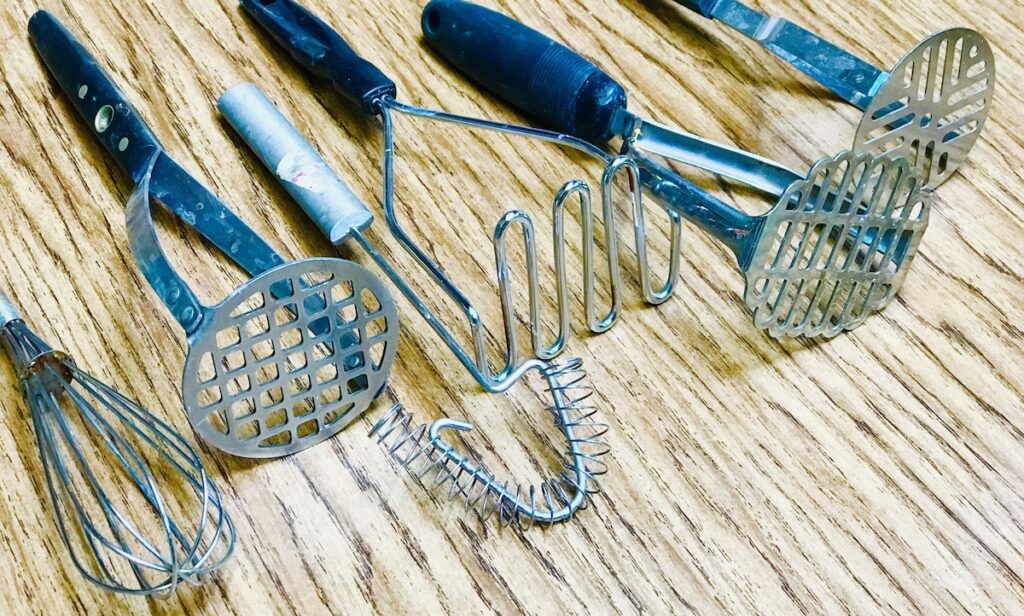
5. Kitchen Tools
Speaking of nontraditional printing tools, have you ever used potato mashers to create art? It’s incredibly fun and produces stunning marks. Check out the work of author and illustrator, Jeanne Stycinski, who uses a variety of printing tools, such as potato mashers and wooden spools, to create her beautiful collage papers.

What kinds of kitchen tools should I collect?
- Potato mashers (check thrift or local resale shops)
- Spatulas (great for spreading and layering paint)
- Forks (Great for dots or lines)
Benefits of having mark-making tools on hand:
- Many tools are multi-taskers that can be used for other projects
- Encourages inventiveness among students (Ask: “How can you use this tool?”)
- Strengthens fine motor skills with uniquely shaped tools
- Fun to collect and scavenge for new tools
- Come in a variety of shapes and designs
- Offer choices to students
- Particularly excellent for younger students
- Great DIY opportunities
- Can be cut into precise shapes for specific printing
If you are looking for more resources about printmaking, check out these resources:
How to Open a Printmaking Center in 5 Steps
Combining Printmaking with Clay
Relief Printing Basics PRO Learning Pack
Be sure to leave all your printmaking tools out to dry completely after washing them. If you seal them in closed containers while they are still damp, they will likely mold.

There are so many ways these tools can be used in the classroom. Finding them is almost as much fun as exploring ways to use them with your students. After you have started your collection of mark-making tools, you won’t be able to stop! Have fun giving your students opportunities to explore different ways to make art.
What is your favorite mark-making tool to use with students?
Where do you like to find printmaking tools for your classroom?
What projects work best for incorporating printmaking techniques?
Magazine articles and podcasts are opinions of professional education contributors and do not necessarily represent the position of the Art of Education University (AOEU) or its academic offerings. Contributors use terms in the way they are most often talked about in the scope of their educational experiences.