Understanding color theory is an essential part of the artmaking process. While it’s important, it is also complex. Many of our students can recall the primary and secondary colors, but there is so much more to it than that! Understanding how color works takes practice and patience. It is nearly impossible to teach our students about every facet of color theory; in fact, we probably have a few new things to learn as adults.
When diving into color, paint seems like the natural medium to teach concepts. Tempera and acrylic paints are often the materials we flock to for color mixing, but watercolor can be a good option, too. Watercolor is a versatile and accessible medium for students. It usually involves less cleanup and creates less of a mess than other painting methods. Students often struggle with watercolor because they don’t spend enough time using the material, and they aren’t patient enough to work with the material properly.
One way to create more exposure to the watercolor medium and teach patience and color theory is by trying various activities at once. In order for students to find success with the watercolor medium, they need to let it dry, and there’s nothing worse than watching a student watch their paint dry. Exposing them to several different color-mixing activities at once will solve this problem while teaching valuable color concepts.

If you’re looking to try different color-mixing activities with your students, here are 7 watercolor activities to try.
1. Glazing Lines
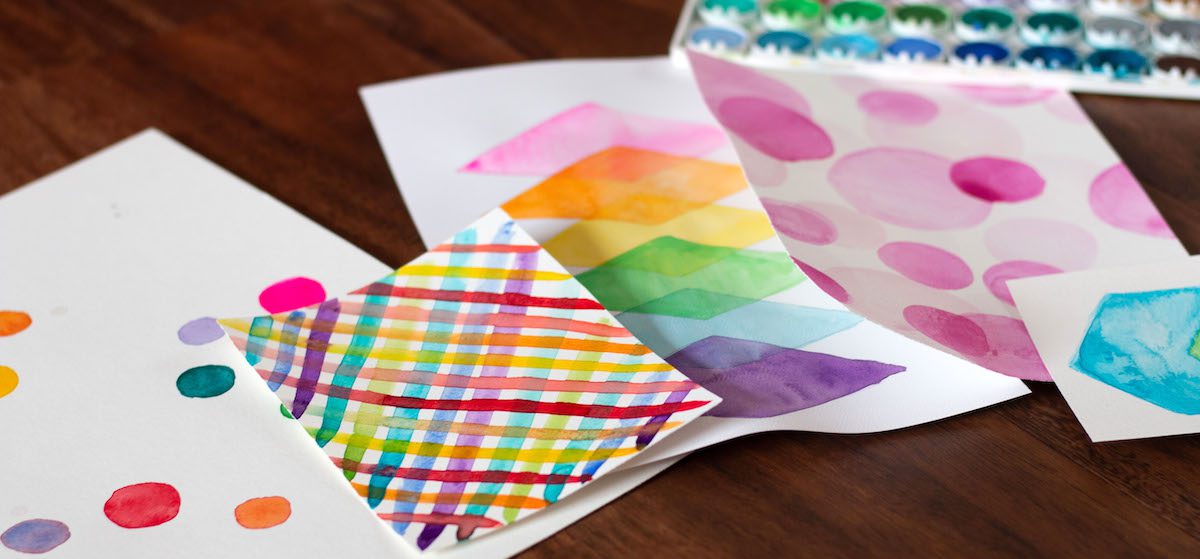
One of the best qualities of watercolor is its ability to create depth by layering watercolors. The glazing technique can bring a painting to life, but it can also teach a lot about color. To complete this activity, start by creating a series of lines on the first layer.
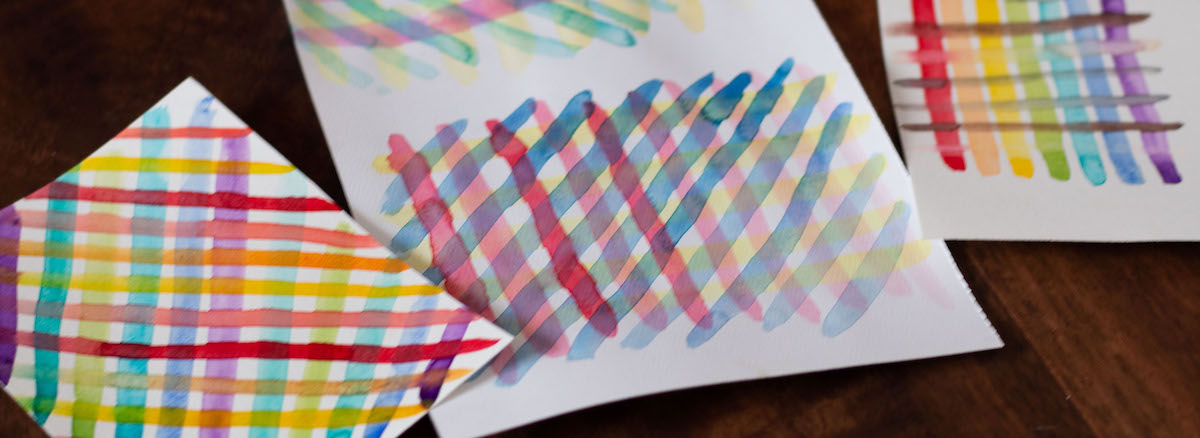
Let it dry, and continue adding on top. If students become impatient and don’t let it dry, their paper will turn into a pool of watercolors. Continue adding as many layers as desired. The end effect will look a little bit like your favorite plaid shirt. The layers create an interesting design and show how colors interact and relate to each other. Here are some color combinations you could try:
- Layer warm colors over cool colors.
- Create layers only using the primary colors.
- Create layers only using complementary colors.
- Layer neutral colors over the rainbow spectrum.
- Layer the same hue with different values.
2. Transparent Shape Diagrams
The Venn diagram is a concept our students use in various educational settings. We can apply those same principles of the Venn diagram to show what happens when colors overlap. Because watercolor is transparent, it’s the perfect medium to use.
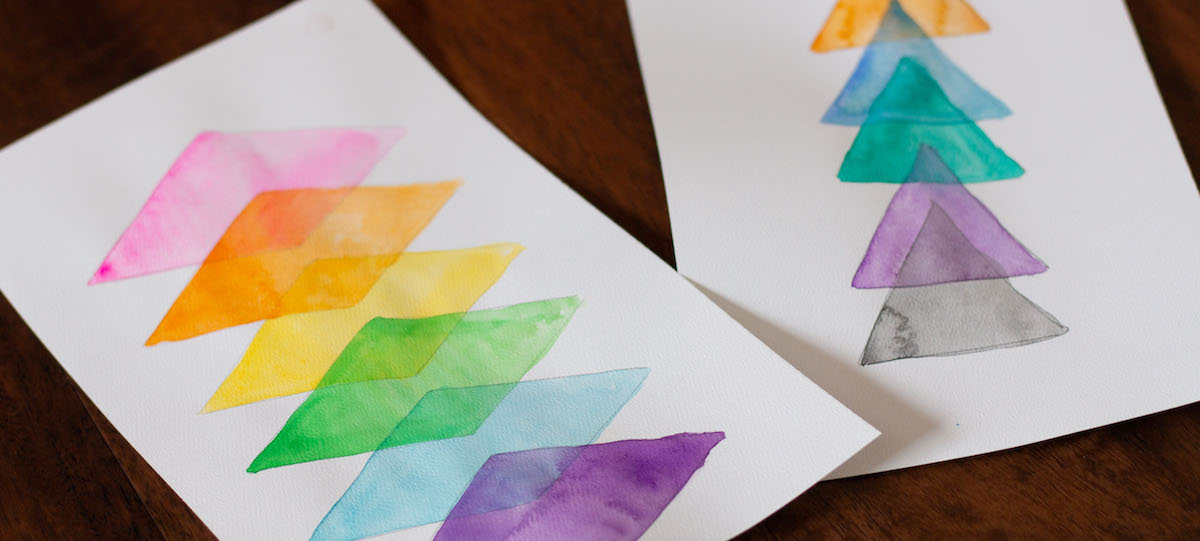
Simply start with a shape and slightly overlap it three or more times. It’s best to leave a little bit of negative space around the shapes to provide some contrast. After the shapes are drawn, begin layering glazes of watercolor. Students will soon see new colors appear in the overlapping areas.
3. Color Bias Color Wheels
Have you ever mixed blue and red together with the result of a muddy, violet color? Or, how about blue and yellow to result in a mossy green? The result of these colors not turning out as true violet and green is because of color bias. Color bias refers to the hue that influences the primary colors. Because paint manufacturers use different recipes and formulas to mix their paint, true primaries don’t really exist. Instead of having a blue, it is going to be a cool blue or a warm blue. This bias will change the result of the mixed colors. If you don’t want to get a muddy, purple color, it’s best to use a cool red with a warm blue. As you’re reading this, it might sound complicated–that’s because it is!
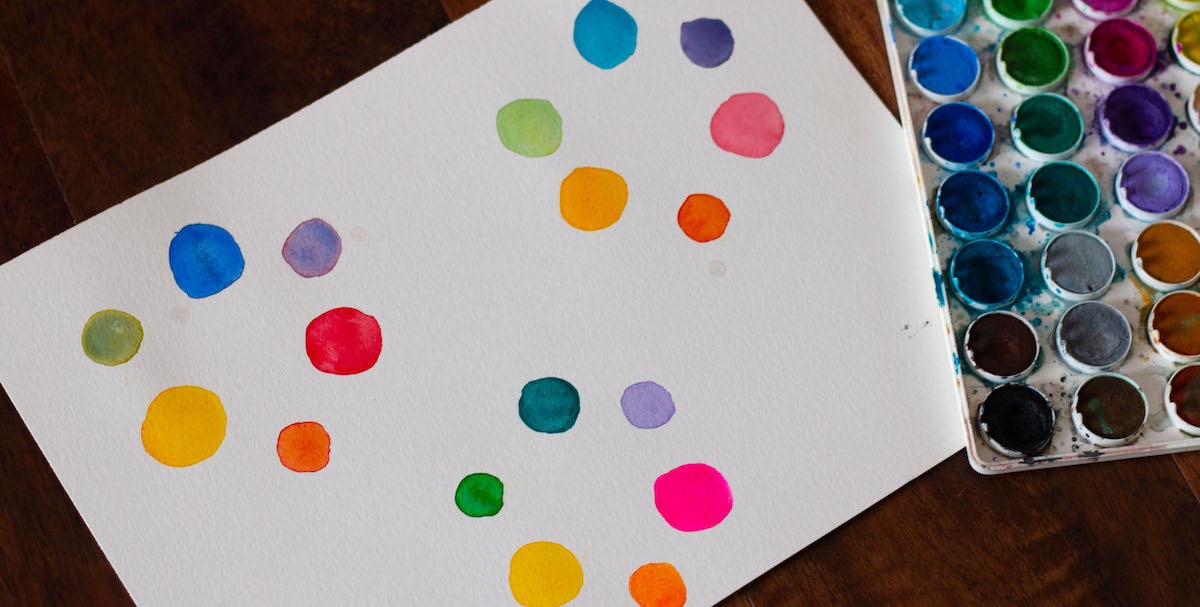
Test it out by using a variety of warm and cool primary colors. In the image above, you can see each set of primary colors yielded different results. To understand how to mix the “perfect” color, students will need to use more than just three primary colors. There’s often a discussion if RYB (red, yellow, blue) vs. CMYK (cyan, magenta, yellow, key black) as the “true primary” color palette. While both arguments are valid, exposing our students to both will help them better understand how colors mix.
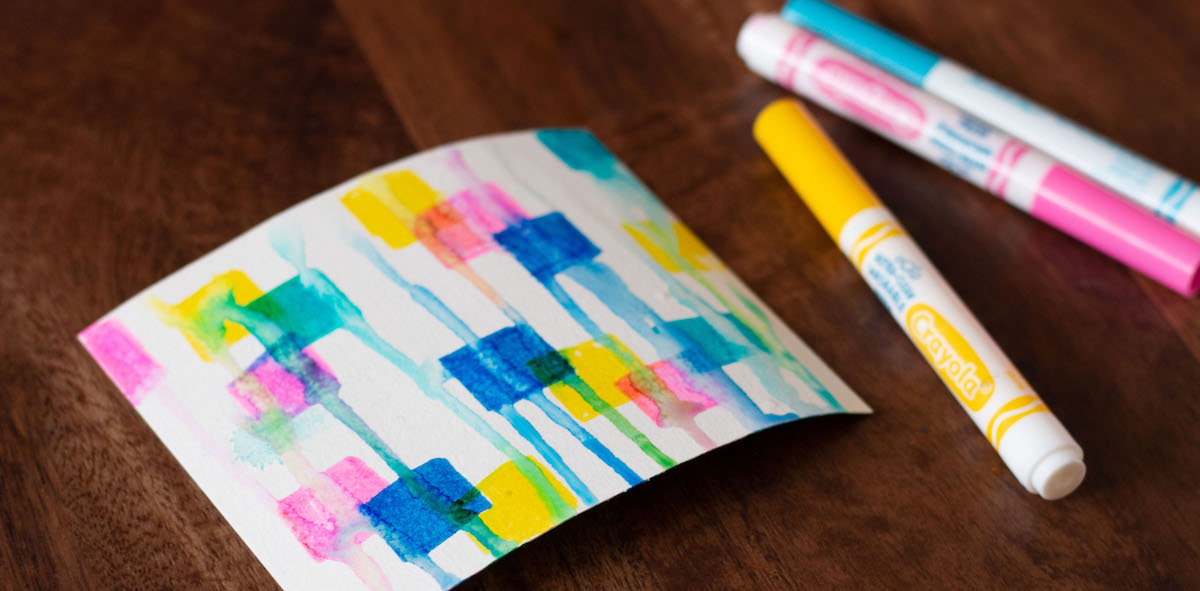
4. Washable Markers Drips
Washable markers, when activated with water, hold similar qualities to watercolor paints. One activity for students to organically discover the color-mixing process is by using water and washable markers.

Start by choosing a series of markers and create overlapping shapes. Naturally, some of the markers will already start mixing. Using an eyedropper with water or a clean brush with water, stand the paper up vertically and let the water drip down from the top. The result will capture organic drips with the magic of color mixing.
Check out these additional watercolor resources:
10 Watercolor Artists to Inspire Your Students
A Better Way to Teach Watercolor Techniques
6 Ways to Take Your Students Beyond Watercolor Techniques
The Perfect Watercolor Lesson for Online Learning
5. Watercolor Pencil Layering
Watercolor pencils are a wonderful medium to include. Since students are often familiar with basic drawing materials, like colored pencils or crayons, using them is easy. Try watercolor pencils for any of the activities on this list.
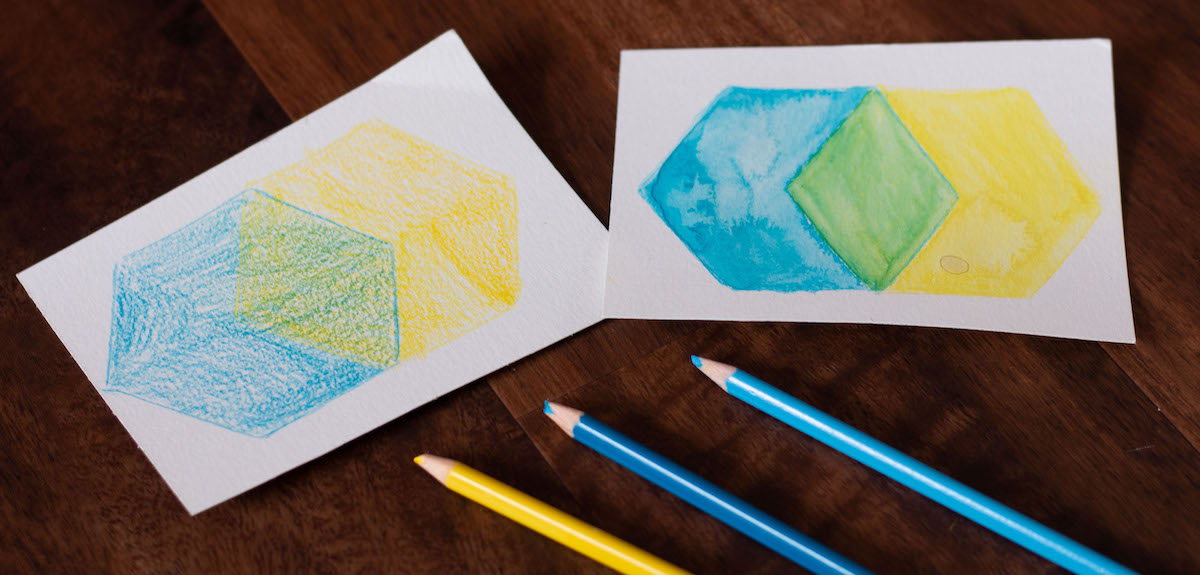
The key here is to layer the pencils evenly for optimal color mixing. Activating them with a little bit of water will turn the pencil into fluid watercolor. Watercolor pencils are a great way to show students to balance and control the amount of water needed for painting with watercolors.
6. Monochromatic Layers
Creating value with watercolor is quite different than using tempera or acrylic. Instead of using white, water comes into play. In order for students to see the value, have them practice layering shapes.
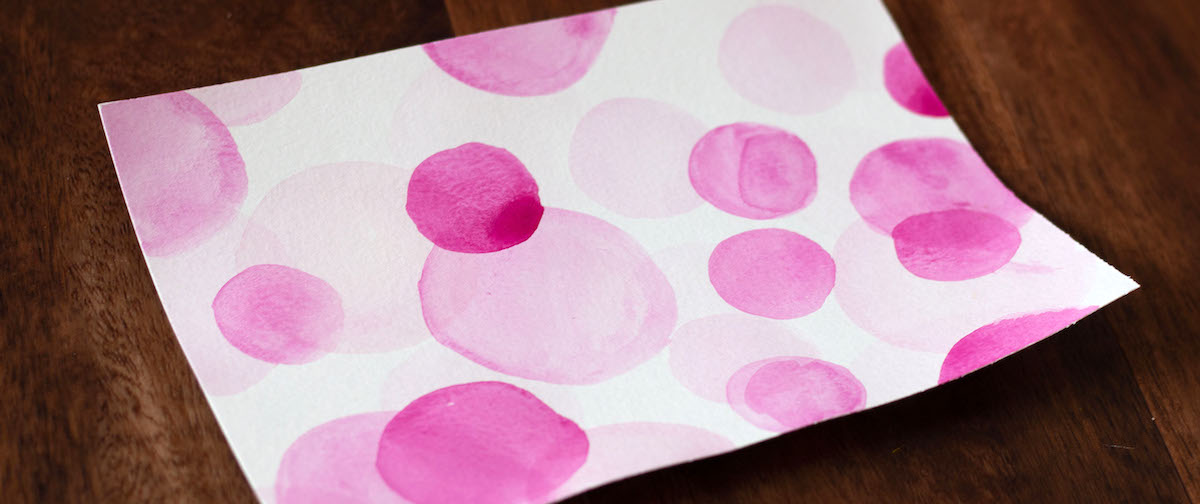
Start by mixing the lightest value of a hue, let the layer dry, and overlap with a darker value. Continue this process with as many layers as you like or until you’ve reached the darkest value of the hue.
7. Color-Mixing Chart
To truly see how colors relate and react to one another, we need to mix them together!
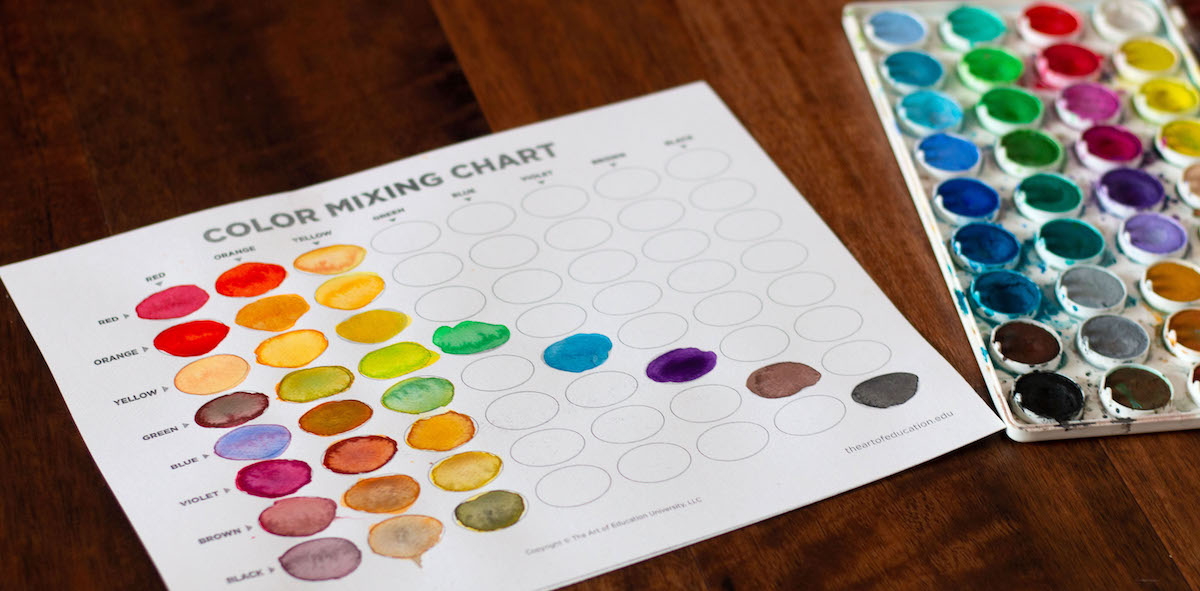
Download this color-mixing chart to start an in-depth color-mixing exploration. You can even print this handout on a piece of watercolor paper. Run the watercolor paper through your copier just as you would cardstock.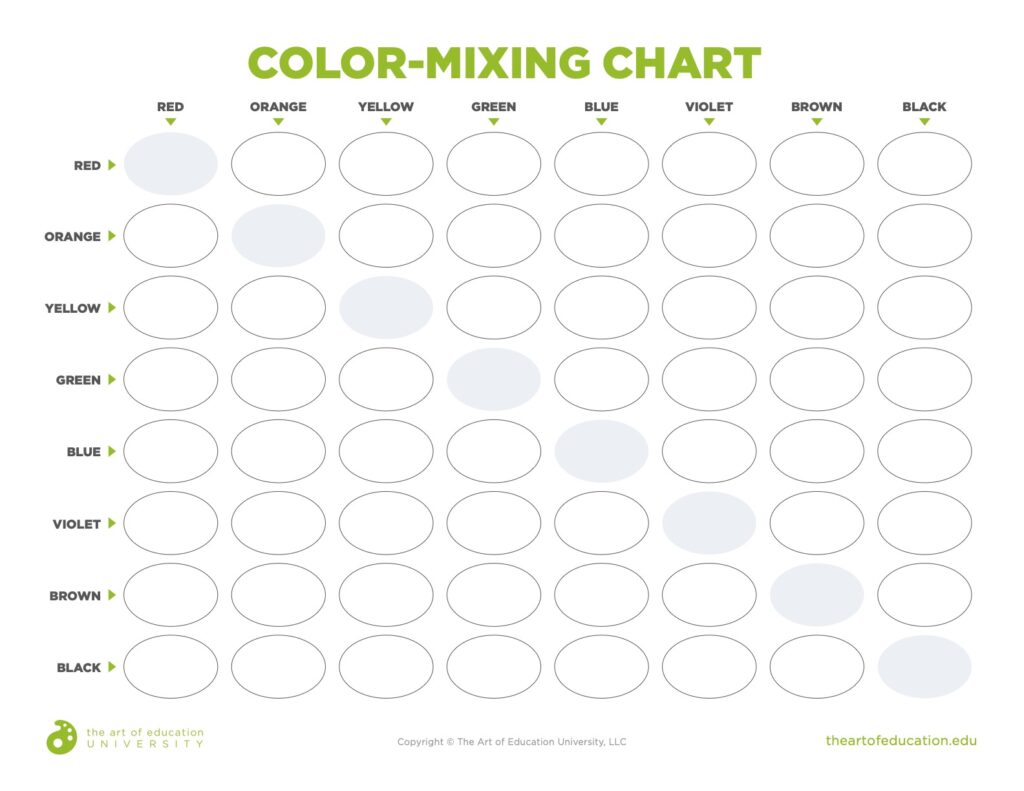
Introducing students to the joy of color mixing is always exciting. By including watercolor and layering multiple activities, you can minimize dry time (and downtime) and maximize student exploration. Part of understanding color theory comes from the explorative process. Next time you teach color theory, consider using one of these watercolor activities.
What’s your favorite color-mixing activity?
Do you prefer using tempera, acrylic, or watercolor to teach color mixing?
Magazine articles and podcasts are opinions of professional education contributors and do not necessarily represent the position of the Art of Education University (AOEU) or its academic offerings. Contributors use terms in the way they are most often talked about in the scope of their educational experiences.


