Oil pastels are an under-appreciated medium that doesn’t get enough credit. While they seem to be most common in elementary classrooms, oil pastels have the potential to work for everyone—even fine artists! While some oil pastels can be higher-end and pricey, there are also many economical options for the classroom setting.
Why is it that oil pastels get overlooked? Could it be that they get lumped into the “coloring” category and don’t come across as “fine art?” While tried-and-true processes, like using watercolors and oil pastels, are usually present in the classroom, there are many other options to explore. In all actuality, we can use them in various ways to spark student interest.
If you’re looking for ways to liven up how you teach oil pastels in your classroom, try out some of these ideas.
1. Explore oil pastel techniques.
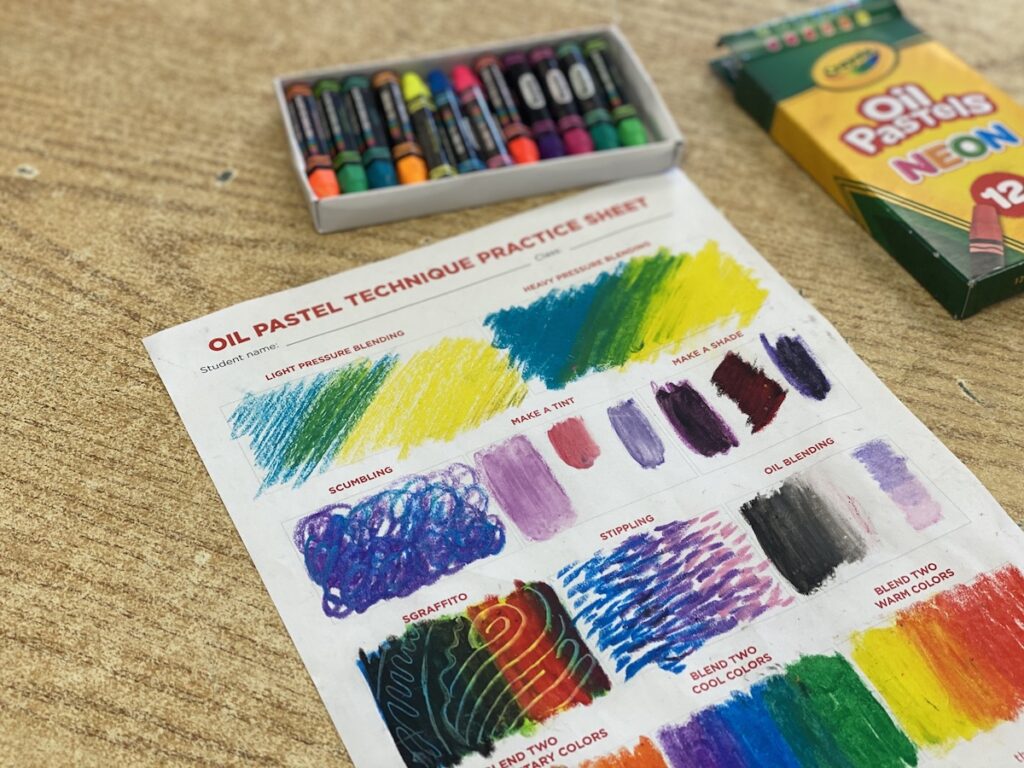
Just as one tests watercolor by trying different techniques, we should do the same with oil pastels. A guided practice or study will show students how to manipulate the material and find success. Students must be allowed time to work with oil pastels to understand the material’s nuances and intricacies. Here are a few techniques you might try with students.
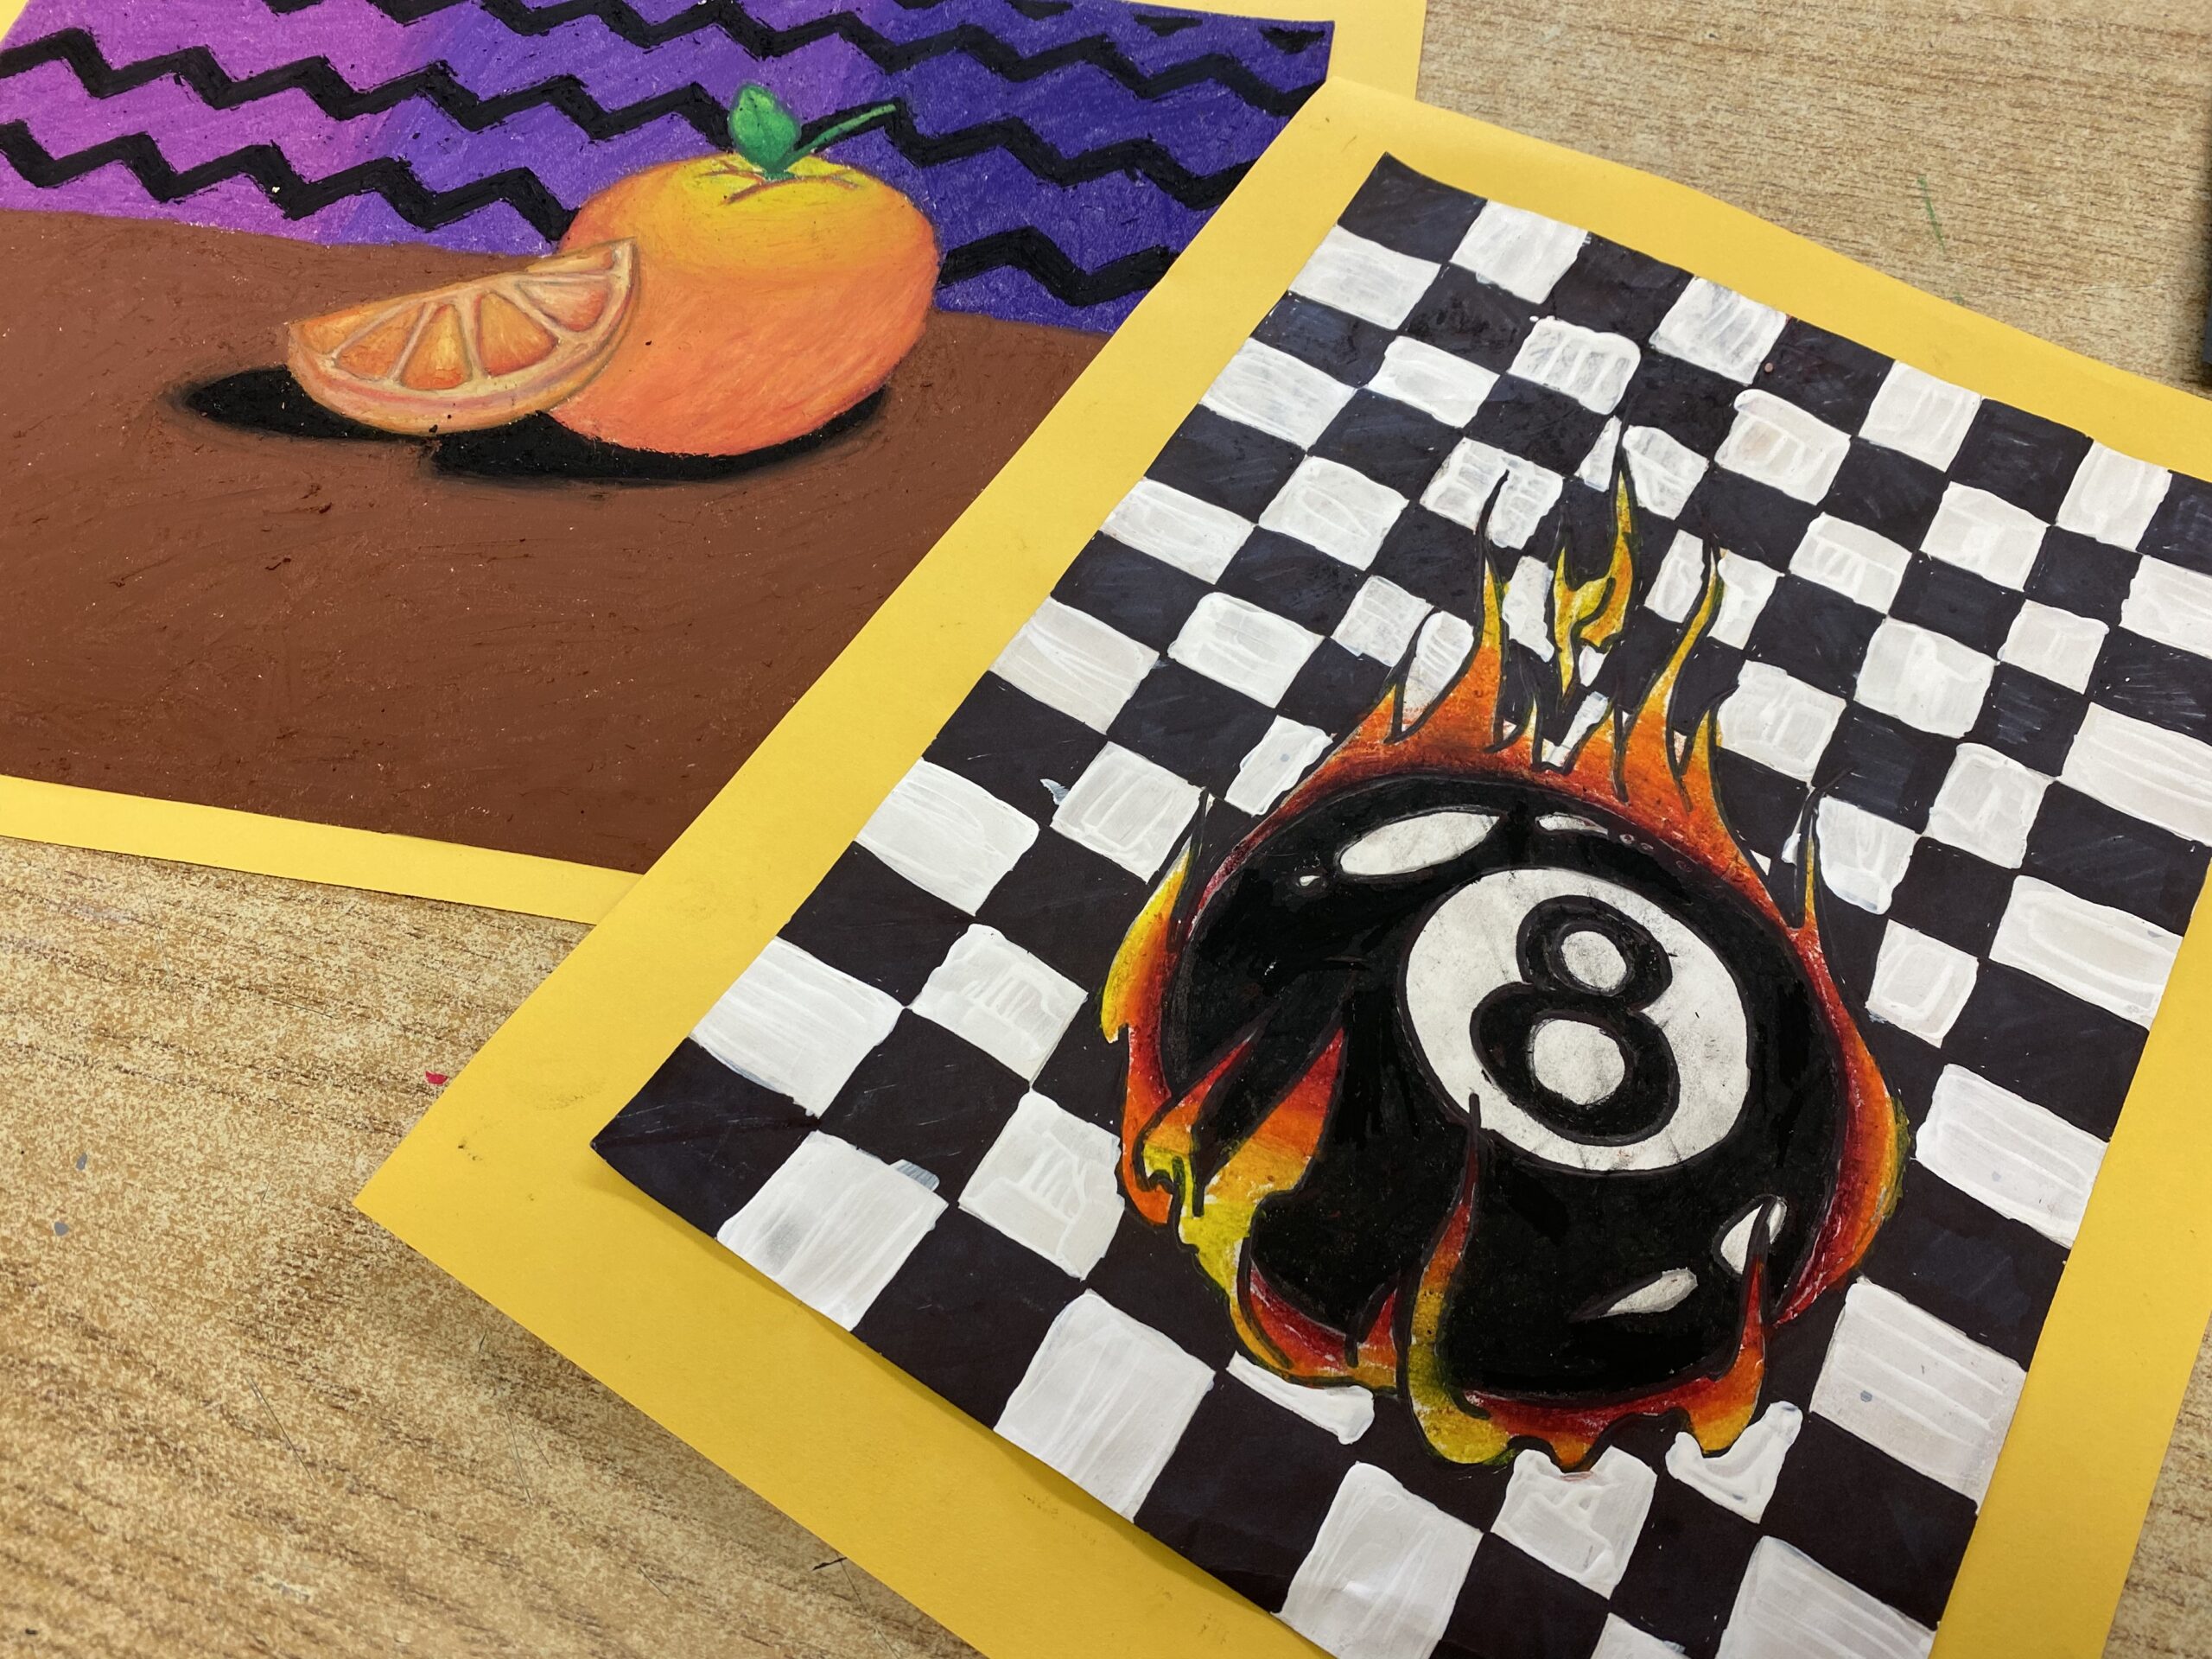
2. Try sgraffito.
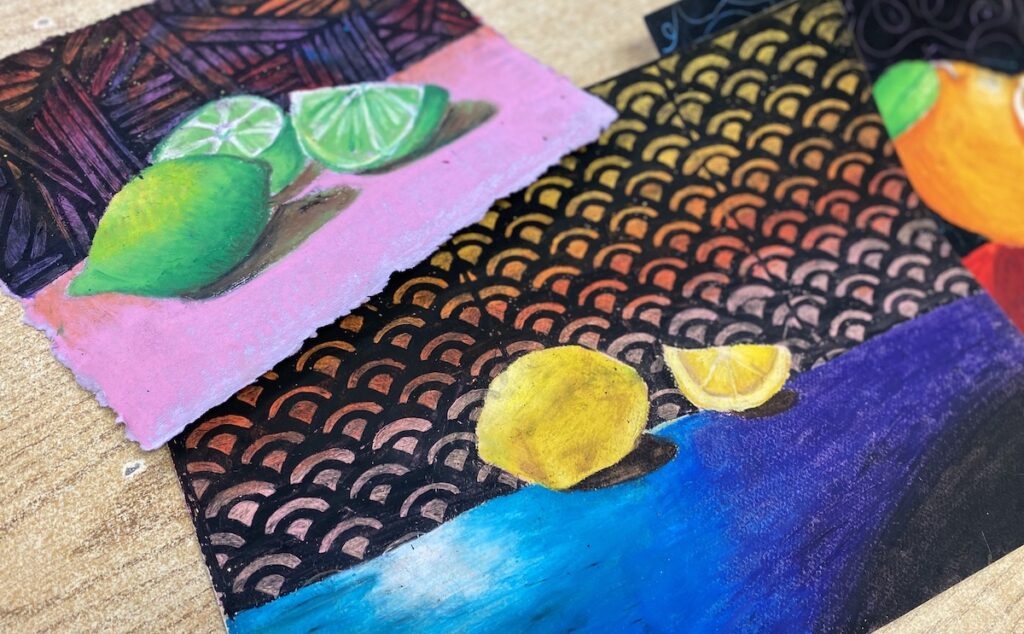
Sgraffito is a technique effective with a variety of media. This Italian word means “to scratch,” and in the land of oil pastel, it means you scratch away the top surface to reveal what is underneath. Explore sgraffito in various ways with these options:
- Oil pastels over oil pastels
- Acrylic paint over oil pastels
- Oil pastels over watercolor
This process will be reminiscent of creating scratch art. Utilizing this technique can create exciting background and details in pieces. When exploring sgraffito, encourage students to use a variety of tools to scratch away the surface. Different tools will perform differently, ultimately creating varying results. Another option to create striking details is to use stencils. Using stencils can be a safe way for students to explore the technique without fear of ruining their piece!
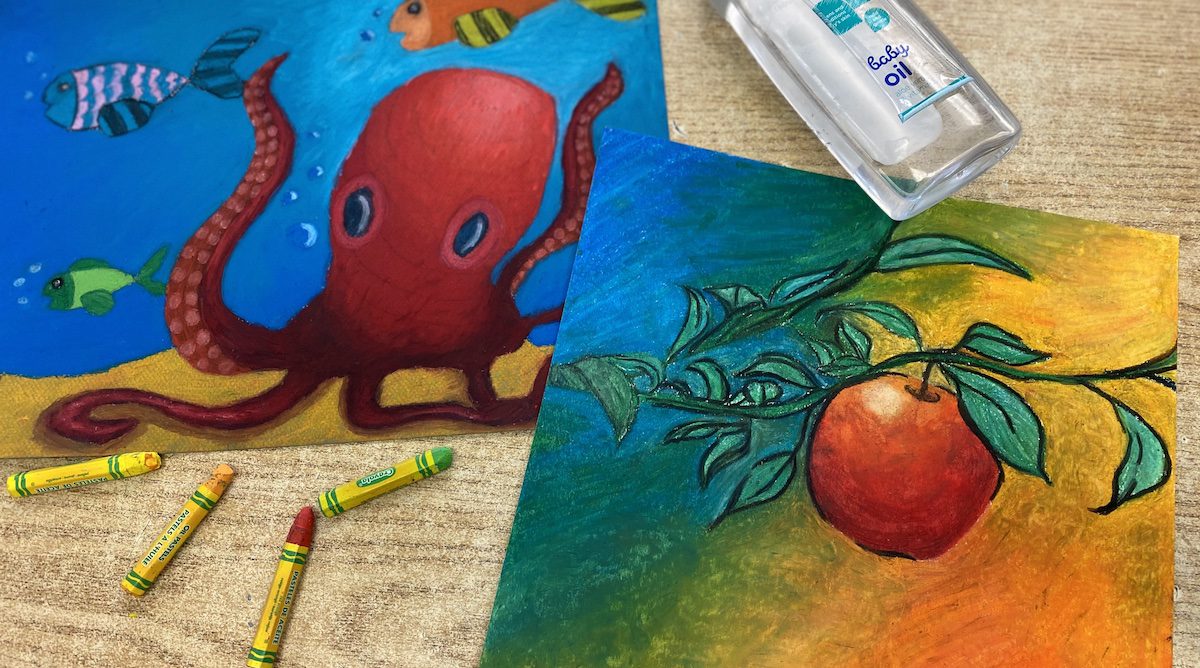
3. Try oil blending.

Oil pastels are a unique material often associated with both drawing and painting. However, in most classrooms, they are mostly used as drawing material. While they prove to be a wonderful drawing material, we can really maximize their potential when treated like a painting material. One way to do this is by utilizing baby oil. Baby oil will react with the oil pastels like turpentine with oil paint, without the harsh chemicals.
This technique isn’t only for higher-grade oil pastels; it will work with all of them. The artworks in the above image were created with a combination of baby oil and Crayola® Oil Pastels. Oil blending works best went applied sparingly and with time to try in between layers. Utilizing different blending tools like cotton swabs, paintbrushes, and palette knives can create a different finished appearance.
4. Try oil pastel faux batik.
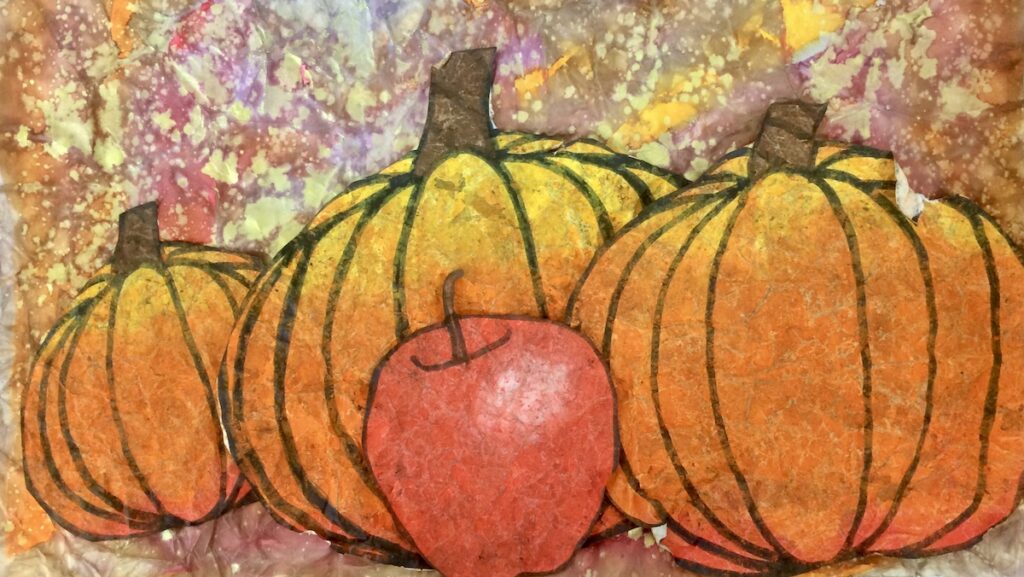
Exploring traditional batik techniques can be fascinating for students. However, we might not always have the appropriate materials, or it may be too advanced for younger learners. Use a faux batik method with oil pastels. Here are the steps to making this work.
- Create a background. The particular background in the above image was created using watercolors with a wet on wet technique. While the watercolors are still wet, crumple up the paper. When the watercolors mix, interesting textures occur.
- Fill in color. The next step is drawing the subject or objects and filling them liberally with oil pastels. After the objects are finished, crumple the paper seven to eight times. The paper will start to feel soft and no longer rigid.
- Add black. Try a resist process by going over the oil pastel with a saturated black watercolor or diluted acrylic or tempera paint to get the batik-style look. Dark contrasting colors work best.
5. An explorative lesson to try.
Exploration and discovery are part of the artmaking process. When students can do this, amazing artmaking occurs. If you’re giving students time to explore oil pastel techniques but don’t know what to do next, try out this lesson idea that will put the application of oil pastels to the test.
- Choose a sphere-like object to create value.
- Use at least three oil pastel techniques.
- Add a background.
Working with a set of constraints allows students to direct their thinking with guidance while practicing creativity. Students take control of the medium and their subject matter by making choices to create their unique piece of art.
Learn more with the PRO Learning Pack, Getting Started with Oil Pastels.
Oil pastels will continue to be an art room staple; the question is whether we are using them to their full potential. Don’t just lump them in with the other “coloring” materials; give students a chance to see oil pastels in a new light. The next time you use oil pastels in your classroom, challenge your students to take them to the next level!
What’s your favorite way to use oil pastels?
What question do you have about working with oil pastels?
Magazine articles and podcasts are opinions of professional education contributors and do not necessarily represent the position of the Art of Education University (AOEU) or its academic offerings. Contributors use terms in the way they are most often talked about in the scope of their educational experiences.


