Nature is endlessly inspirational. Historically, artists have made many artworks based on an investigation and observation of nature. Interestingly, it’s not just artists who are captivated by it. There is a reason why landscapes and botanical illustrations are so popular—just look at Bob Ross! Many of us have come across site-specific work, like Andy Goldsworthy and Nils-Udo. But have you tried going one step further by involving nature directly in your artmaking? Using materials you or your students have found in nature can teach them about the local fauna and the connection between science and art. It can also increase their awareness of being a good steward to the environment, which taps into the SEL competency of Responsible Decision-Making.
Before we look at five artmaking ideas, let’s discuss some special considerations when working with nature.
Even if you are doing this in the middle of the school year and your classroom routines are strong, reviewing expectations around art materials doesn’t hurt. With a lesson focused on nature, it is a wonderful opportunity to teach students the respectful harvesting of supplies.
Here are a few reminders that have been helpful to reiterate for my students:
- Ask before taking.
Make sure students are allowed to collect materials from whatever space you are using. This probably isn’t so much of a concern if you are going on a walk around campus, but it’s a good idea to double-check if you are going on a field trip. - Take items that have already fallen to the ground.
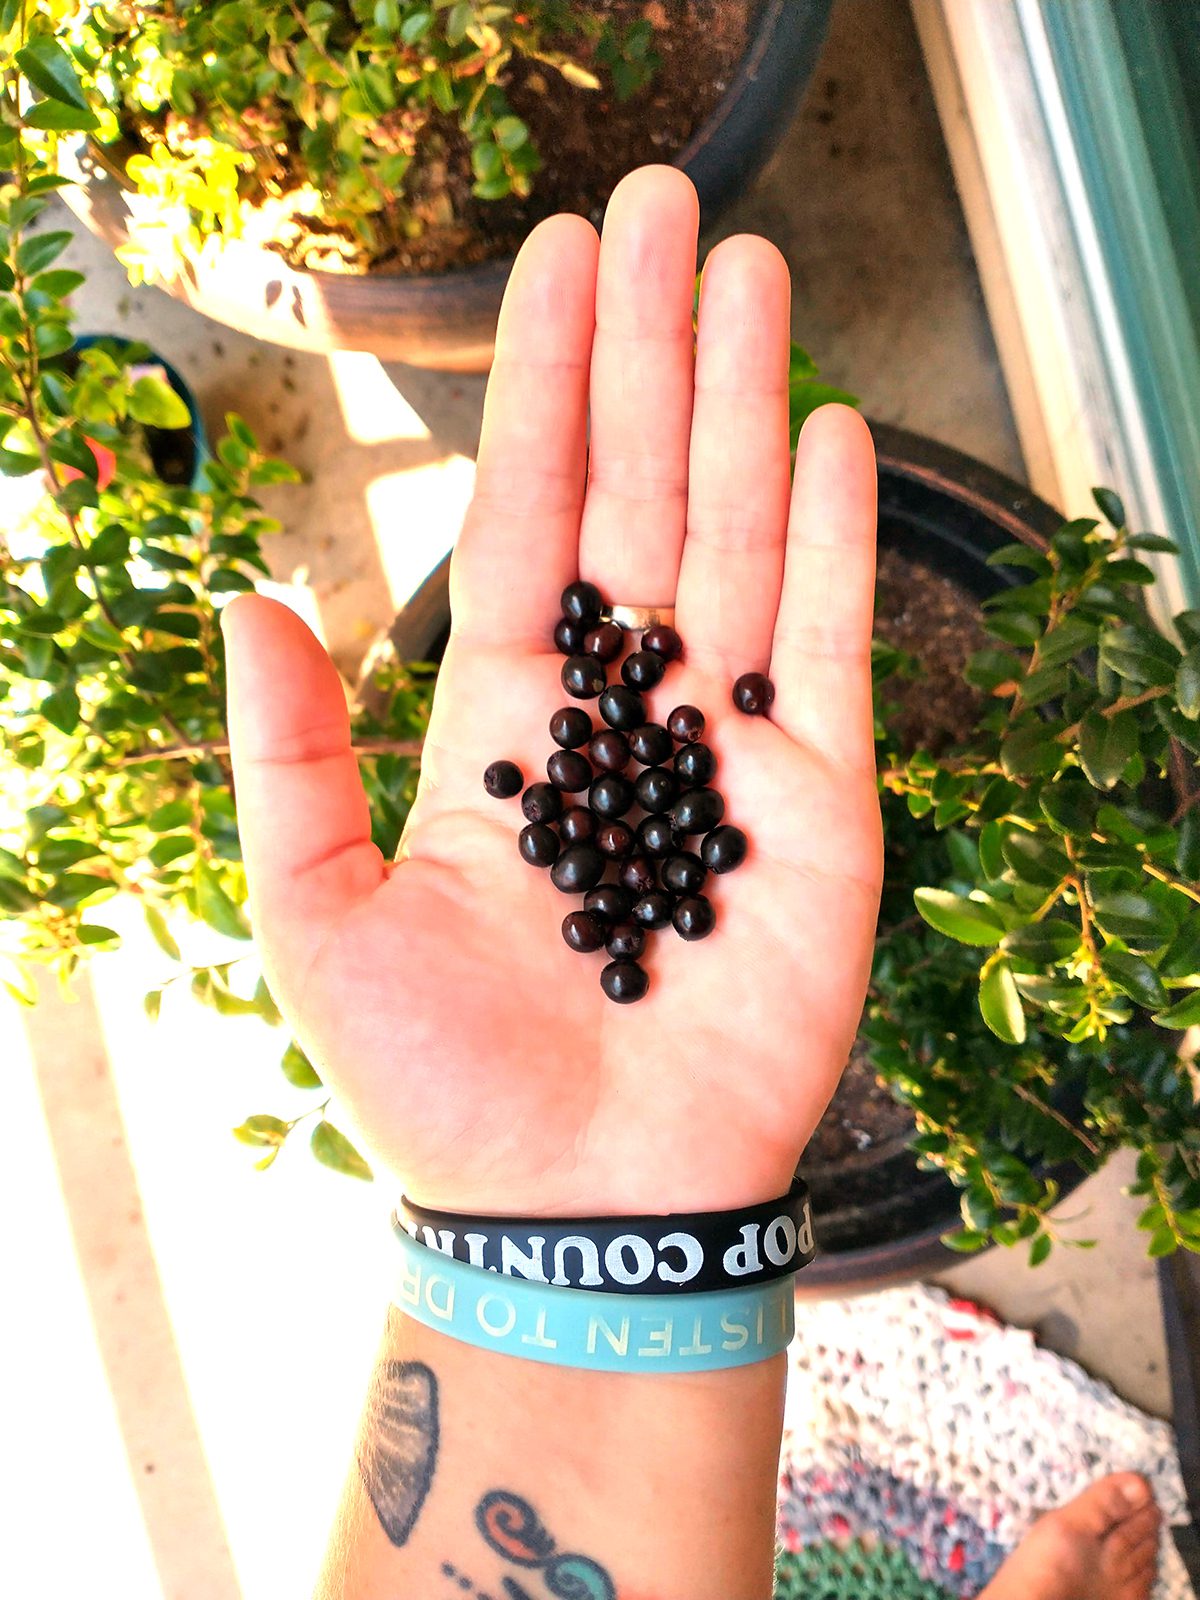
Fallen leaves, petals, and sticks are all fantastic materials. Make sure students understand that, no matter how tempting, they are not to “pick” anything up that is alive. It’s not worth the risk of harming the plant. This also keeps students from accidentally touching something like poison oak or toxic mushrooms! - Use supplies that are environmentally friendly.
This is especially important when taking rubbings or impressions while exploring. If students are using ink to pull prints, make sure the ink is nontoxic and washable. If they are taking rubbings, make sure to practice only shading on the paper, not the ground itself. - Respect living creatures.
As fun as it might be to involve snails or salamanders directly in the artmaking—please don’t! Remind students of the importance of respecting wildlife. They are probably happier observing the artmaking than being a part of it. - Learn about what you are gathering.
Take a moment to learn about the plants that students are collecting. Are they native or non-native species? Do they have any cultural significance to the indigenous communities in the area? What are some similar plants? This step encourages students to connect what they are learning in the art room to the outside world.
With all of these reminders, it may leave you and your students curious as to what is left to actually use! Don’t worry; there are plenty of items in nature that can be turned into fabulous artwork. Below are some suggestions of items to look for. However, you may have to adapt your list for your climate and surroundings.
Here are some materials to be on the lookout for:
- Fallen leaves and petals
- Sticks and branches
- Feathers
- Pebbles and rocks
- Acorns and other seeds
- Bark
Now that you have reviewed and gathered materials, here are five fun artmaking ideas:
1. Cyanotype Compositions
Create a cyanotype print to demonstrate strength in the principles of design. Challenge your artists to compose an interesting composition with their gathered materials. As cyanotypes limit your color palette to only shades of blue, students must rely on their compositional skills to create something eye-catching. Make a mental note that preparing for this lesson can be time-consuming. If you are too busy to prepare your own cyanotype paper and your budget allows, you can purchase preprepared cyanotype paper. If your students have access to a darkroom, teach developing techniques by making a nature photogram instead!
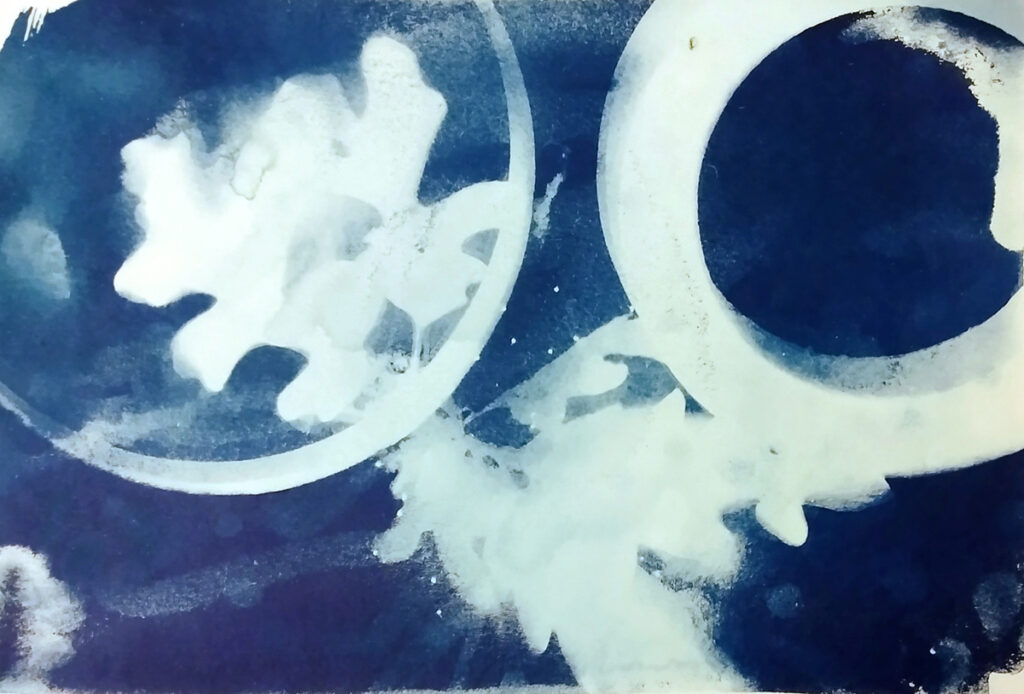
For more information on cyanotypes and other photography processes that do not involve cameras or darkrooms, click on this article.
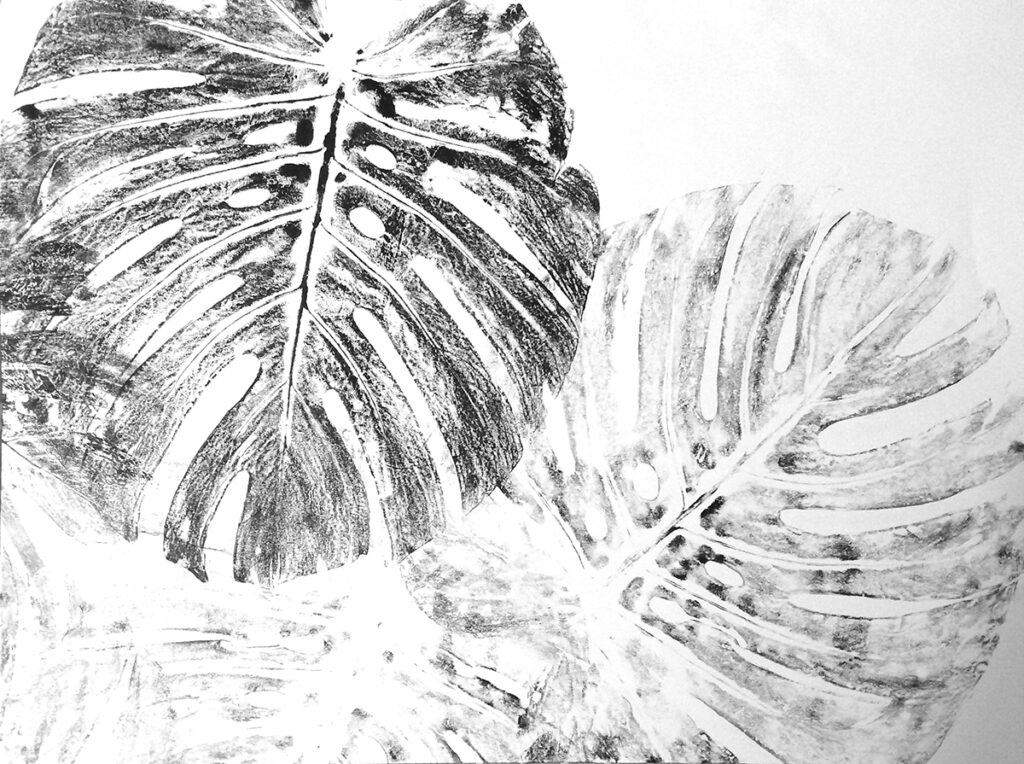
2. Monoprint Studies
Try a monoprint with found materials. This can be done as practice for a block printing project or as a project in itself. Challenge students to create a series of monoprints that use the found materials. Students can experiment with endless combinations of layering flat, natural items and paint on their printing plates. This project allows students to practice responsible printmaking practices, like charging their brayer and mixing colors, while also flexing their problem-solving abilities.
3. Make-Your-Own Collage Materials
There are many options for students to make their own collage materials. A simple start would be for students to use their found nature items directly in a collage, such as tearing up a giant leaf and gluing it down to create a new shape in the final artwork.
Here are some additional suggestions:
- Texture Rubbings
Students bring their sketchbooks and a variety of crayons on a nature walk. Take wax rubbings of textures by placing the item underneath a sheet of paper and “coloring” with a crayon on top. - Scraps
Use your test prints from the cyanotype and/or monoprint lessons above. These can be cut or torn into smaller pieces. - Handmade Paper
Make handmade paper and add found foliage into the paper pulp.
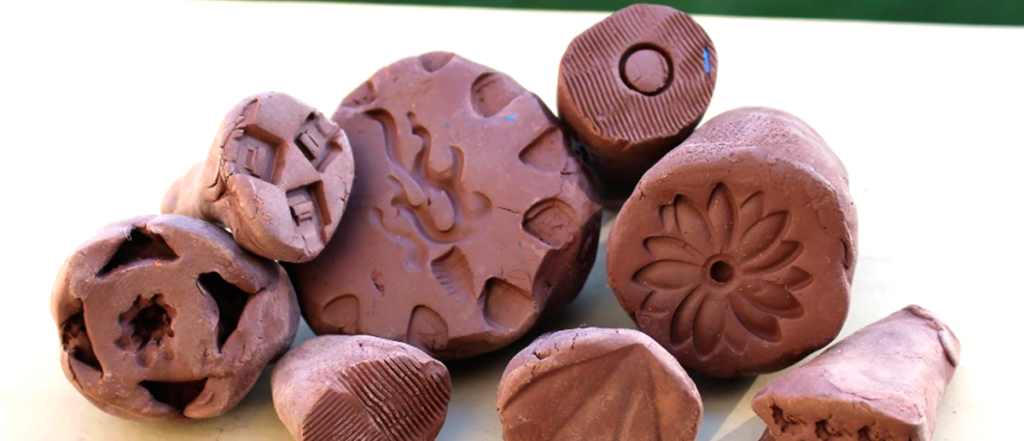
4. Ceramic Stamps
Teach students how to make texture stamps out of clay. Give each student three to five chunks of clay about the size of a golf ball. Go on a nature walk and have students collect textures by creating impressions with the clay. Once these stamps are bisque-fired, challenge students to use them in their next project.
5. Homemade Paint
Painting is already a magical experience for many students. Make it even more memorable by having your students mix their own pigments and paints!
Here are three ideas to introduce DIY paint recipes into your art room:
- Satisfying and Simple
Give flower (and leaf) pounding a try. Have students gather highly pigmented fallen leaves and flower petals and arrange them in an interesting composition on watercolor paper. Once covered with a paper towel or wax paper, students can begin crushing their materials. This type of monoprint can be used as a form of “painted paper” for collaging or as a composition on its own. - Time Intensive
Making your own ink takes a little more time, but it results in a very rewarding process. For this to be successful, you will need to have a way to boil water (an electric kettle works great) and small glass jars with lids (such as recycled baby food jars.) Decide how many colors students will be making. Once the ink is completed, students create a piece using only natural pigments. For a collaborative twist, encourage students to share their pigments with one another. If you are looking for a “tried and true” recipe, check out Melissa Mary Jenkins’ recipe for avocado ink. - Team Up With Science
If you live in a place where oak trees are plentiful, you can use oak galls to make brilliant black ink. You will need very specific materials to do this, so you will want to work with a science teacher. This is also a labor-intensive process, so it is better suited for older students.
Are you looking for even more resources and lesson plans? Check out the Creating With Nature FLEX Collection!

Making art using supplies directly from nature builds a connection between your students and the environment around them. This connection grows student knowledge of the world and fosters a sense of responsibility and ownership. By bringing parts of nature physically into artmaking, you encourage students to look past their immediate setting to actively investigate the outside world. As we move into warmer temps, we hope you give some of these innovative nature ideas a try!
Check out these resources for more inspiration on nature and artmaking:
- Break Free From Traditional Nature-Inspired Lessons
- 8 Nature Inspired Art Activities
- How to Infuse Nature Into Your Studio Practices—Insights From Artist Emma Freeman
- Creative Concepts to Reconnect With Nature
- 9 Amazing Artists to Inspire Nature-Related Art Projects
- Nature With Mixed Media Collection in FLEX Curriculum
- Under the Sea Collection in FLEX Curriculum
How do you use nature in a unique way in your art room?
What idea will you try with your students this spring?
Magazine articles and podcasts are opinions of professional education contributors and do not necessarily represent the position of the Art of Education University (AOEU) or its academic offerings. Contributors use terms in the way they are most often talked about in the scope of their educational experiences.