Mark-making lies at the heart of every visual art form. It’s the universal language artists use to communicate energy, mood, narrative, and structure. We often think of mark-making in the context of drawing or painting, but have you considered the possibilities with relief printing? This summer, open the world of creative exploration and go beyond image replication. Discover fresh ways to suggest texture, create depth, and convey essence through printmaking play. Then, transform your classroom into a mark-making playground to bring the magical adventure to your students!
Get ready for a playful adventure! Experiment with carving tools, textures, and values to create dynamic, expressive prints through mark-making magic.

Why focus on mark-making in relief printmaking?
Relief printmaking introduces a tactile, hands-on process. It prompts thinking and seeing beyond outlines and literal representation to shapes, forms, colors, and textures. As such, it’s a natural segue to mark-making. Mark-making in drawing can seem very abstract, and it’s often easier to understand it when you’re physically carving, incising, or gouging marks that you can touch with your fingers.
Further, relief prints usually have a very distinct style featuring bold lines and shapes. Marks tend to stand out more clearly than in some paintings or drawings, which can be more subtle with blending and shading. Especially for beginner artists, this makes it easier to identify specific marks and tie them to composition and meaning.
The Power of Different Marks: Create Texture and Depth
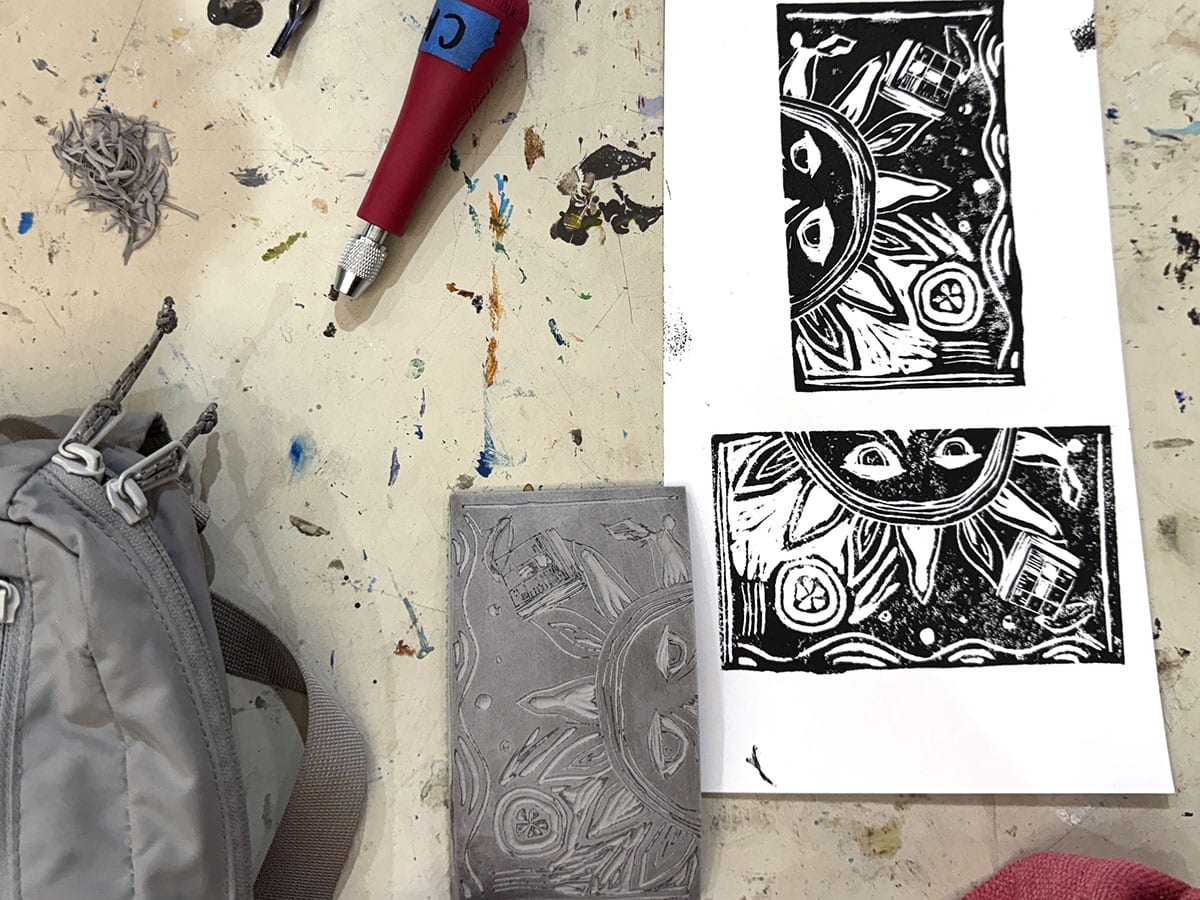
To get the distinct bold lines and shapes of a final relief print, there needs to be contrast and the interaction of light and shadow on the block. Create interesting marks with the correct tools and techniques to build this texture and depth. Use scrap blocks to play with the tools and experiment with various angles, pressure, and tips. The more severe the angle and the harder the pressure, the more dramatic the lines and values will be. Combine these factors with drawing techniques like hatching, crosshatching, and stippling to make even more compelling images!
Let’s look at three different carving tips and the distinct effects they create:
- V-Gouge: Produces thin, sharp lines perfect for delicate textures like grass or fine hair.
- U-Gouge: Creates thicker, rounded marks ideal for bold outlines or flowing textures like water.
- Flat Blade: Useful for clearing larger areas of negative space or making wide, sweeping marks for skies or backgrounds.

The Power in Planning: Pack in the Magic in One Day!
Because relief prints can look so complex, many mistakenly believe printmaking is an ordeal. Streamline the process by taking the time to plan and prepare, and you may surprise yourself with how much printmaking magic you can pack into one session! Set aside one day this summer to simply experiment and discover. As you’re playing, make note of mark-making you think your students will love and consider how you can bring the same joy to your art room.
Prep for the adventure ahead.
Brainstorm a list of things to collect ahead of time. There’s nothing worse than breaking your creative flow because you need to run to the store to grab something! Remember, we’re exploring and experimenting, so get a variety of items to play with and print on. Going small is another great way to keep the experience light and try many new things.
Gather the following materials:
- Relief Surface: Soft foam sheets, linoleum, or recycled cardboard.
- Carving Tools: V-gouge, U-gouge, flat blades, or pencils.
- Inks: Water-soluble block printing ink in black.
- Paper: Lightweight print paper or recycled materials.
- Optional Textures: Found objects like leaves, fabric, or mesh.
Make magical stations.
Being creative can also be messy, so embrace the process! Spread your supplies out on a large table or even the floor. Take advantage of the beautiful summer weather by setting up a folding table or laying down a tarp outdoors! Group your supplies to create your own stations. This will help you get a feel for how classroom stations may work for you later.
Here are three mark-making exercises to try that work well in stations:
- Texture Tests
Provide reference images of natural textures like tree bark, grass, or water ripples. Students will practice replicating each. You can also have actual items from nature for students to mimic their texture or use as a stamping tool. - Value Ventures
Carve small test blocks to create different values. Strive to build a full value scale out of the test blocks and prints. Make it a challenge and see how long you can make your value scale! - Layered Learnings
Compose patterns and play with layering blocks and prints to create complex surface designs. Add another layer of meaning and have students capture ideas or feelings like wind or calm.

The Power of Wrapping Up Well: Reflection is Key
While experimenting and playing are fun and full of learning, you can make the connections last with intentional reflection. While you’re taking a few minutes to clean up your space, use that time to clear your thoughts, too. Then, come back and spread the final prints out. Look at each as evidence of discovery and a memento of your adventure. Jot down thoughts on the back of each print or record in a visual journal.
For each print, consider the following two questions:
- What printmaking tool, technique, or process was the most surprising?
- Which part are you most excited to replicate in a future artwork?

Relief printmaking is the perfect playground for mark-making magic, especially when you take the time to plan, adventure, and reflect. Who said stations and artistic challenges are just for students? Use them to foster exploration in your own practice by replicating textures, generating values, and rearranging layers. Try different tools and techniques in various combinations to produce new marks you’re excited about. Turn a one-day adventure into a full season of artistic discovery for your students to make their mark!
What other tools or techniques make interesting marks in relief printing?
Who is your favorite printmaker and mark-maker?
To chat about mark-making with other art teachers, join us in The Art of Ed Community!
Magazine articles and podcasts are opinions of professional education contributors and do not necessarily represent the position of the Art of Education University (AOEU) or its academic offerings. Contributors use terms in the way they are most often talked about in the scope of their educational experiences.


