Have you ever wanted to start a mural project? Does the process seem too complicated and unpredictable to begin? I know I felt slightly intimidated before my first mural project. Since then, I have led 30 murals with student groups and learned some important lessons.
Here are 12 key steps that will help you lead a mural project once your group is assembled.
1. Generate a Theme
If you do not already have a theme, begin by showing images of other murals. Ask your mural group to name the images and messages in the murals they see. Practice identifying possible themes in your exemplar murals. Brainstorm and record possible theme ideas for your group’s piece. Generate a list of ideas on your board.
2. Brainstorm Content and Imagery
Write down as many ideas as you can from your group. Accumulate a list by asking what should be included in the mural. Try to get each group member to contribute something. Write down every idea even though you do not need to incorporate everything into the mural.
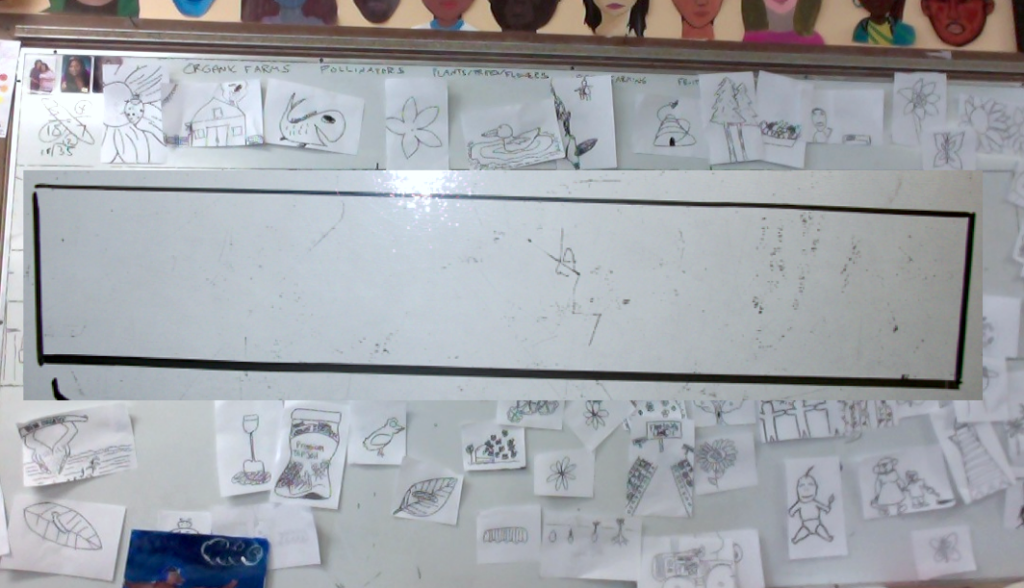
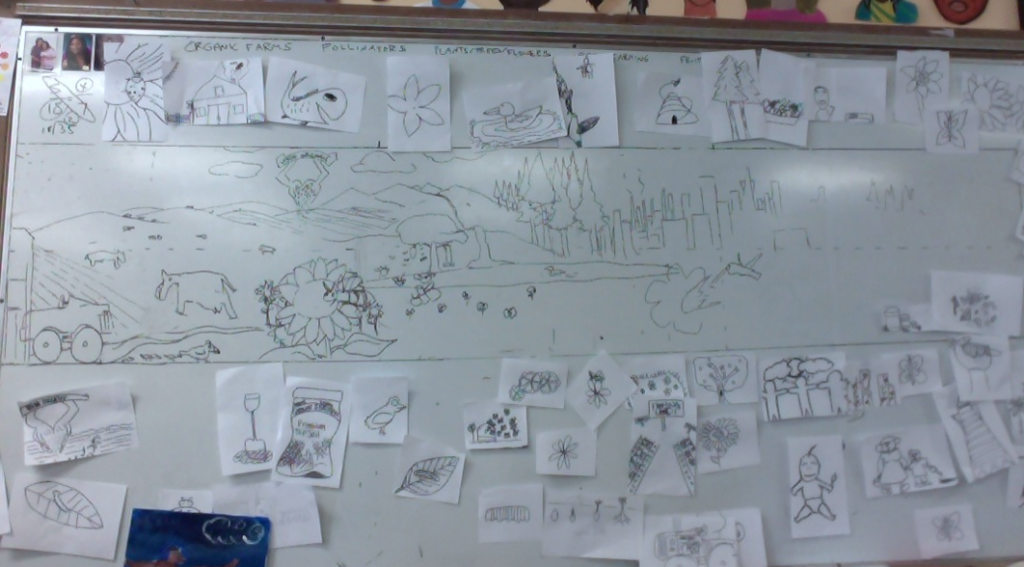
3. Create a Shape Proportional to Your Wall
Create a shape on your classroom board that is proportional to your mural wall. This will serve as the space for arranging and designing the composition together as a group.
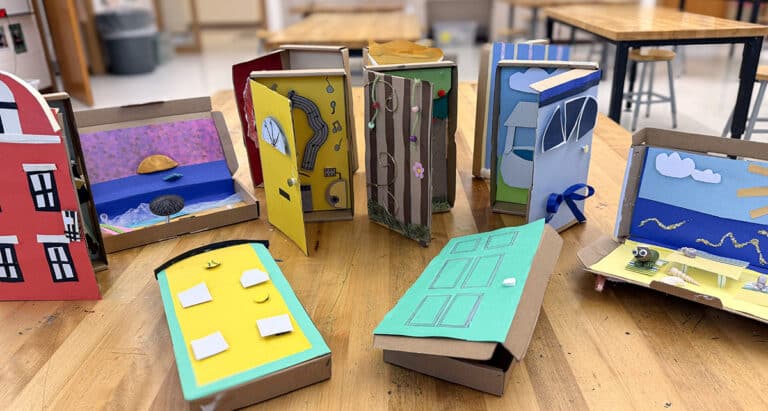
4. Create Sketches of the Imagery
Using printer paper, pencils, and markers, have your group select images from your brainstorming list. Draw visual representations of the images on the paper, one image per paper. These will serve as visual references to manipulate as you negotiate the mural composition. Once the drawings are inked in with marker, tape them up around the composition.
5. Arrange the Composition
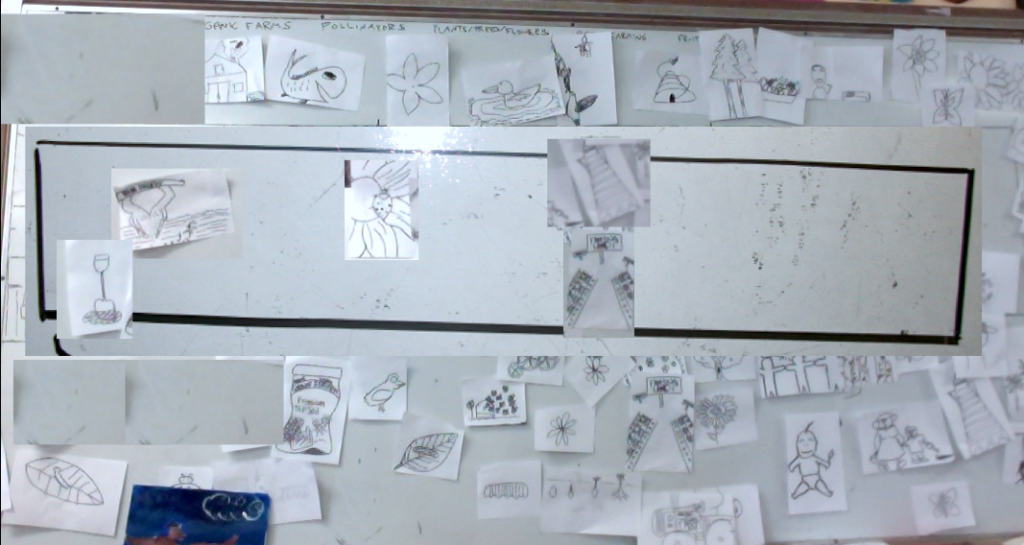
Ask your group to choose one image and discuss its placement in the composition. Would they like to see it on the left, right, center, high, or low? Leave the image taped to the board and then choose another image. Once you have a basic arrangement of the images placed in the composition, begin to advance the design.
6. Consider Foreground, Middle Ground, and Background
It is important to analyze how to create depth in a composition. I have found that illustrating the concepts of foreground, middle ground, and background can be helpful for making the design more sophisticated. Study murals that create illusions of depth and notice their changes in image scale and placement like the one below.
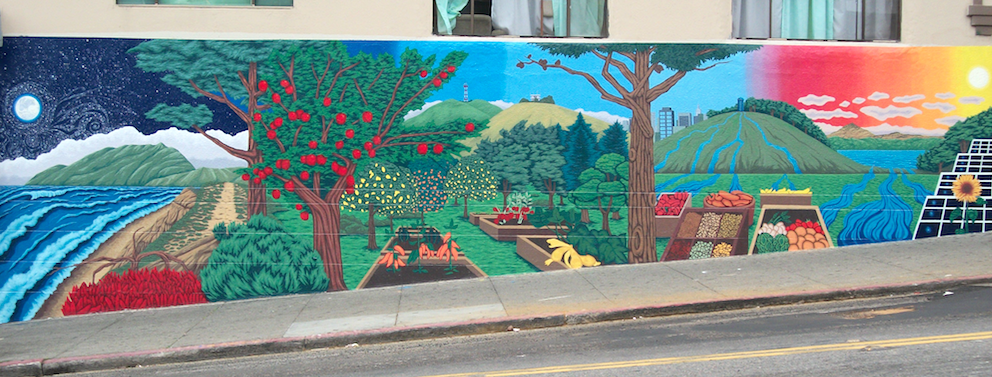
Point out how overlapping images can help contribute to creating the illusion of depth.
7. Draft the Composition
Lead the conversation while drawing a new version of the imagery. Start with one of the images taped on the board, and ask your group if it should be in the foreground, middle ground, or background. Use your hands to help your group determine the scale of the image and then draw out a quick version of this image into the composition. Make sure to utilize overlapping.
8. Finalize the Composition
Once you have a complete rough draft, have students draw out and color the newly decided composition. Once students complete this task, critique and a discuss final color schemes and imagery design.
9. Calculate Your Color Needs
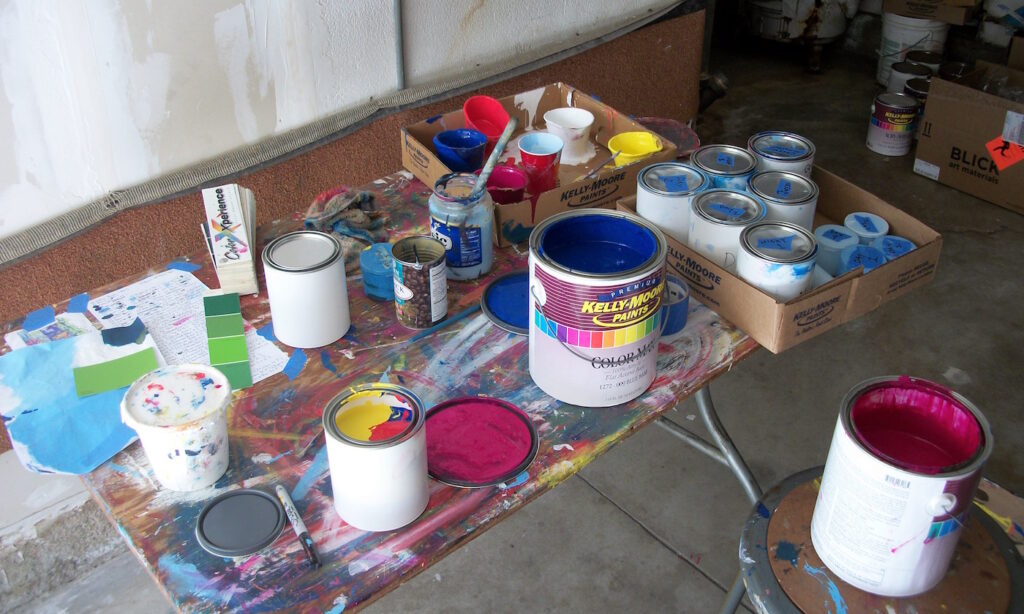
Making your colors in advance could be the single most important step in the mural process. You can save time and avoid mistakes by looking at your colored design and calculating how much paint color you will need. Convert your sketch from inches to square feet. For example, if your background will require 10 square feet of paint to cover it, double that amount (most mural paint will require at least two coats to cover well). Some colors are more translucent and will need additional coats before becoming opaque.
10. Mix and Label Your Colors
Mixing your colors in advance, labeling them in an organized manner, and storing them in containers with lids will accelerate the momentum of your mural. Major spills and miscalculations can occur if students try to guess how to make the correct colors and amounts at the mural site.
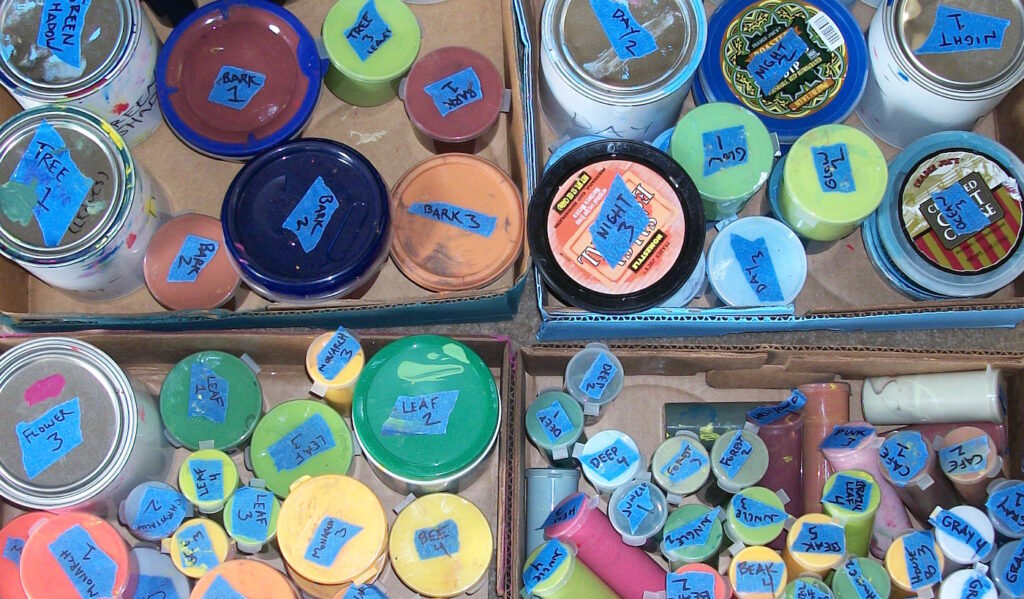
My strategy is to accumulate various containers with lids that hold 2.5 and 5 ounces of paint. If you double the ounces that a container holds, that is the number of square feet in paint (1 ounce=2 square feet). Larger containers, such as salsa or butter containers, can hold between 20 and 80 square feet of paint. Quarter gallon containers hold 100 square feet of paint. When making shifts in value or color, I label according to a number system. For example, if I am shifting the value in my sky colors, I label each color Sky 1, Sky 2, Sky 3, and so on.
11. Transfer the Sketch to the Wall
Some people make elaborate grid systems to transfer sketches to walls. I tend to keep my grids in sections of eight. I divide the height in half and divide the length into fourths. It is helpful to make copies of the sketch to tape up all along the mural wall so students have lots of visual access to the design and grid they are trying to transfer.
12. Streamline the Order of Operations
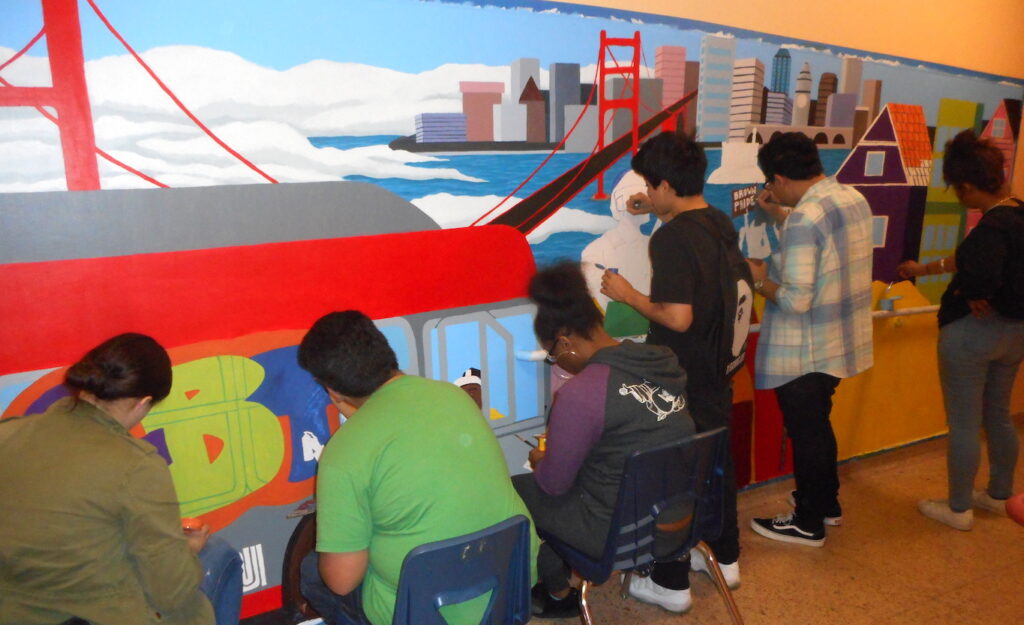
When ready to paint, I stress two fundamental practices that save time and effort. First, paint from back to front. Paint the farthest background first and work your way to the foreground last. Second, when students are painting an image, begin by painting the darkest values of the image, and work to the lightest values last. These are general procedures and there are exceptions, but going back to front and dark to light can maximize efficiency and momentum.
Before beginning a mural project of any scale, remember doubt and anxiety can be a natural part of the process. Murals are usually permanent and public, adding more pressure to the project. If you follow these key steps and have complete confidence in yourself and your students, you will successfully execute a stunning mural painting!
What are the key concerns or questions you have about your specific mural project?
What kinds of advice would like to receive or offer others?
Magazine articles and podcasts are opinions of professional education contributors and do not necessarily represent the position of the Art of Education University (AOEU) or its academic offerings. Contributors use terms in the way they are most often talked about in the scope of their educational experiences.