GIFs are the new meme. They’ve become such a prominent part of our pop culture that the latest update of Apple’s iOS included a GIF keyboard! I’ll be the first to admit that I’ve even had an entire text conversation only using GIFs. Teachers love them, students love them, so why not make them? Students are very interested in the world of animation and creating GIFs is a simple way to explore it.

Check out this step-by-step guide to begin creating GIF animations using Photoshop.
1. History of the GIF
Before tackling GIF animation it’s best to give your students a brief history lesson. Photographer Eadweard Muybridge, known as the “Grandfather of the Motion Picture,” first captured motion through photography in the 1870s. However, the first GIF (Graphic Interchange Format) wouldn’t be created until 1987. The GIF is a compressed file that was ideal for sharing across slow modem connections in the 1990s. In 1997 the “Dancing Baby” would go viral and the rest is history. For a more detailed look at the history of the GIF, share this presentation with your students.
2. Upload or Create Images in Photoshop
Before jumping into animation, your students will need to have a solid understanding of Photoshop. These beginning projects would be a great way to get students started.
To start, students can simply upload images or draw directly in Photoshop. From here, they will use their editing skills and tools to manipulate their image however they wish. It will be important to work in layers as they create. Encourage students to spend quality time on this step, because this is the step that will take the most time.
To follow along, download this PSD file. This is also a great way for students to learn the process.
3. Open the Animation Window
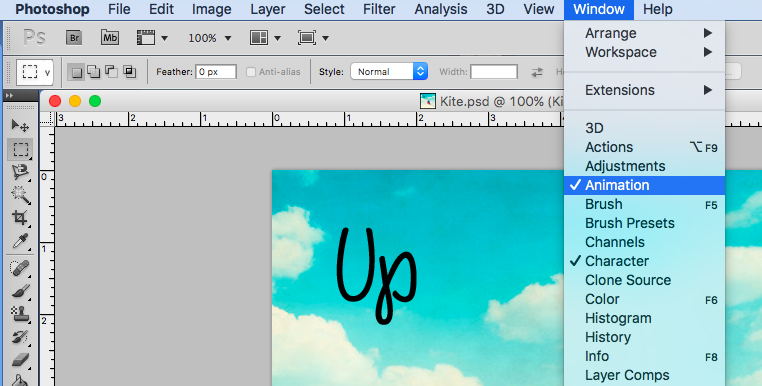
Once you have completed editing the static image or drawing, the animation process begins. Depending on the version of Photoshop you are working in, this will be a little different. In the toolbar, select Window>Animation or Window>Timeline. From here, make sure your window is in frame animation mode. This should look similar to the image below.
4. Create Animation with Layer Visibility
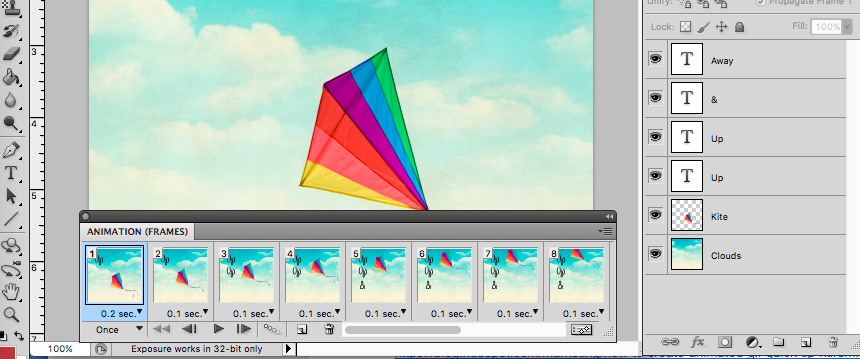
In this step, students will need to understand layer visibility. Layer visibility is simply clicking the eye icon to the left of the layer to hide or show it. This process is best explained by comparing it to stop motion. Virtually, we are putting a series of still images together to create a moving image. Using layer visibility will allow for gradual changes to be made in the animation.
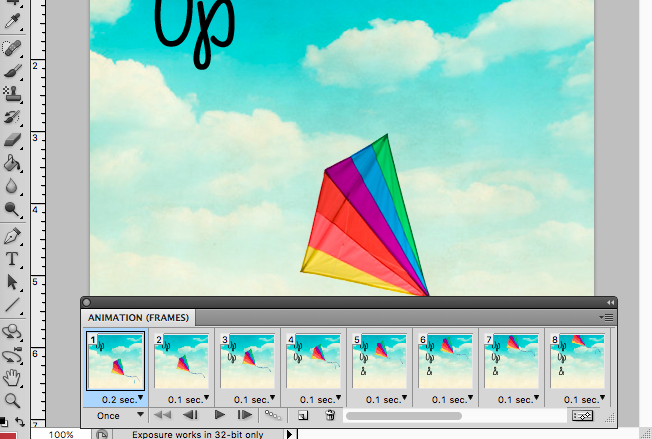
Each time a new movement is desired the frame will need to be duplicated. In the kite example, the kite can be moved around in each duplicated frame to give the illusion it is flying.
5. Adjust Timing
Before finishing the animation, adjust the time under each frame. Depending on the desired speed of the animation, time can be adjusted easily.
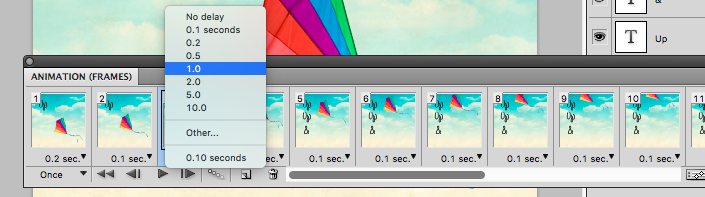
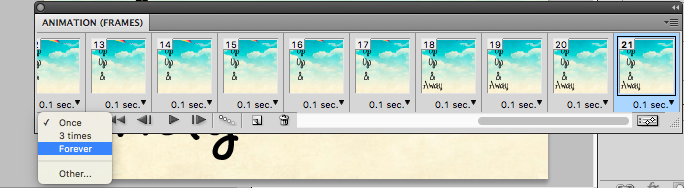
If you want your GIF to play through continuously without stopping, make sure to select the forever option.
6. Preview GIF
To test your GIF, simply click the play button under the frames. You can also use the rewind and fast forward controls manually view the frames.
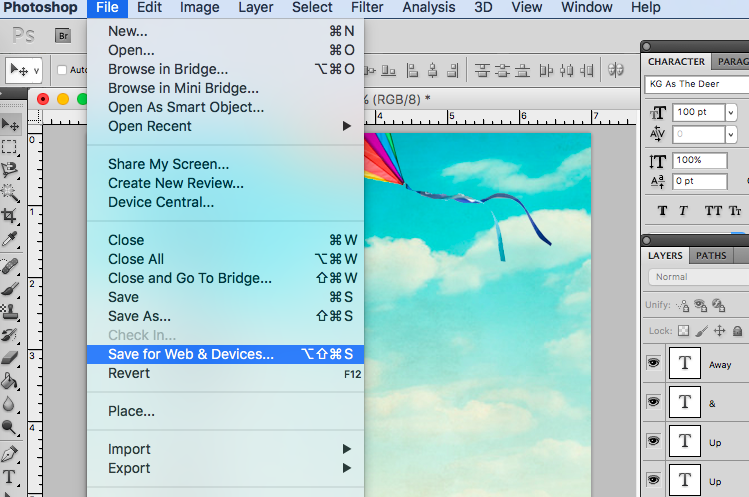
7. Saving the GIF
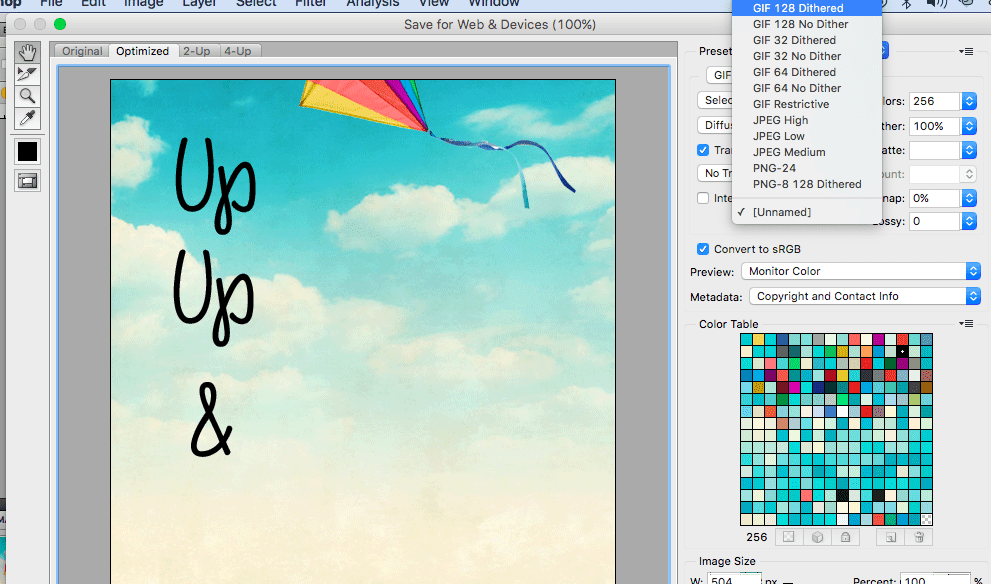
Saving a GIF in Photoshop is different than saving other files. Make sure you are saving the file “For Web and Devices.” In newer versions of Photoshop, you will have to Export > Save for Web.
A new window will appear to finalize saving options. In the presets, I’d recommend saving it as “GIF 128 Dithered.” This will optimize more complicated and colorful graphics. After you have saved the GIF you can view it by dragging the file into an internet browser. Students can also send the image to themselves to view it on their phone!

Creating GIFs Without Photoshop
- Here are directions for creating GIFs using GIMP.
- Free editing sites like Pixlr or GIMP can be used to manipulate images. To convert images into a GIF, visit this website.
Creating GIFs will be an engaging process for your students. But be warned–once you show them how to do it, they will want to animate everything!
Do you create animation projects in your art room?
How do you incorporate technology to engage students?
Magazine articles and podcasts are opinions of professional education contributors and do not necessarily represent the position of the Art of Education University (AOEU) or its academic offerings. Contributors use terms in the way they are most often talked about in the scope of their educational experiences.


