Have you ever tried to fire glass in your school kiln? I once actually unloaded 550 unfused glass pieces because I chickened out. However, after I researched, took a class, and finally took the plunge, I realized I had nothing to be afraid of! If you’re in the same boat, repeat after me, “Worrying is like a rocking chair. It gives you something to do but gets you nowhere.”
I’m here to tell you: Glass firing in your ceramic kiln is easy.
This is especially true when you realize most of the crazy, in-depth glass fusing guides are designed for serious glass artists. If you’re an art teacher and want to fuse hundreds of student pieces at a time, you don’t need to get complicated. You can get fancy once you are comfortable.
So, let’s get comfortable.
Before you start firing your glass, check out my article, “Simple Steps and Supplies to Get Started With Glass Fusing,” to help you decide what supplies you need to buy.
How to Fire Glass in Your Kiln
First, figure out what type of fuse you want.
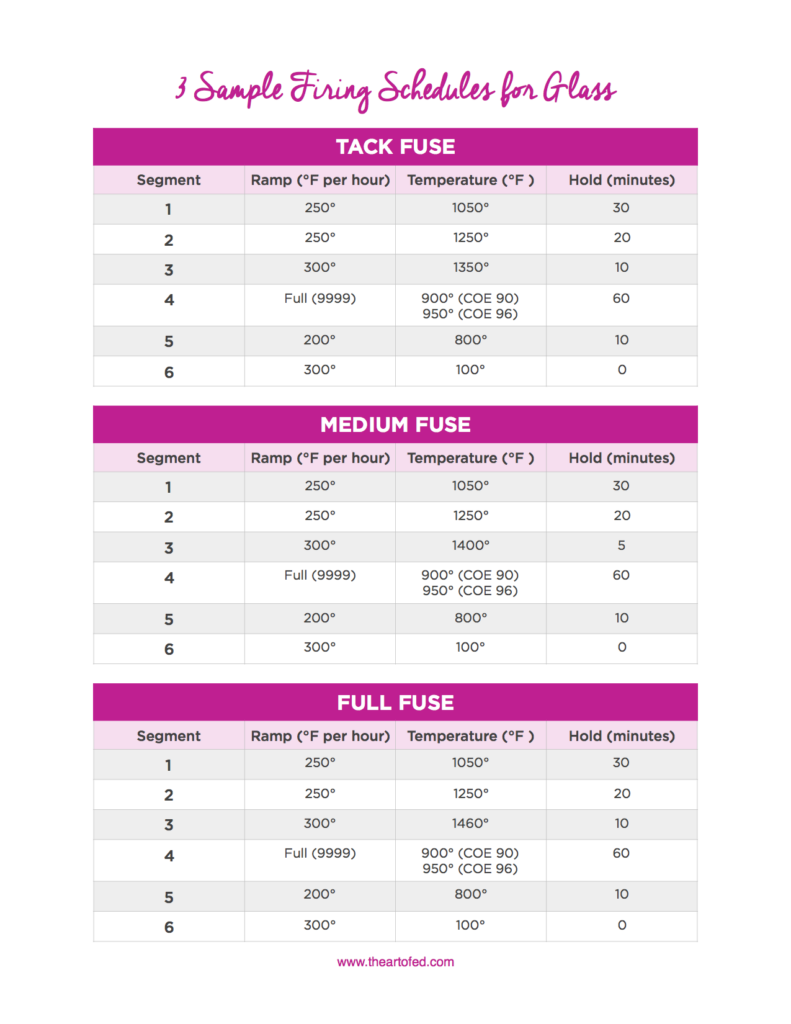
1. Tack Fuse: 1350-1370° F
At the lowest temperature, tack-fused glass will just “stick” together and maintain many of its characteristics (including relief and edges). As the temperature goes up, the glass loses its relief and hard edges. This type of fuse is good for detailed projects.
2. Medium (Contour or Soft) Fuse: 1400-1450° F
A medium fuse is a high-temperature tack fuse. It’s perfect for student work because all the edges will come out rounded, and therefore, be safe for students to touch. It’s also a good bet if you want to keep some relief in the work. This is the type of fuse I use the most in my classroom. 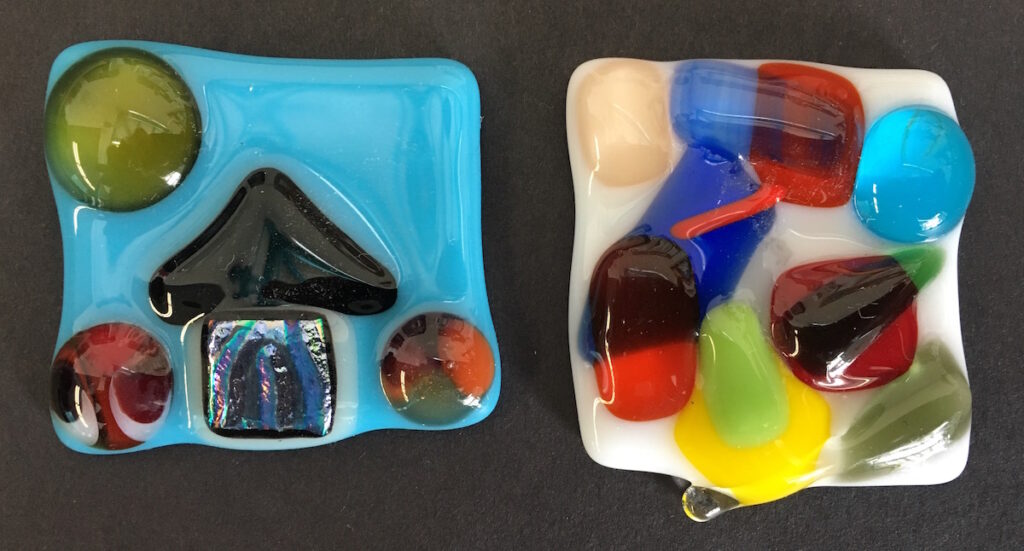
3. Full Fuse: 1460-1470° F
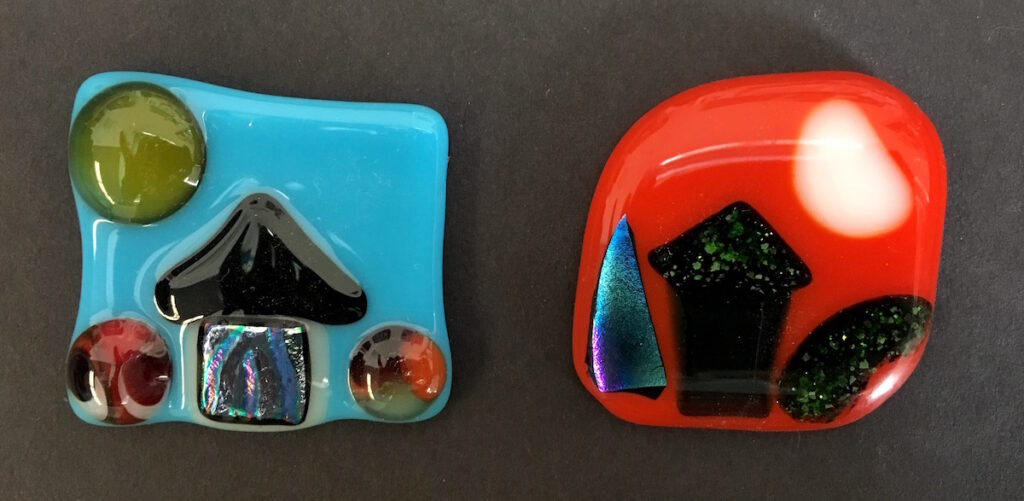
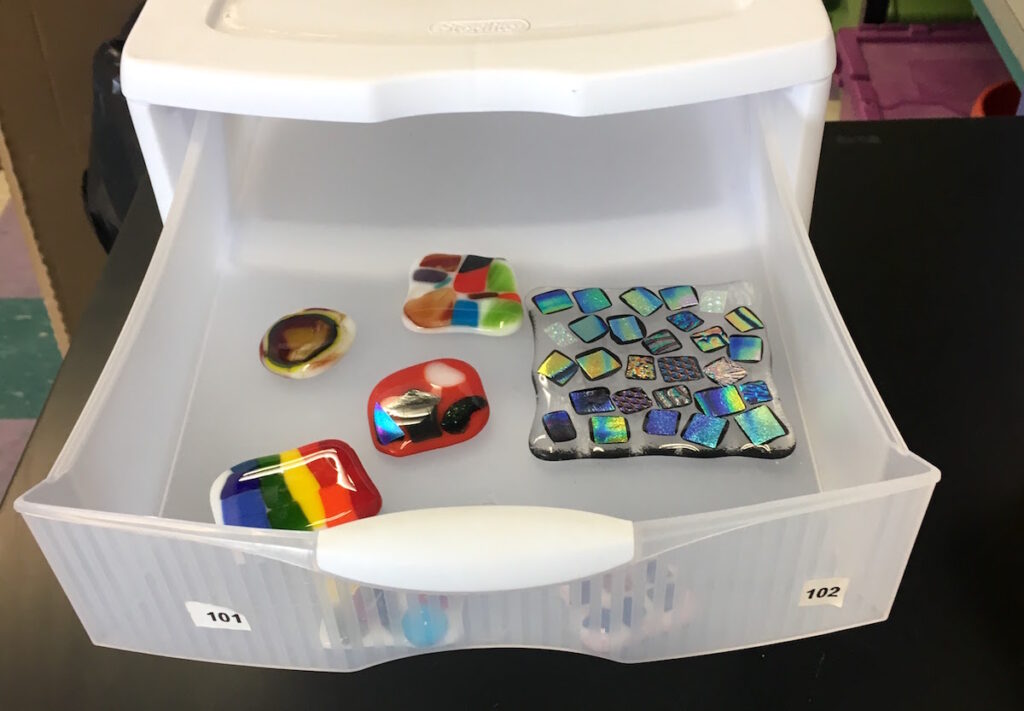
Full fused glass happens when the glass is heated long enough or gets hot enough to completely join the glass together. Full fused glass is completely smooth and glossy with no texture. The edges are soft, and any corners are rounded. You can see a comparison between a medium fuse (on the left) and a full fuse (on the right) in the image below.
Then, set up a firing schedule.
If you fire clay, you most likely use cone firings. Cones are firing schedules with predictable outcomes. If you want to play around with glass fusing, you cross into the territory of programming your own firing schedule. But really, it’s easy. Firing schedules you program yourself are called Ramp-Hold firings. You are telling the kiln to ramp up to a temperature at a certain rate and hold there for a set amount of time. Each time you tell it to do this, it’s called a segment. Most schedules have about six segments.
Here is some vocabulary that is helpful to know.
- Ramp: To raise or lower to a temperature
- Rate: The rate of degrees/hour at which the temperature rises. You can have it go slow, like 100 degrees per hour, or much, much faster. 9,999 degrees per hour is the fastest and is often called FULL.
- Hold (also called Soak): How long the temperature remains the same
- Segment: Each segment includes a ramp, rate, and hold
Your kiln’s digital controller will have a page in the manual for you to set up a firing schedule. Look there first. However, many kiln companies also have a customer service number if you’d like to talk to an expert.
Here are 3 easy firing schedules I’ve tried with success.
Download the sheet below if you’d like to keep it for reference!
Decide if you will vent.
You are probably used to venting your kiln with every firing. The noxious fumes that clay and glaze give off make it a necessity. However, with glass, it’s a different story. Glass does not release fumes when fired. Most glass artists actually do NOT vent their kilns because of the risk of thermal shock. Thermal shock happens when glass cools too quickly, which can cause it to crack or even break.
Because of my ceramics background, I still choose to vent my kiln when firing glass. The kiln paper and glue may have trace amounts of noxious byproducts, and I like to play it safe. You can read more about venting your kiln here and make the decision for yourself!
Test it out.
Before you fire student work, test out your kiln with a few pieces of your own. Be sure to place each piece a few inches away from other glass pieces (and the edge of the kiln shelf) to prevent them from flowing together or right over the edge!
Enter your schedule into your kiln and press start! The results will amaze you. Just remember, glass holds heat for a long time, so even if your kiln temp is low, hover your hand above the glass pieces to see if they’ve cooled before touching them.
Keep an eye out for the next article in the series about teaching your students how to create using glass!
If you’ve ever fused glass, how did it go?
If you’re trying it for the first time, share your results!
Magazine articles and podcasts are opinions of professional education contributors and do not necessarily represent the position of the Art of Education University (AOEU) or its academic offerings. Contributors use terms in the way they are most often talked about in the scope of their educational experiences.