Teaching for Artistic Behavior is becoming more prevalent in the world of Art Ed as more and more teachers focus on teaching for creativity. However, the logistics of transforming your room and teaching practice can seem daunting. One of the biggest barriers teachers have to making the switch is simply knowing where to start.
Setting up your centers is a great first step. Many teachers start by opening a drawing center. As their comfort level builds, and students get used to the process, more centers open. Today, I’d like to talk about the second center I set up in my TAB classroom, the Collage Center.
4 Steps to Opening a TAB Collage Center
1. Demo: Keep it Short!
In the TAB philosophy, demonstrations are kept to five minutes or less to ensure students get roughly 80 percent of their class time to work. When opening a center for the first time, you want to boil down your intro to what your students absolutely NEED to get started in a space. Then it’s time to let them explore.
After the grand opening of all your centers, your five-minute demos can deepen to include new collage materials and tools, collage artists and styles, and lessons about different collage techniques. If you need more time to teach an in-depth technique, ask students who feel inspired to stay for a longer demo.
2. Introduce the Space
I begin by introducing students to the layout of the center. I discuss the parameters, available resources, and opportunities students have. It might sound something like this:
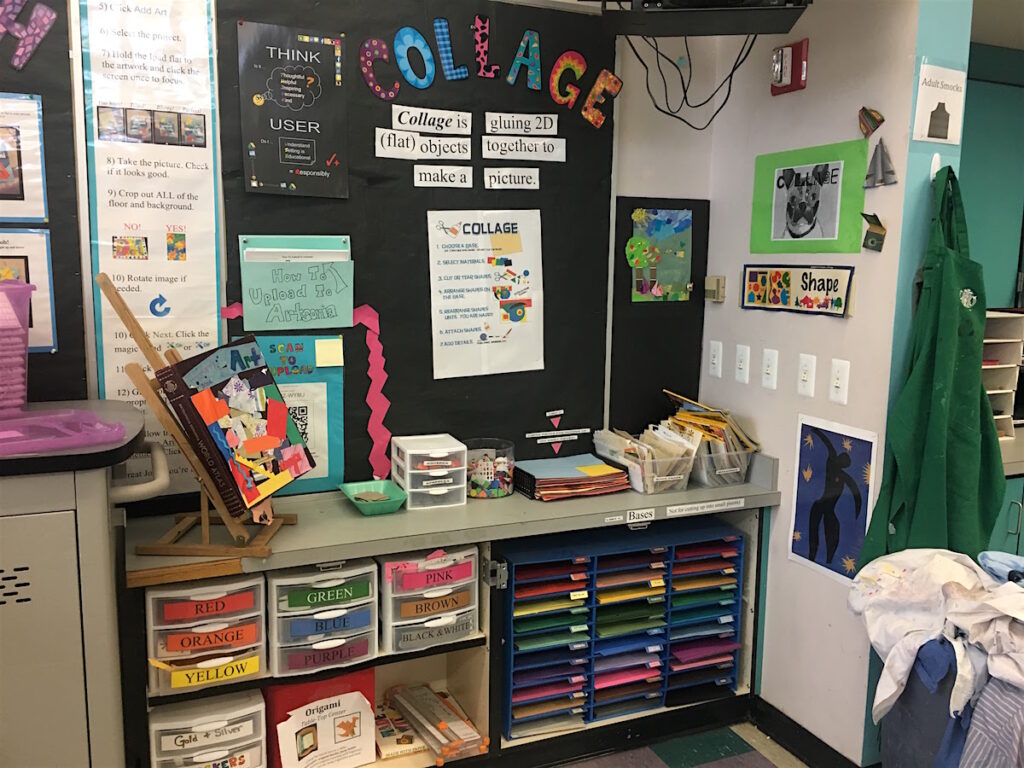
“The word ‘collage’ means ‘to glue’ in French. The poster on the wall reminds you how to make a collage. By following all of these steps, you can create a 2D picture using cut paper, glue, and other materials.”
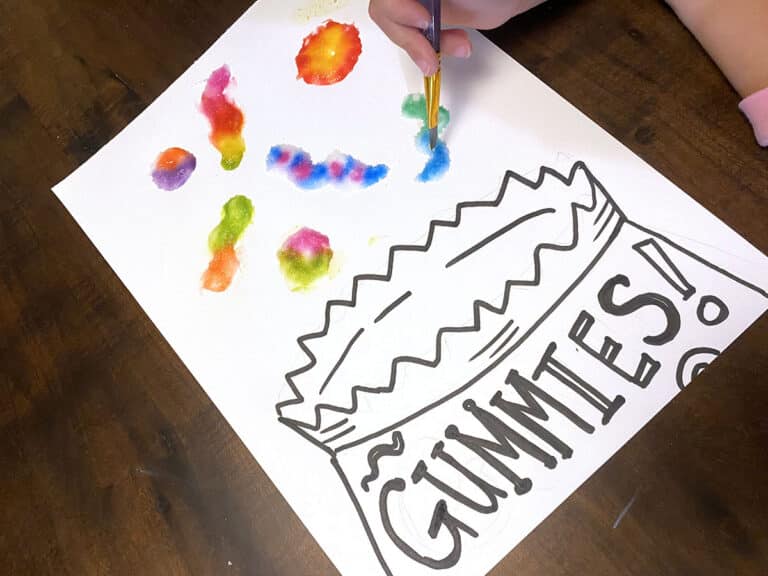
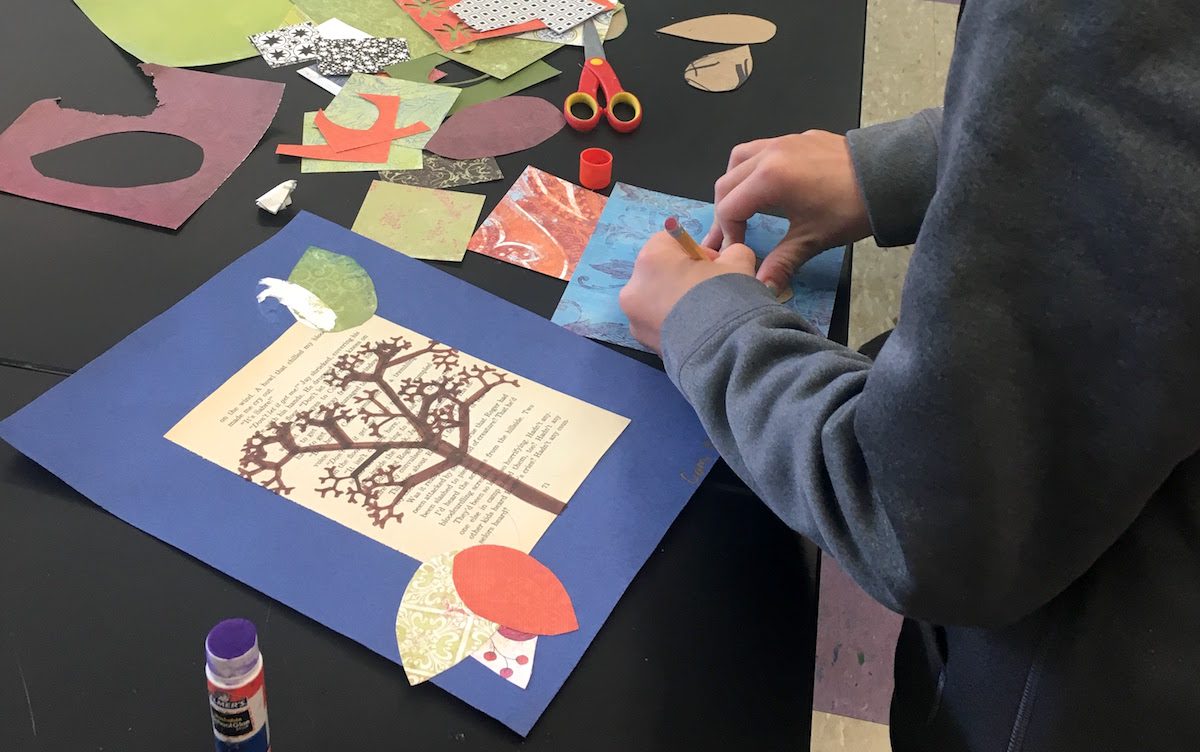
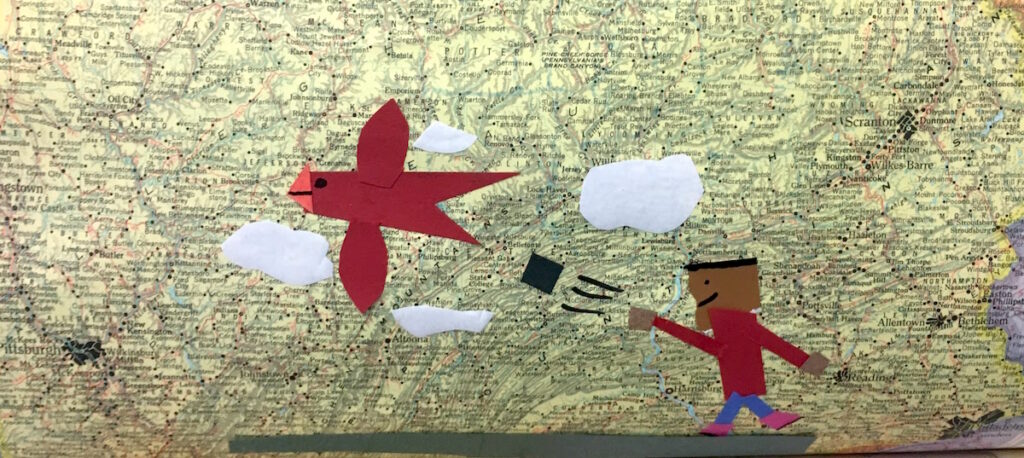
You may also provide guiding posters describing ways to manipulate the paper (cut, tear, roll, wrinkle, punch), shapes you can use (geometric or organic), and additional ways to transform a collage (painting or drawing). Often TAB teachers will post vocabulary with visual aides for techniques, such as overlapping or mosaics. Add a little art history with some famous work and some informational texts about collage artists or collage techniques.
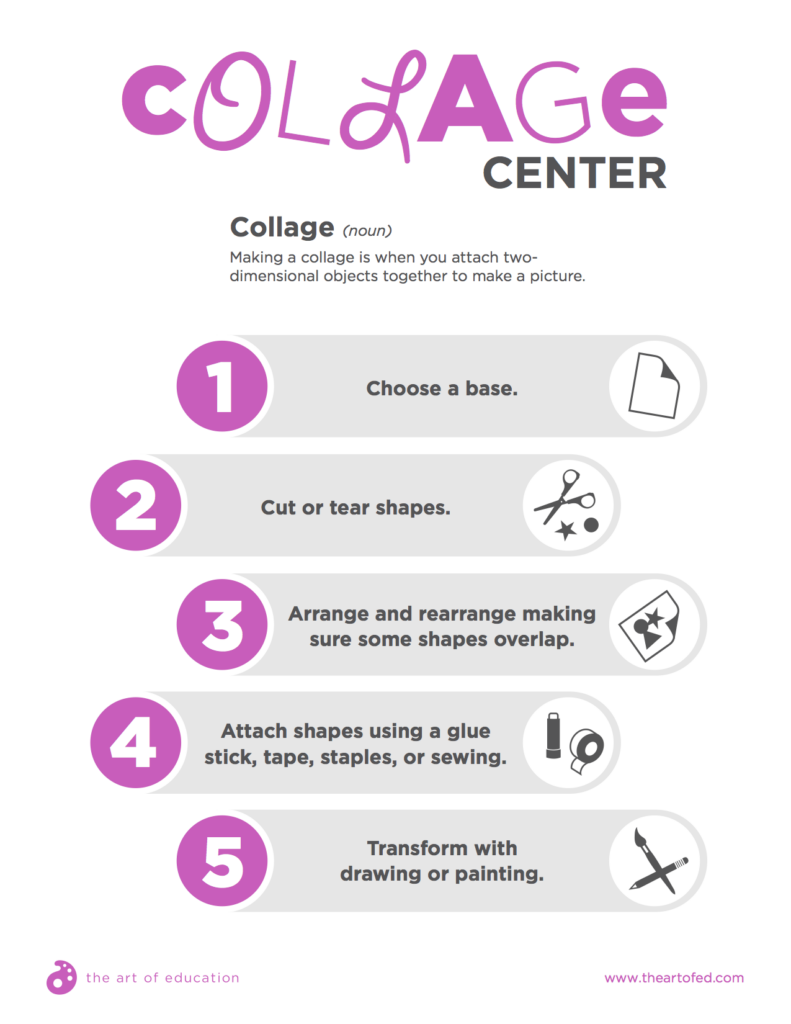
Here is one poster that is ready to go for your space. Feel free to download it below!
The sky is the limit! Think about what you want your kids to get out of their collage experience.
3. Demonstrate Tools and Materials
The collage materials should be arranged in a kid-friendly way so students can easily keep the space clean and materials organized. Here are some things I say to students as we discuss the process:
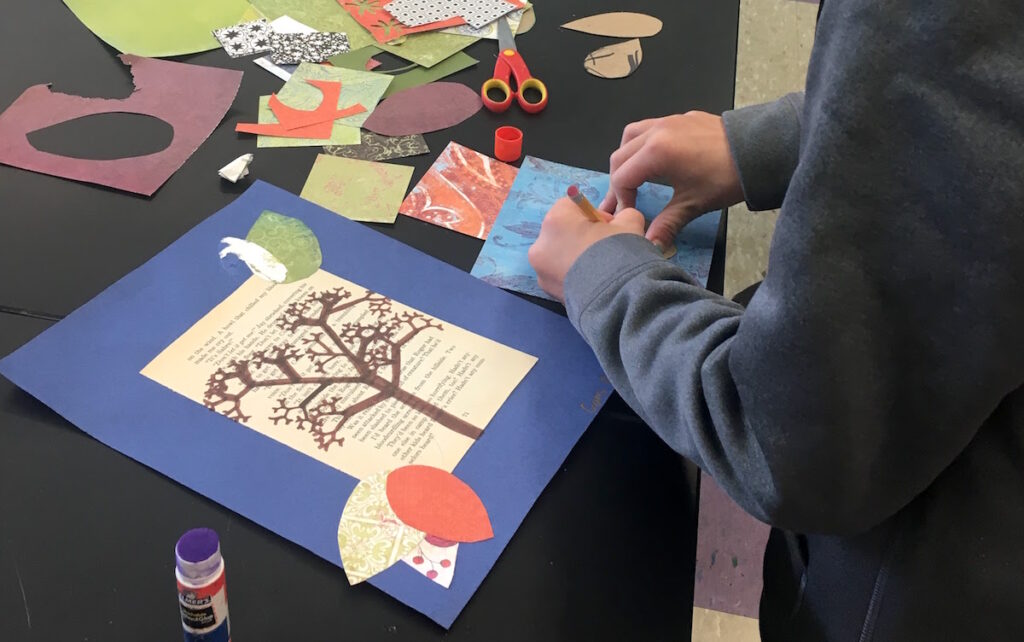
“First, you find the base of your collage. Bases are NOT for cutting up but are a stage for gluing onto. You may choose one base.”
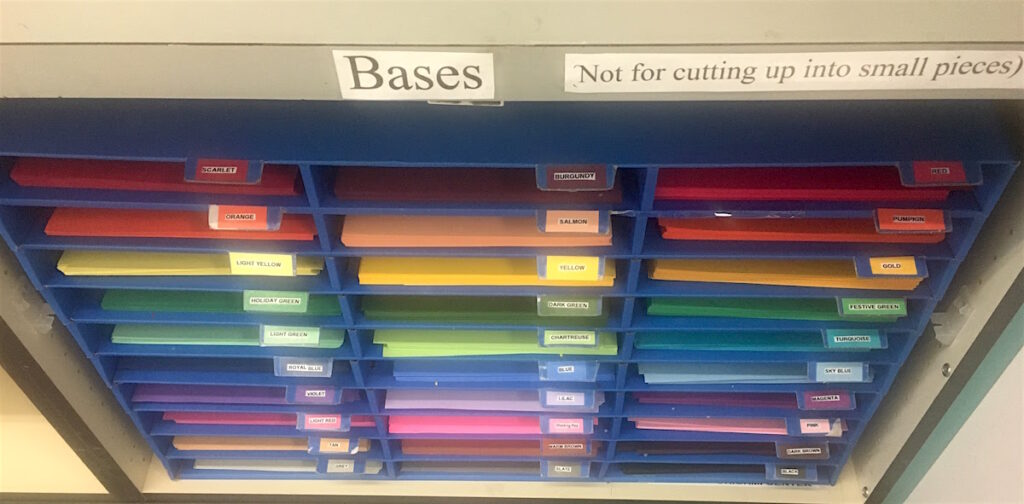
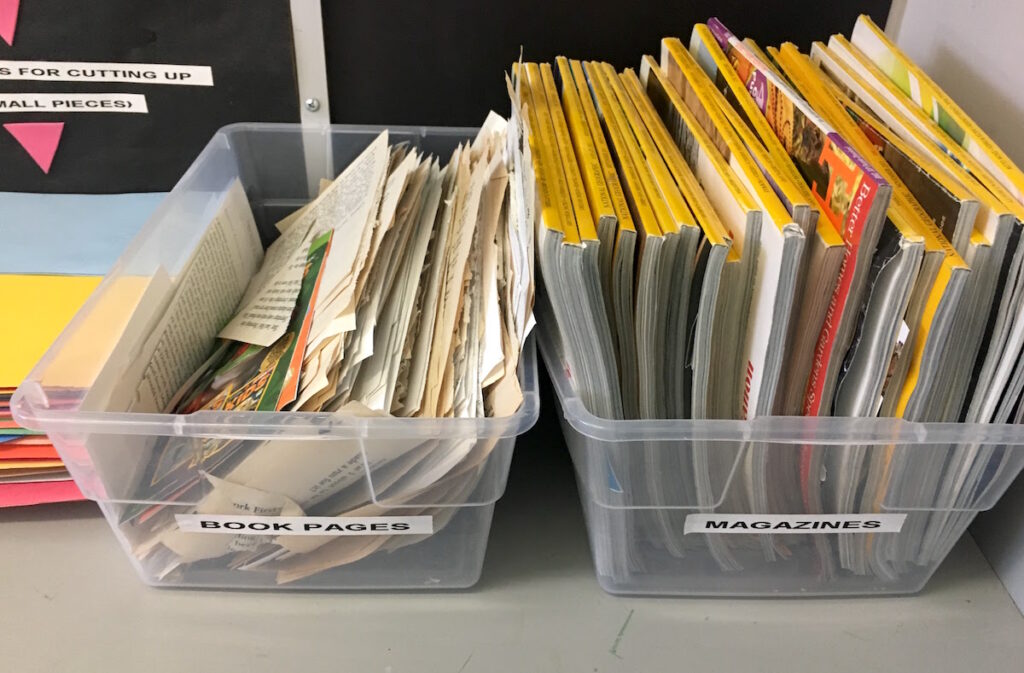
“Next, you can choose your materials. I have put all the paper for cutting or tearing in these color-coded boxes. If you need red, choose from this box. If you need blue, choose from this box. There is also a box for book pages and magazines. (Add any other cool collage materials you’d like to this space). All of these materials are for cutting up and gluing onto your base.”
“When you return materials, put them back in the correct boxes so the center stays clean. In order to keep this center open, you must take care of it!”
“On the Tool Cart (central table with tools for all centers), you will find glue sticks, staplers, tape, scissors, and (insert tools such as hole punchers, paper rippers, paper crimpers, kid safe paper cutters, and shape punches). Glue sticks are the best way to glue paper to paper. White glue is too wet! Return all the items to the correct spots when you’re finished.”
Set up your center the way YOU choose and change it as traffic patterns, usage of materials, and student interest show you what your kids need.
4. Make the Center Part of Your Lesson Plan
Once you have explained the center and established your expectations, students will be able to make some incredible creations! In order to make this center an ongoing success, you need to set your students up with all of the tools and information they need. Remember, you are only giving five minutes of instruction, so your center needs to fill in the gaps. Here are a few things to keep in mind:
- Make the materials and tools accessible and organized.
- Label materials with photos and words.
- Create menus of available tools and materials.
- Display famous artwork for inspiration.
- Create “how-to” posters or anchor charts for concepts you want students to try.
I hope these ideas help demystify TAB by offering one way to open a collage center. However, this is not the only way! There is a huge community of TAB teachers sharing out there, so take some time to browse TAB resources for collage center ideas. I’ve listed a number of my favorite resources below. Each provides ideas other teachers have shared to adapt for your classroom.
More Collage Center Inspiration:
- TeachingForArtisticBehavior.org
- Engaging Learners Through Artmaking by Katherine M. Douglas and Diane B. Jaquith
- The Learner-Directed Classroom by Diane B. Jaquith and Nan E Hathaway
Twitter handles and hashtags such as:
- @HopkinsArtRoom(that’s me!)
- @ElmwoodArt
- @twoducks (Kathy Douglas, co-founder of the TAB philosophy)
- @MelissaPurtee (High school choice!)
- #TABchat #choicebasedart #choicebased
Remember, you don’t have to have everything you want on the first day of class. Even having a few basic centers set up will get you on your way to TAB!
Do you do anything special to open your collage center?
How do you teach collage?
Magazine articles and podcasts are opinions of professional education contributors and do not necessarily represent the position of the Art of Education University (AOEU) or its academic offerings. Contributors use terms in the way they are most often talked about in the scope of their educational experiences.