Students in all kinds of classrooms love found-object sculpture. In choice-based and traditional classrooms alike, sculpture projects often take the cake, quickly becoming student favorites. This is likely because the kinesthetic and imaginative nature of building reaches even the most rambunctious and apathetic students.
On the flip side, projects like these can often seem like a nightmare for teachers. And, if you teach in a choice- based classroom, you have the additional headache of maintaining a center over a period of time.
It pays not to let fear stop you from diving in. A successful found-object sculpture lesson can lead to a truly authentic artist experience. That means failures, as well as successes and a variety of weird and wonderful outcomes!
If you’re ready to try found object sculpture, here are some ways to start!
Create a Culture of Collecting
“Searching for art materials and objects is a rewarding artistic behavior…. When children collect objects outside of school, they are planning and thinking about their artwork – Katherine Douglas and Diane Jaquith, Engaging Learners Through Artmaking
Creating a culture of artistic collecting is a big part of maintaining a thriving found object sculpture area. It’s also an important way to keep students engaged in the artmaking process outside of the classroom.
It’s important to get students and parents excited and invested in collecting items for the classroom. I’ve created a list of the most useful items for my classroom for you to share or adapt for yours!
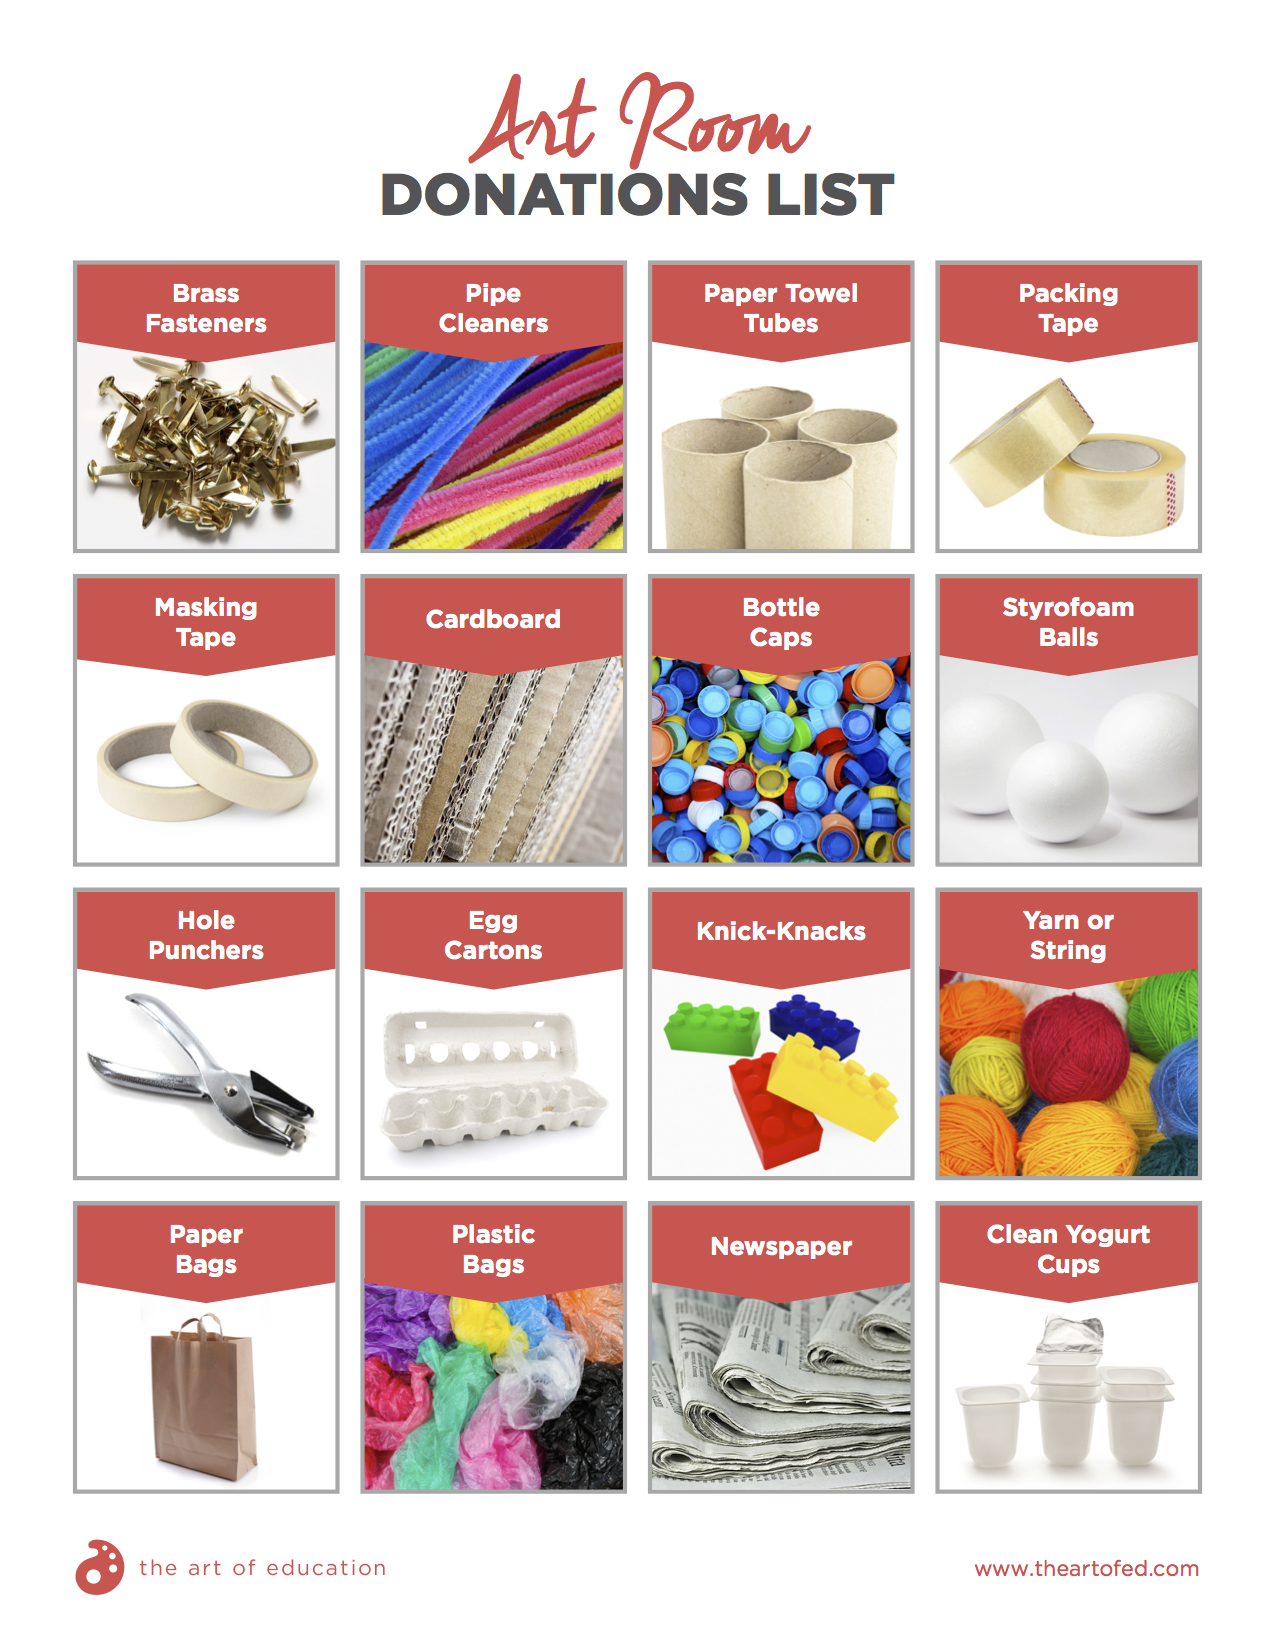
Here are some ways to elicit donations:
- Share your list on your school’s social media sites, digital newsletters, websites, or blogs.
- Post your lists around your school, including in the front office, on the front door, and next to a donation bin.
- Send a home a hard copy of your donation wishlist with students.
- Reward the class that brings in the most donations with a special privilege.
- Hire a skywriter. (Just kidding!)
Once you begin the culture of collection, you’ll be surprised by how much you get! Keep track of what is most useful to you and your students and edit your donations list to reflect this. Also, make families aware of what things you will not accept such as dirty items or items containing allergens.
Finally, if you get a donation you can’t use, toss it or give it away right away. Do not let unwanted stuff pile up!
Think About Organization
Depending on how you run your classroom, your organization will vary. Whether your students visit a center or you provide materials at their tables, here are some tricks to staying organized.
Provide Limits
Limits are the key to keeping material choices innovative and allowing all students to try many materials. For popular or scarce items, like popsicle sticks, keep limits small. For example, students may be able to use only so many popsicle sticks per class period or project.
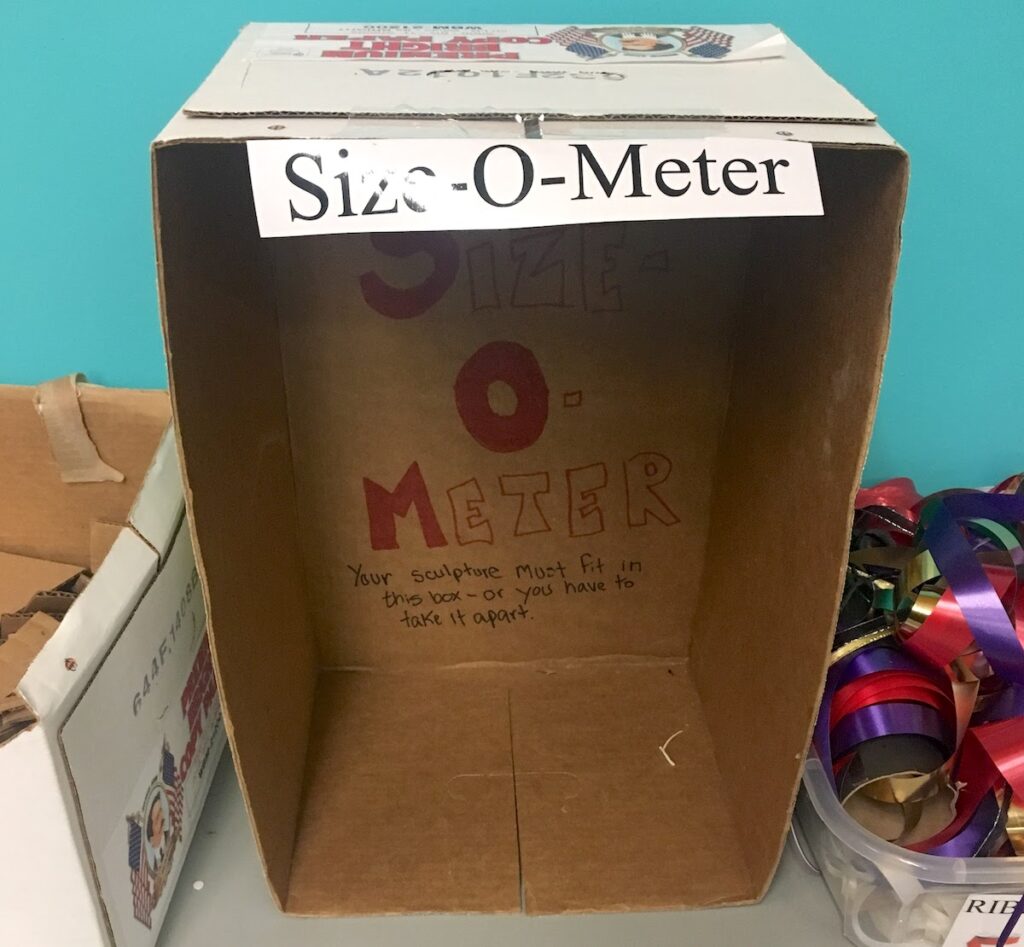
As far as completed sculptures go, it’s often a good idea to create size parameters to allow for storage.
Cut Building Materials Small
Pre-cutting items like cardboard and pipe cleaners is essential. Not only will this force students to build from scratch, but it will also keep sculptures from getting too large. Depending on your storage capability and the size of your kiddos, you can cut items as small or large as you want. Resist the urge to give students boxes or egg cartons as this promotes the urge to fill them up instead of using them as raw building materials.
Looking for more in-depth information about teaching sculpture? Don’t miss the Foolproof Methods for Teaching Beginning Sculpture Learning Pack in Art Ed PRO! You’ll discover new lessons and ideas that can be used with a variety of materials.
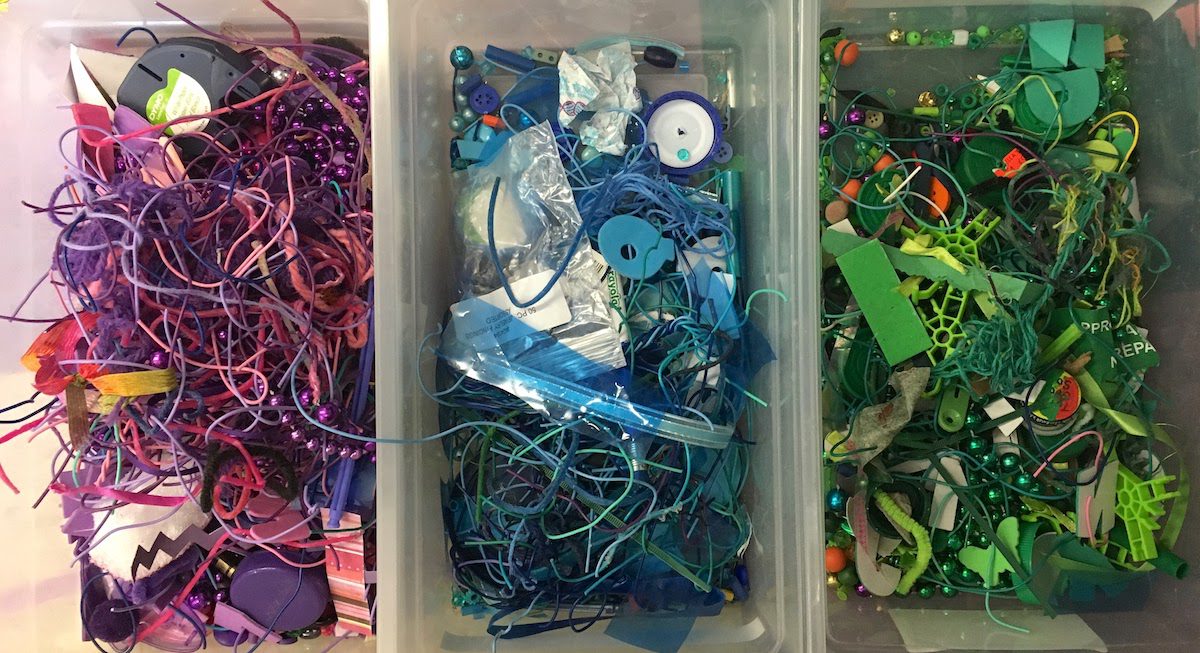
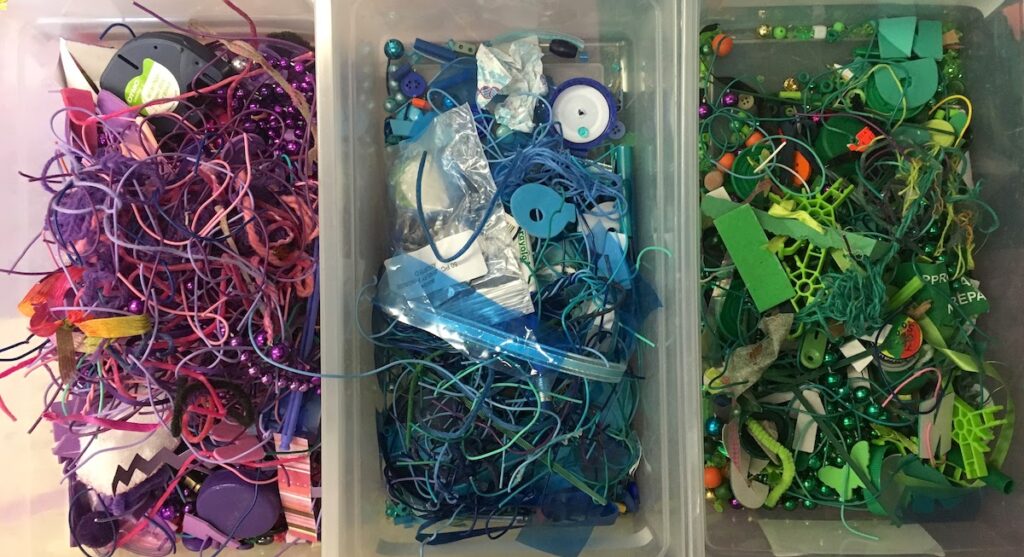
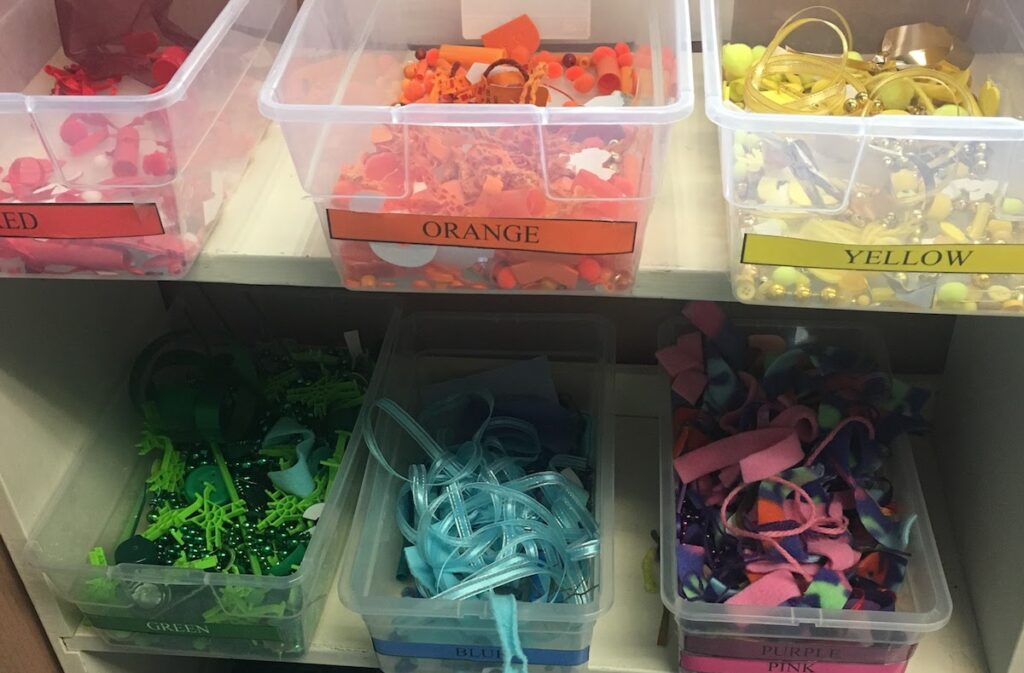
Create Child-Friendly Organizational Systems
Having a too-specific organizational system can lead to a lot of frustration for you and your students. It can be fun and engaging to color code items to make things visually appealing and easy to clean for younger students. Keeping items mixed in a large box can lead to a treasure hunt feel, where students are inspired by what they discover. A mystery bag of items for students to use, trade, or share can lead to a culture of collaboration!
Your set up doesn’t have to start perfectly. If you’re in a choice-based space, you can start with what you think will work and spend the first few weeks observing students using the center.
Ask yourself questions like:
- How is traffic flow?
- What materials get used the most? The least?
- Which areas can’t stay organized? Why?
Get feedback from students and make changes as needed. Centers work best when they grow and change with student needs.
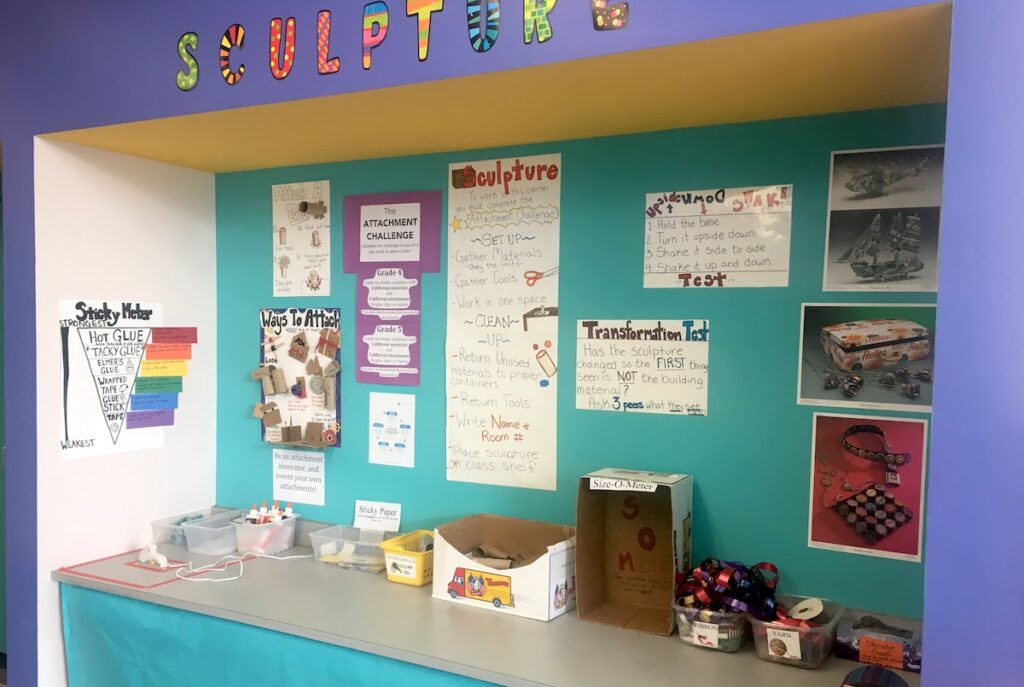
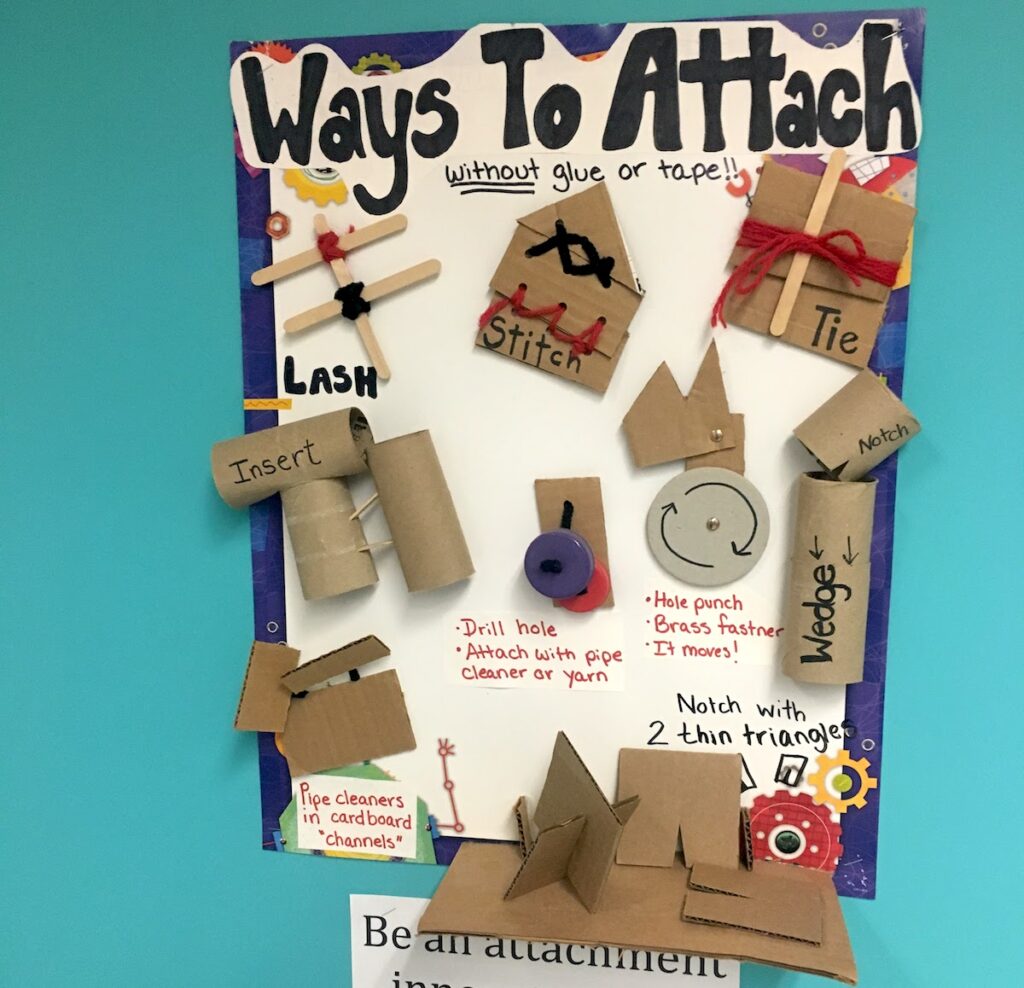
Provide Anchor Charts
Whether you post them on the walls of your center or at your tables, it’s a good idea to have visual directions and rubrics for students to reference. Depending on what students need to know, your visuals might include:
- A list of available tools, materials, adhesives, etc.
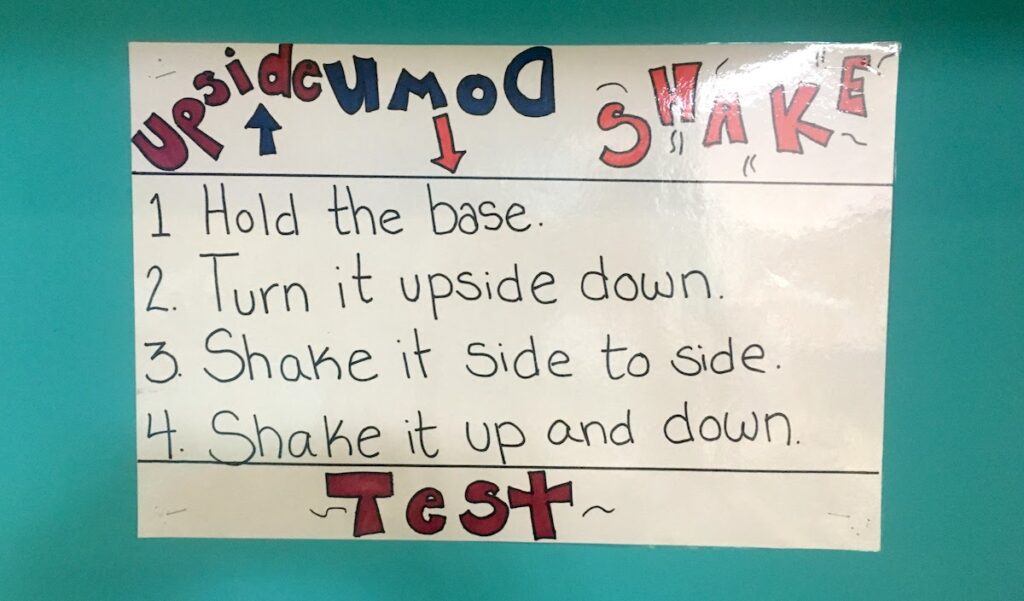
- A rubric of the qualities of a finished sculpture such as strength, good balance, and aesthetics.
- A list of vocabulary words or artists who create found object sculptures.
Remember that Process is Important
Found-object sculptures can be difficult to appreciate at first, especially to the untrained eye of a parent or administrator. Adults must remember that even sculpture follows Lowenfeld’s Stages of Artistic Development and we should never discount the “scribble stage!”
Here are 2 tricks to allow your students’ process to shine through with their product.
- Artist Statements
When sending home or displaying student creations, it’s always a good idea to have students write about their sculptures. You’ll be amazed at the magical world hidden beneath what adults can see. If you’re working with very young students, you can try to get a volunteer to scribe for them.
- Educate Staff and Parents
It’s essential to help your staff and parents see the value of process as well. You can try providing a list of questions to help adults discuss student artwork. Or, you may send home a letter or reading list to explain the concept of process vs product, citing research.
Here are some resources to share with parents or to help you develop a successful found-object sculpture lesson in your classroom:
- The Attachment Test by Diane Jaquith
- Teaching for Artistic Behavior: Sculpture Center
- 12 Must-Have Materials for This Year’s Sculpture Projects
- Beautiful Stuff: Learning With Found Materials by Cathy Weisman Topal
- The Learner Directed Classroom by Diane Jaquith and Nan Hathaway
- Engaging Learners Through Artmaking by Katherine Douglas and Diane Jaquith
Now that you have the nuts and bolts of how to get started with found-object sculpture, it’s time to try it out! Remember it will take time and patience both for setting up the center and allowing kids to grow as creators. Don’t expect perfection. Give your students time to explore! As your students become more comfortable with building, you’ll be amazed at their capabilities.
Do you do a found-object lesson or center?
Share some successes or failures you’ve had with found-object sculpture in your classroom.
Magazine articles and podcasts are opinions of professional education contributors and do not necessarily represent the position of the Art of Education University (AOEU) or its academic offerings. Contributors use terms in the way they are most often talked about in the scope of their educational experiences.