Artists throughout time have been fascinated with capturing the visual imagery of the people who surround them. In a sense, portraiture documents our history. Like other artists, I have found my students are genuinely interested in learning the techniques needed to master drawing the face.
I have also found when the art of portraiture is consistently taught across grade levels, students understand it much better. Allowing students to repeatedly see how the face is made up of line, shape, and value takes student work to the next level.
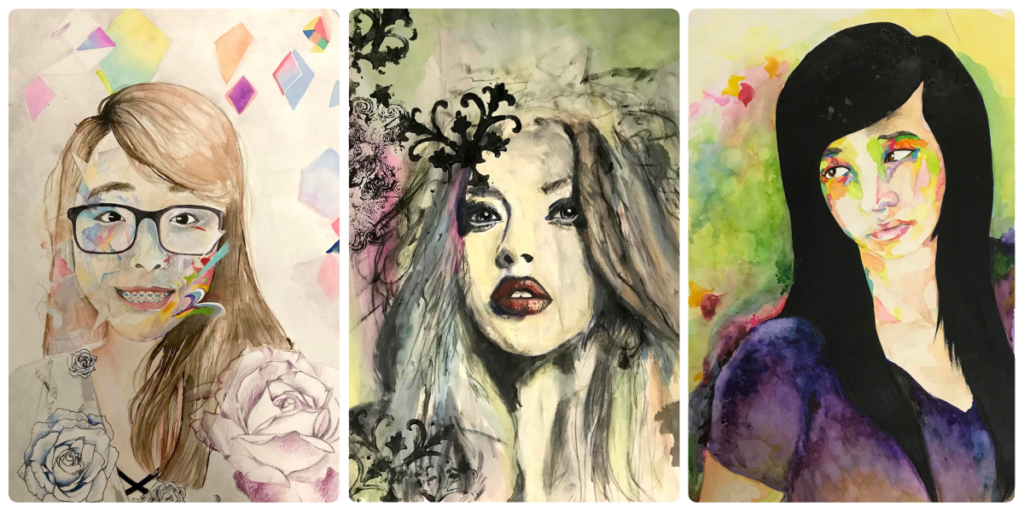
Once students have learned and practiced the basics, it’s all about finding the right creative prompt to help them tell their visual stories. I am excited to share this list of ideas with you!
Below you will find ten lessons complete with Objectives, Materials, and Procedures. I’ve also noted for which grade levels these are best suited. That said, these are versatile lessons! All of them can be scaled up or down depending on the age level you teach.
I recently shared this information at the Winter 2018 NOW Conference. It was an amazing day filled with inspiring presenters! Registration for the Summer Conference is now open. I’ll be presenting on Art with Purpose and would love to see you there! See what other presentations have already been released and learn more right here.
10 Portrait-Inspired Lessons for All Ages
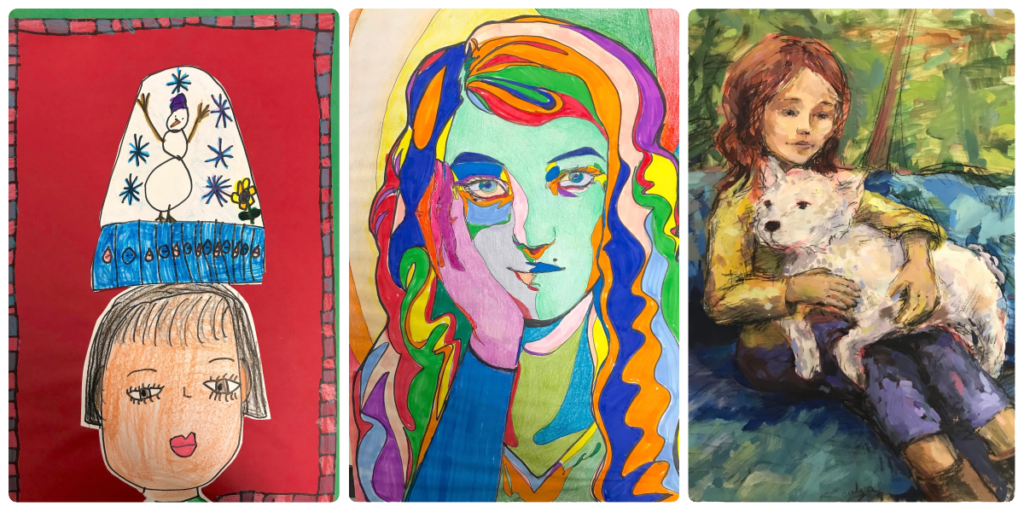
1. Hokey Hats
Best suited for grades K-3
Objectives
In this project, students will view and discuss hats from various time periods. They will observe and be inspired by the decorations and patterns they see. Students will use various media and techniques to create a mixed media piece.
Materials
- Black permanent markers
- Crayons
- Markers
- 8.5″ x 8/5″ white paper
- Visuals of hats
- Construction paper
- Scissors
- Glue
- Construction paper crayons
- Tempera paint
- Sponges
Procedures
- Ask students to think about how they look.
- View and discuss samples of hats from various time periods to see how they have changed. Ask students to think about what hats may tell about their wearers.
- Have students draw their portraits.
- Demonstrate how to draw different types of hats and how to decorate with a pattern.
- Have students create their own hats from construction paper to add to their portraits.
- Encourage students to decorate their hats with a pattern.
Extension
To add even more visual interest to these pieces, students could stamp a patterned border with tempera paint or draw a patterned border with construction paper crayons.
2. All About Me, Picture Perfect Self-Portraits
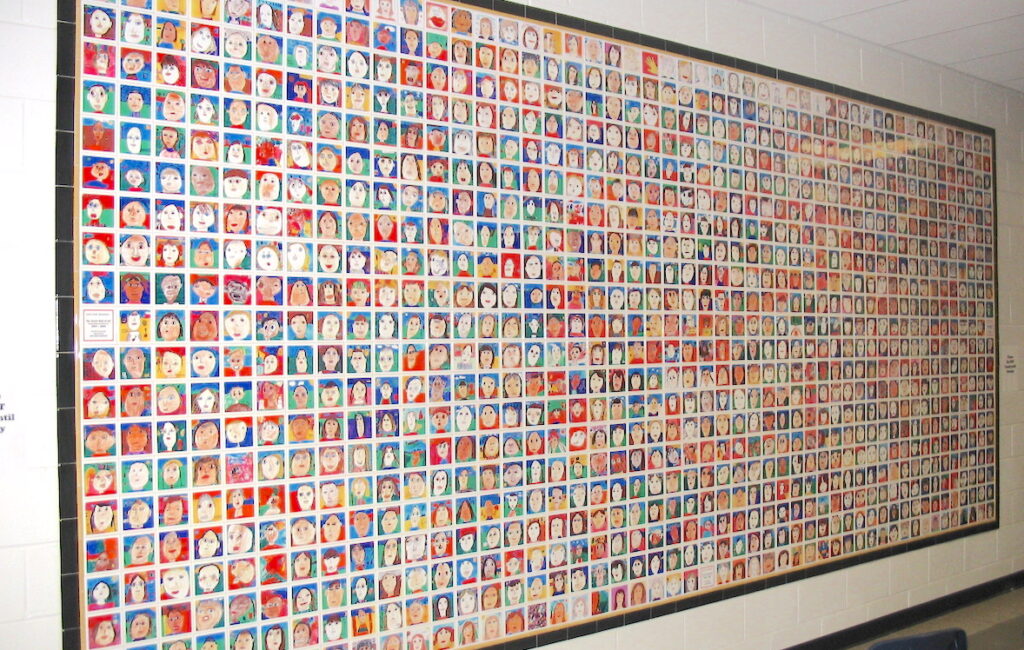
Best suited for grades K-5
Objectives
In this lesson, students will think about who they are and learn how to create proportionally accurate portraits. Students will learn how to work with crayons to blend their own unique skin tones and how to paint with markers.
Materials
- Black permanent markers
- Crayons
- Markers
- 8 ½ “ x 8 ½ “ white paper
- Portrait examples
- Mirrors
Procedure
- Ask students to think about how they look. Then, have them look at themselves in a mirror to see if their perceptions match their reality.
- Show students examples of portraits from different times in art history and discuss the proportions of the facial features.
- Teach students how to use their fingers as rulers to measure the different parts of their faces and discuss how they relate to one another. For example, the length of the eye matches the height of the nose, and the length of the mouth matches the height of the ear.
- Demonstrate how to draw different facial features, including hair.
- Have students draw their faces using everything they’ve learned.
- Have students add a horizon line to create the illusion of background and foreground.
- Teach students how to layer crayons to create their own skin tones.
- Have students add color to their drawing by using crayon for the portrait and marker for the background. If using water-based markers, students can “paint” with them.
Extension
Consider using this lesson as a fundraiser. Families love self-portraits! You could even get each student’s portrait put on a ceramic tile to create a school-wide installation.
3. Mona MEsas

Best suited for grades K-5
Objectives
In this lesson, students will learn about Leonardo da Vinci and learn to create proportionately accurate portraits. In addition, students will experiment with various mediums to create a mixed media artwork.
Materials
- Thin Sharpies
- Crayons
- Markers
- Oil pastels
- Mona Lisa print for reference
- Glue
- Scissors
- Construction paper
- 8 ½ “ x 11″ white paper
- Copies of the Mona Lisa with the face erased
Procedure
- Ask students to think about how they look.
- Introduce students to the Mona Lisa. (If you’re feeling bold, try dressing up like her. It’s always a huge hit and something the students will never forget!)
- Give students a copy of the Mona Lisa with the face erased. Instruct them to draw their own faces where hers was. (Get it? Mona MEsa!) If you haven’t already, make sure you demonstrate how to draw facial features in proportion.
- Then, have the students trace over the rest of the copy with a Sharpie marker, effectively creating a contour line study of the Mona Lisa.
- Have students create a background that has personal meaning to them. It’s a good idea to instruct students to add a horizon line at this point to help them create foreground.
- Students can add color to their pieces using markers, crayons, colored pencil, or oil pastels.
- Finally, have students glue their completed self-portrait to a piece of construction paper to give it heft and a finished look.
Extension
To take this lesson a step further, have students add a transparency over their first drawing. Using permanent markers or oil pastels, have them create a second “look” and background for their portrait. Attaching the transparency on top of the first creates a fun flippable effect!
4. Finster’s Folk Art Faces
Best suited for grades 3-6
Objectives
This project uses folk artist, Howard Finster, as inspiration. Students will tell a personal story through their artwork and mix paints to create their unique skin tones.
Materials
- Images of Finster’s work for reference
- 12″ x 18″ white drawing paper
- Pencils
- Black permanent markers
- Markers
- Tempera or acrylic paint
- Scissors
- Glue
- Construction paper
Procedure
- Have students view and discuss Finster’s work, concentrating on his self-portraits.
- Have students draw their faces in pencil and trace with a black permanent marker.
- Have students mix their skin tone and paint their face and neck. Then, have students fill in the rest of their piece using markers.
- Once the paint is completely dry, have students re-trace their lines with the black permanent markers.
- Have each student write a story about themselves and transfer it directly onto their portrait using pencil. This step will make the portraits mimic Finster’s storytelling pieces.
- Finally, have students cut out their faces leaving a half-inch border and mat them on construction paper.
5. Michelangelo-Inspired Self-Portraits
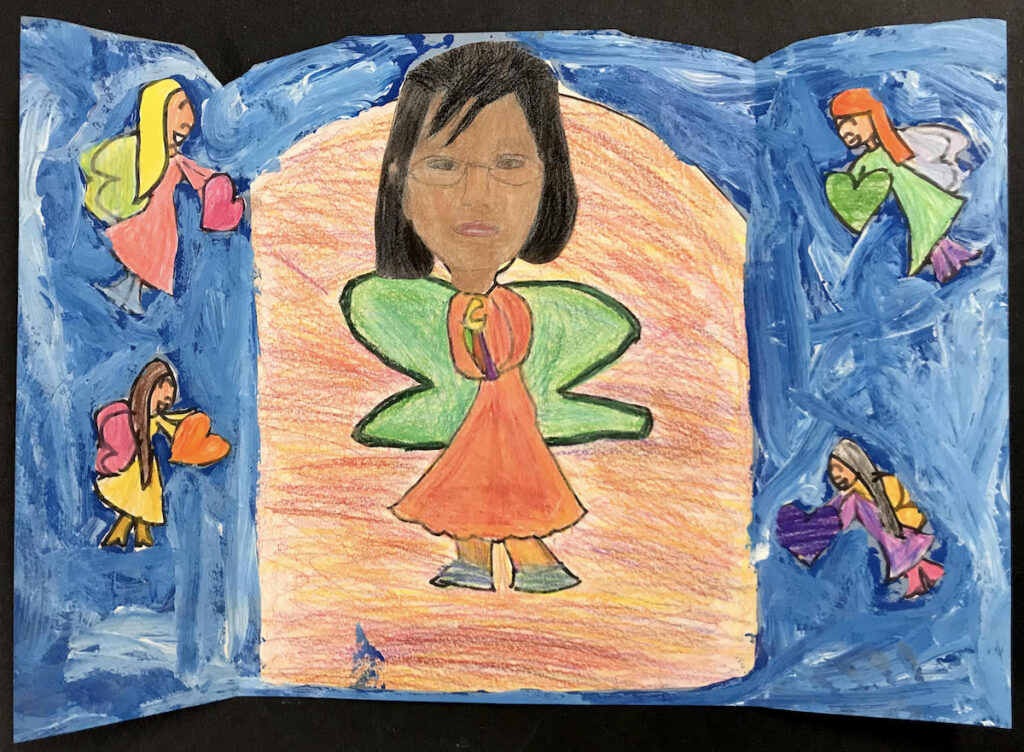
Best suited for grades 3-6
Objectives
In this project, students will learn about the art of the early Renaissance artists, specifically Michelangelo. Students will learn about the Sistine Chapel, frescos, and panel art. Students will get to feel what it might’ve been like to draw on the ceiling by drawing under their tables. Finally, students will learn about color layering.
Materials
- 9” x 12” heavy white paper
- Prismacolor Art Stix or colored pencils
- 12” x 18” construction paper
- Scissors
- Tape
- Digital photo of each student (printed out)
- Images of the Sistine Chapel for inspiration
Procedures
- Have students look at and discuss examples of different types of angel paintings created during the Renaissance, including those of the Sistine Chapel.
- Discuss how Michelangelo created the work of the Sistine Chapel.
- Have students tape their papers under their tables and sketch out their angel shapes while lying on their backs, propped up on their elbows. After sketching, have students switch to sitting in their regular seats for the remainder of the project.
- Have students cut out the digital image of their face and glue it to their angel sketch. Then, have students color their faces using Prismacolor Art Stix or colored pencils.
- Have students add color to the remainder of their angels and backgrounds using the media of their choice.
- Try hanging these on the ceiling to complete the effect!
Extension
To turn these into triptych-inspired panels, have students glue their angels to construction paper and fold the sides. Then, have them complete the side panels using imagery and text.
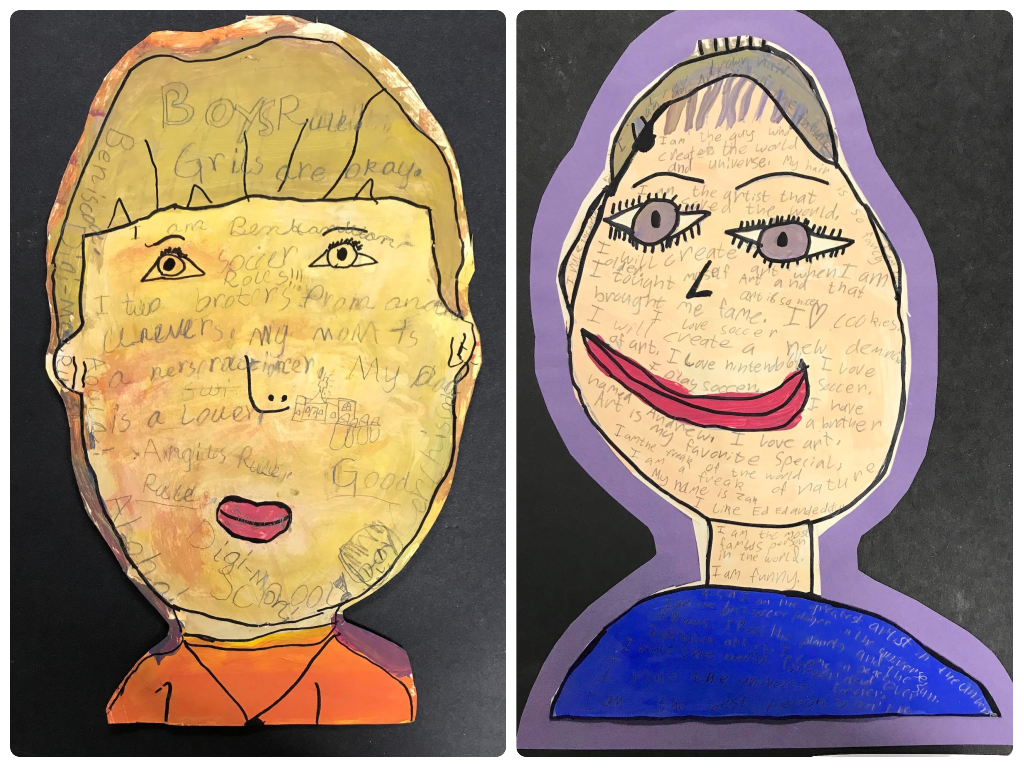
6. Honesty Hands: Who Am I?
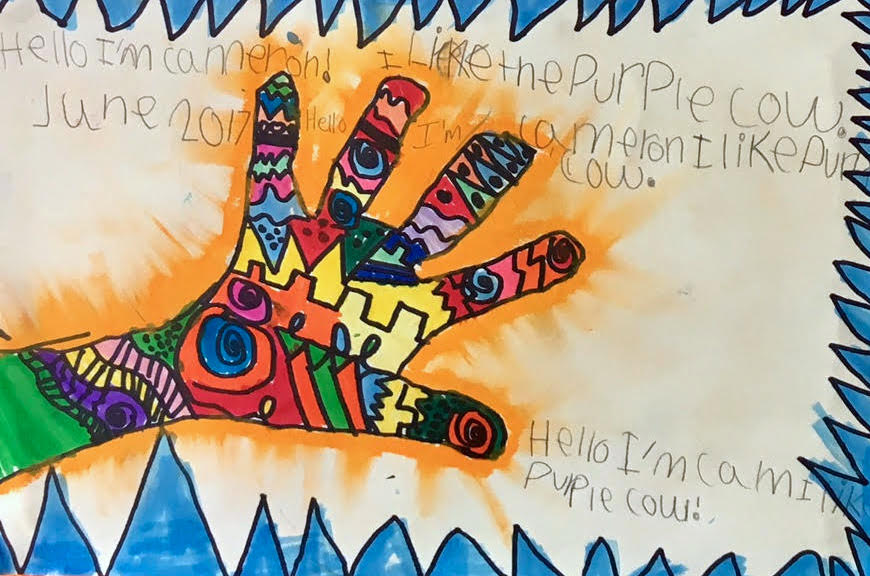
Best suited for grades 4-8
Objectives
This lesson eases students into the idea of self-portraits. Students will learn how to tell a viewer about themselves without drawing their face and to give their art more personal meaning. Students will also learn about color selection and blending techniques.
Materials
- 9″ x 12″ white drawing paper
- Pencils
- Black permanent fine tip markers
- Markers
- Oil pastels
- Feathers
- Visuals of painted Ndebele for inspiration
Procedures
- Briefly discuss the art of portraiture with students. Explain that instead of drawing their faces, students will explore the idea of portraiture through symbols and colors.
- Talk about how each person’s hand tells a personal story of who they are.
- Have students trace their hand with a pencil onto their paper and talk about contour line.
- Have students trace their hand outline with the black permanent marker and then create a meaningful line design inside the hand.
- Have students color in the different sections they create with markers. Then, have them add embellishments with oil pastels.
- To fill in the background, discuss warm and cool colors and have students choose one or the other with which to work. Have students go around the hand and around the border of the paper. Then, have them blend the colors inward to create a glowing effect.
- Finally, students will write a story, in pencil, about who they are as individuals around the hand, giving the art more personal meaning.
Extension
You can have students add some three-dimensional embellishments like feathers, beads, or small pieces made of model magic to take this a step further.
7. Pop Art Portraits
Best suited for grades 4-9
Objectives
In this project, students will learn about Pop Art and the art of digital photography. Students will create mixed media pieces.
Materials
- 9″ x 9″ heavy white paper
- Black permanent markers
- Markers
- Oil pastels
- Prismacolor Art Stix or colored pencils
- Digital cameras
- Color or black and white printer
- Digital images of each student
- Scissors
- Glue
- Pop Art images for inspiration
Procedures
- Have students view examples of several Pop artists, focusing on the work of Andy Warhol. Discuss the idea of repetition present in the work and how that relates to digital photography.
- Have students look in a mirror and discuss what they see.
- Have students partner up and take digital photos of each other. Before the next class, print each student’s photo.
- Have students use the photograph to draw what they see, leaving space on the paper to glue the original photo down.
- Have students color in their digital image using the Prismacolor Art Stix or colored pencils. Show students how to layer different colors to achieve their unique skin tones and remind them they will need different values, so their faces don’t look flat.
- Have students cut out their colored digital images and glue them onto their papers next to their drawings.
- Have students color in their drawn self-portraits in the same way.
- Finally, have students create a background for their piece by using black permanent marker to draw and then markers and/or oil pastels to finish.
Extension
Instead of just using Pop Art as inspiration, try mixing two styles together. American Modernism works well. With the two portraits side-by-side, Grant Wood’s American Gothic is a natural fit.
At the end of the project, have students walk around the room to view everyone’s work. Have each student choose one piece to write a quick narrative story about, making sure to use the vocabulary learned in the lesson.
8. 2 Contour Line Studies: “Hand Studies” and “Partner Portraits”
Best suited for grades 7-9
Objective
Students will understand the importance of contour line. They will practice blind contour, partial blind contour, and contour line techniques.
Materials
Hand Studies
- 12” x 18” black construction paper
- Pencils
- Glue
- Chalk pastels
Partner Portraits
- 12” x 18” white drawing paper
- Pencils
- Black permanent markers
- Crayons
- Markers
Procedures
Hand Studies
- Introduce the importance of line in art. Pose the question, “Do you think this is the most important element? Why or why not?” and discuss.
- Discuss the term contour line and view artwork that uses contour line.
- Have students create ten sketches of their hands in their sketchbooks and choose one to recreate on a larger scale.
- Have students draw their hand on the black paper with pencil and trace the pencil lines with glue.
- When dry, have students fill the resulting spaces with chalk pastel.
Partner Portraits
- Have students do some contour studies in their sketchbooks using their classmates as subjects. Before starting, demo drawing a face in contour line. (I always mention a bug following the lines very slowly as I model this technique.)
- Have students move to the large paper and draw a “partner portrait” of someone else in the class. Encourage students to use contour lines in the negative space as well.
- Have students trace their pencil lines with both thin and thick black permanent markers paying attention to the line quality needed to show variety.
- Have students add color with both markers and crayons, being sure to keep the colors separated by the newly formed shapes.
Extension
Have students create a display of these two projects together for the hallway to teach others about contour line!
9. Portrait Project
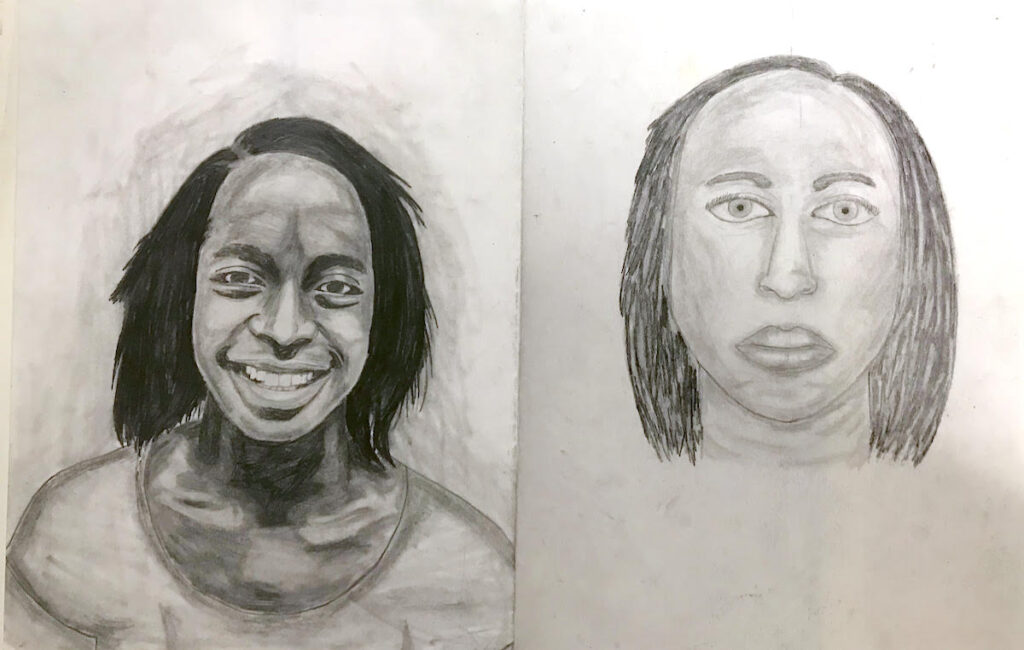
Best suited for grades 9-12
Objective
Through this project, students will experience the difference between drawing from life and drawing from a photograph. Students will use line, shape, and value to create a proportionally accurate portrait. Students will compare and contrast their two drawings and discuss the differences.
Materials
- 12” x 18” white drawing paper
- Pencils
- Mirrors
- Black and white high-contrast photographs
Procedures
- Instruct students to fold their paper in half.
- Have students look in a mirror and begin to draw what they see on half of their 12” x 18” white drawing paper. Remind them to measure with their fingers, using the eye as the constant and to observe closely so they can draw what they actually see.
- After two to three class periods of drawing from a mirror, have students turn their paper over and begin to draw from a high contrast photograph of their face on the other side.
- Again, remind students to use line, shape, and value and to observe closely and draw what they see.
- Over the next few class periods, have students go back and forth between the direct observation study and photograph study, comparing and contrasting as they go.
- When finished, have students critique and discuss the two portraits and drawing techniques.
10. PIN-spiration Portraits
Best suited for grades 9-12
Objective
In this final project, students will learn how important it is for artists to become researchers. Students will learn to use Pinterest boards for inspiration by combining the styles of three artists or techniques to create their own work.
Materials
- Access to Pinterest
- Mixed media
Procedures
- Explain that one way artists can be inspired is by looking at the work of others. Show students one way to organize this type of inspiration is through a Pinterest board.
- Throughout the semester, have students pin a minimum of ten artworks per day. Don’t be surprised if they pin many more!
- When it’s time to start the project, have students choose three of their favorite pinned works to use as inspiration.
- Give students complete freedom to use any size surface, any and all media, and to explore the art process and the tools they have been taught to create a final piece of WOW art.
This lesson is a wonderful way to prepare students who may take an AP Art course. It challenges them to make their own artistic decisions.
I hope you can use these lessons with your students to help them better understand the art of portraiture while celebrating their beauty and creativity! Enjoy!
How are you teaching your students about the art of portraiture?
Do you think it’s important to teach portraiture at every grade level?
Magazine articles and podcasts are opinions of professional education contributors and do not necessarily represent the position of the Art of Education University (AOEU) or its academic offerings. Contributors use terms in the way they are most often talked about in the scope of their educational experiences.