Right now my sixth graders are so deeply engaged in a collaborative art project that many of them are begging to skip recess to work on their assignment. The surprising thing is that it is an art history project! So, why are they so excited?
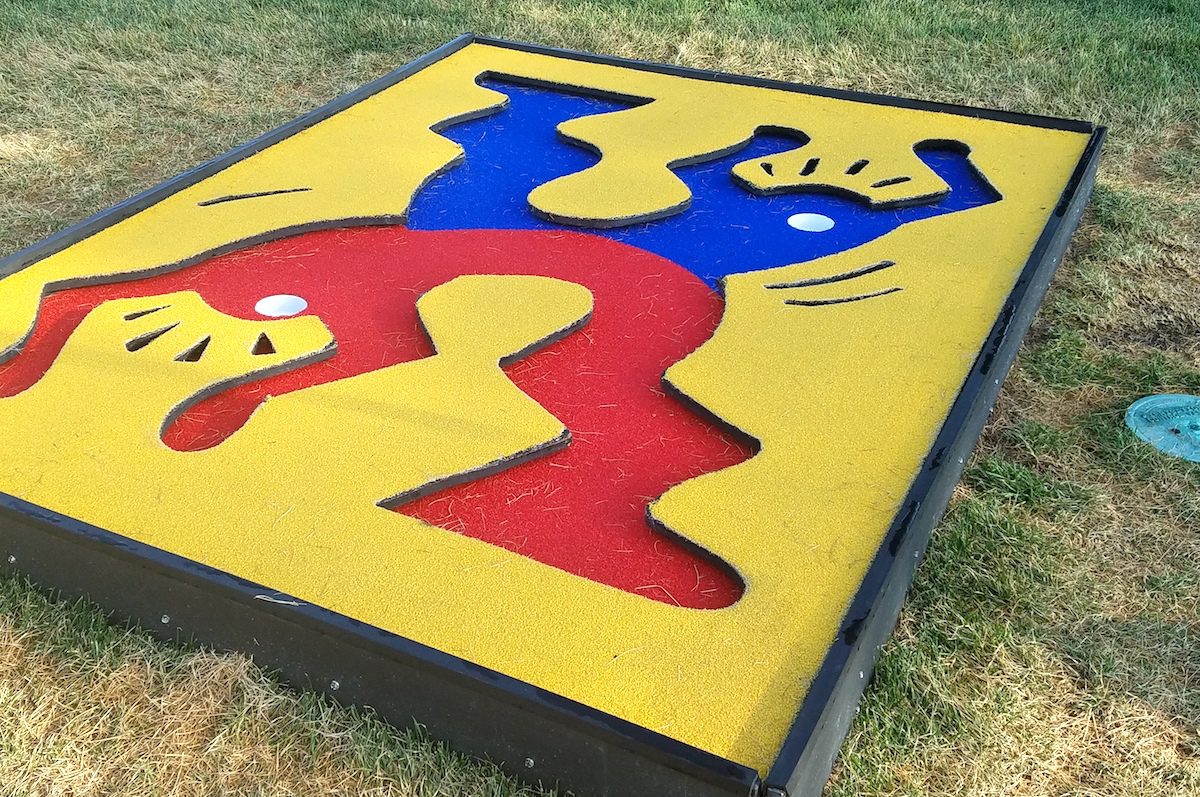
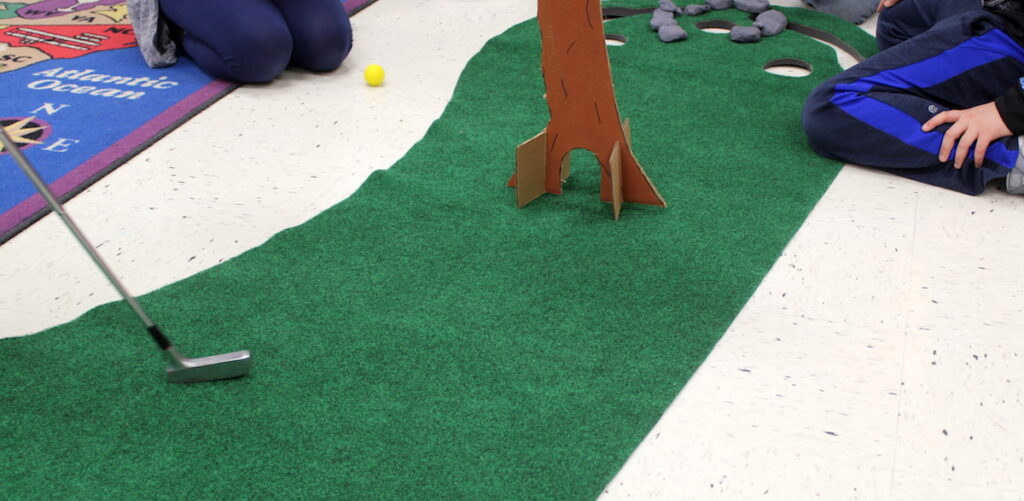
We are creating a student-designed, 18-hole, art history inspired, mini-golf course to play at our spring art show!
Let me take you back to the beginning. This summer, my husband and I embarked on a rejuvenating midwestern road trip. Our adventures took us to Minneapolis, Minnesota where we took in the sculpture gardens of the Walker Art Center. We were there to see Claes Oldenberg’s Spoon Bridge and Cherry in person, but we got more than we bargained for.
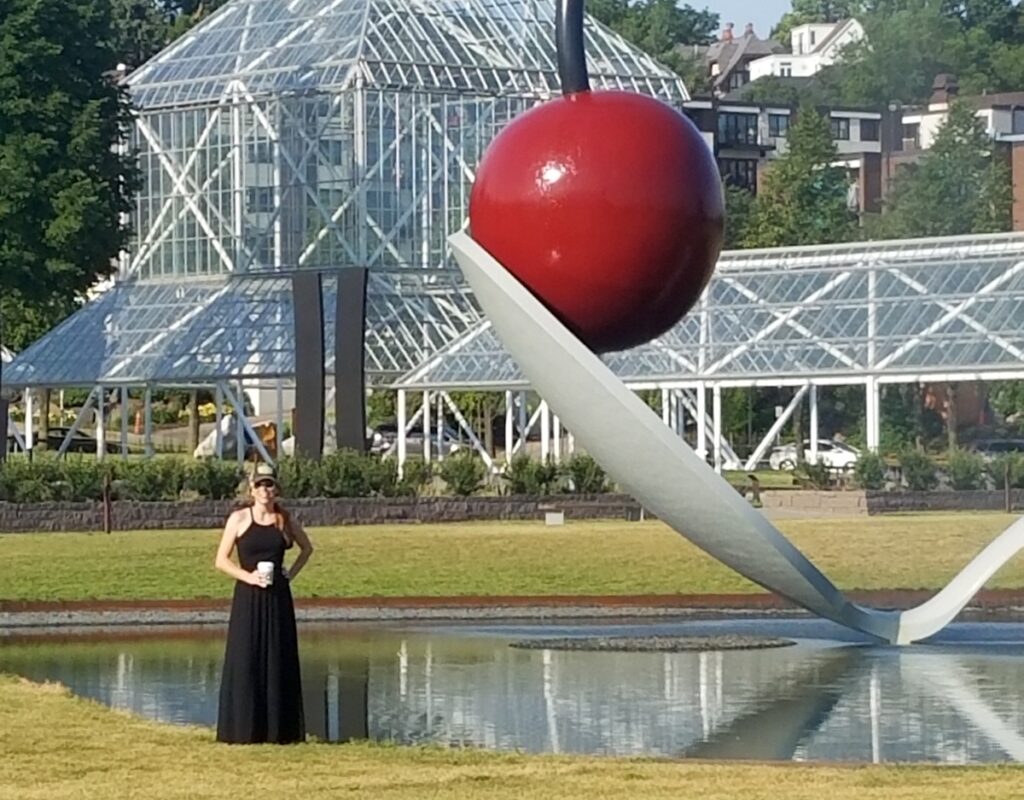
Within the sculpture garden was the Walker’s annual summer “Artist Designed Mini-Golf” event. This interactive masterpiece is simultaneously a series of artworks and a functional mini-golf course. Each hole within the 18-piece course was designed by an artist or team of artists. Some holes were reflective of that artists’ work, and some were a nod to art history. My husband and I were enchanted, and I knew I had to bring this idea back to my students.

When school started, I spent a lot of time sharing this idea and advocating for resources. Now, almost six months later, this passion project is just weeks away from coming to fruition. Along the way, our mini-golf course has promoted cross-cultural connections with teachers with whom I would have never expected to partner. It has also injected problem-based learning and STEAM into my art room in dynamic ways. The best part is that it has inspired some reluctant artists.
Here is a guide for implementing a similar project in your art curriculum!
First, find collaborators!
A project of this size is easier to manage when multiple people are involved in the research, design, and funding process. The characteristics of this project can lead to some unusual and fun pairings.
Consider inviting the following types of colleagues:
- PE Teachers
Mine are teaching a mini-unit on golf the week of our show. - Librarians or Technology Specialists
Our school’s technology teacher led the charge with the research component of this project. - Science or Math Teachers
There are HUGE opportunities for STEAM connections embedded in the process. - Your PTO
They frequently plan family and community events, so supporting a mini-golf night is a natural fit!
As you approach each of these potential stakeholders, be sure to point out the exciting benefits of an “art history mini-golf collaboration,” from their professional perspective. Once they see the potential benefits for their own programs, they can’t help but want to be a part of this project.
Next, guide meaningful research!
Present a variety of interesting artists from which to choose.
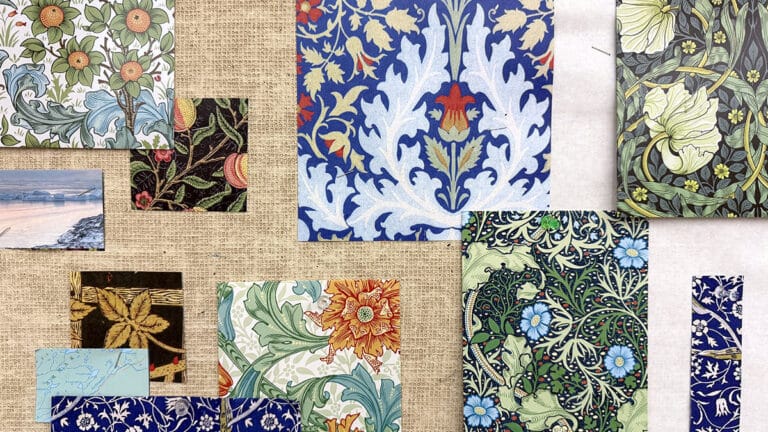
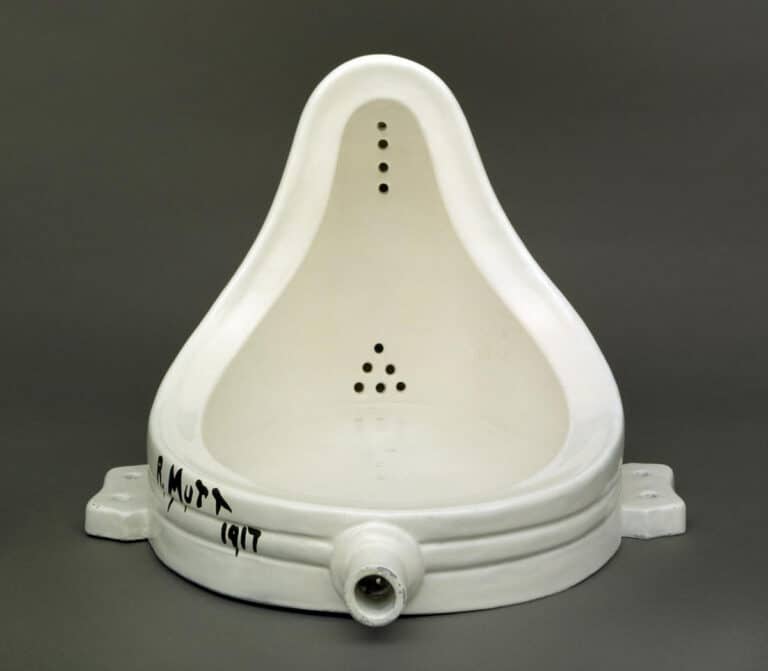
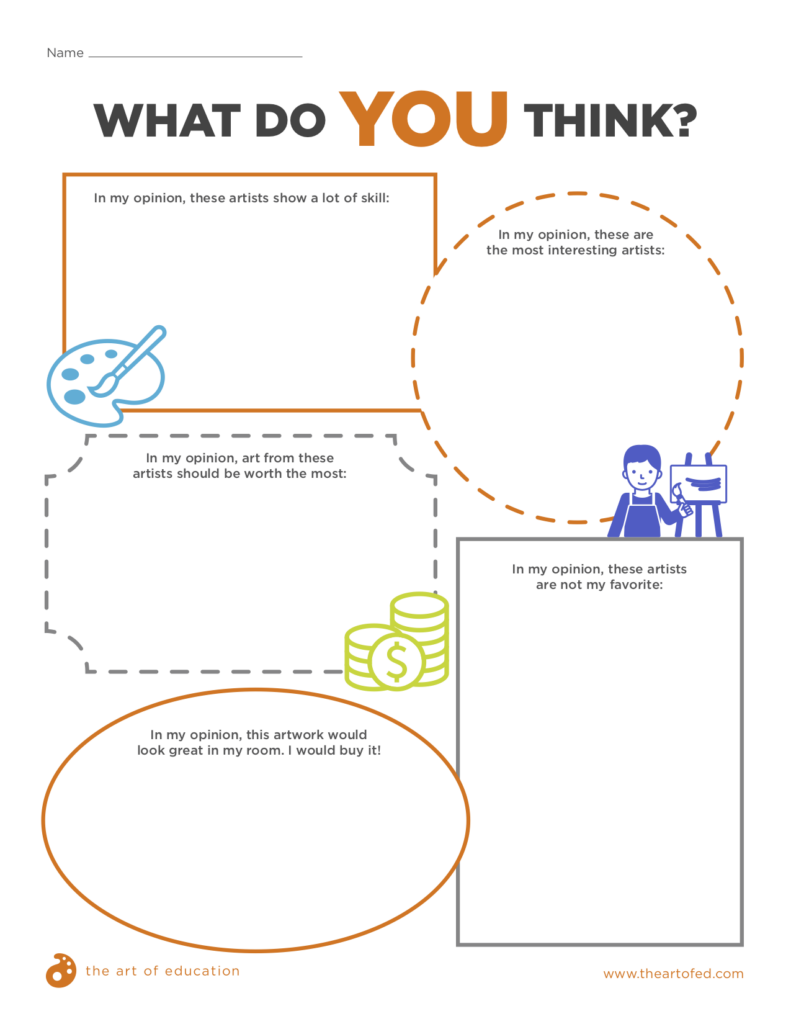
While some students already have a favorite artist, many need encouragement to pick an interest area. I like to present 20-30 artists, doing a brief “commercial” for each. I share an image via PowerPoint and take 60 seconds to share the most interesting tidbits I know about that artist and their work. This process is similar to a “book talk.”
To keep my students engaged during these commercials, I provide them with a graphic organizer. This worksheet is divided into categories. The students are responsible for fitting each artist into one or more of the groups. This process helps students unpack their thinking and begin to form opinions about who they might like to study further. If you’d like to try this strategy, check out the download below.
If you’re looking for even more innovative ways to bring art history into the classroom, don’t miss these two PRO Learning Packs!
- Make the Most of Art History in the Elementary Art Room
- Implementing Art History in the Secondary Art Room
Give direction to the research process.
The ILT (Information Literacy and Technology) teacher in my building was eager to join this project because it offers a rare opportunity for students to do something “hands-on” with their completed research.
Whether you oversee the research process yourself or collaborate with another teacher, keep the following three things in mind:
- Chunk the assignment to ensure success!
Give students a set of specific questions so they can easily identify the purpose of their research. - Figure out how students will organize and share the facts they are learning.
You may require students to gather certain biographical information or collect information on their chosen artist’s most famous works. If you’re looking for a simple form to collect information, you can find one by clicking here. - Decide how you will handle nudity and sensitive biographical information.
As students start to explore artists on the internet, these issues will inevitably come up. If you have concerns, discuss it with your administrator BEFORE beginning the project. Make sure you have a clear action plan.
Finally, provide structure and build your course!
Choose a format for the entire course.
I was fortunate to have my PTO purchase actual putting greens for this project, but you could use particle board or set up in a carpeted room!
Once the greens arrived, I laid one out in the classroom and let the students putt around for a bit, to fully understand the unique constraints of their project.

After playing, I laid down some necessary parameters:
- The viewer should make an obvious connection between the appearance of the hole and the chosen artist.
- The holes will be set up for one night in the gym. They must be durable but don’t need to be waterproof.
- No cutting or painting the greens is allowed; so sculptures must sit on or around the grass.
- Any supplies in the art room, within reason, are available for use.
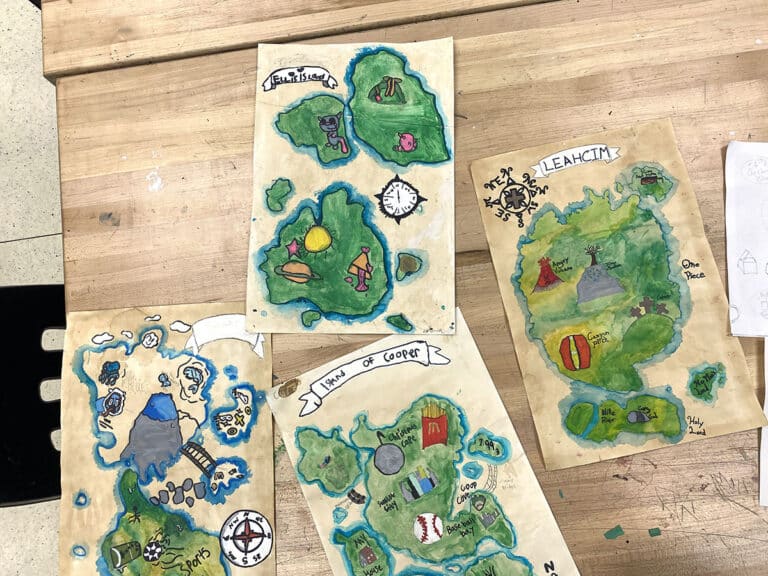
Assign groups or allow free choice.
This year, students were grouped according to the artists they had researched. In some cases, friends intentionally chose the same artist as other friends, but it still seemed to work out well. Choose the format that will work best within your classroom’s dynamics.
Provide focus
Sometimes, collaborative projects can be tricky to manage. With multiple students participating and wide-ranging parameters, it becomes important to inject a clear planning process.
Here is what worked in my room:
- Defining what supplies would be available to the kids.
- Having planning meetings with each group.
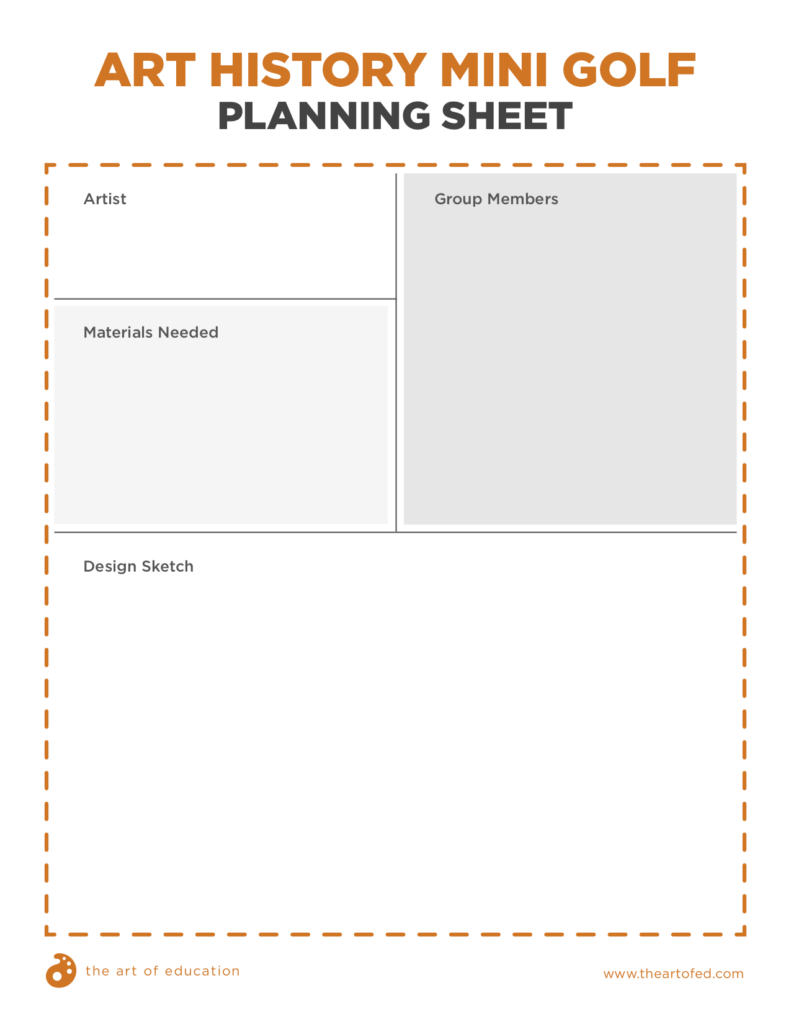
- Providing a structured planning sheet that helped the group identify next steps and promoted accountability.
You can download the planning sheet I used with my students below!
As they plan, help facilitate the transition from research to a three-dimensional interpretation of the artist’s work. Don’t limit the options or media; your students will think of applications you’d never imagine. Their creativity will astound you!
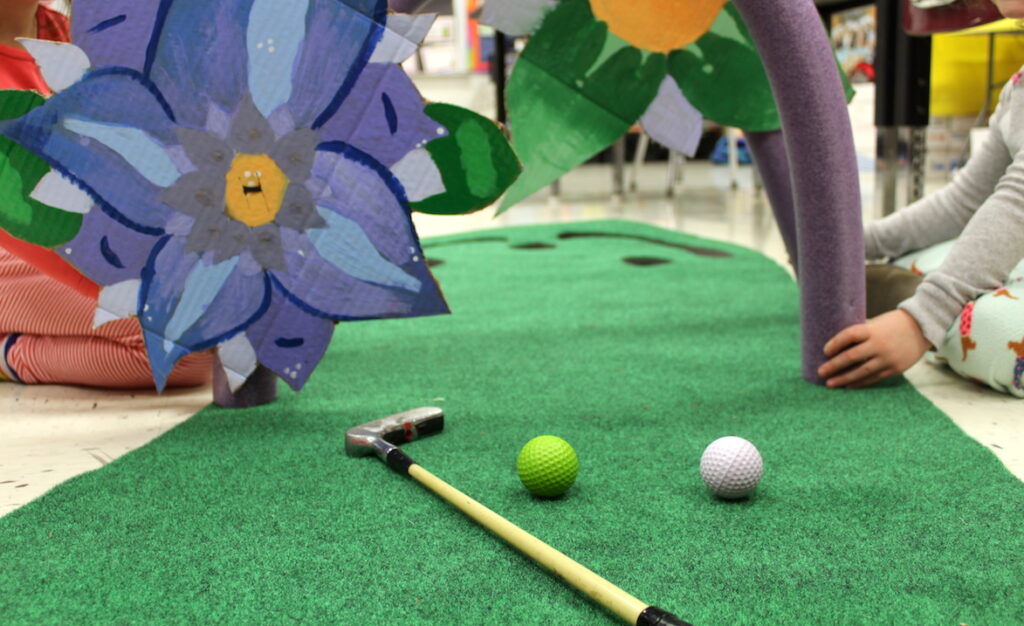
Here are a few of my favorites so far:
- A pool noodle arch decorated with Georgia O’Keefe flowers
- A gray cardboard barn with a splatter painted floor in the spirit of Jackson Pollock
- A paper mache bowler hat and apple ala Magritte’s Son of Man
- A skateboard ramp being re-purposed and painted in Picasso’s cubist style
Use a few “hacks” to keep your sanity.
Finally, experience has taught me one of the key factors for success with this project is time. Whether they decide to recreate da Vinci’s inventions in cardboard or explore Seurat’s pointillism in puffballs, students are going to need a substantial amount of time!
Besides time, here are six other helpful “hacks” we have discovered:
- Start stockpiling cardboard early.
Talk with your custodian and ask them to start saving large boxes for you. - Consider storage.
Many of these creations are going to be enormous, so clean out your art closet to make room. - Tackle the cardboard cutting challenge by purchasing a cardboard cutter for teacher use.
You will be shocked at the time this saves you. This tool is invaluable. - Create project sustainability by communicating the temporary nature of things.
For example, if students choose to use expensive materials like wood, let them know it will be re-purposed by another artist next year to save money. - Regularly set up the green to allow for testing.
Don’t underestimate the trial and error that goes into this process. Allow your students to play, to make sure their design works! - Promote safety as they golf!
My PE teachers were excellent consultants when it came to safety. Ultimately, we decided to opt for foam balls and putters due to the age and volume of the students. There have been countless days I have silently thanked them for help with that decision!
Choose a venue for the community to play the course.
After all of your students’ hard work, you will want to share the course with the community! Mini-golf is an ideal fit within several spring events that are common at the public school: spring carnival, field days, or your art show. Choose one and begin to publicize the course! Don’t forget to invite your administration or even the school board. Who doesn’t want to play a round of golf?!
At first, building an art history mini-golf course can seem to be an impossibly expensive undertaking. But, as with all art projects, it just takes some creative problem solving to make it a reality for your school. Your efforts will be rewarded tenfold, as you see students who were never invested in art class clamoring to put in extra work on their mini-golf hole!
What tips do you have for efficiently organizing group projects?
What is your favorite way to teach art history?
Magazine articles and podcasts are opinions of professional education contributors and do not necessarily represent the position of the Art of Education University (AOEU) or its academic offerings. Contributors use terms in the way they are most often talked about in the scope of their educational experiences.