In today’s “selfie” generation, photography isn’t always seen as a high art form, especially among our students. Therefore, it’s up to us to share the work of prominent photographers and showcase what a powerful form of expression photography can be.
Luckily, we can easily capitalize on our students’ love of technology to do this! And, it couldn’t be easier, especially if you have access to iPads. Sharing the technical side of photography can help influence your students to think differently about taking photographs.
Today I’ll be sharing how to introduce your students to photography using the iPad. However, you could easily use the suggested prompts at the end with any form of technology to which you have access.
Check out these 4 easy steps to introduce your students to photography using iPads.

1. Inspire your students.
When introducing your students to digital photography, it’s important to hook them in the right way, so they are excited to learn. This way, they’ll be motivated to gain a deeper understanding of how photography works.
One way I like to introduce the ideals of photography is through the video Art with Mati and Dada – Dorothea Lange. This video is a cartoon but would work for many grade levels. It addresses how to capture the right moment as well as how to pay attention to angles and lighting.
Once we watch this video, we discuss how photography has changed over time and how we can use information from the video in our photography. I also share some images of high-quality photography. I make sure to include many different types of photography like portraits, nature, abstracted photos, and photos of everyday spaces to get them thinking on a deeper level.
The list of artists I share includes:
Once my students are inspired, it is time to show them some iPad basics.
2. Demonstrate the iPad and apps.
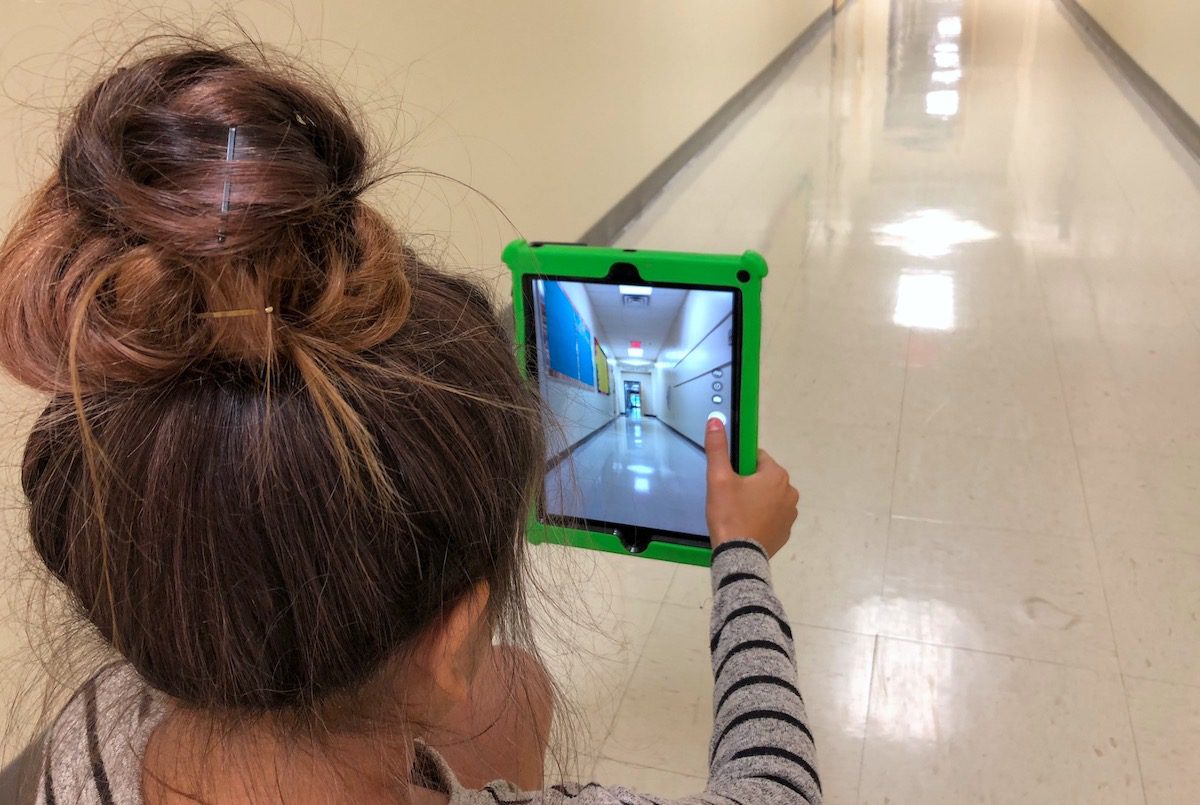
Once your students are inspired, it’s a great time to introduce the tools they’ll be using to create their work. If needed, show your students the basic way to operate an iPad and take a photograph.
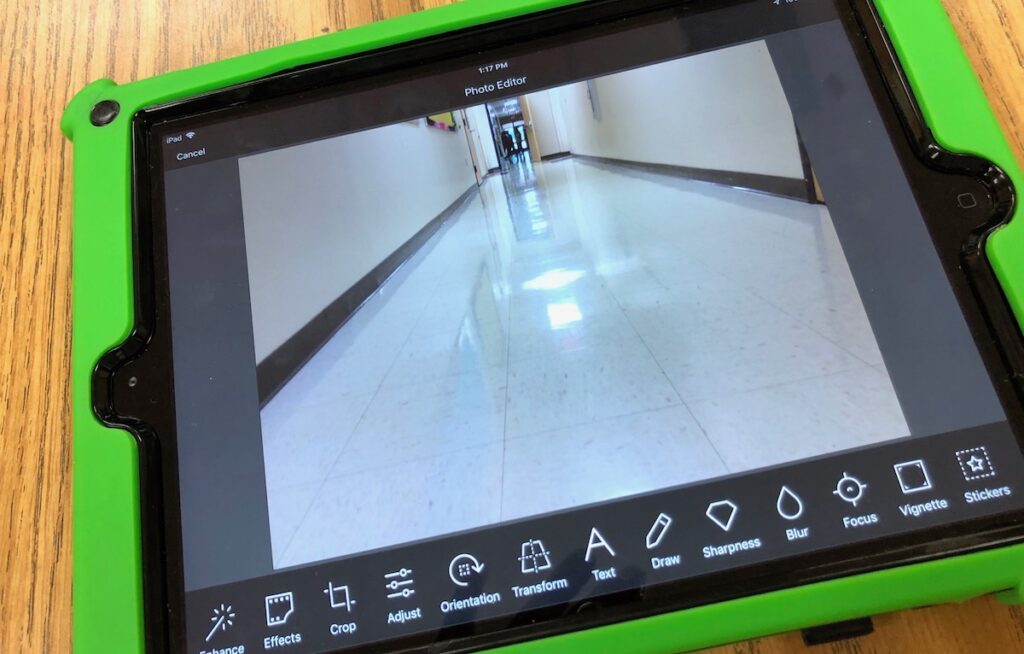
You will also want to demonstrate how to use whatever photo editing app you have chosen. There are many options, but I like to use Photo Editor by Aviary. This app has several editing functions that give students a chance to work with the lighting and dimensions of the photograph. It is simple and easy to use.
I introduce the following features to my students during our demonstration:
- Enhance
This feature offers options to enhance various lighting effects and brighten the image. - Crop
This feature allows students to resize the photograph with a grid. - Adjust
This feature offers brightness, exposure, contrast, warmth, and saturation among other options. - Orientation
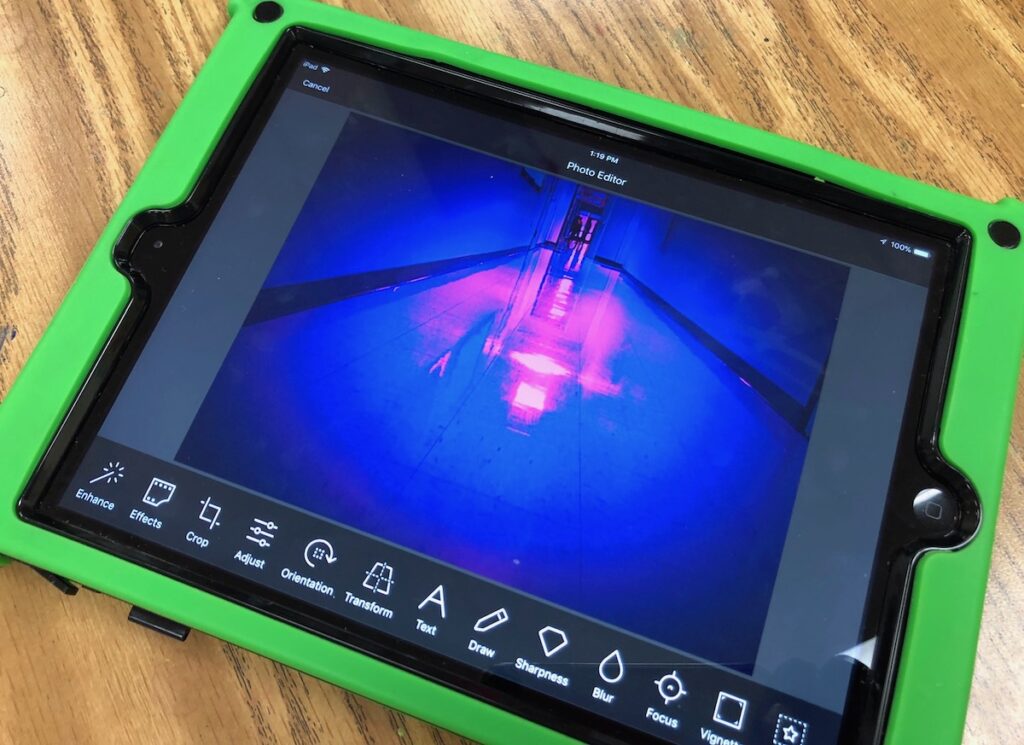
This feature allows students to turn their image left, right, vertical or horizontal. - Blur
This is a fun feature that blurs areas students touch. - Vignette
This feature adds a vignette to the edges of the photograph and allows students to move the vignette around the photograph.
I also make sure to give my students time to explore any features I don’t demonstrate. Many times, my students teach me a variety of tricks as they play around and merge different edits.
Finally, reiterate that students are not making memes. They should avoid any text or meme options the apps may contain.
3. Share how to combine apps.
If you would like your students to take it to the next level, show them a few other apps they could explore after they use the first one. Combining the editing capabilities of two apps on the same photo can allow your students to get some really great results.
Here is a list of 4 apps that work well:
They each have their own unique features and can offer another level of design to your students’ images. You can demonstrate this process or let your students explore it on their own.
If you’d like your students to combine apps, let them know from the beginning so they know what to expect.
4. Give students a prompt to drive their final product.
Now that your students are inspired and understand how to work the iPad and photo editing app, it is time to begin their final product. This is also a good time to let them brainstorm a list of ideas they may be interested in photographing. You can let your students use their own ideas or give them guidelines or prompts to inspire your work.
Here are 5 few ideas you could use in your classroom:
- Take your students on a walk around the school and let them find moments or areas to capture.
- Take a walk to the playground or common outdoor areas for students to be inspired by nature and capture shots outdoors.
- If your students bring their own devices, allow students to take photographs from their homes, neighborhoods or even photographs they captured on vacation.
- Set up a container of still-life items and let students set up and photograph their own still-lifes.
- Let your students choose an idea from their brainstorm list and photograph it.
These ideas should get you and your students going in the right direction. If your iPads are limited, you may want to pair students and let them take turns using the iPads. This could be done alongside another project as well.
Once you let your students loose, be ready to be blown away by their creativity and skills!
What photography apps do you use in the art studio?
How to do you introduce photography to your students?
Magazine articles and podcasts are opinions of professional education contributors and do not necessarily represent the position of the Art of Education University (AOEU) or its academic offerings. Contributors use terms in the way they are most often talked about in the scope of their educational experiences.