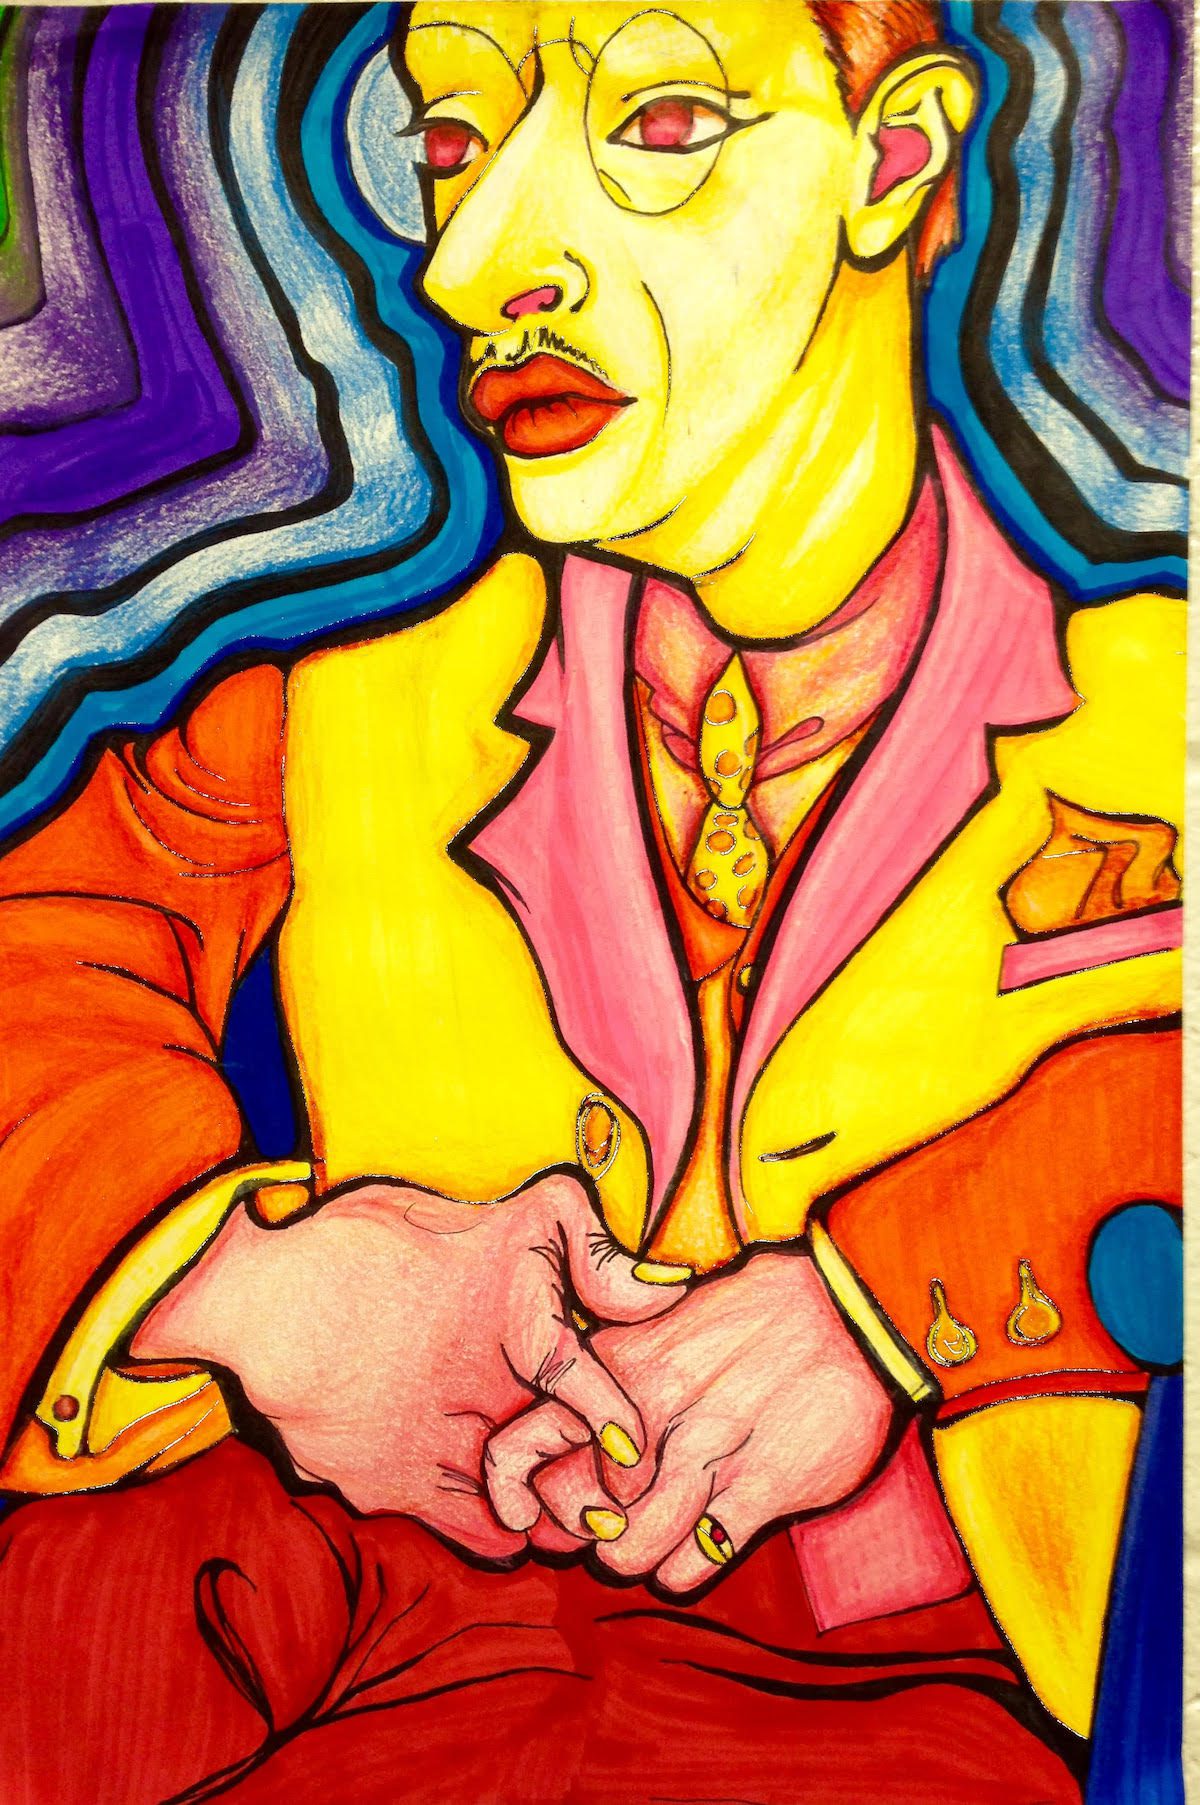
We all know the one thing we lack as art educators is time! There is never enough of it. So, each year I search for new lessons that will quickly teach my students a multitude of techniques. One of my favorite lessons of this kind starts with the well-known book Drawing on the Right Side of the Brain. In it, author Betty Edwards outlines an activity that has the reader recreate Picasso’s Portrait of Igor Stravinsky…upside-down!
The Benefits of Drawing Upside-Down
According to Edwards, drawing upside-down helps students practice recognizing shapes and lines in a subject. By turning their reference photo upside-down, they can begin to draw with the right side of their brains. They don’t have to worry as much about the final product, and can focus more on the actual drawing process.
According to the book, this is because the left side of the brain processes visual cues, interpreting them as familiar patterns and symbols. By turning the reference photo around, it becomes unrecognizable. The right side of the brain is forced to see the lines, shapes, and abstracted details instead of the object as a whole.
It’s a fascinating concept, and one I use early on with my drawing students. I have found it to be a wonderful tool to aid them in drawing portraits as well.
I used to teach this lesson to my students as a one-day study. But then I began to think about the ways we could enhance this quick teaching activity and ended up turning it into a full week-long lesson complete with three learning objectives! Best of all? This lesson works with almost any grade level.
Here are the steps you can use to introduce the lesson to your students.

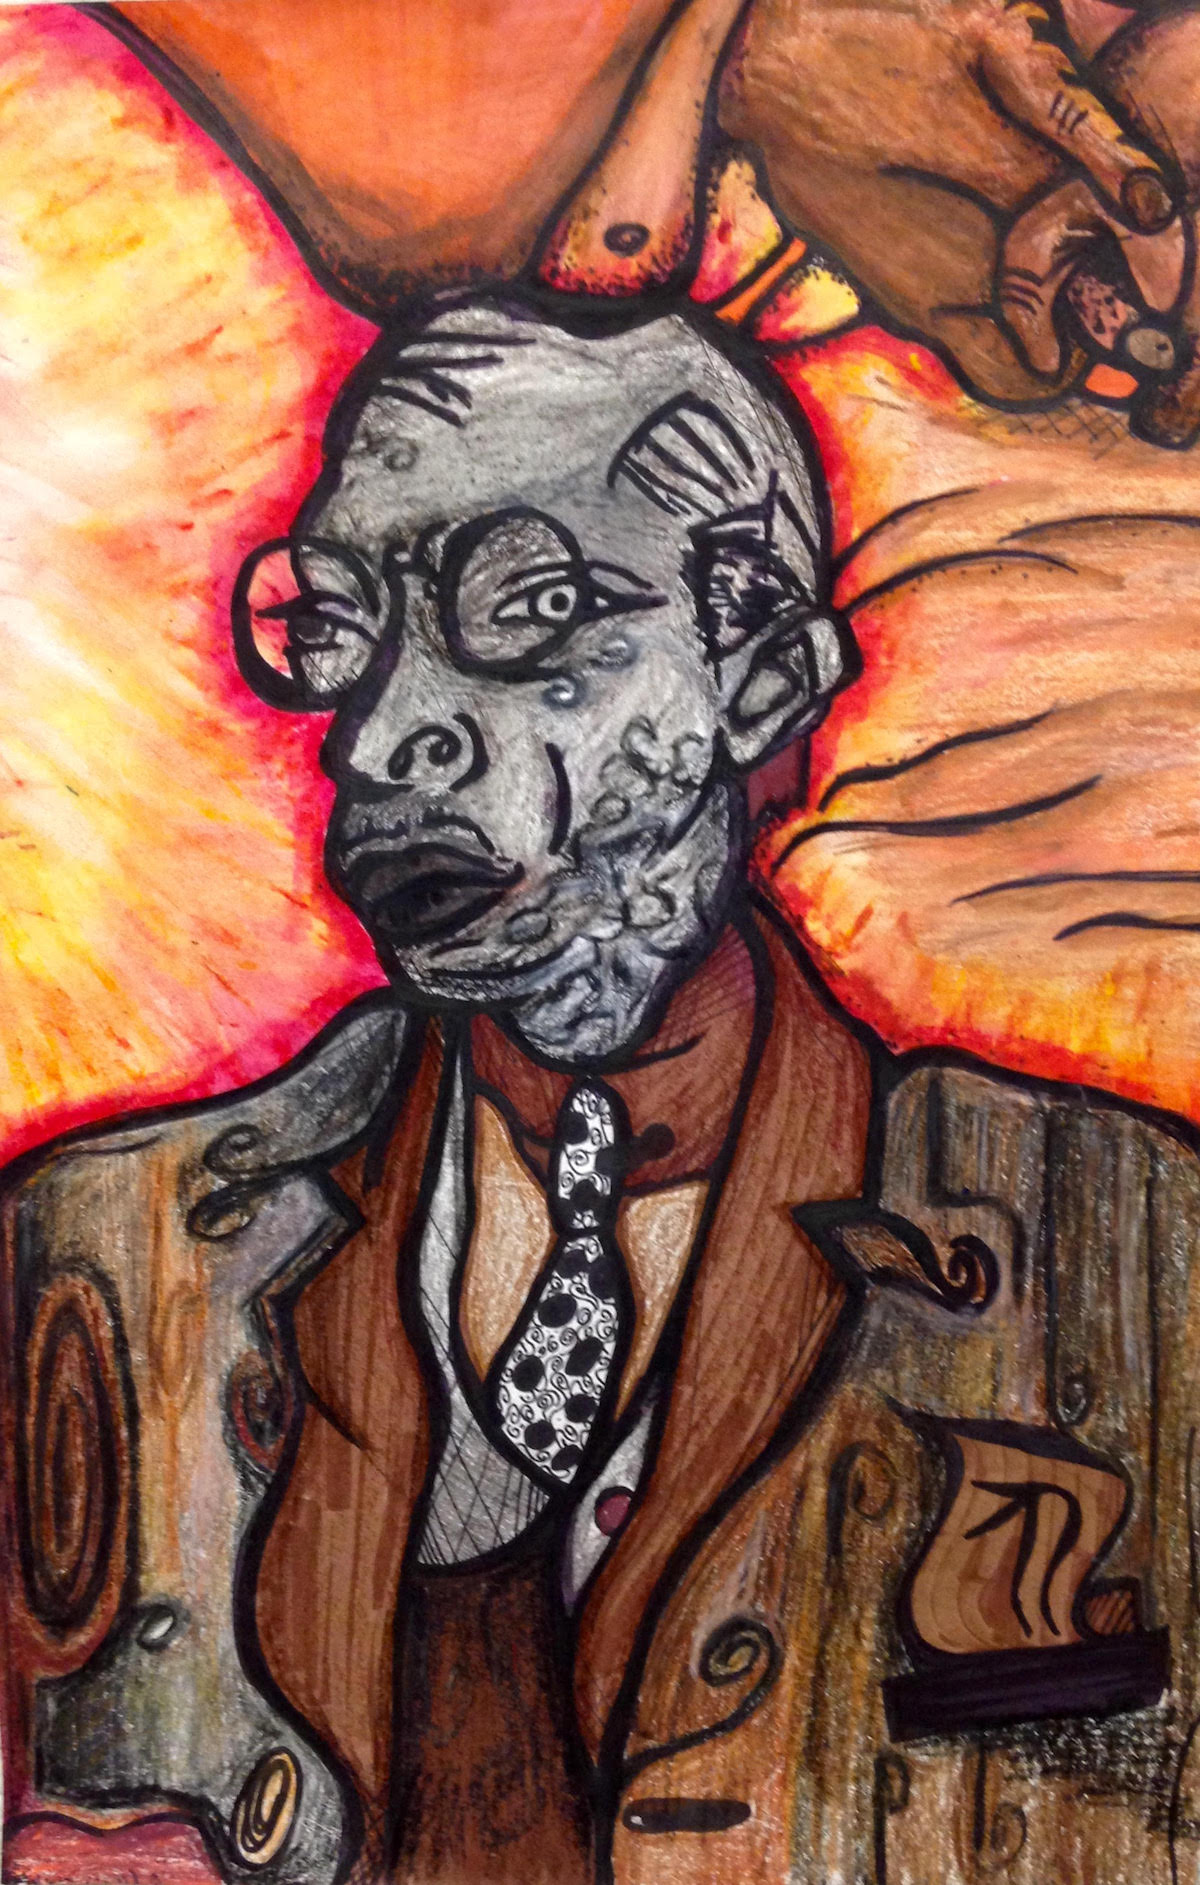
1. Do a Quick Blind Contour Study
Give each student a copy of Picasso’s Portrait of Igor Stravinsky and a piece of 12” x 18” drawing paper. Have them turn the Picasso portrait upside-down. Then, have students do a quick blind contour study on their drawing paper using graphite. This warm-up activity gets them used to working upside-down and seeing the lines and the shapes in the work.
2. Do a Second Contour Study
Have students turn their drawing paper over and do another study. This time, have them do an upside-down contour study slowly. Remind them to really look at the lines they are drawing. Have them measure each feature, paying attention to the proportions. This activity can be frustrating, so remind students it’s about learning to see, which is often one of the most difficult things to do in art. However, it’s also the key to being a successful technical artist.
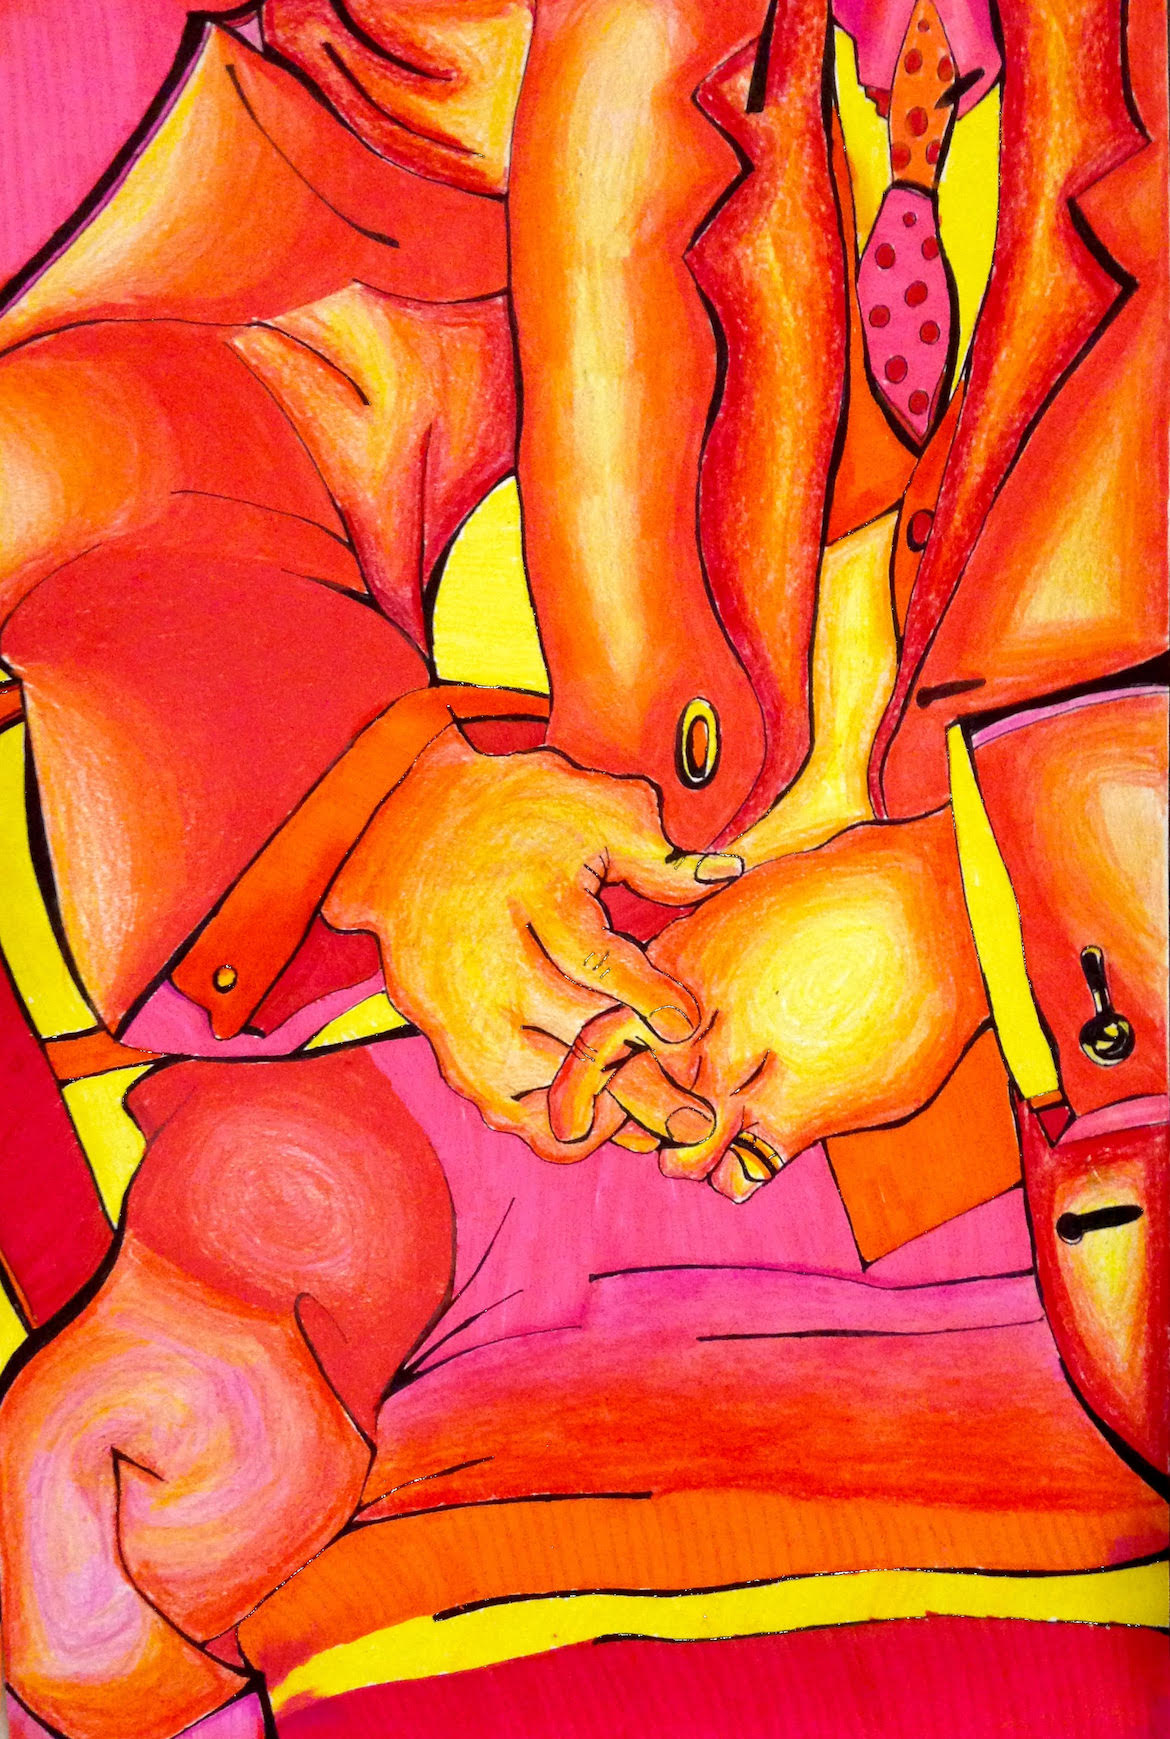
3. Experiment with Line Quality
The next objective is to teach students the importance of line quality. Have students take drawing pens and begin to go over their pencil lines. They can choose if they want to trace their blind contour or their regular contour study. Encourage students to add thick and thin lines until they create an interesting composition.
Line quality is often an important, yet overlooked art concept, so I allow students to spend some time on this and really experiment with the art of line. I also ask them to get creative and do something interesting in the negative space to enhance their work.
4. Add Color
The final learning objective is to bring in color theory. Review primary and secondary colors, neutrals, complements, analogous and monochromatic schemes, along with tints and shades and any other concepts you like. If it has to do with color, review and discuss!
Then have students experiment with dry media such as markers, Art Stix, crayons, and oil pastels. Remind them this part is about finding textures that work well together and create an interesting contrast. Have students select a color scheme they enjoy, and add in their colors using the various mediums. The results are always outstanding!
5. Present Finished Work
Finally, have students mat and sign their work. I like to hold a critique and hang their work in the hallway as a class display. I still remember the first year I took this simple study and moved it to a full-blown art lesson. I almost cried happy tears to see the final exhibit. The creativity, the learning, and the art was a true testament to what a good, solid art lesson can ultimately teach our kids. Not to mention how successful my students felt about their work!
I have found the more learning objectives I can tie into each lesson, the more my students discover through the process. This is a tried-and-true lesson that always garners successful final masterpieces.
I love taking a traditional teaching tool and turning it into a successful lesson. If you’re interested in adding engaging drawing lessons that build skills to your curriculum, don’t miss the AOE Course Studio: Drawing. You’ll gain a fresh perspective and the inspiration to redesign and scaffold your drawing curriculum.
Have you considered using Betty Edward’s book to springboard new lesson ideas?
What lessons do you teach that help your students better understand contour lines?
Magazine articles and podcasts are opinions of professional education contributors and do not necessarily represent the position of the Art of Education University (AOEU) or its academic offerings. Contributors use terms in the way they are most often talked about in the scope of their educational experiences.