Did you know November 11th is Origami Day? Origami originated in Japan, and the holiday is observed there as well. Origami day is the perfect time to share the art of paper folding with your students.
The best part about using origami in the classroom is that it allows for endless possibilities. The final pieces can stand alone, be used in collaborative work, or even be used in mixed media pieces. The outcome is truly up to the artist.
When planning activities, think about the age range of your students. You’ll want to choose a difficulty level with which your students can be successful.
Here are 3 different ways you can share origami with your students!
1. Origami Heart
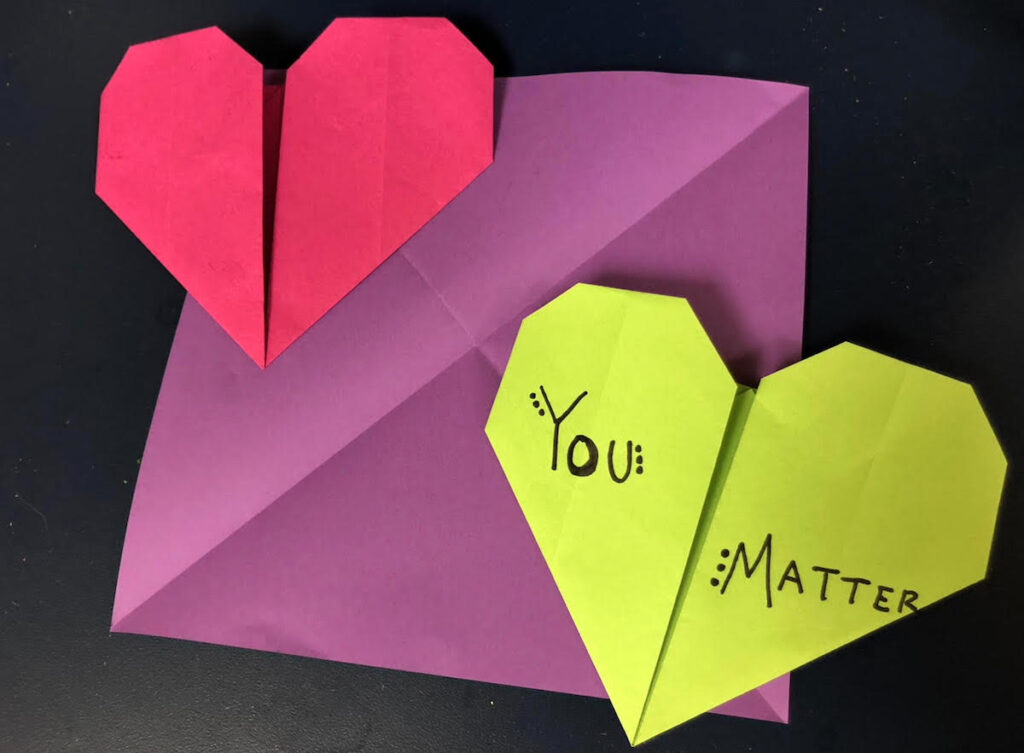
The origami heart is a beginning lesson to teach your students. It can be completed in seven folds, so it is not very time-consuming.
Materials
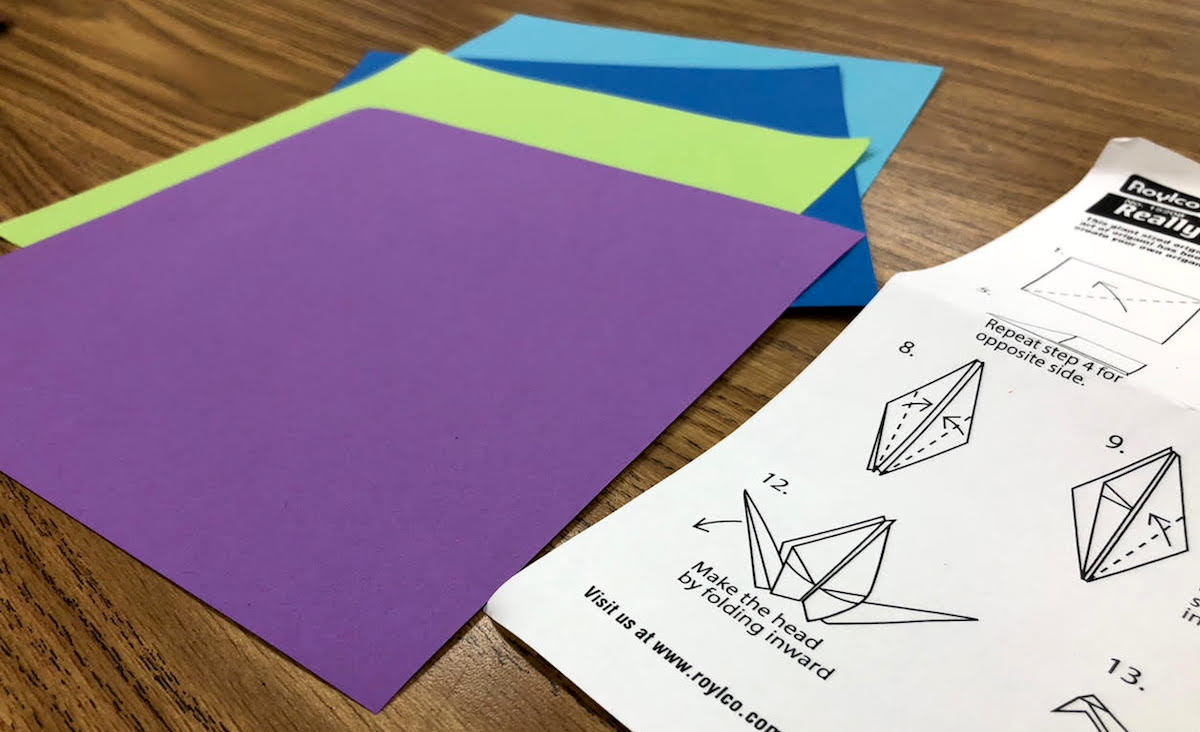
- Variety of origami paper (or copy paper cut into squares)
- Origami heart directions or video tutorial
Procedures
- Talk to your students about origami and its origins. Here are a few fun facts to share.
– Origami was named in 1880. The word stems from “oru” which means fold and “kami” which means paper.
– The most popular and easily recognized form of origami is the paper crane.
– Traditional origami uses square paper and does not allow cutting. - Demonstrate how to make an origami heart. You can also show the demonstration video mentioned above.
- Give students a sheet of origami paper and one template per table. Let them create their origami.
To take this lesson to the next level, have your students write a positive message on the origami heart and ask them to pass it on to someone who needs a kind message. If resources permit, let each student make two to three hearts so they can keep one for themselves and pass on the rest.
2. Origami Pumpkin in a Mixed Media Artwork
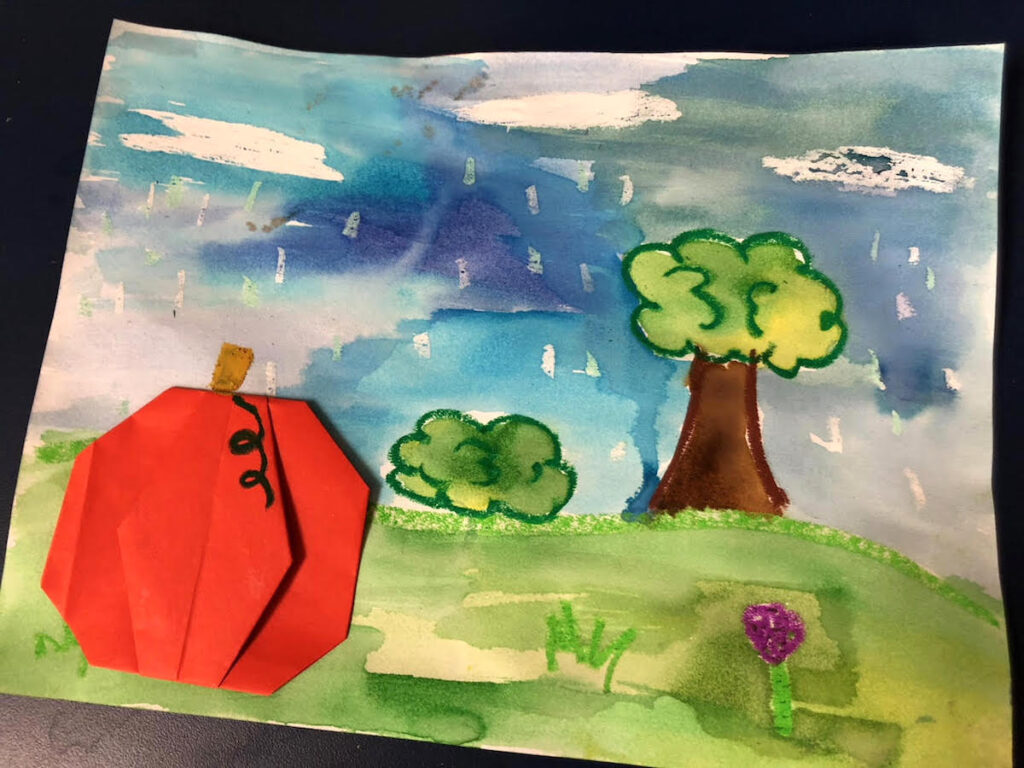
Making an origami pumpkin is fitting for fall. You can add an extra element by adding it to a mixed media piece of art. This lesson will take two class periods.
Materials
- Orange origami paper (6″ x 6″ or larger)
- 9″ x 12″ drawing paper or construction paper
- Drawing supplies
- Painting supplies
- Scissors
- Variety of paper scraps
- Origami pumpkin directions
- Origami pumpkin video tutorial
Procedures
- Introduce the term “origami” to your students and share some information about it.
- Show your class the video tutorial and then hand out the directions. Remind students that although the template and video show a jack-o-lantern, they do not need to add a face.
- Have students review the directions and give them their origami paper. Let them create their pumpkins.
- After students have made their pumpkins, tell them they will now use their imagination to create a mixed media picture that will include their pumpkin. At this time, you could consider giving your students a theme like “landscapes” or leave it open-ended. Either way, I recommend having students complete their background/setting first, then add their pumpkin at the end. Tell students they can get as creative as they want with collage and drawing materials.
- Have students share their final products with the class.
3. Origami Frame
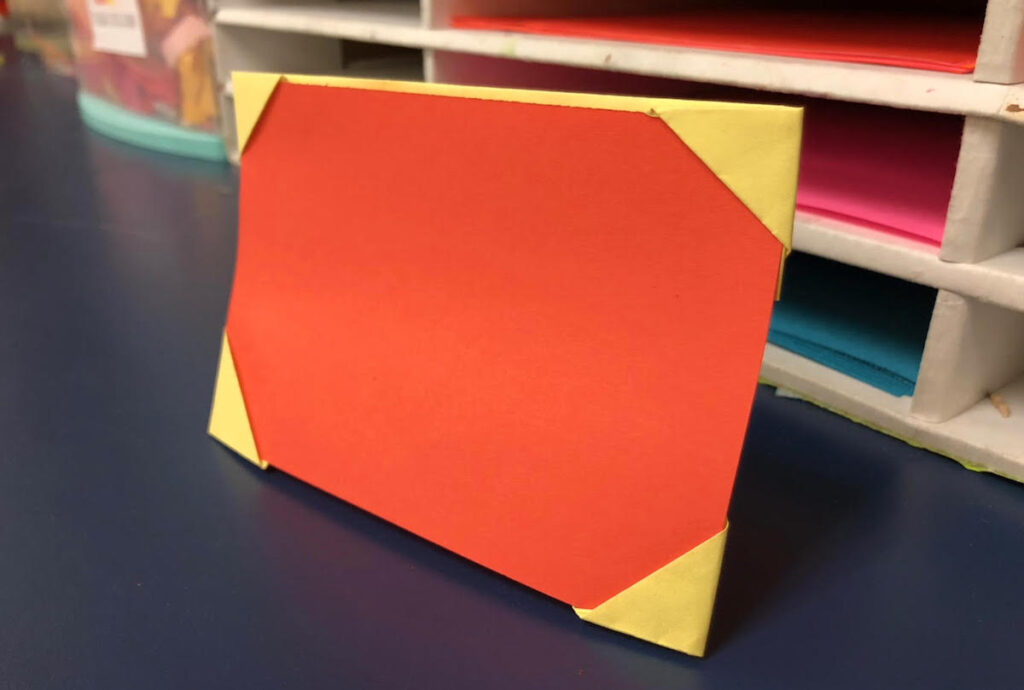
An origami frame is a fun lesson your students can use for real photographs or mini art pieces.
Materials
- 8.5″ x 11″ thin paper like colored copy paper or scrapbook paper
- 4″ x 6″ sheet of drawing paper
- Origami frame video tutorial
- Drawing supplies
- Paint supplies
Procedures
- Introduce the term “origami” to your students and share some information about it.
- Show your students the video tutorial about how to make their own origami frame. You can also show them by giving a live demonstration.
- Give students a square sheet of paper and have students create their own origami frame.
- Once students are finished making their origami frame, give them a small piece of drawing paper that will fit inside. Let students create art to fit inside the frame. A real photograph could fit inside the frame as well.
No matter what type of origami design you present to your students, they will have a great time creating it. It is a medium that can truly capture their attention and get them engaged.
What is your favorite origami design to share with your students?
How do you present origami to your students?
Magazine articles and podcasts are opinions of professional education contributors and do not necessarily represent the position of the Art of Education University (AOEU) or its academic offerings. Contributors use terms in the way they are most often talked about in the scope of their educational experiences.