When I first started teaching, I had boxes of fresh clay, pottery wheels, and a kiln. Then, I went to teach at another school and was asked to teach sculpture with air dry clay. Gasp!
My first response? What is this, and how does it work?
With this new challenge before me, I decided to start experimenting.
My goal was to determine what you can and cannot do with air dry clay.
Handbuilding is a “GO.”
Handbuilding techniques such as coiling, slab construction, and sculpting work well with air dry clay. An advantage to air dry clay is the variety of armatures you and your students can use. Since the piece isn’t going into the kiln, you don’t have to worry about the armature burning or melting. A con to building with air dry clay is how fragile it can be. Thin additions like legs, fingers, and ears will easily break off.
To avoid small parts breaking off, have students create mixed media pieces. Using things like wire, pipe cleaners, or dowel rods for fingers, long skinny legs, or eyelashes can prevent these pieces from breaking as easily.
When sculpting, encourage students to slip and score to attach pieces, just as you would when working with regular clay. My preferred brand of air dry clay is Amaco Marblex grey clay. I find it doesn’t crack as much as some other brands. To avoid cracking, keep students from adding a lot of water to the clay when they make slip. This can be done in the same manner as with regular clay.
Air dry clay is not food safe.
With regular clay, as long as you work with food-safe glaze, you and your students can create things like functional mugs, bowls, and plates safe to use for eating and drinking.
Students can still create mugs, bowls, and plates with air dry clay, but they must be for decorative purposes only. While this can be disappointing to students, use it as a way to encourage creative and playful design.
Have students brainstorm other uses for bowls and plates like pencil holders and jewelry or key trays. They could also create a planter or candle holder.
Avoid devastating kiln explosions.
If you’ve never opened a kiln to uncover the broken remains of all your student’s projects, consider yourself lucky. Avoiding the disappointment of telling your students their projects are destroyed gives air dry clay major bonus points.
With regular clay, you need to carefully time the drying and firing process. This can be a challenge when attempting to align it with your class schedules.
Air dry clay allows you to skip the kiln completely, cutting down on the amount of time it takes to complete a project from start to finish. That being said, to avoid cracking with air dry clay, you still need to pay attention to how quickly it’s drying. As with regular clay, drying slowly is the best bet. Drape a plastic bag over the top and be patient.
Use color!
When it comes to adding color to your pieces, many things are the same with the exception of using glaze.
Since air dry clay isn’t fired, you won’t be using any glaze. Avoiding glaze saves you a lot of money, but removes the magic of things like colorburst glazes.
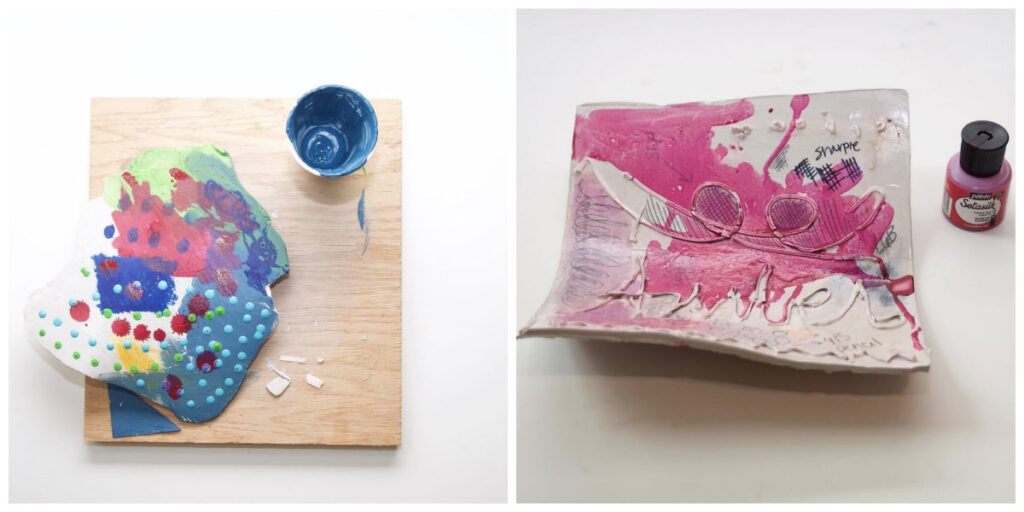
Just as with regular clay, encourage your students to experiment with different ways to add color. A fun way to allow your students to experiment is to have each student create one to three small tiles, adding color in their own way. When experimenting, let students try any medium to which you have access. Experimenting with; marker, acrylic and tempera paint, watercolor, ink, and colored pencil are a few ideas to get you started.
As students explore, be sure to have them record what they used, and the results. For example, they may find if they use too much watercolor, their tile can crack.

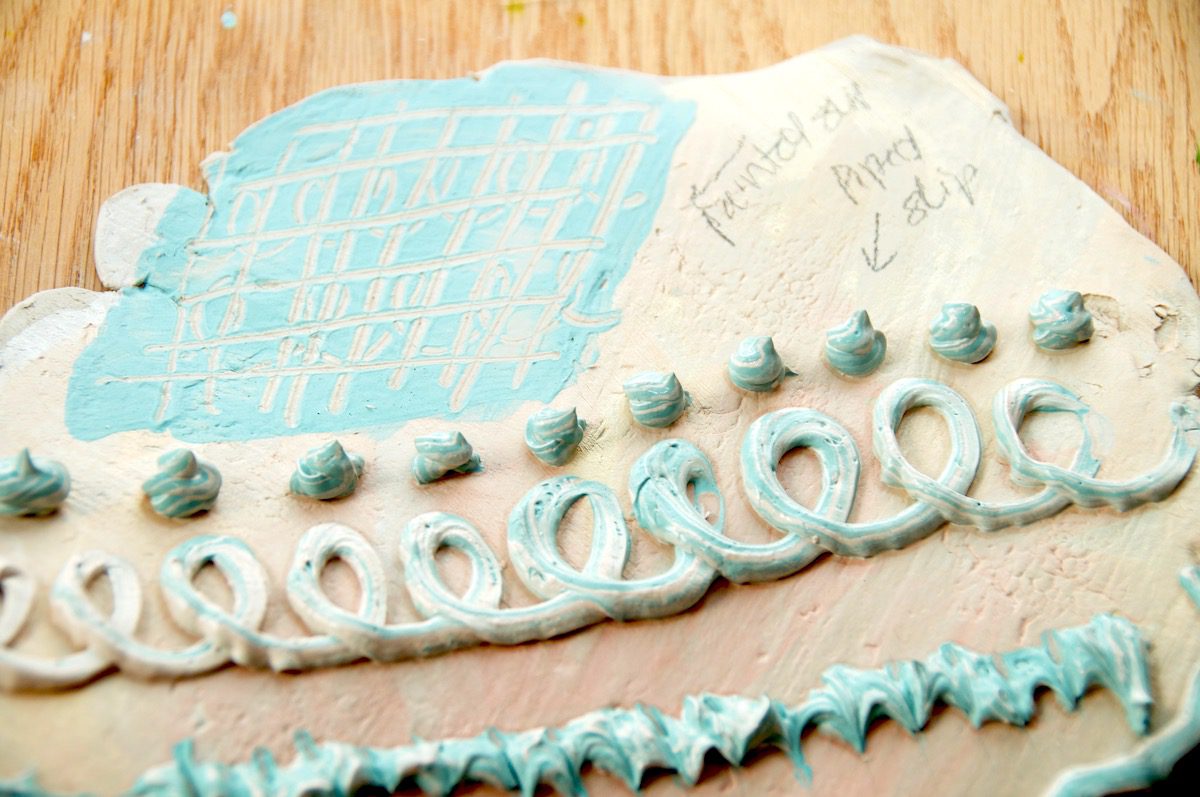
Add colored slip details.
Creating colored slip is another fun way for students to add details to their pieces. The best way to create colored slip is by using Mason stains. However, I’ve also found success by adding paint to the slip.
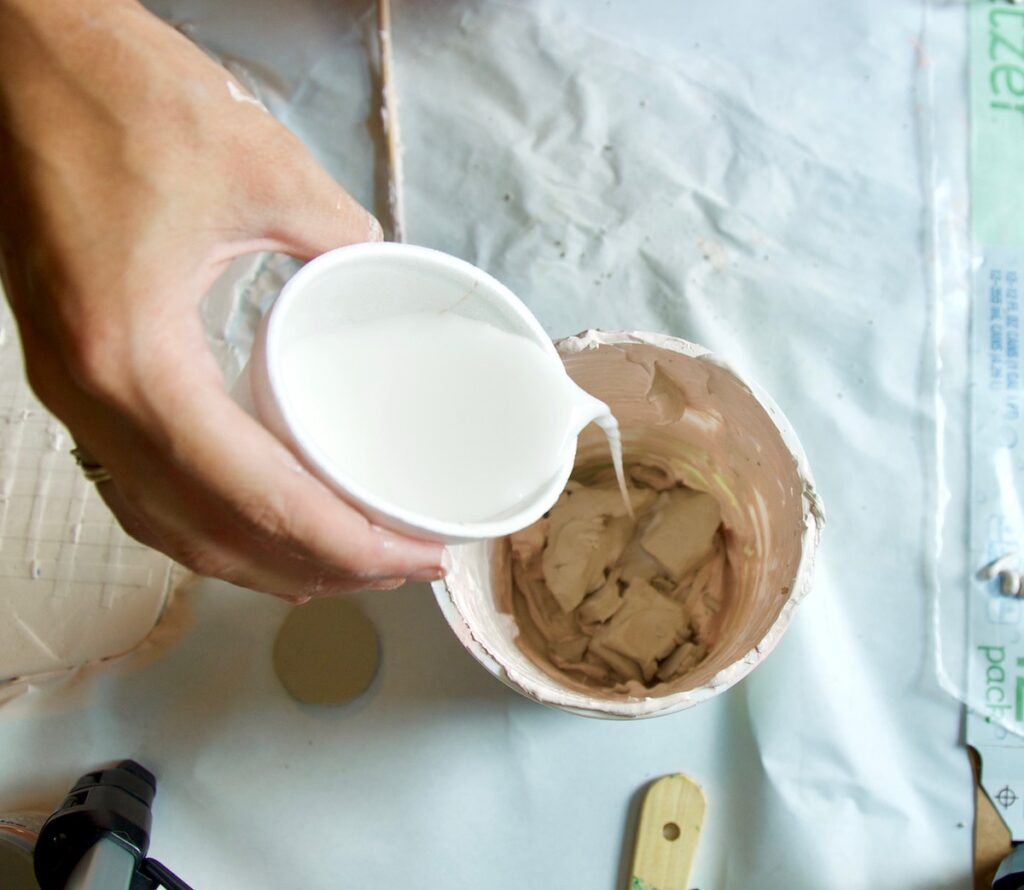
Here’s an easy way to make your own slip:
- Start with dry clay (this is a great way to repurpose old clay).
- Place it in a Ziploc bag, and add some water. Start with a small amount of water adding more as needed.
- As the clay softens, mix the clay and water by squeezing it in the bag continuing to add more water until you have the desired slip consistency.
- Next, add some squirts of paint into the bag, squeezing to mix.
- Once you have your desired color, snip the edge of the bag, using it as a piping bag.
Explore mixed media.
While you can create mixed media pieces with all kinds of clay, I find it easier for students when working with air dry clay.
Since air dry clay isn’t going into the kiln, students can add mixed media elements as they go.
When working with a piece that’s going to be fired, students need to plan where they want to add things like feathers, wire, or sticks, allowing for shrinkage. Then, wait until their work is through all of the firing phases to complete the additions. No such restrictions apply to air dry clay making mixed media pieces easier than ever.
Combine multiple types of clay.
Another thing to explore is working with more than one type of clay. For example, combining paper clay and air dry can be fun and lead to exciting results. You can add paper clay to a piece of air dry clay that is completely dry.
Artist Deborah G. Rogers is a great example of someone using both air dry and paper clay to create playful sculptures. Rogers is a self-taught artist living in Norfolk, Virginia. She was first introduced to air dry clay in school. After working as a children’s book illustrator, she had the desire to work in 3-D, leading her back to air dry clay. Rogers works with two types of clay, Marblex (my favorite), and La Doll. She uses Marblex for the main sections of her pieces, transitioning to La Doll for the smaller, more detailed sections.
In an article entitled Layer Upon Layer, author Teresa Annas describes Roger’s process: “Once the form dries, she coats it in gesso, then add layers of wash, using acrylic paints, inks, and dye. Then she draws on it with colored pencils. In sealing the piece with water-based, walnut-tinted varnish and finger-applied wax, she creates the vintage look she’s after.”
Overall, air dry clay is a fun medium to introduce to your students. It works best if you treat it as its own medium instead of trying to replace regular clay. If you choose to appreciate air dry clay for what it is, you’ll encounter far fewer frustrations, and you can encourage even more creativity and exploration with your students.
What’s your favorite thing to create with air dry clay?
What’s your secret trick to creating with air dry clay?
Magazine articles and podcasts are opinions of professional education contributors and do not necessarily represent the position of the Art of Education University (AOEU) or its academic offerings. Contributors use terms in the way they are most often talked about in the scope of their educational experiences.