One of the best things about AOEU courses is that art teachers from across the world come together to share, learn, and improve their practice. It’s always a joy to get to know these creative, passionate teachers who are full of amazing ideas!
One of my favorite classes to teach is Studio: Drawing. Time and time again, I am in awe of the art activities and lessons they come up with for their classroom. Today, seven students are sharing ideas, sure to take your students’ drawing skills and your drawing curriculum to the next level.
Here are 7 creative ideas that have come out of AOEU’s Studio: Drawing Course.
1. Play “Drawing Jeopardy.”
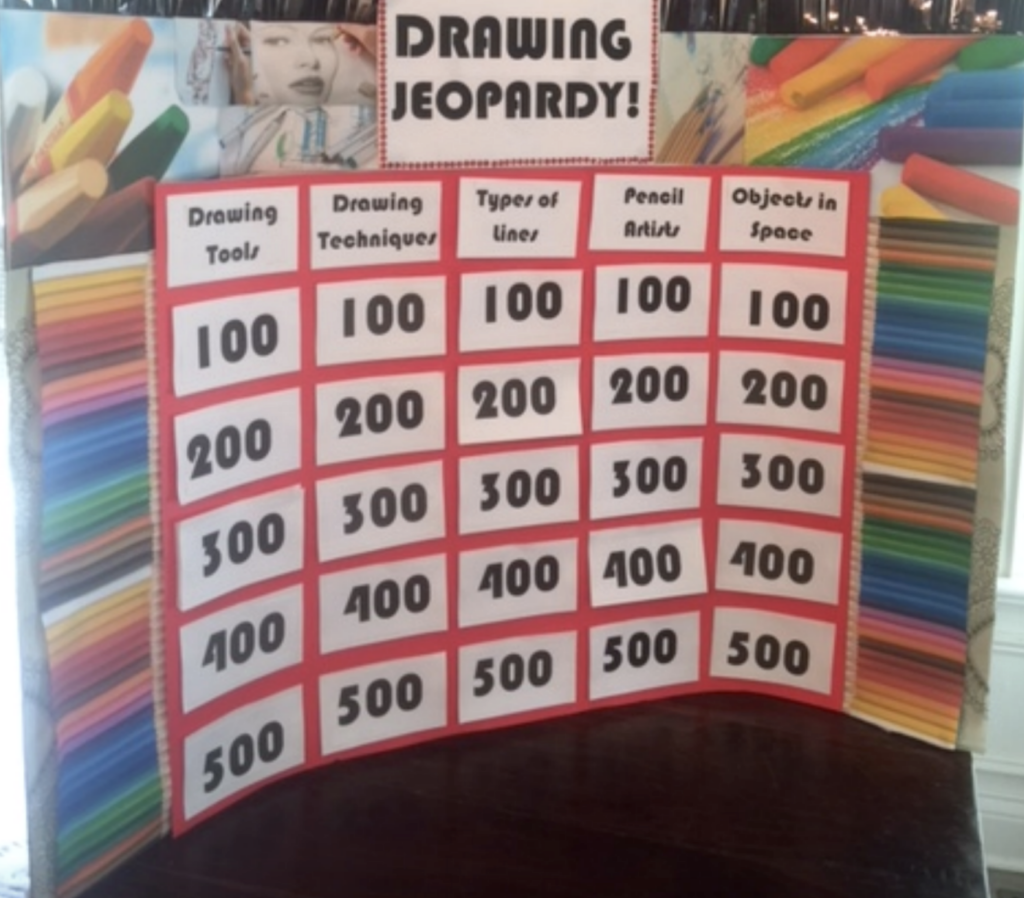
This idea comes from Studio: Drawing student, Donna Banks. Donna created a fabulous “Drawing Jeopardy” game to engage her students. She included questions and answers based on drawing concepts, techniques, vocabulary, and more.
Here is what Donna had to say about her instructional learning tool.
“The physical game board loosely emulates the game screen from the television show. It is brightly collaged to show a number of drawing implements and techniques to inspire play. I used bold colors to design the board and included a shiny fringe to attract students. The index cards adhere via low-tack glue dots. So, answers and categories can simply be swapped out, whether for differentiation purposes or teaching different subject areas.”
The game is designed to be played as a class, with the teacher acting as the game show host and the students divided into teams. The team with the most correct answers to the questions wins. This is such a creative way to teach students terms they will be using throughout their drawing studies.
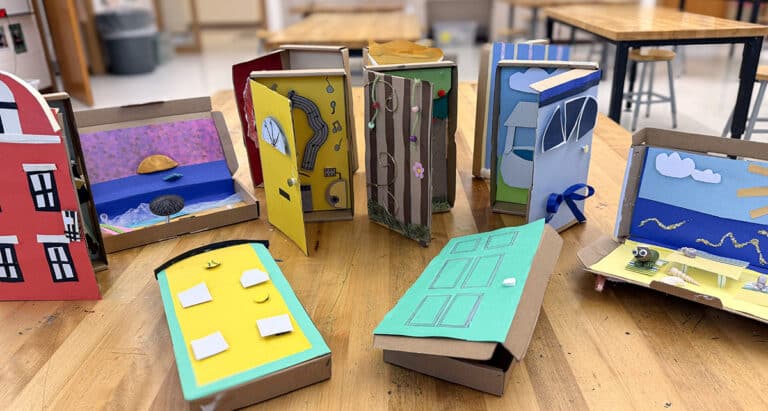
2. Reflect on the visual journaling experience.
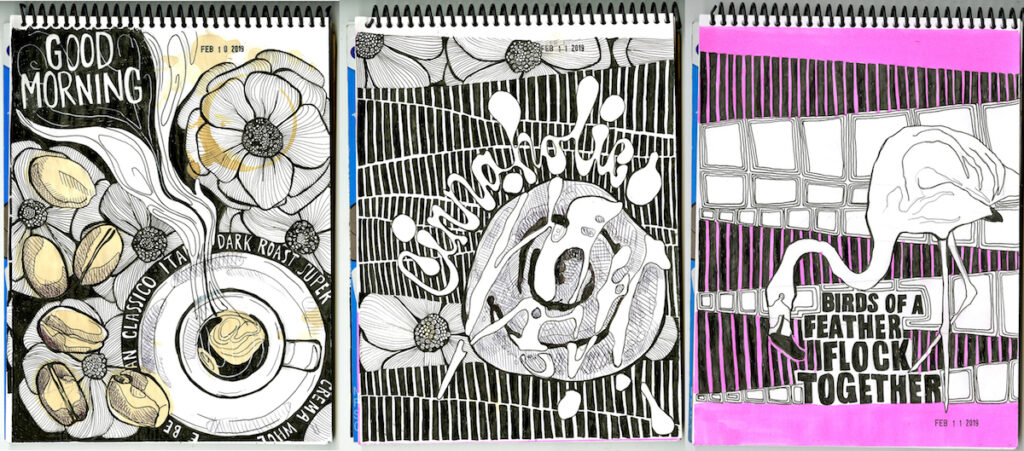
Students in the Studio: Drawing course take notes via a visual journal. The learning that takes place is nothing short of spectacular, as students organize their visual notes in their own creative ways. Student, Daniela Cirone, did a fantastic job with her first journal assignment. Her reflection about the process, part of which can be seen below, shows just how much she grew.
“I officially faced my fear of drawing in a sketchbook and actually really enjoyed the process! I wrote a lot of notes while watching the videos and in my readings. This started to loosen me up and ease my anxiety regarding the, ‘How do I start?’ thoughts.
I woke up early on a Saturday morning to start my visual journal. I had it sitting on the kitchen table while I was making coffee. Again, my mind went to, ‘How do I start?’ I thought back to the previous week’s comments and feedback about getting my paper dirty by staining it. So, there I was, spilling coffee on page one of my visual journal.
Once I actually got started, it was shockingly easy to keep going. I just drew the next thing that came to mind. For once, I didn’t have a preconceived plan, I just created. My first sketchbook page was inspired by activating all of my senses. I had the aroma of fresh coffee in the air. I had coffee beans spread around my sketchbook and table. I was tasting the coffee, spilling it, reading the coffee bean label. It was the moment I was living, and I captured it all in my drawing.”
Imagine how having your students reflect on how they are creating their visual journal pages would deepen their thinking or force them to see things in a new way.
3. Face your fear of tricky techniques.
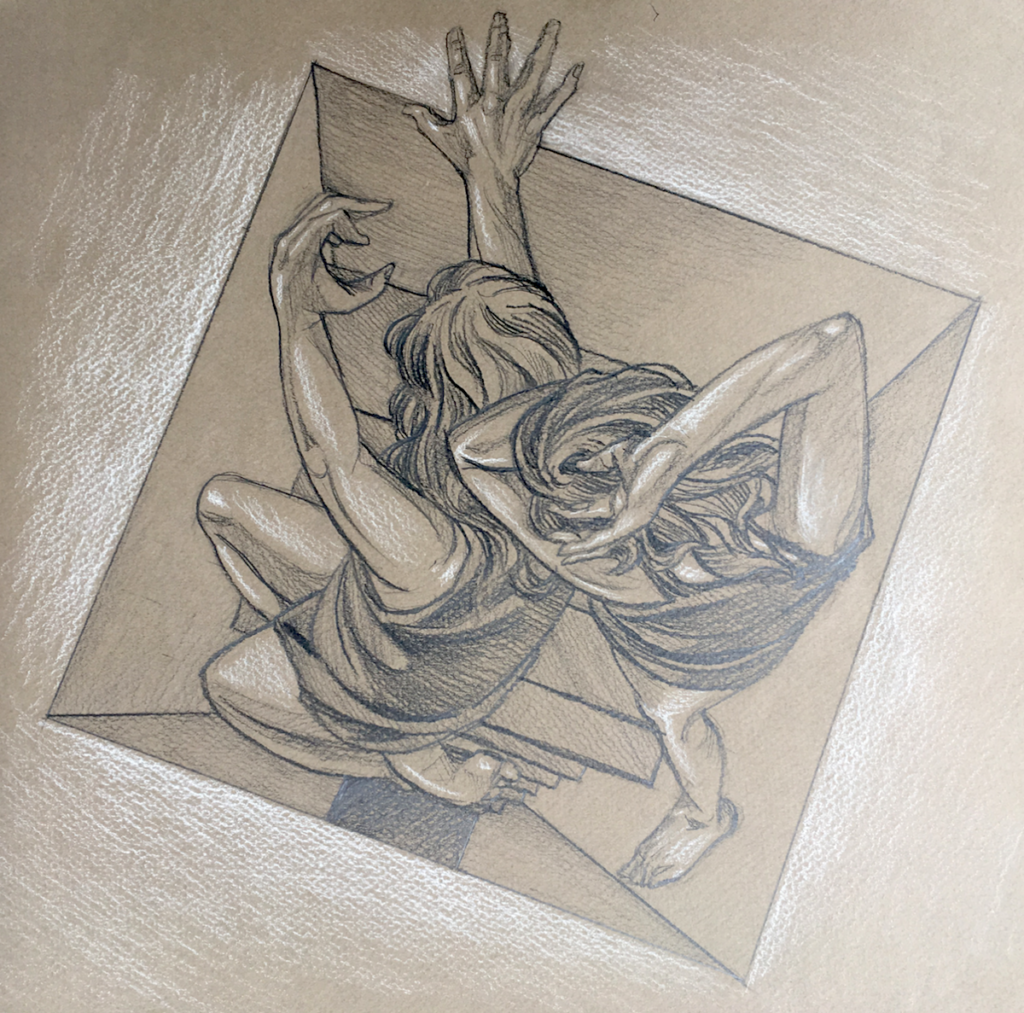
For many art teachers, anatomy and perspective aren’t favorite subjects to teach. However, student, Christine Cintula, combined the two into a dynamic lesson.
She shared, “I chose to integrate last week’s anatomy learning with this week’s focus on perspective. I’ve always been inspired by Michelangelo Buonarroti’s drawings. So, I attempted to add figures that showed despair and desperation, falling down a staircase that has no end.”
To successfully complete this drawing, Christine took photos of two poses she felt would give the drawing power and emotion. She posed on her staircase to aid in drawing the perspective of the stairs.
Think about how your students might take their own reference photos to aid in drawing complicated subject matter. When students have the opportunity to take the photos they draw from, it’s a win/win!
If you’d like to brush up on your anatomy skills, check out the Drawing the Human Form PRO Learning Pack. You’ll discover how to teach your students about proportion, structure, and posing and take the fear out of realistic drawing.
4. Remix a classmate’s drawing.
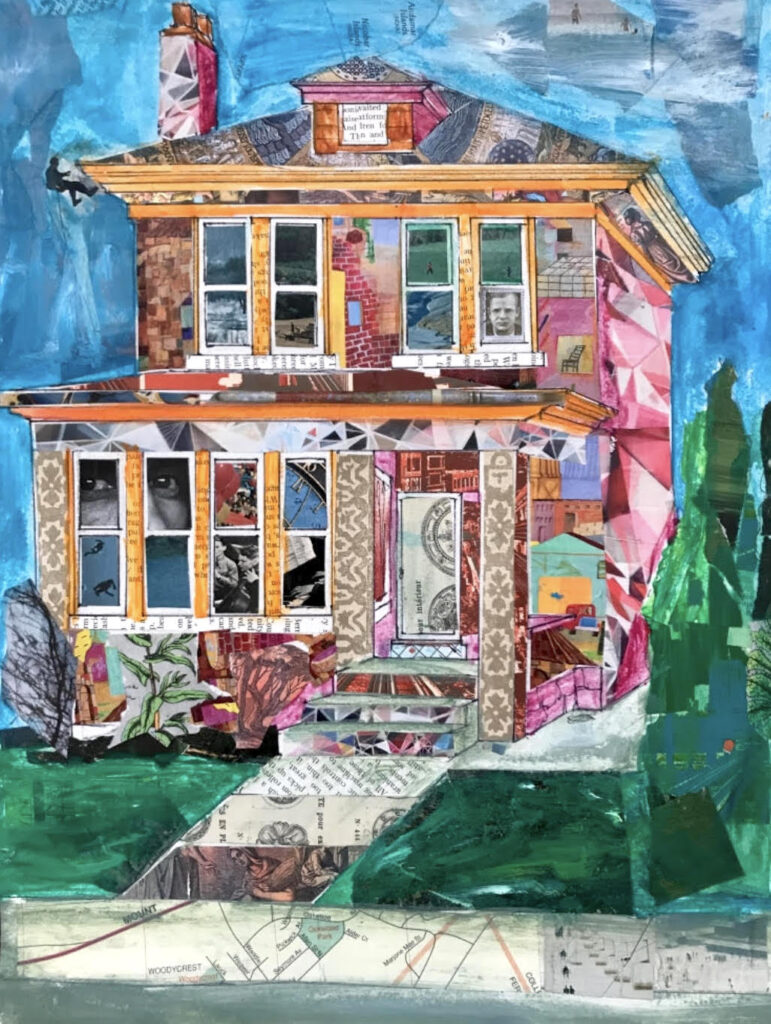
Studio: Drawing student, Karen Melvin, was inspired by the collage and drawing work of classmate, Robea Nordman. She decided to use the inspiration to go in her own direction. Here’s a bit of what she had to say about the process.
“I decided to draw my house using linear perspective. Inspired by the collage Robea created, I wanted to try to use collage for the majority of the image. I gathered a variety of magazine and book pages and used a gloss medium to adhere collage pieces together. Filling in areas with just the right size collage piece was a challenge. To solve this problem, I used tracing paper to trace the area I wanted to fill in. Then, I sandwiched the tracing paper and collage scrap together and cut them out. When I teach a collage perspective project with students, I plan to employ this trick. I will also encourage them to add their own story and explore a variety of media as they add color and texture to their work.”
Imagine the possibilities of having students use each other’s work as jumping off points. The flow of ideas would be incredible.
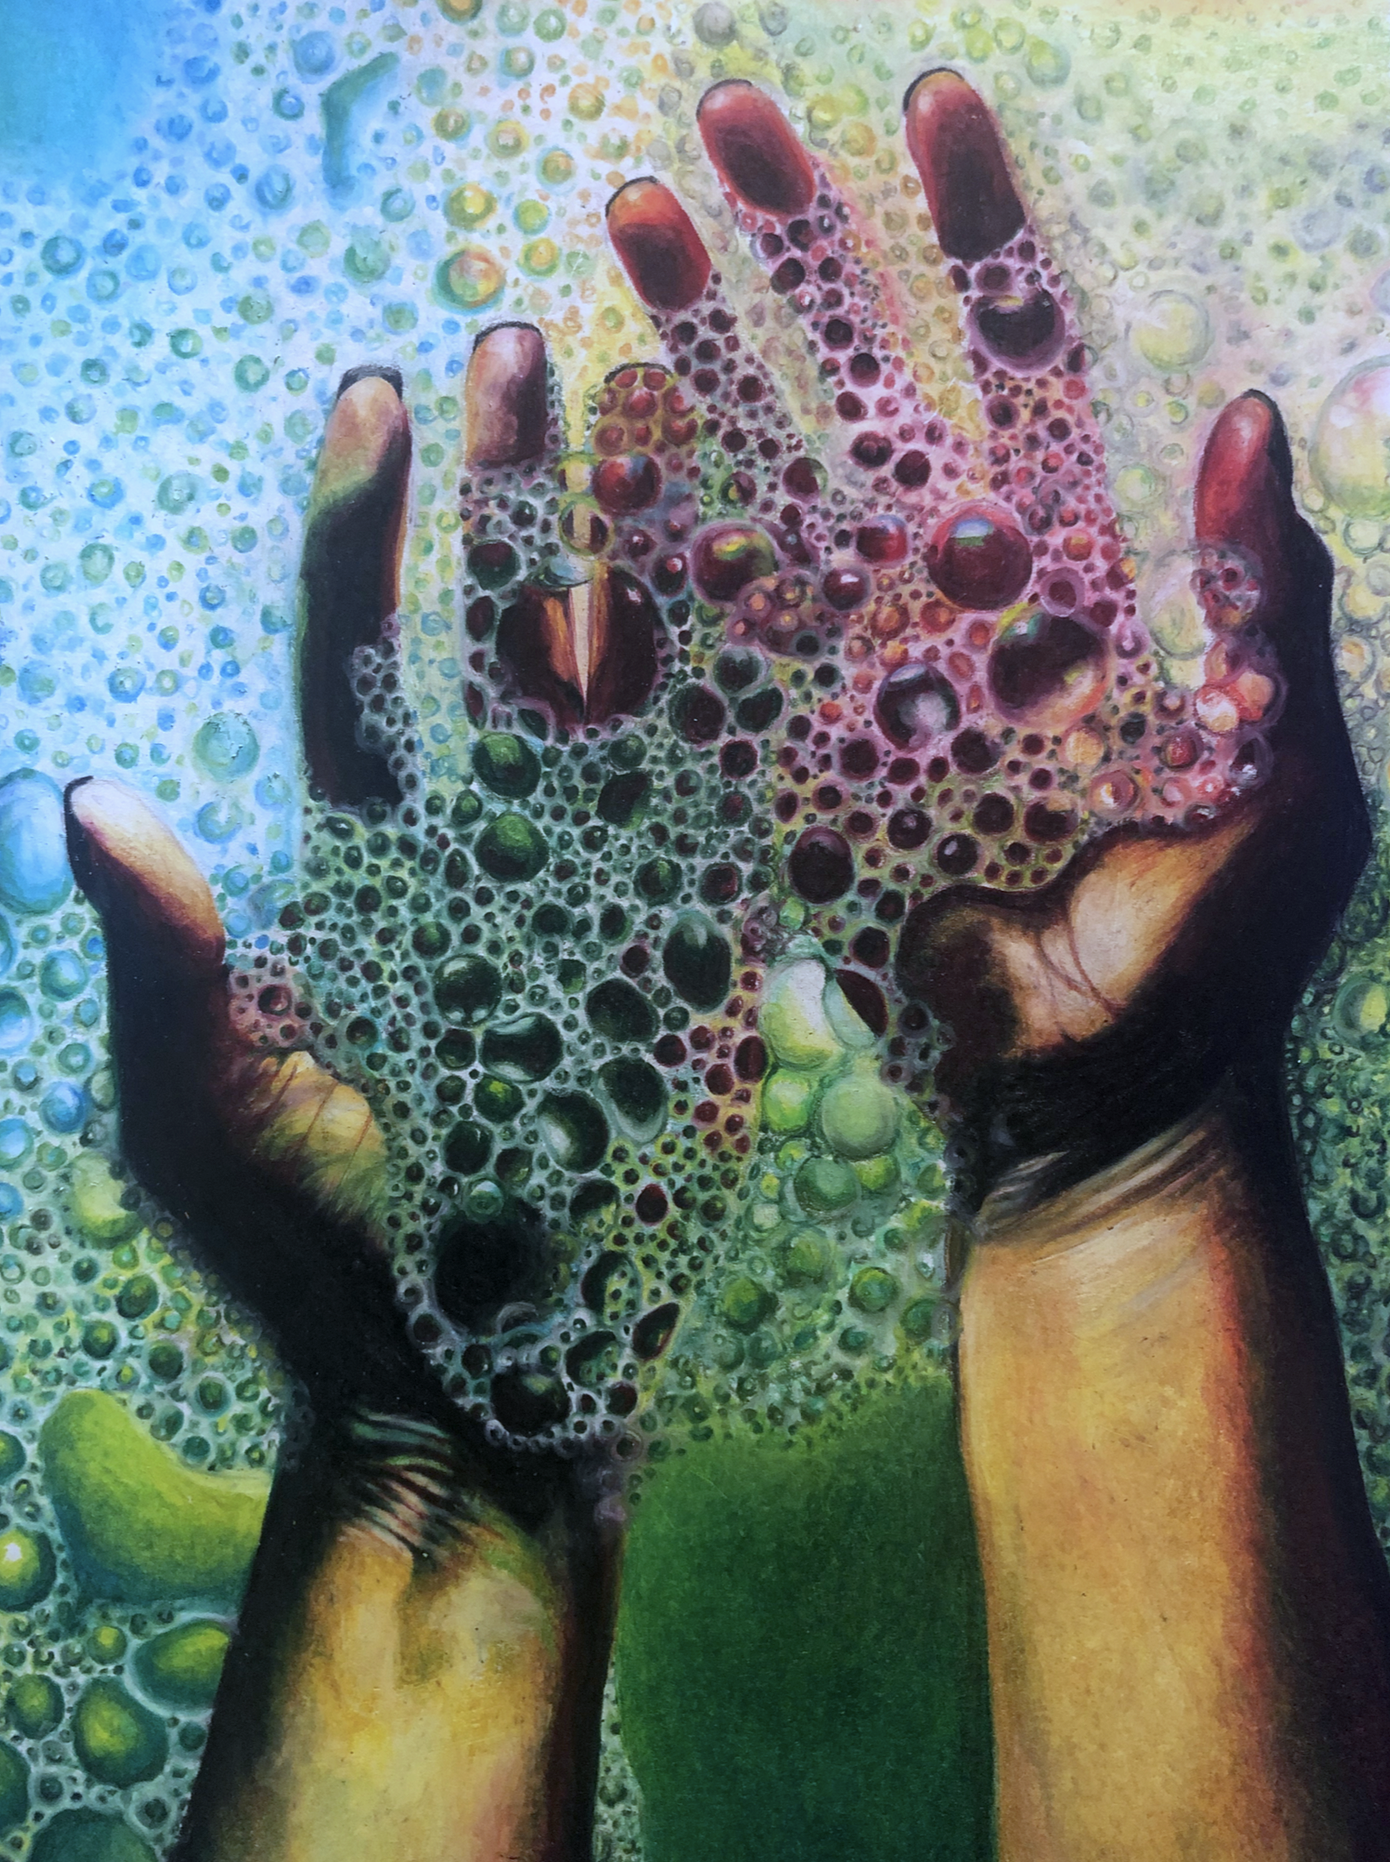
5. Tackle light, color, and texture.

Student, Kristie Hirten, did an amazing job experimenting with light, color, and textures during one of our lessons. Here is what she says about the experience.
“I am very proud of the realistic nature and appearance of my drawing. I really loved doing this drawing, and it occupied the majority of my week. There was quite a lot of detail that was included. The photos that I took for this assignment were also very interesting. I used a fish tank and colored plastic wrap to cast color into the water. The soap and the hands give an appearance of things that are slipping away through your fingertips. It was challenging to capture was the amount of detail in the bubbles in this drawing. But again, looking at it from the perspective of line, shape, and color helped so much.”
The other students and I were thrilled to see Kristie’s thinking and drawing go to the next level. Consider how you might push your students by requiring them to work within these parameters.
6. Let your students experiment with media.
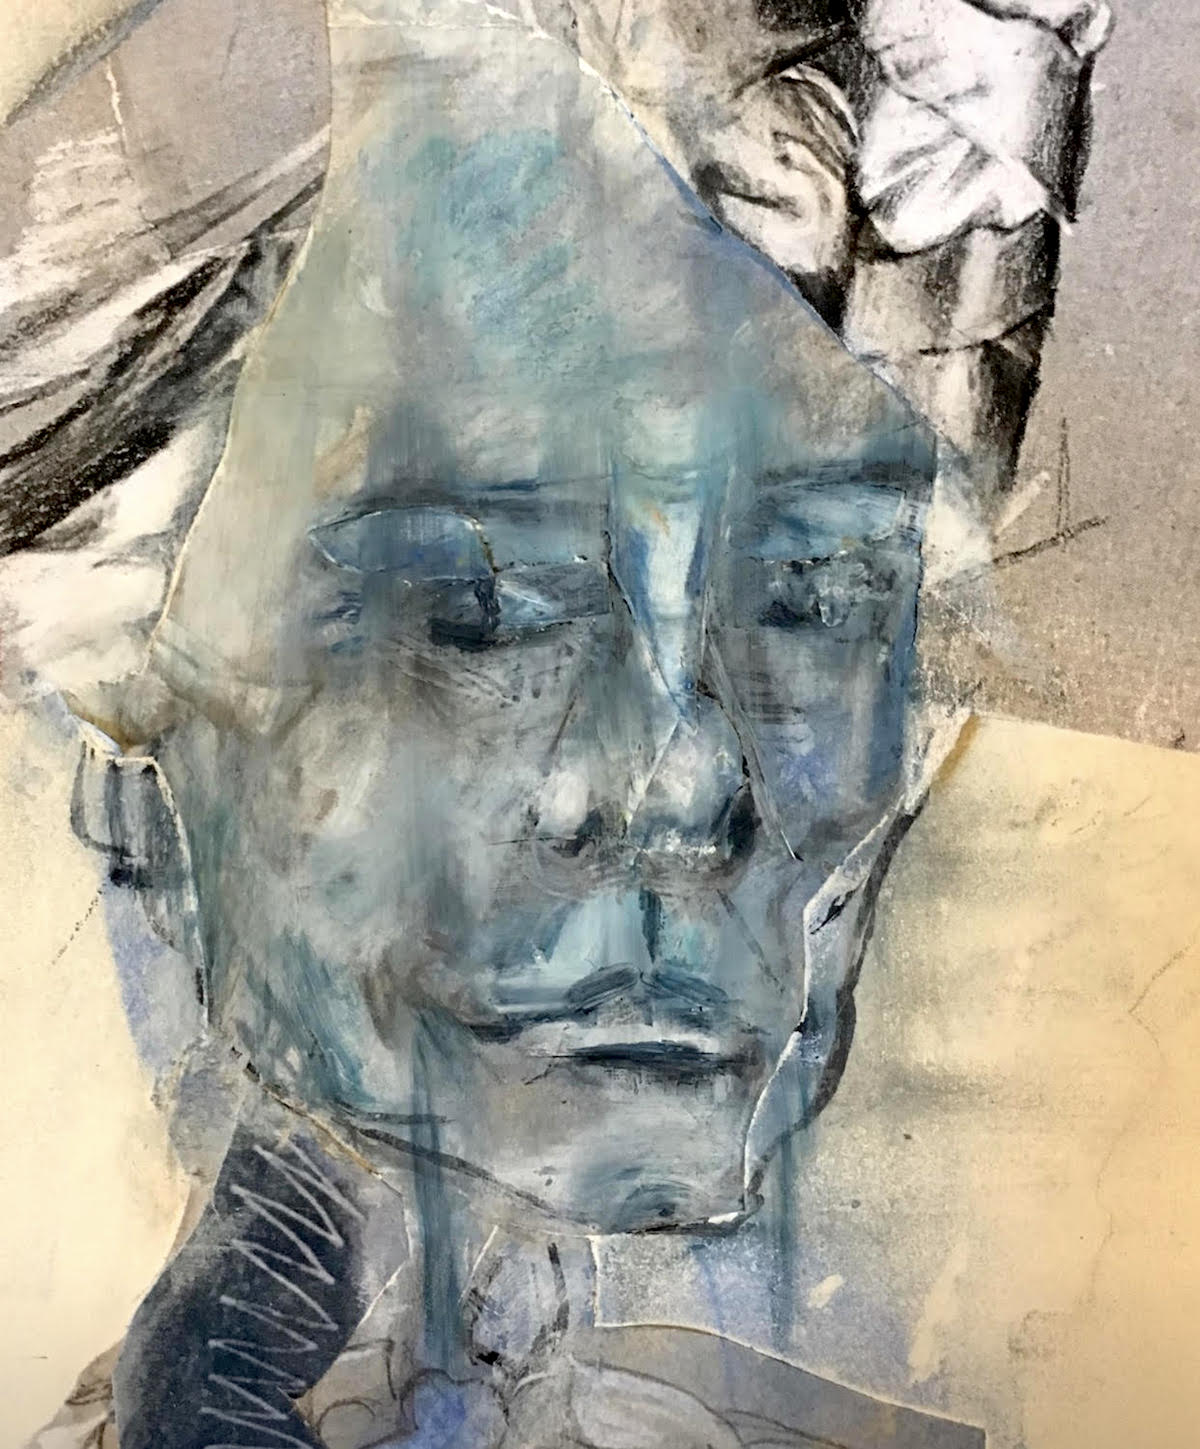
Tackling portraiture can be intimidating for students. It’s fascinating to see how different people approach the challenge. One of my favorite solutions was the work of Studio: Drawing student, Kathleen Flynn. Kathleen did an incredible job of merging anatomy with portraiture. She used mixed drawing materials, including pen and ink, graphite, and oil pastel, to create a strong series of works in her teacher showcase. Here is what she writes about the experience.
“To date, and within this course, I’ve revisited and explored several media. I used alcohol markers for the first time to render the form and discovered that porous papers do not work well with this media. I used colored ink pens instead of the traditional black pen. Hatching with fine tip brushes and diluted ink is very satisfying and proved to be less straining on fingers and hands. Oil pastel on a small scale is difficult, but blending with a tortillon, instead of one’s finger, can produce nice effects.”
Encouraging your students to experiment with a variety of media is one way to help them build their skills. Even if an experiment doesn’t work out, they’ve still learned something!
7. Merge various techniques.
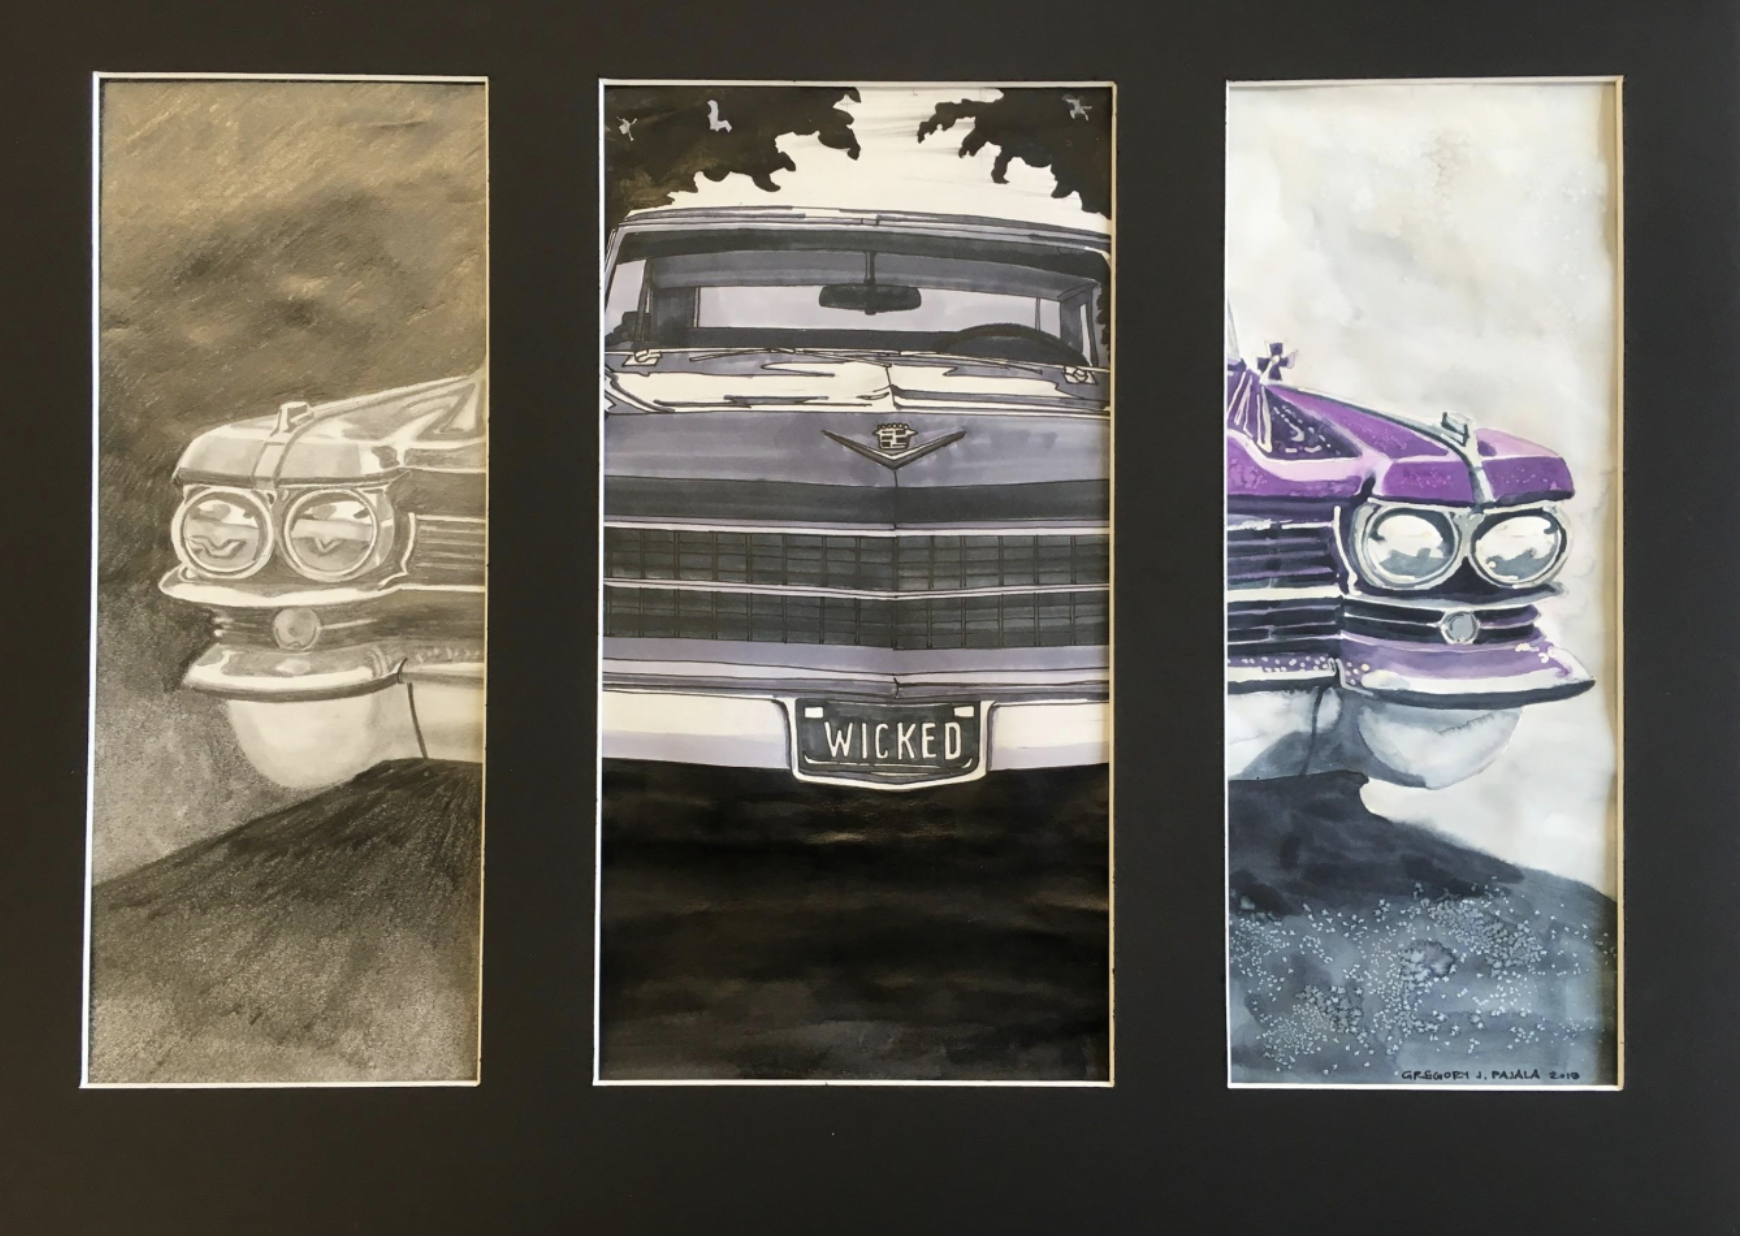
It’s always exciting to see when a student combines their new knowledge and skills into a successful final piece. I was thrilled when student, Greg Pajala, shared his teacher showcase. It merged elements from the course together into a fabulous final work that inspired us all.
Greg writes, “I used multiple techniques and media to create the final piece. I intended to showcase the different materials and methods we had used over the course of the semester. The first panel is graphite, the second is a marker, and the third is a technical pen with a watercolor wash. I created each panel separately, using the grid method. Then, I matted them as a single piece. I really wanted each panel to stand on its own, but also work together as a larger piece.”
Challenging your students to use multiple techniques in a single piece will help push your students out of their comfort zones.
One thing we all learn via these online courses is that truly, “together we ART better.” I’ve been saying it for years, but AOEU student, Kathleen Flynn, said it beautifully as she summed up her experience in the course:
“I believe it’s important to keep a network of supportive teachers. I still remember the colleagues with whom I shared studio space at grad school. Something special happens when people are face-to-face in a shared space as opposed to online. The personalities in this class, however, made it less impersonal than online classes I’ve taken in the past. Folks on here have been really honest and supportive, and exceptionally generous with sharing resources. I’ll always appreciate and admire this great group of artists and teachers. Thanks, everyone!”
I hope these ideas spark some new thoughts for your next school year. I know the work I see coming out of teachers across the nation certainly inspires me!
How do you currently teach drawing techniques to your students?
Have you considered taking an AOEU studio course?
Magazine articles and podcasts are opinions of professional education contributors and do not necessarily represent the position of the Art of Education University (AOEU) or its academic offerings. Contributors use terms in the way they are most often talked about in the scope of their educational experiences.