Now that spring is in full swing, you may be counting down the days to your school art show. Art educators across the country are frantically trying to finish projects and plan for an impressive display. Art shows are a great way to showcase your students’ work and highlight their achievements. The event can be a confidence-booster for your creative students and an advocacy tool for your community.
Traditional school art shows consist of artwork curated by the teacher or self-selected by students. Each student has at least one artwork on display. This is a great way to show students they are all appreciated and represented in your art show. As families enter your building, all of your students will have an opportunity to show off the work they created in your classroom.
While individual projects give each student a chance to shine, consider a few new additions to your art show this year. Collaborative installations can be another way for students to have a big impact at your spring art show.
When teachers hear the word “collaborate,” they sometimes think of chaos and stress. But, collaborations can be perfect at this time of year! Students need to move, problem-solve, and work together to encourage engagement through the end of the school year. A collaborative installation can be an awesome addition to your annual art show.
12 Projects for a Great Art Show
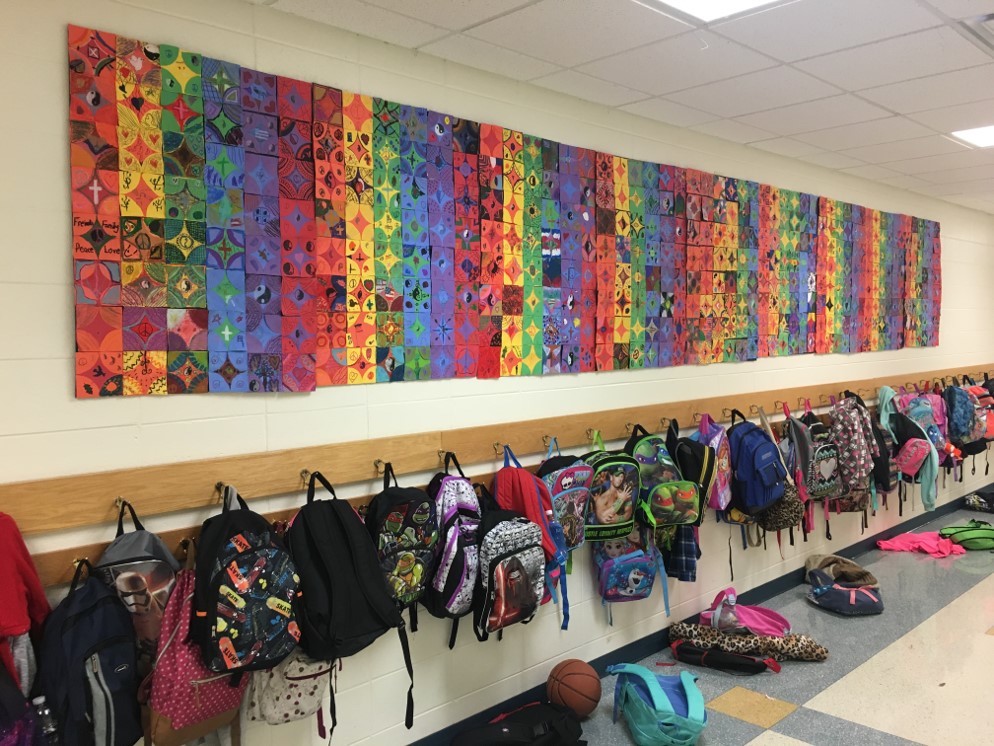
1. Paper Quilt Display
Paper quilts are a simple, eye-catching collaboration with a rich art and design history. You can tie in elements and principles of design and review skills you want to make sure your students have mastered. Concepts like pattern, symmetry, color, repetition, shapes, geometry—the list could go on and on—are easy to build right in!
When you’re looking for examples to share with students, look to the past with famous quilt designs like Gee’s Bend. You can also look to contemporary examples, like the textile designer Libs Elliott.
Have each of your students create a paper square and assemble them for a group display. You can control the color scheme to achieve a more unified design or let the design take on a life of its own. This is also a wonderful example of how each individual impacts the whole class or school. When you remove one piece, the quilt is no longer complete; it’s missing something special. Use this as an analogy about how much they matter to your school community.
2. Japanese Notans
Japanese notans are absolutely gorgeous paper cut designs. They look incredibly intricate and may seem intimidating if you haven’t tried them before. You will be surprised at the lengths your students will go to once they get the hang of the concept.
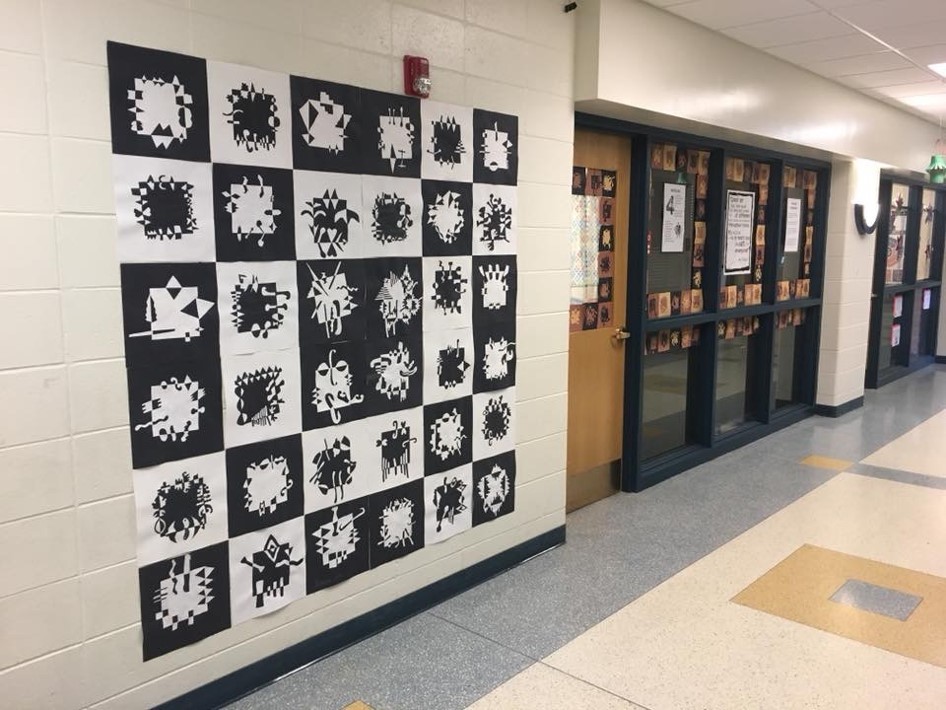
Students will need two squares of paper. One twice as large as the other. For example, a 6″ square and a 12″ square of contrasting colors. While black and white is the traditional notan combination, you can coordinate some fun displays with different color combinations as well.
Students will draw and/or cut shapes from their smaller squares and mirror the positive piece from its negative space. The pieces are glued down, and the resulting design is awe-inspiring. This is a great lesson for reviewing positive and negative space. The abstract component alleviates anxiety about what they are creating, so students can really let loose and experiment. This project works well for students who are often frustrated in art class. They can find success and take pride in their work.
3. Greg Mike-Inspired Monsters
Greg Mike is a street artist based in Atlanta, Georgia. He has created murals all over the country, and many feature his signature character, LOUDMOUF. The character is recognizable with a few distinguishing characteristics: a blue square shape with a chipped tooth. While the character takes many different forms, these elements typically stay the same.
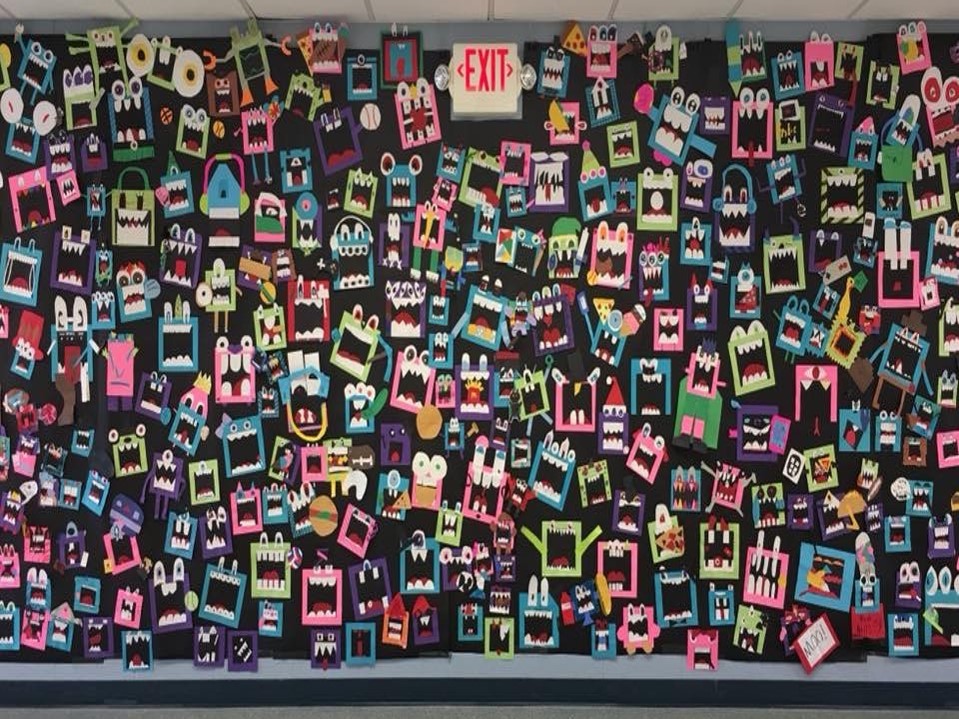
This can be a fun project for students to create monsters of their own. They can all start with the same basic format but add their own creative touches to make their monster unique. This is another great analogy to share with your students as they are creating. We can identify the things we have in common with one another and celebrate our differences.
4. Split Portraits
Self-portraits are intimidating, even more so for students who are starting to be self-conscious about their artwork. Students seem to shut down if their work doesn’t look realistic enough. One way to combat this attitude is to give students a confidence booster with a project that helps them succeed. Split portraits give students a photo reference to assist in drawing the rest.
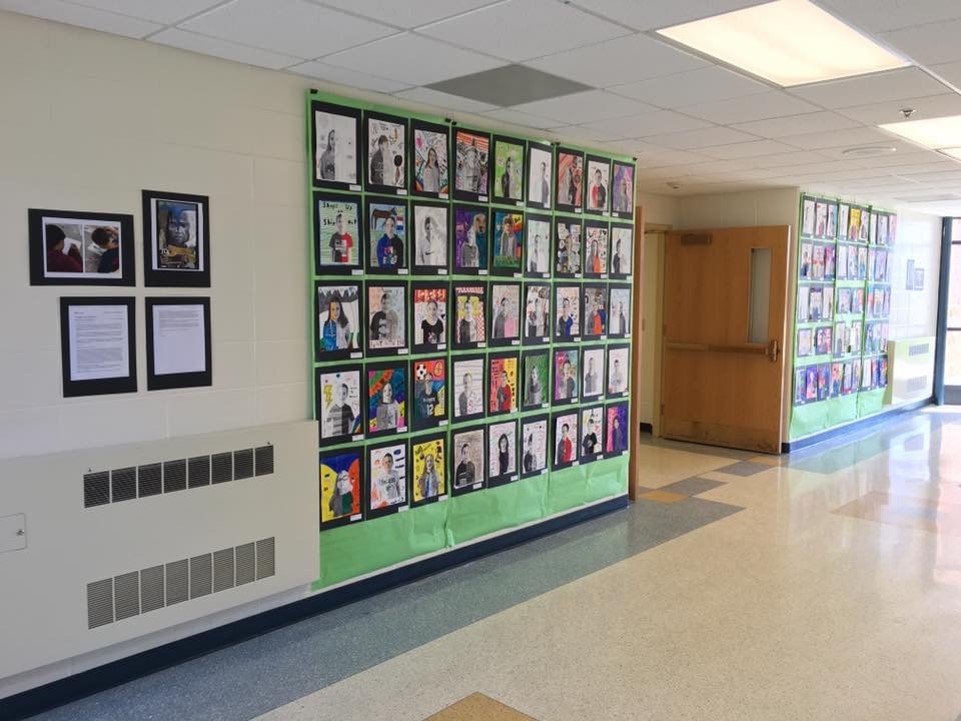
You can review the concept of symmetry and proportion and introduce some portrait drawing techniques in this lesson without overwhelming students. Have them fill their background with symbols, text, and scenery that represent their interests and personality.
A wall of split portraits with recognizable photos/drawings will be a big hit at your art show. Students will be proud to show off their work and have fun looking for their friends from other classes. Families and community members will be impressed at the drawing skills students learned in the process.
5. Color Scheme Landscapes
The color wheel is an art education staple we all want our students to master. As we introduce different color schemes, we know the best way for students to learn these is by applying their understanding. We can ask them to memorize the colors in a specific color scheme, or we can ask them to create using the color scheme instead.
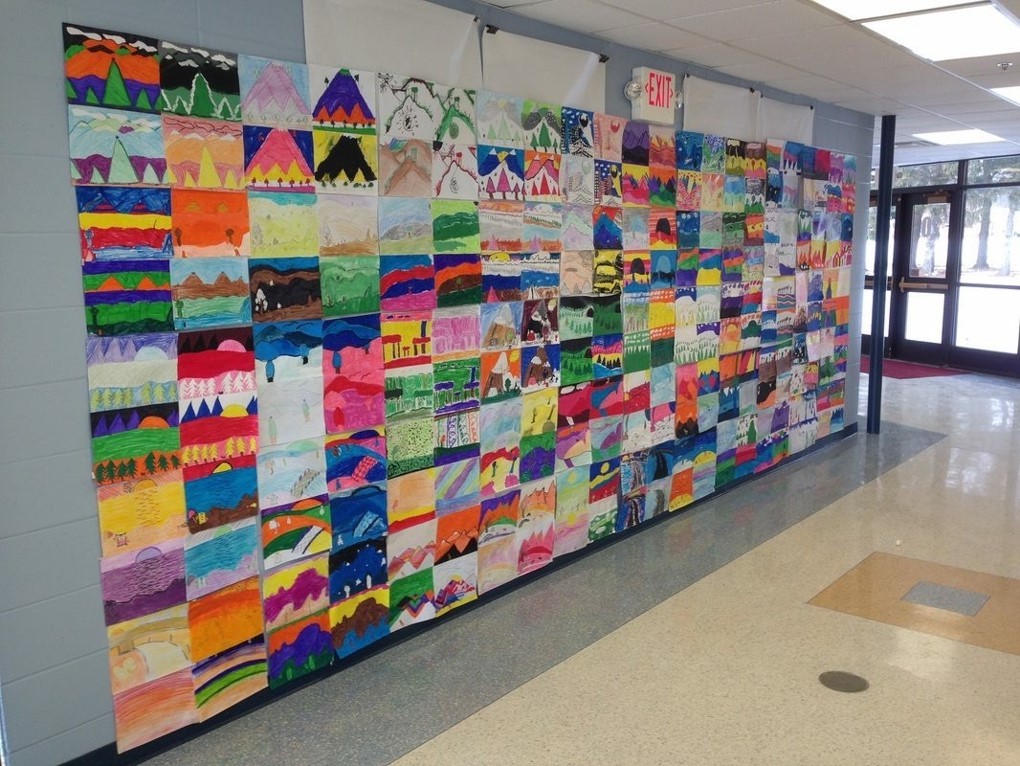
One way to effectively check your students’ understanding is to have them create a series of work in different color schemes. No student is going to want to draw the same still life, portrait, or landscape, over and over, but you can help make this process easier.
Ask students to draw a landscape using only the element of line. Have them create dark outlines with their pencil, a ballpoint pen, or a permanent marker. Stress to the students that they are not to include any shading just yet. Tell them they should include only the outlines of their landscape, similar to a coloring book. The changes in value and fine details will be added later.
Collect their drawings and take them to your copy machine. Run off three to four copies of each student’s landscape. Now you have multiple copies of each student’s work! With each class period, introduce a new color scheme and have students add color to their landscapes. They will get immediate practice and begin to recognize the different color schemes through the application.
Display the series of work together at your art show. Students will be able to impress their families by pointing out each color scheme, which one they like best, and how they’re different. The result is a terrific display for your art show!
6. Mayan Glyphs
Simple projects can be elevated by introducing new materials. In this case, the material is even shiny! Students will jump at the chance to work with this metallic surface. Light-gauge tooling foil is a great material for students to create repoussé projects from their drawings and designs.
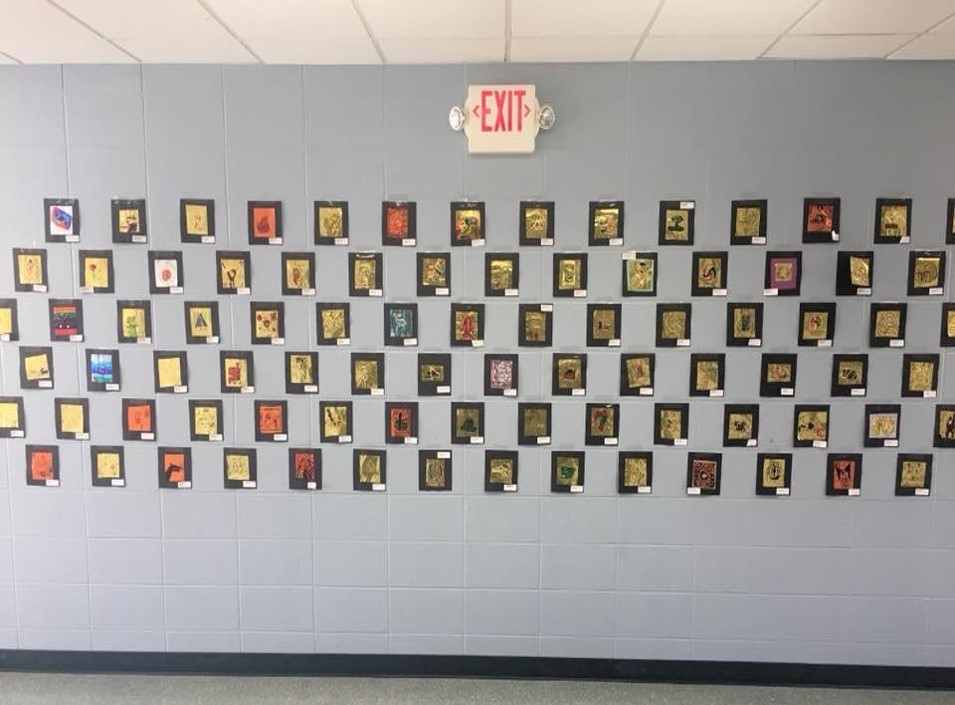
Show students examples of Mayan glyphs and have them compare and contrast the symbols with Egyptian hieroglyphics. You can have students create a list of symbols we use today. After your discussion of glyphs and symbols, have students design their own.
Using a pencil on the tooling foil will create raised or recessed edges, like an engraving or relief. Students can use colored permanent markers to make their designs even more impressive. Hang the metal glyphs together for a wall of shiny, metallic artwork at your art show.
7. Paper Lanterns
Paper lanterns are fun, colorful, and can hang from the ceiling to add another visual element to your art show. Students will love creating this three-dimensional craft, and it will brighten up your halls!
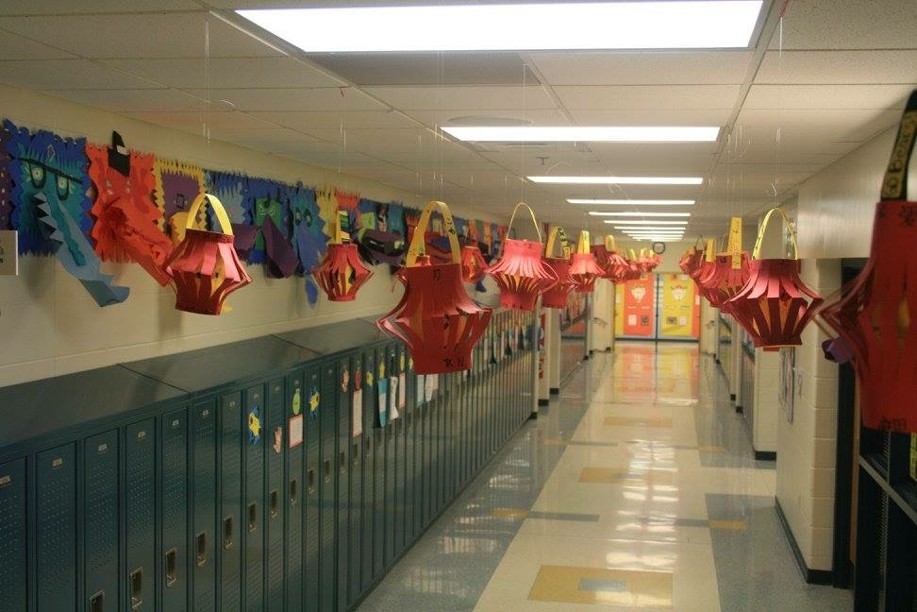
If you want to add another concept to the project, have students choose their own contrasting or complementary colors from the color wheel. This will allow you to check for understanding as they create their paper lantern.
8. Kelsey Montague-Inspired Wings
By now, you have probably seen the popular interactive display of a pair of wings. Created by artist Kelsey Montague, you can find the #WhatLiftsYou murals worldwide and on social media. People love to interact with the murals and take pictures in front of the work.
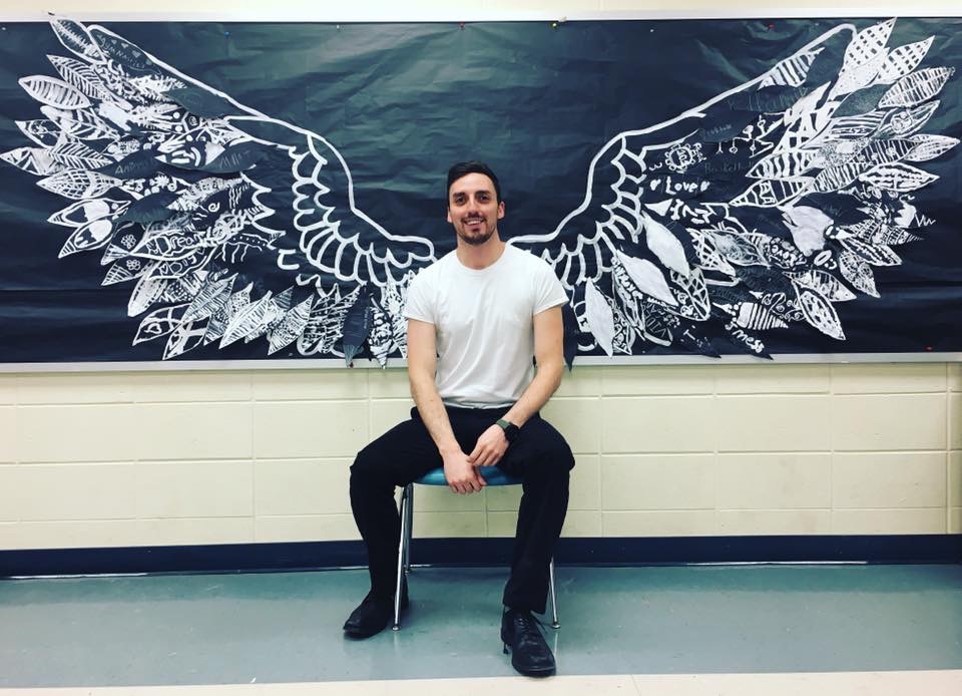
You can recreate this interactive experience at your art show by having students design their own feathers to add to the wings. You can control the color scheme and shape of the wings while students use their creativity to design a feather unique to them. They can draw symbols or write words on their feather with endless possibilities. Your students will be eager to take their own picture with the wings on the night of the art show!
9. Keith Haring-Inspired Mural
Keith Haring is an art educator-favorite to share with students. His abstract figures, bold lines, and bright colors are an eye-popping addition to any classroom and will be a big hit at your art show!
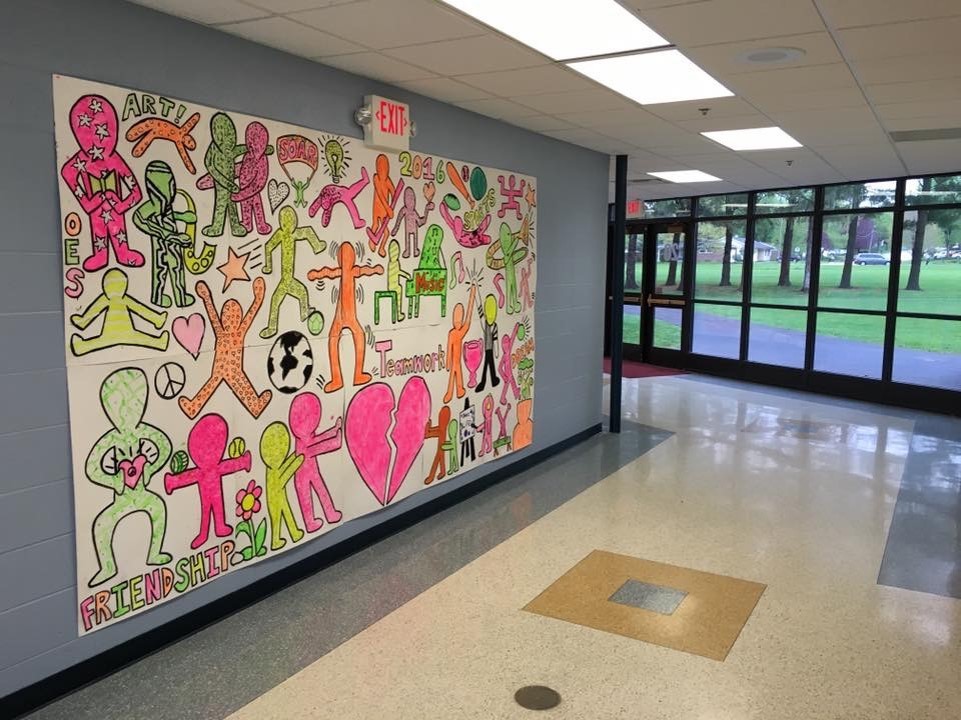
Have students work together to create a series of figures in different poses that reflect student interests, activities, etc. Once the poses have been selected, students can sketch and paint bold outlines. Assign groups of students to particular figures to divide up the work.
Limit the color palette to create a unified mural design. Keith Haring himself did this when creating a mural with Chicago students. He painted the bold outlines in black, while students filled the figures in however they chose with a neon color palette.
10. Cherry Blossom Branches
There is something peaceful and beautiful about cherry blossom paintings, and they are relatively simple for students to create. Stress the importance of creating thin lines as students reach the end of the branch.
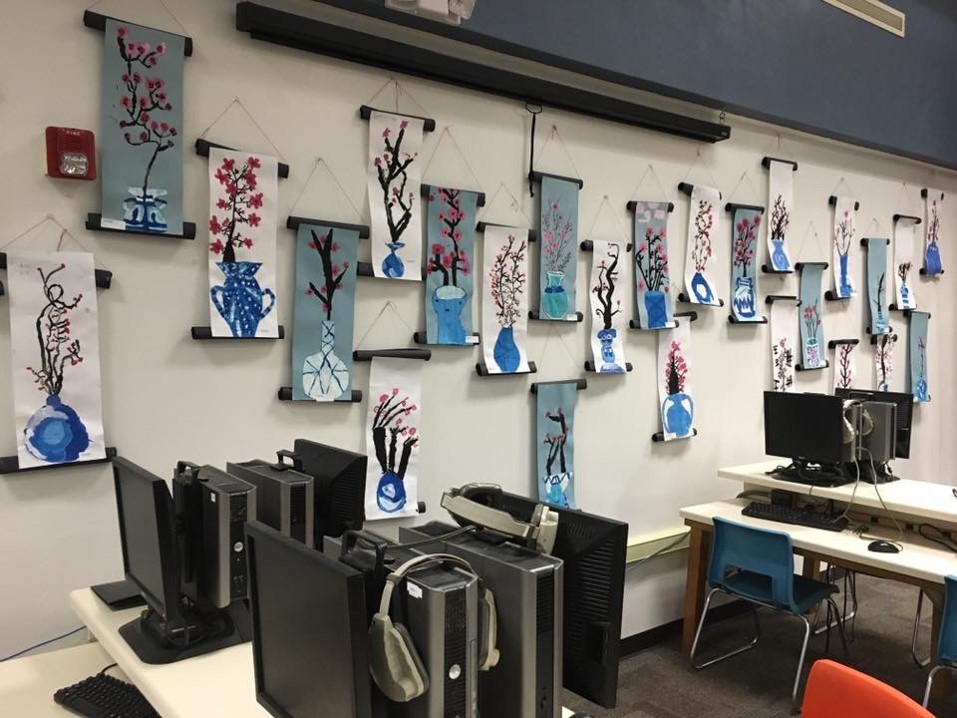
You can display the paintings together on the wall with a creative twist. Create a scroll look by gluing black rolled paper tubes at the top and bottom of the paintings. Hang with string for an interesting display for your art show!
11. Tabletop Displays
While you’re trying to decide which projects to display, you may find you have a ton of great artwork but not enough wall space! This is when you have to get creative. Consider displaying work on top of tables, bookcases, and other flat surfaces in the school to maximize space at your art show.

One way to create a tabletop display is to glue or staple three works together to form a triangular prism. You can do this with three works by the same student, or three different student artworks. These displays will have your guests walking around to see all sides!
12. Art History Parodies
While not everyone who visits your art show may know the contemporary artists you share with students, they may be familiar with a few famous pieces of art history. Have students take a universally recognized work of art, like Starry Night, the Mona Lisa, etc., and have them create a unique parody.
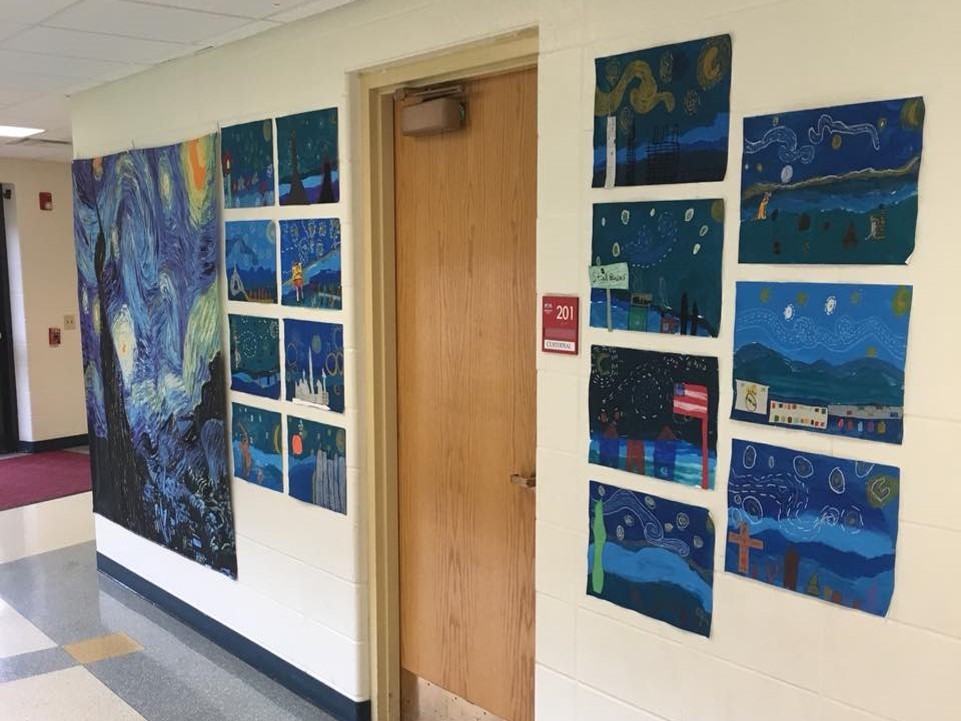
Explain to students that a successful parody keeps some recognizable elements the same while adding, changing, and/or removing other elements to make the artwork fresh and new. Students can incorporate figures from popular culture to show off their unique interests. Hang these works together and enjoy all the smiles they bring throughout your art show!
While art shows take a tremendous amount of hard work, organization, and attention to detail, the pride and accomplishment students feel when they see their work on display is well worth it. Including collaborative works of art will only add to this feeling. Why not try some (or all!) of these suggestions to add a little “Wow!” to your end-of-year art show!
What are your go-to art show projects?
How do you decide what projects to display?
Do you create any collaborative installations with your students?
Magazine articles and podcasts are opinions of professional education contributors and do not necessarily represent the position of the Art of Education University (AOEU) or its academic offerings. Contributors use terms in the way they are most often talked about in the scope of their educational experiences.