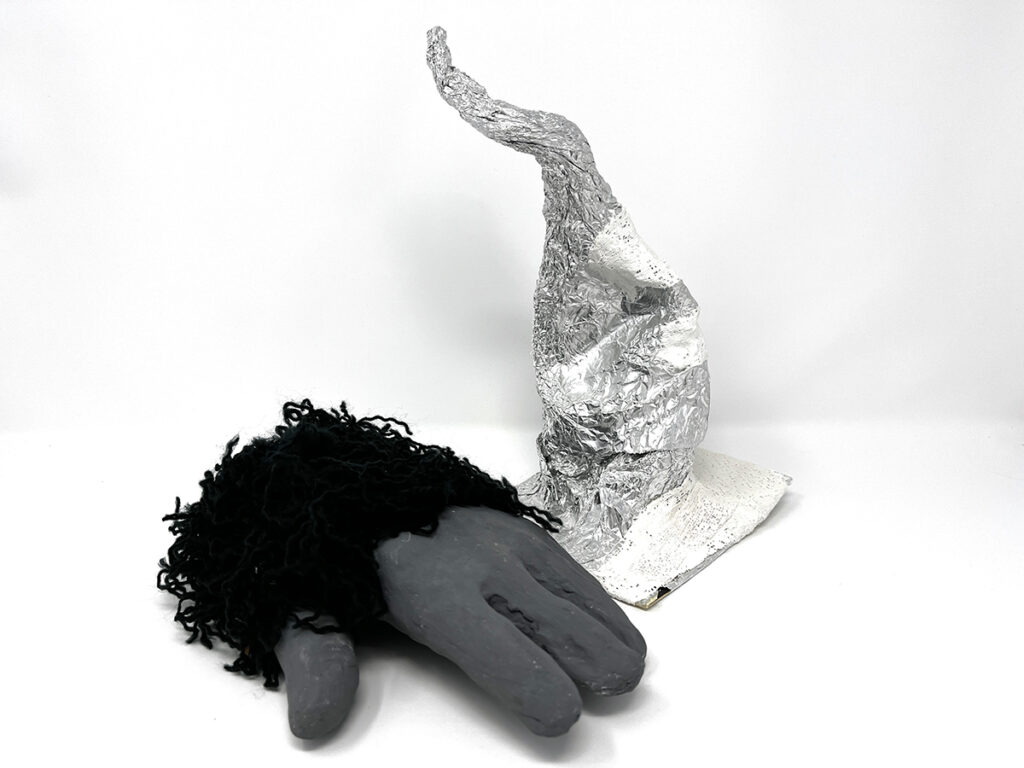
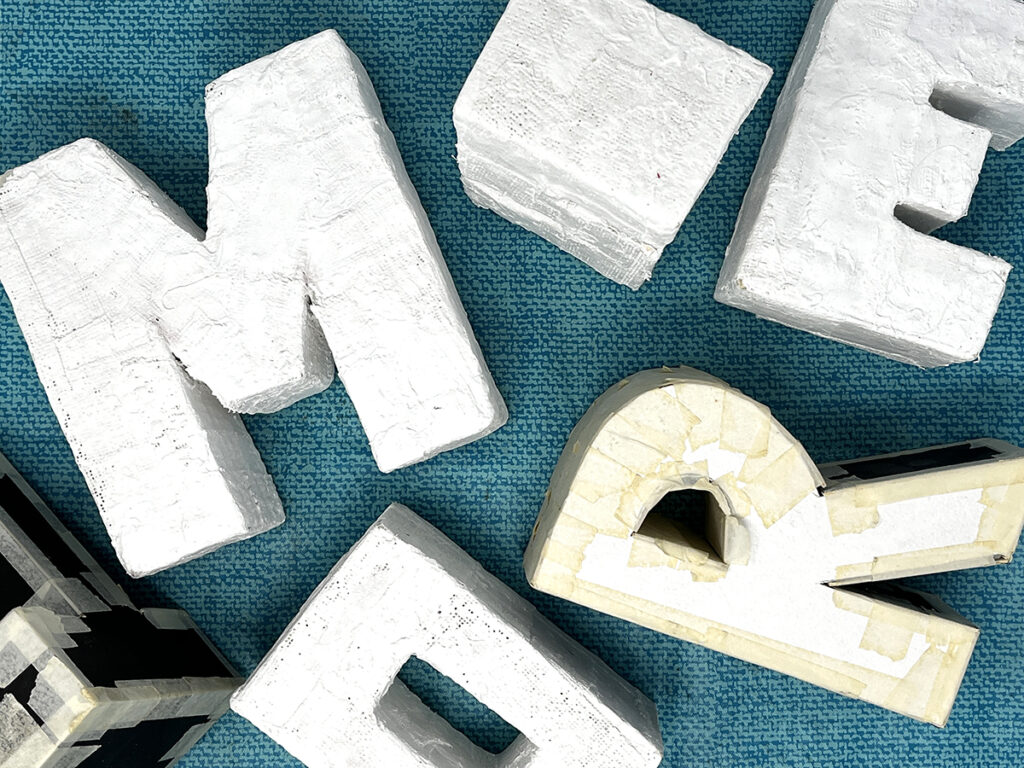
We all know art teachers are experts when creating artwork with plaster and molds. It’s fun, messy, and usually fail-proof. Students can put their creative flair on the project, and then, ta-da! You have a beautiful sculpture to display in the showcase. But what if there is a project that challenges students beyond the foundational masks, 3D letters, or aluminum foil armatures? What if it pushed your artists to take risks and try something new for an amazing artmaking experience?
If your curiosity is piqued, keep reading for the sweet project that will wow your students.
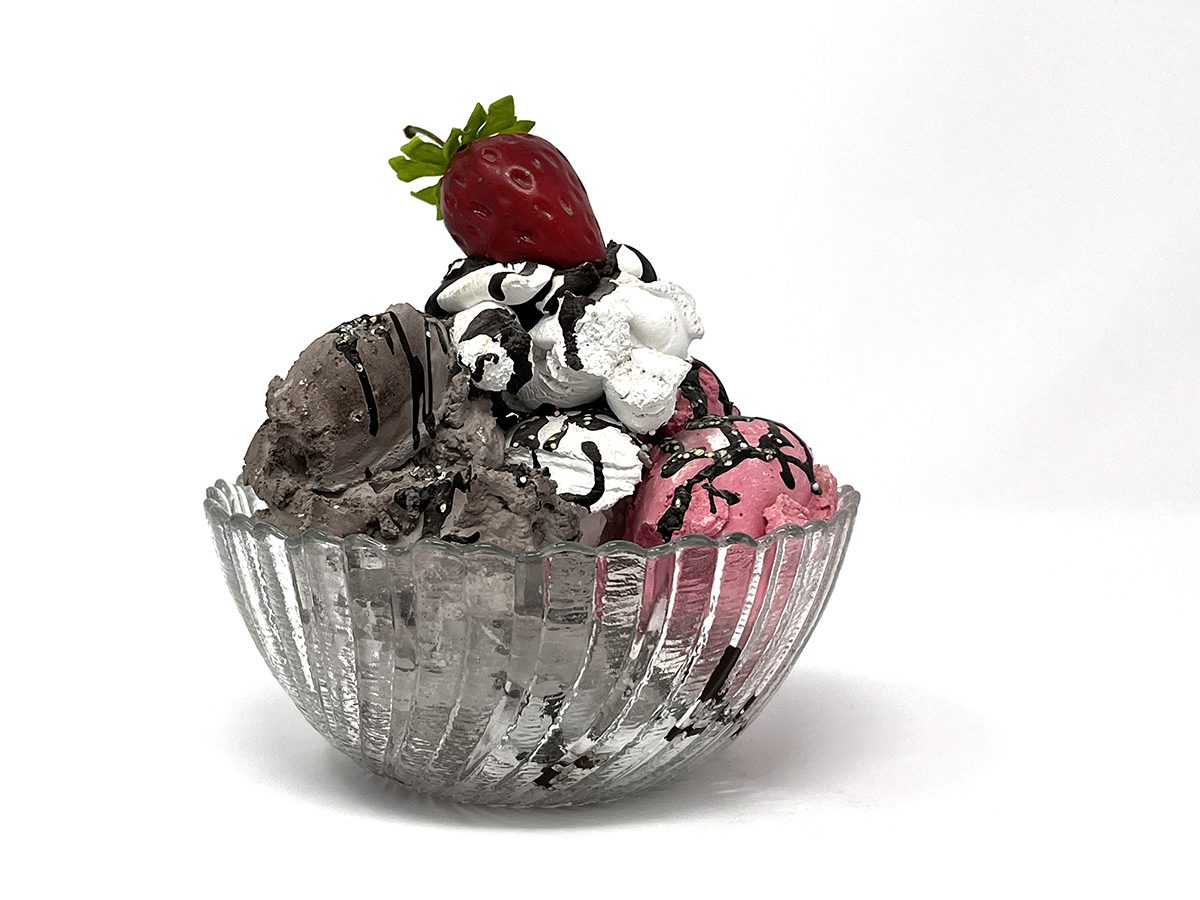
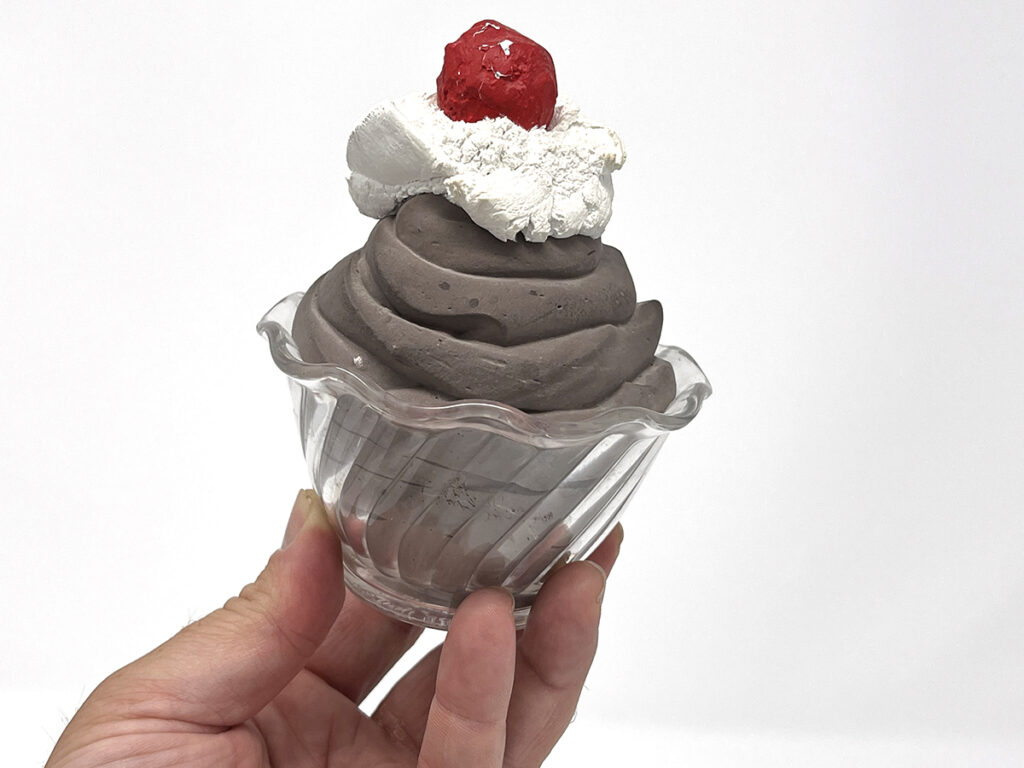
Mask molds, balloons, wire and aluminum foil armatures, and 3D letters may be your standard “go-to” for plaster strips. Why not try something new? Begin experimenting with plaster of paris on its own for more possibilities. Create realistic ice cream topped with whipped cream and sprinkles in the art room. Your students will get excited… and hungry! Let’s share the “recipe” so you can try it with your art students too.
Materials:
- Table covering
- Plaster of paris
- Water
- Plastic mixing bowl/container
- Tempera paint, food coloring, or dye
- Donated or disposable bowls, one per student
- Ice cream scoop
- Plastic spoons
- Plastic sandwich bags
- Handcrafted or store-bought fake cherries
- Handcrafted or store-bought faux toppings or mix-ins (1, 2)
- Garbage can or bucket
- Pasta strainer or plastic basin
Steps:
- Combine the plaster of paris and water with a plastic spoon in a plastic mixing bowl or container until it is the consistency of tomato soup.
- Add tempera paint, food coloring, or dye to add color. The mixture will thicken rather quickly, so add color while it’s still on the thin side.
- Stir in any faux ingredients.
- Scoop the mixture into the dessert dishes with an ice cream scoop.
- Add additional scoops quickly so that each scoop sticks to the previous one.
- Repeat the same process for the whipped cream topping, but mix everything in a plastic sandwich bag. Cut a small hole in the bottom corner of the bag when the topping is ready, and pipe it onto the ice cream.
- Add your favorite toppings before the dessert hardens.
Tips for Success:
- Do this project on your own to troubleshoot issues and get comfortable with the steps.
- This is a messy project so prepare accordingly. Cover surfaces and assign students cleanup jobs. Lay out all materials and tools for quick and easy access.
- Sink access is essential. Consider setting up this project as a pop-up plaster dessert center near a sink. Try this with your art club before introducing it to your art classes, or have it be a side project for small groups.
- Plaster of paris hardens, so even its liquid form cannot go down the sink drain. Have a trash can or bucket handy to dispose of all plaster of paris safely. Wash hands and dishes over a strainer to catch any large pieces.

Connect With the Standards:
Creating these crafty desserts aligns with each of the National Core Art Standards. Let’s take a closer look at examples of Creating, Presenting, Responding, and Connecting.
- Anchor Standard 3: Creating
From start to finish, assembling plaster of paris desserts follows the creative process. Ice cream is a fun start, but other dessert variations are endless. Refine the techniques and share what works and what doesn’t work to help students as they create their own. - Anchor Standard 5: Presenting
Imagine showcasing your students’ desserts inside a bakery display case. Partner with the home economics teacher to make real desserts. They can be refreshments during a class exhibition of the faux creations! - Anchor Standard 8: Responding
Artist statements, critiques, or reflections are all ways to feature each student’s experience and engagement in the creative process. - Anchor Standard 11: Connecting
Consider how you can connect with your students’ interests during this project. Ice cream may be a staple during the summer months, but what other desserts are important to your students and their families at other times of the year? Are sweet treats part of their cultural and family traditions?
Overall, this lesson is a great way to focus on the creative process, align with standards, and leave room for personalization. Creating with plaster of paris is messy but well worth it. Making sweet desserts engages students and invites their ideas and inspiration into the process. Once they find success, they will be hooked. Before you know it, you may have other students asking when they will be able to make desserts in their art class!
Take a quick look at these delicious delicacy connections:
- Counting with Wayne Thiebaud by Susan Goldman Rubin
- Ten Creative Artists that Use Food as Their Medium or Muse
- Kate Malone’s fruits and vegetables
- Mechelle Bounpraseuth’s life-size sculptures of food
Here are a few more plaster projects to consider:
- Do You Dare? Plastering Students’ Faces for Amazing Mask Results
- 9 Essential Tips for a Successful Plaster Mask Lesson
- How to Make a Creative Plaster Mask in 5 Simple Steps
What plaster sculptures do your students already love to create?
Share your best hacks for teaching, managing, and cleaning up plaster.
Magazine articles and podcasts are opinions of professional education contributors and do not necessarily represent the position of the Art of Education University (AOEU) or its academic offerings. Contributors use terms in the way they are most often talked about in the scope of their educational experiences.