Editor’s Note: Today I’d like to introduce the newest member of the AOE Writing Team, Wynita Harmon! Wynita teaches elementary art in Plano, TX and provides her students with lots of choice in order to develop their creative thinking and problem-solving skills. You can learn more about Wynita here. Please join us in giving Wynita a warm welcome in the comment section!
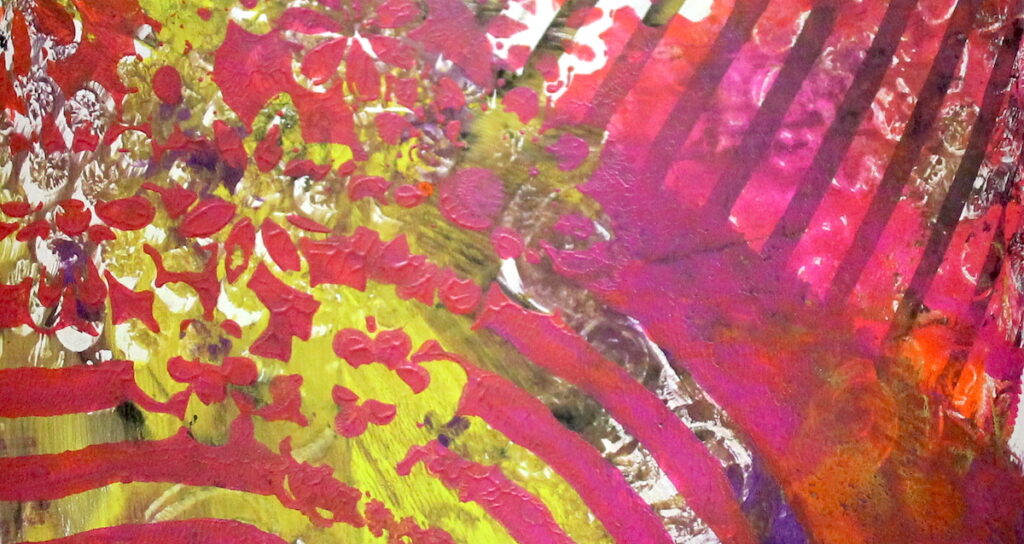
Creating monoprints is a magical experience for students and one of the most popular activities in my art studio. The abstract nature of the results and the engaging process keep students coming back again and again. I find great pleasure in watching my students experiment, as they are so excited to see their resulting masterpieces!
Each monoprint comes out beautifully unique.
In my room, we use Gelli plates. They are user-friendly and the possibilities really are endless. Of course, you can display the finished prints as-is, but you can also show students how to take their prints to the next level by adding layers with drawing and collage materials. These more advanced processes allow students to enhance their skills while intentionally promoting the creation of mixed-media artwork.
Let’s dive into how to take Gelli plate monoprints to the next level.
Step 1: Create Monoprints
It is important to have a workspace set up or materials already put aside in order to maximize your time.
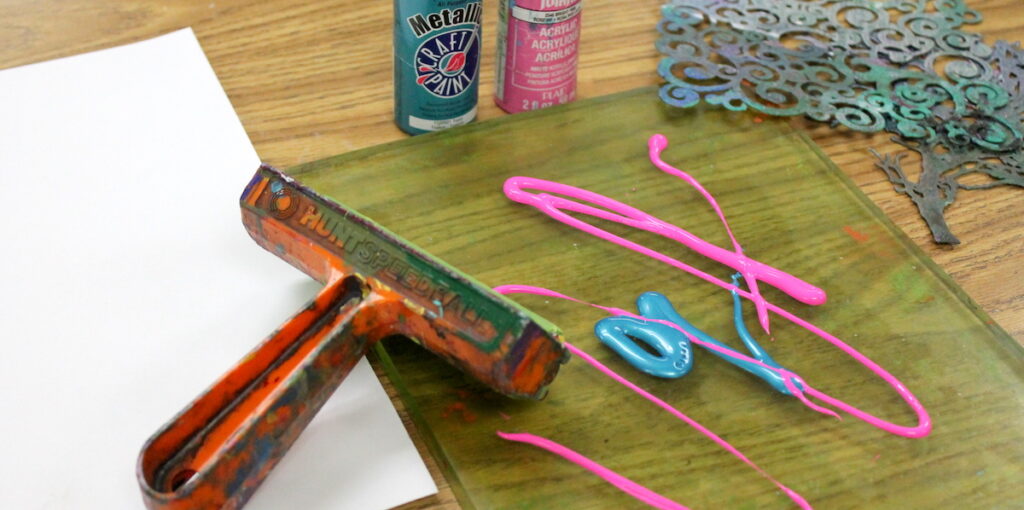
Materials
- Gelli plates
- Brayers
- Paper
- Scrap paper
- Acrylic paint
- Wet wipes
- Stencils
- Texture materials like bubble wrap, corrugated cardboard, texture plates, etc.
- Paint scraper tools
- Other supplies students could experiment with like cotton swabs, cotton balls, aluminum foil, etc.
Once your materials are set up, students can begin printing using the process below.
- Lay down base color.
First, have students put a few drops of two to three colors of acrylic paint onto the Gelli plate. Have students roll with a brayer until the plate is fully covered. - Clean off brayer.
After laying down the base color, have students roll the brayer on a scrap piece of paper. Be sure to keep the dried scrap paper as it makes excellent collage material! - Manipulate the paint.
Now is the time for students to use texture materials, stencils, paint scrapers, or other materials to create a design on their Gelli plate. Be sure to remind students not to overdo it. They don’t want all of the paint coming off! - Pull the print!
Finally, have your students lay their paper onto the Gelli plate and rub the back for about 30 seconds to transfer the design. - Repeat Steps 1-4.
I recommend printing a second layer over the first in order to create more complex designs and color schemes. However, depending on your time and resources, you may just want to stick with one.
If you or your students do not have prior knowledge of creating monoprints with a Gelli plate and need a tutorial, you can check out a video I created right here.
Step 2: Help Students Brainstorm and Get Inspired
We all know our students may need a little push in the inspiration department from time to time. Give your students an opportunity to brainstorm ideas of what they would like to create with their print or inspire them with the ideas listed below.
Inspiration Ideas
- As a class, view images related to visual journaling. Or, as an alternative, print some images to leave out at a station. These could provide inspiration for combining drawing and collage materials with painted surfaces.
- Ask students to write poetry to go with their prints. Challenge them to add imagery to their print that communicates the meaning of their poem.
- Suggest students write a list of adjectives that describe themselves. Then, have them choose a few to depict with collage or drawing materials on top of their prints. This would be a great idea to add to a project with an “Identity” theme.
- Have students respond to a big idea or theme such as Doodling, Nature, Love, or Friendship.
- Allow students time to do some brainstorm sketching about things they might like to add to their print.
Step 3: Add Collage and Drawing Layers
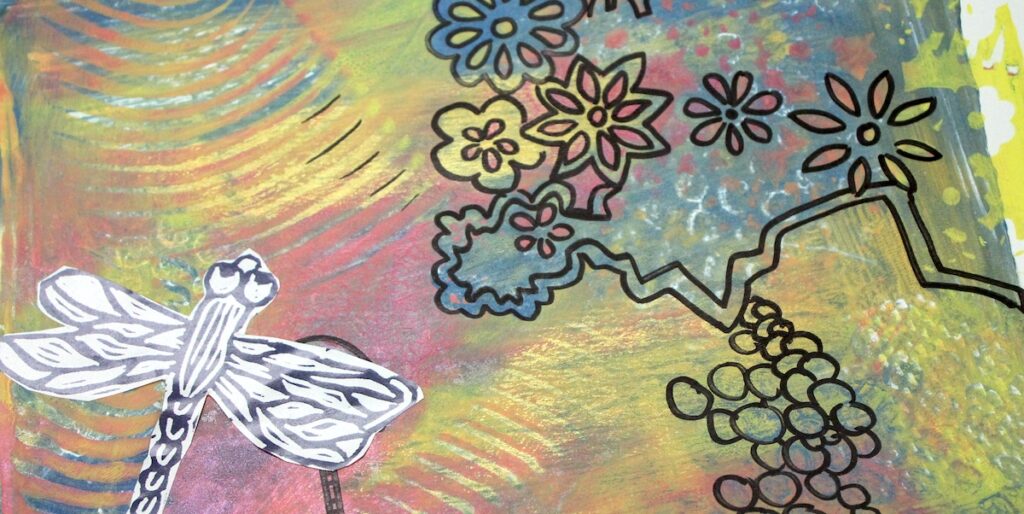
By this step, students should have a print ready to go and an idea in mind based on their own choice, the inspirations provided, or a theme you set out as the focus for their artwork. Students can add collage elements first followed by drawing elements or vice versa. Both ways will provide interesting results.
Collage
Provide your students with the usual suspects like glue and scissors, but also supply them with a wide array of materials such as kid-friendly magazines, yarn, sequins, construction paper, old books, fabric scraps, and newspapers. The more items they have to add to their prints, the more creative they will be.
Drawing
Students can embellish or draw on their print or even just enhance patterns and designs created through the printing process. They can add text as well. Supply students with broad and thin line markers and Sharpies, oil pastels, charcoal, colored pencils, pencils, and any other drawing materials of your choice. While all of these materials are not necessary, it is good to have at minimum two options.
The final piece should provide each student with a mixed media piece they are proud of!
Final Tips
Although this is a wonderful experience to give your students, it can take a bit of time and effort to set up. Here are four tips to make things run more smoothly!
- If you do not have a class set of Gelli plates, you can use other surfaces for monoprinting or set your room up in stations so students are working through the steps at different times.
- If you do not have stencils, you can create your own using cardboard, old transparencies, or other scrap materials. Stencils are also available for purchase through art catalogs, at craft stores, or on Amazon.
- If you don’t have the budget to purchase wet wipes, you can simply use paper towels and a spray bottle for cleaning.
- If you run a choice-based classroom, you can have all students do Gelli plate monoprinting as a skill building activity in rotations. Then, during the following class, you can do a mini-lesson about how to turn the print into a mixed-media piece.
As educators we know that while working with one medium is great, it’s important to show our students how to effectively combine different techniques. In this way, they can become well-rounded artists.
Do you use Gelli plates in your art studio?
How do you promote mixed media projects?
Magazine articles and podcasts are opinions of professional education contributors and do not necessarily represent the position of the Art of Education University (AOEU) or its academic offerings. Contributors use terms in the way they are most often talked about in the scope of their educational experiences.