It seems whenever we introduce new technology to our students, they’re eager to jump in. The rapid pace of development for tech means they are constantly encountering new ideas. While their enthusiasm is great, it also can be a little daunting. As educators, we may not always be comfortable bringing these new ideas and processes into our classrooms.
One project sure to capture your students’ attention is holograms. This sounds daunting, but it is completely doable for any art teacher. Your kids will be impressed, and they’ll have a blast! Kerri Waller presented this idea in her Art Ed Now presentation, 6 STEAM Lessons Your Students Will Love, and conference attendees were intrigued!
Follow the steps below to create your own low-tech holograms!
1. Gain a basic understanding of the process.
The first step to this project is gaining a basic understanding of how holograms work. Although these creations are easiest to describe as holograms, they are actually the result of the Pepper’s Ghost effect. Pepper’s Ghost is an illusion effect that makes images appear like holograms or ghostly apparitions. It is a common special effect technique used in theaters, amusement parks, concerts, and museums. The illusion is made possible with glass (or glass-like surfaces such as a transparency) and light. Because of ray optics, light is reflected and refracted to produce an image that appears like a hologram.
2. Create a hologram pyramid projector.
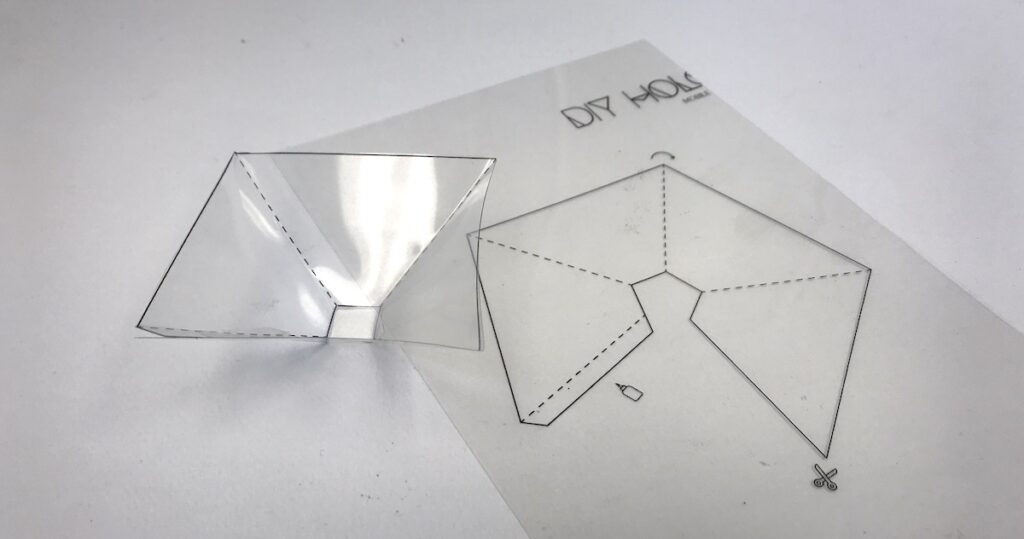
To start this project, your students will need to create pyramid projectors. These are the clear, pyramid-shaped containers that will help reflect and refract the light. This step sounds complicated, but all you need to do is run a transparency through the copy machine.
The easiest way to make the projector is to use this DIY hologram template download and follow the steps below.
- Decide if you will display your hologram with a tablet or a mobile phone.
- Choose the corresponding template size from the download.
- Print the template you need.
- Copy the template onto a transparency by running it through the copy machine.
Check to make sure your copy machine can handle transparencies! If it can’t, you can carefully trace the template onto a transparency with a thin permanent marker. Use a ruler to make sure the lines are precise. - Follow the directions on the download to cut out and assemble the hologram pyramid projector.
If you want to push this project further and incorporate math, you could have your students create their own templates using rulers.
3. Create an image.
One of the coolest aspects of this project is that the images to be projected can be created digitally or traditionally. Students can either create in a graphics program or create with traditional media, snap a photo, and upload it to the device.
Whichever approach you choose, make sure to follow these steps to ensure a successful hologram projection.
- Start with a black or dark-colored background.
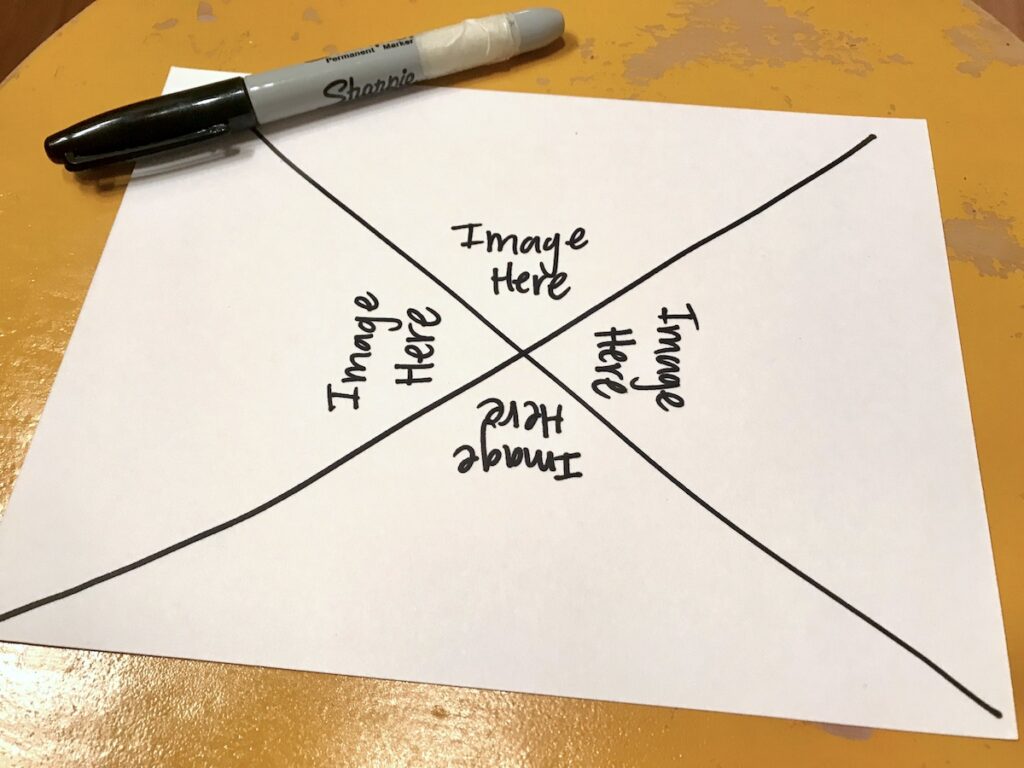
This will result in the hologram projection showing up bright and clear. - Before creating the image, draw an “x” to divide the paper or screen.
If using traditional materials, draw lightly as you’ll want to remove the “x” later on. - Draw an image in one of the four triangular-shaped spaces.
- Repeat the same image in the three remaining spaces.
This is an excellent opportunity to discuss symmetry. If students are using text, make sure to tell them to write backward since the image will be reflected.
Let’s take a look at 3 examples, each created differently.
Example 1: Digital Image
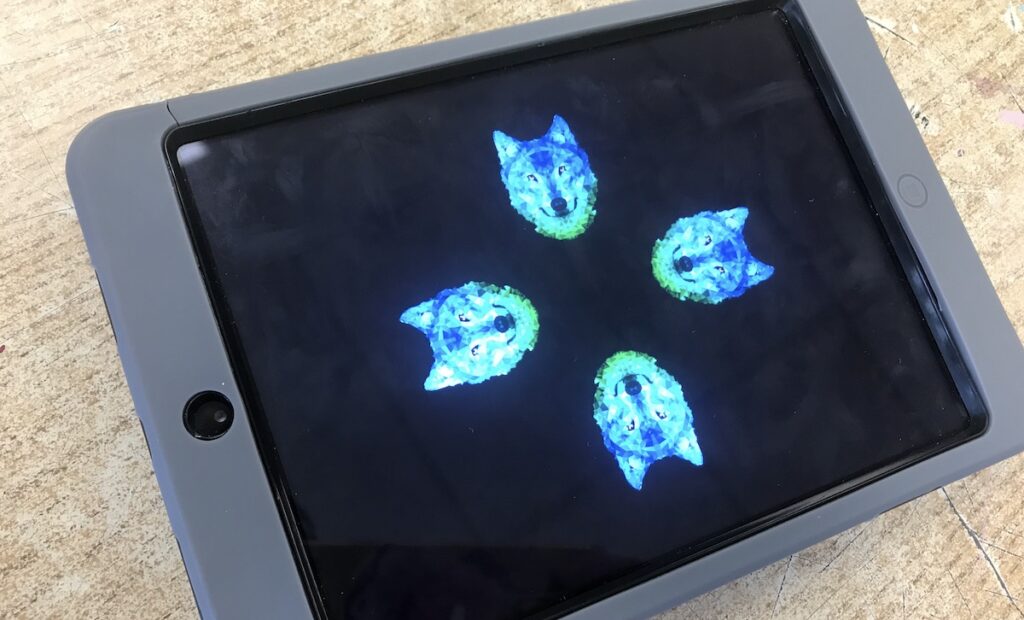
Students can create a digital image in Photoshop or a similar program like Pixlr or Adobe Draw. Here you can see the “x” has been removed from the image.
Example 2: Digital Animation
To take the digital creation process a step further, students can animate their images. Creating a simple GIF animation will make for an interesting projection.
Example 3: Traditional Drawing or Painting
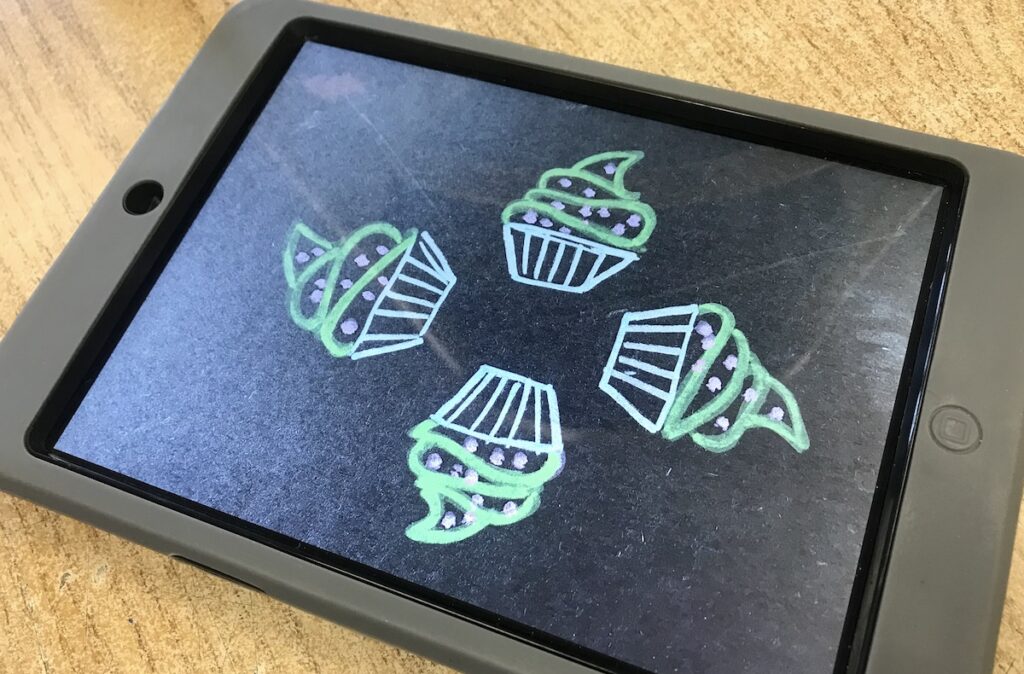
Remember, images do not need to be created digitally. Using a piece of black construction paper students can draw or paint an image using the same setup. Materials that contrast with black paper will work best. Try using metallic markers, gel pens, or oil pastels for best results.
4. Present Your Hologram
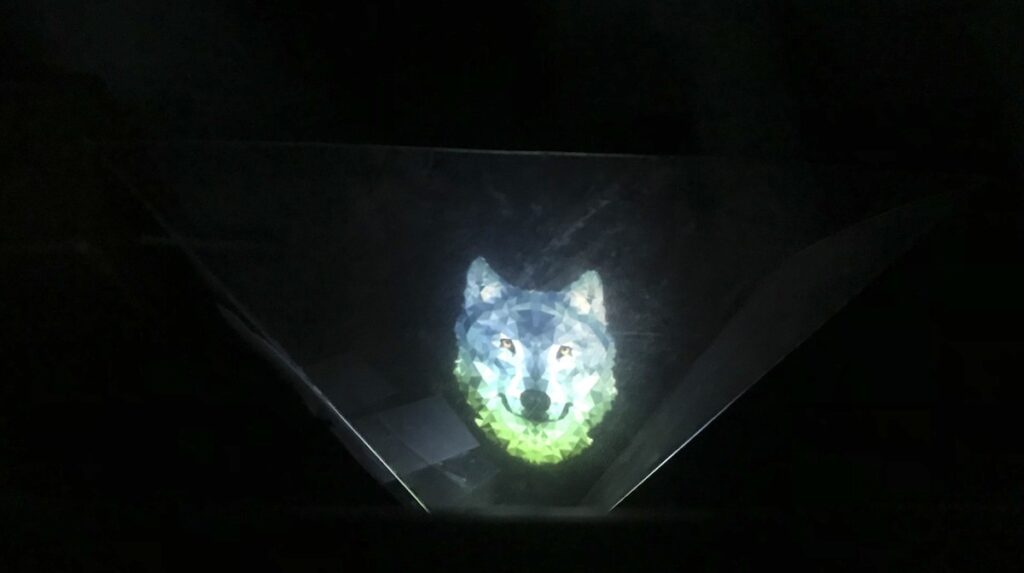
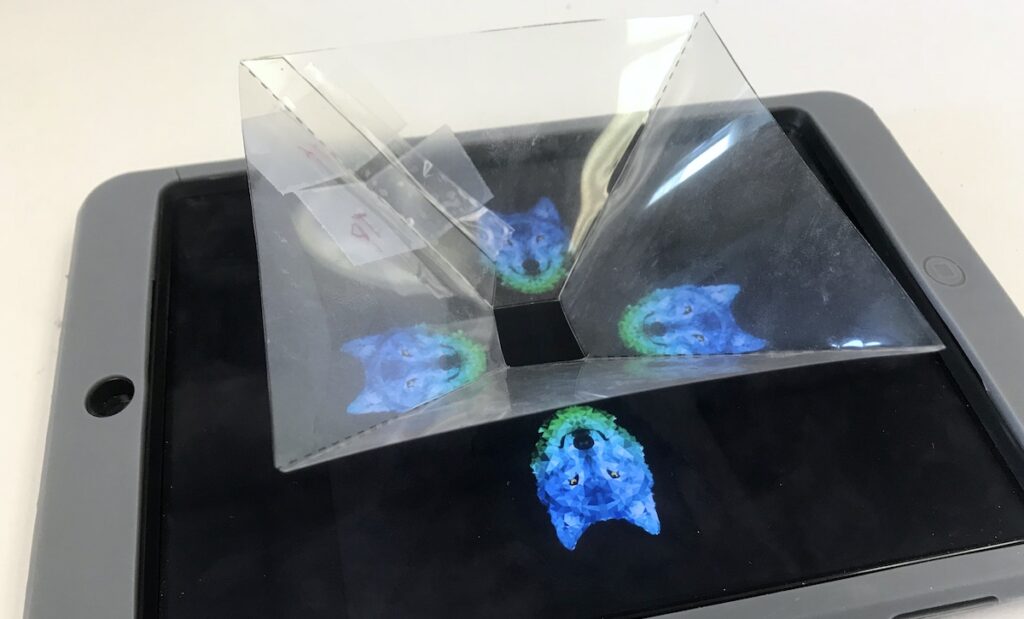
To create the holographic effect, you must have your digital image or traditional drawing on a tablet or smartphone. The digital image can be shared with the device you will be using to project. To project the traditional image, simply take a photo of it. You can see the hologram best if the lights are turned off. Place the transparency projector from Step 2 in the middle of the image on the device and look at the side of the projector. The image will appear as if it is floating in the center of the projector.
If you’ve been wanting to try a project that implements basic technology while integrating math and science principles, give this one a try! Your students will be engaged in the process and will create some fantastic hologram images!
Have you ever made holograms in your art room?
What is your favorite low-tech project to do in the art room?
Magazine articles and podcasts are opinions of professional education contributors and do not necessarily represent the position of the Art of Education University (AOEU) or its academic offerings. Contributors use terms in the way they are most often talked about in the scope of their educational experiences.