The art room is naturally a place filled with high energy. Students are chatting, creating, and giggling. That’s what makes the art room so amazing! But, let’s be honest, sometimes the volume can get out of control. You can hardly hear the conversation of the students standing right in front of you. Rather than adding to the noise by shouting or shushing, try this simple and ART appropriate voice volume system at the start of the new school year. Its simplicity will engage and save you and your students’ hearing for the rest of the school year.
It only takes three letters.
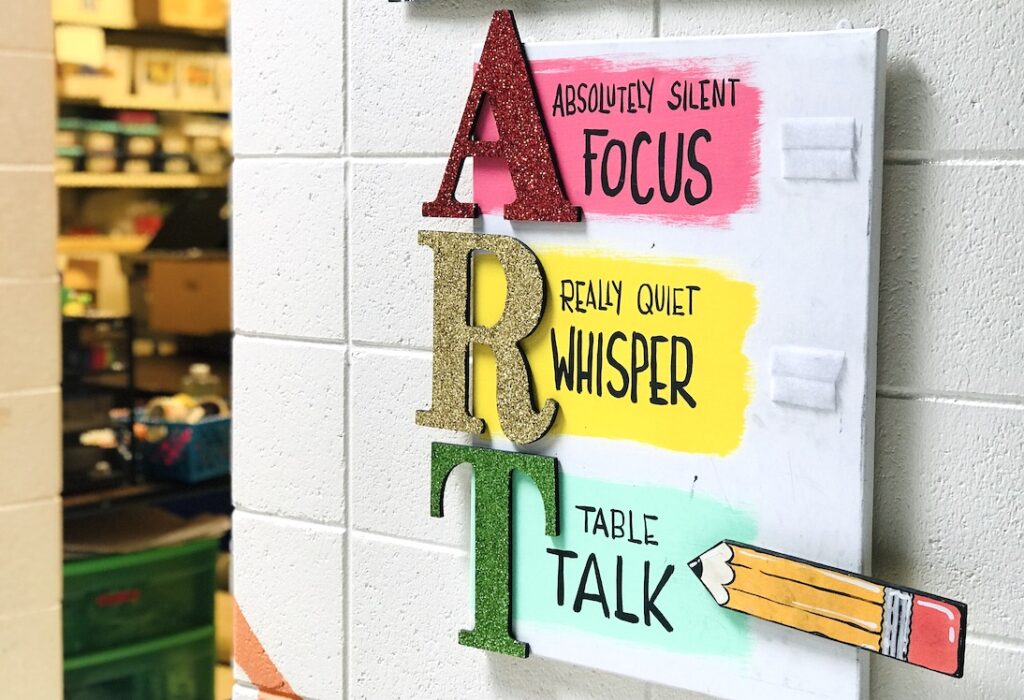
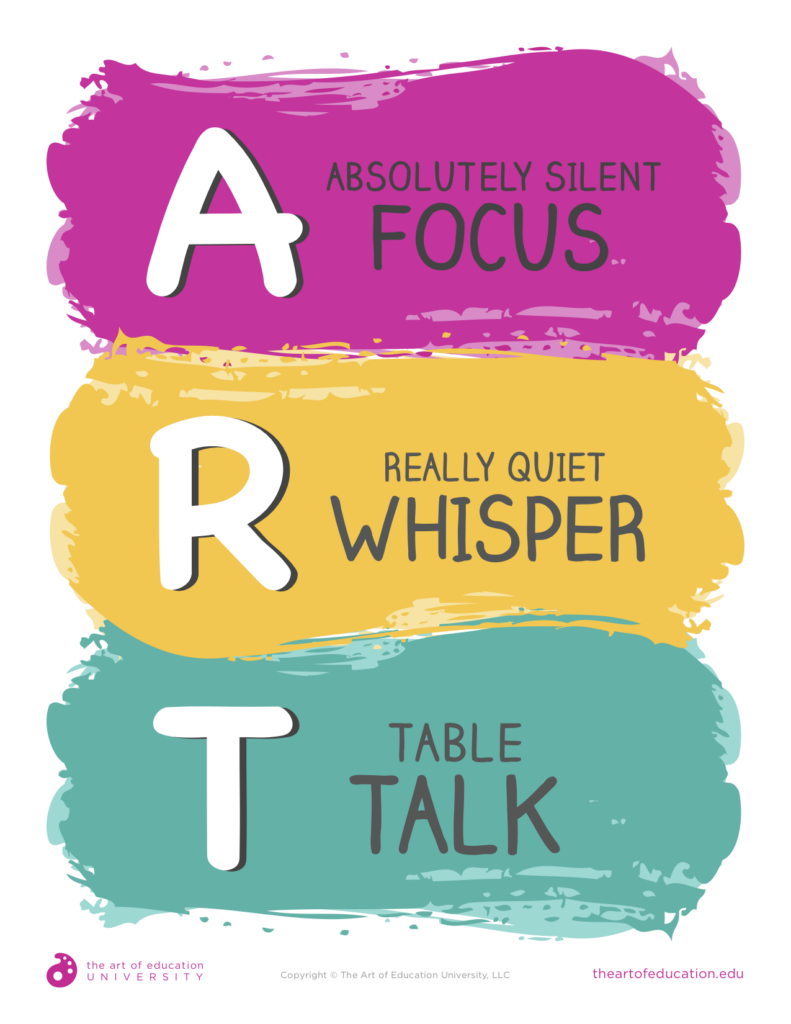
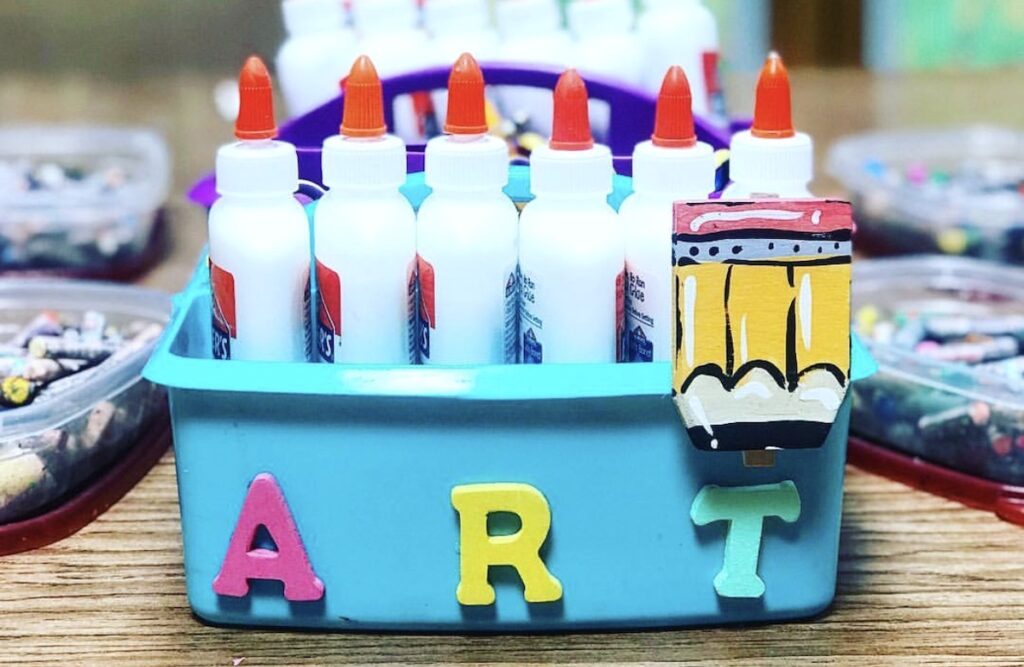
A = Absolutely Silent
R = Really Quiet Whisper
T = Table Talk
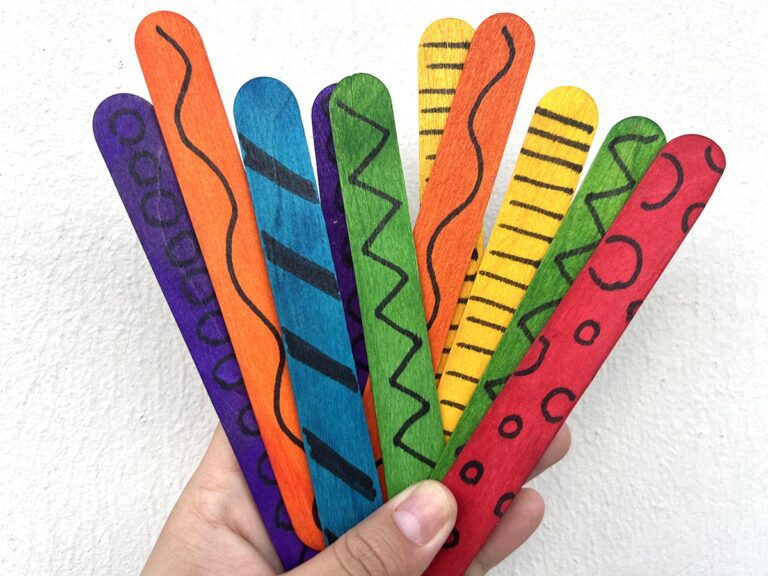
Make an indicator like a large wooden pencil, arrow, or paintbrush to point to the volume level you expect from students. You can attach the indicator with velcro or clips so it can easily be moved.
If you don’t have time or materials to create a crazy glittery chart, use this free download ready for display.
Perfect! You did it! Now slap the poster on the wall or at each table, and it works like magic, right?
Not necessarily. You must teach and model proper volume control behavior for the best results. Your students need to be shown exactly what you expect at each level. You’ll need to be diligent at first when integrating this new system, so the volume level expectations stay consistent. Putting in the scaffolding will benefit you and your students for the rest of the year.
Try these 3 tips to start this system out strong:
1. Put ART letter indicators on each table/workspace:
The act of having a student at each table move a clip during a volume transition makes the whole table more responsible for the noise level. If there is one poster way across the art room and the volume indicator is changed, sometimes the volume remains appropriate for a few minutes then slowly increases. Having the ART volume near students helps to keep them accountable.
2. Make students responsible for moving the volume clips.
If you have student jobs in your classroom, add this one to the list. Having students move clips as well as monitoring how the class is following the chart brings ownership to the management system. If you don’t use specific classroom jobs, elect students modeling good behavior to change the wall indicator to the proper level.
3. Use call and response or hand motions to reinforce the desired volume.
When you need to transition to a different letter, say something like, “Our voices are too loud for ‘Table Talk.’ Please move your pencil clip to an ‘R.’ Your voice should be no louder than this.” Try whispering the appropriate volume you expect at this point. You can also create a motion for each level for when the volume transitions occur. Then you aren’t contributing to the noise level with your own voice. The repetition of transitions to desired volumes will be something your students soon recognize. It will become second nature.
Remember: The wonderful thing about your art room is that it is YOURS.
You can decide the level of volume you are comfortable with. Remember, high energy and volume can be a good thing! For example, check out this article about playing music in your art room.

At some point, you may hear a whispering student ask, “How much time before we are back at ‘Table Talk’?” You may want to consider using a visual timer or a timer on your classroom board to indicate how long you expect each volume level to last. You and your students will find a rhythm that works for you.
However, here’s an art teacher management secret about not using a timer. If you tell the class they need to be at a whisper level for five minutes and after five quiet minutes, they are still working perfectly at a whisper…let them be! It’s much harder to trick those awesome artists into maintaining their volume if they are watching a timer diligently!
Soon, the most amazing thing will happen. Your students will specifically ask for volumes that work best for them. Students may ask to move to a certain level, complain it is too noisy, or admit they cannot focus. It’s pretty awesome when students take responsibility for their learning.
Controlling the volume of your art room can have some pretty amazing benefits. While conversation can be beneficial—it isn’t always best. Hopefully, these tips are just one step to help your students and you!
How do you manage volume in your art room?
During class, when your biggest struggle with classroom volume?
Magazine articles and podcasts are opinions of professional education contributors and do not necessarily represent the position of the Art of Education University (AOEU) or its academic offerings. Contributors use terms in the way they are most often talked about in the scope of their educational experiences.