
Are you ready to transform your classroom into a creative and colorful art laboratory? Look no further than fruit and vegetable printmaking! This simple yet magical approach introduces students to printmaking techniques using items straight from the produce aisle. It’s hands-on, inexpensive, and full of opportunities for discovery. Plus, who doesn’t enjoy the quirky excitement of stamping a carrot and turning it into a masterpiece?
Execute this delicious printmaking lesson in your bustling classroom in just one day with the tried and tested tips below.
Note: Adhere to your district and school’s food and allergy guidelines. If you notice a student who appears hungry or is experiencing food insecurity, promptly reach out to your administrator and professional school counselor to ensure the student receives support and resources.
Why print with fruits and veggies?
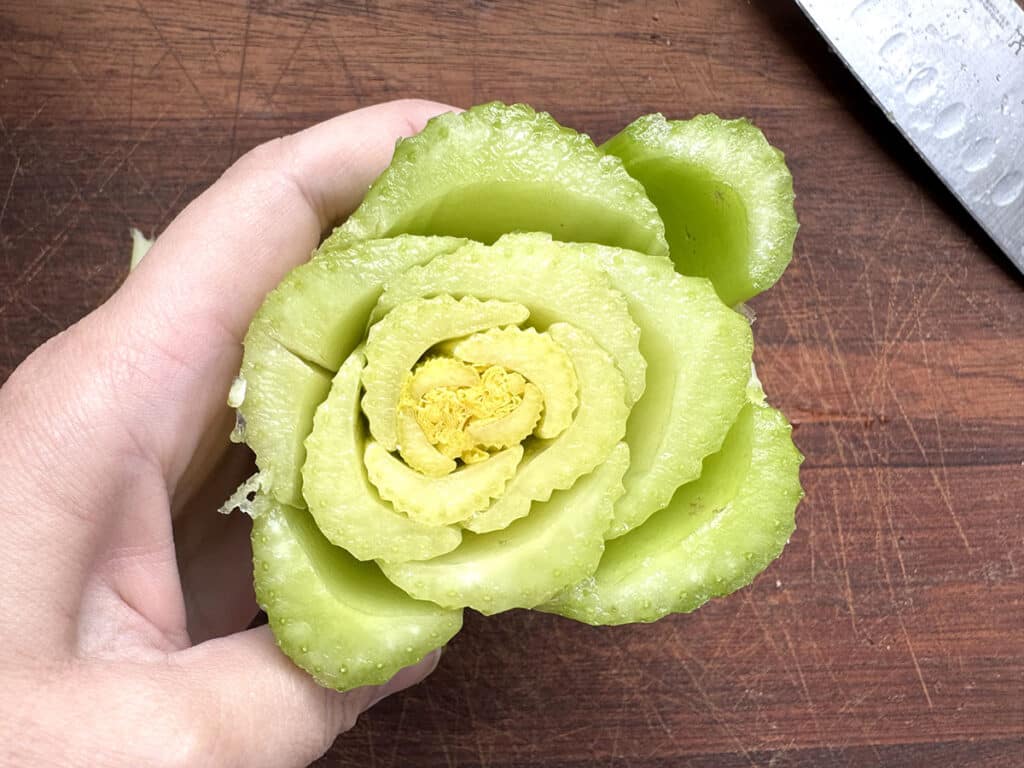
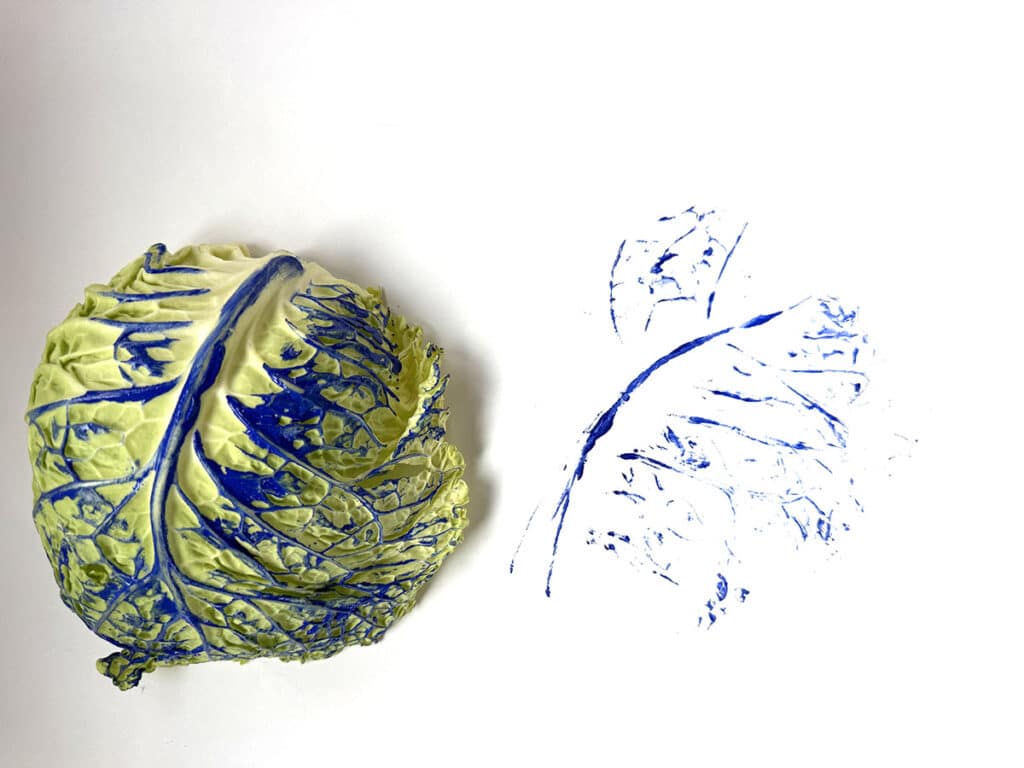
Watch your students’ faces light up as they discover that celery mimics roses, okra creates intricate starbursts, and apples transform into bold graphic prints. Beyond the novelty, this lesson unlocks so much creativity and connection. Because each slice of produce is unique, students will crave making more and more! Each print can kickstart discussions on texture and pattern. Sneak in fun science facts about the natural world and plant structures. You can even touch on sustainability by using scraps and avoiding waste. Reach out to local grocery stores and ask them to donate produce before it gets thrown away.
Prep for produce printmaking like a pro!
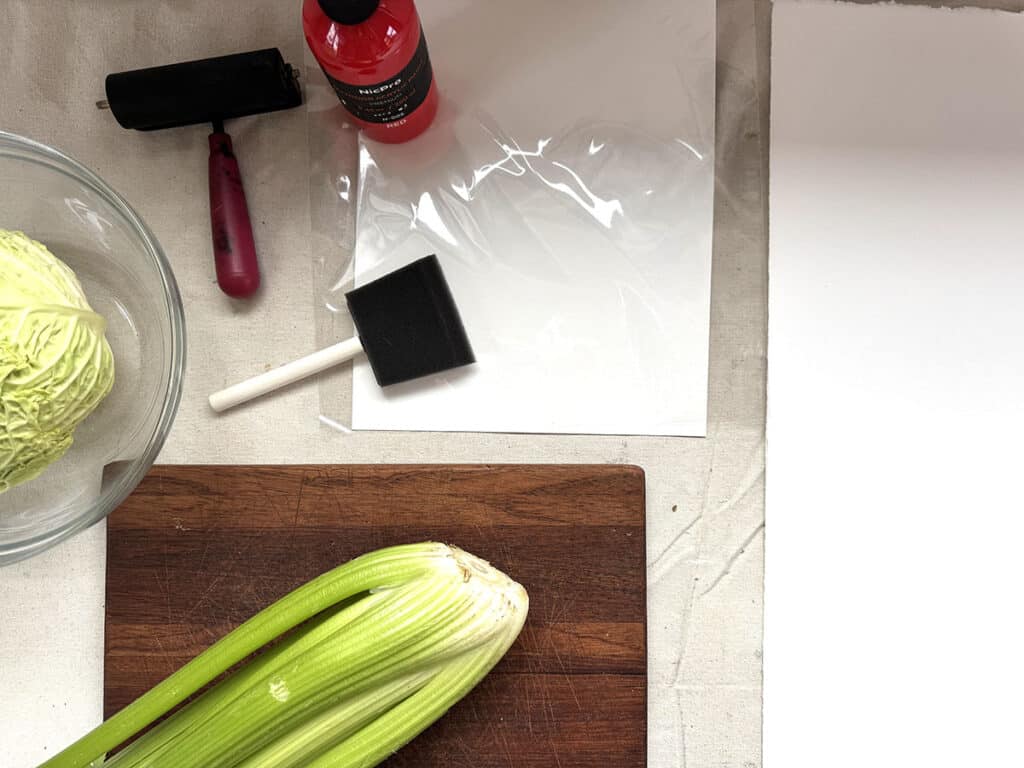
Smooth sailing in the classroom starts with smart prep. The day before, purchase your produce. Avoid overly ripe produce because it will get mushy, turning your masterpiece into a “mess-terpiece!” Then, prepare your produce by slicing fruits and veggies into workable shapes. Halve apples, cut celery into short stalks, and slice okra crosswise. Store them in airtight containers to keep them fresh.
The day of, cover your workstations with butcher paper or disposable tablecloths for easy cleanup. Set up stations with paint, foam brushes, and paper towels. Use paper plates that you can toss after or shallow trays and pour on a layer of thin paint. Remind students that less is more. Tell them to use a thin layer because too much will produce blobs and blur the shapes.
Keep the fun flowing with stations.
Large classes can get chaotic fast. Harness that energy into productive printing with stations. Try an Experimentation Zone, Thematic Creations Zone, and Display and Drying Zone to cover all parts of the artmaking process. Encourage students to continue cycling through the stations until the period is over. Rotate the stations every 10-15 minutes to get them moving, minimize boredom, and ensure everyone gets a crack at all the cool materials.
Here are three zones to get all of your students involved:
- Experimentation Zone
Give students time to play! They’ll test different vegetables and experiment with pressure. Try overlapping veggies to create depth, dabbing multiple colors on one piece of produce for a tie-dye effect, and rotating a fruit to explore patterns and movement. - Thematic Creations Zone
Provide prompts to focus their designs. Ideas like building an imaginary garden, designing a dream meal, or creating a crazy creature help students think beyond random stamping. - Display and Drying Zone
As students finish a print, place it on a drying rack or hang it on a clothing line. This station also doubles as a mini-gallery for instant feedback and appreciation! Try adding a fun critique activity for a reflective component.

Take printmaking beyond the art room.
One-day lesson ideas don’t have to be a one-and-done deal! Inspire your students to expand their prints into new projects. Start by reflecting on what foods and marks surprised them. Brainstorm how they can use these techniques in future artwork. Generate a list of other fruits and vegetables they’d want to try next, and what shapes they think they’d produce!
Try these three simple extension activities:
- Greeting Cards
Fold prints into personalized cards. Send them home, write notes of appreciation to their classroom or favorite teacher, or jot down words of encouragement for residents of a local retirement home. - Composition Collages
Cut or tear prints into unique shapes. Layer and arrange in fresh combinations to practice compositional skills. - Surface Design
Use larger sheets of bulletin board paper, butcher paper, or fabric to create hand-printed patterns. Use it as wrapping paper or get ahead on the next school year and craft a fun bulletin board to welcome students back!
Explore an artist who elevates printing with food.
If you think printing with food should stick to the preschool classroom, you haven’t seen Ruth Asawa’s work yet! Ruth was a child of Japanese immigrants who experienced living in an internment camp for several years during World War II. She later went to art school and explored how simple wire can produce abstract, voluminous sculptures.
One of Ruth’s well-known prints is made from a simple potato. She took an ordinary potato, carved a tree-like form, and printed it in rotating patterns across Japanese paper in only two colors. Just like with her wire sculptures, she investigated transparency through overlapping and ink quantities.

Fruit and vegetable printmaking is more than a juvenile craft or a quirky one-day activity—it’s a joyful explosion of creativity that makes students rethink the ordinary. This activity will leave a lasting impression on your students with its mix of science, sustainability, and artistic exploration. Grab some apples, celery, and carrots, and transform your classroom into a produce-powered art lab. Who knew veggies could be this much fun? Get ready to make your mark—one stamp at a time!
What connections does this activity have with other content areas?
How would you extend fruit and vegetable printmaking into a larger unit or project?
To chat about printmaking with other art teachers, join us in The Art of Ed Community!
Magazine articles and podcasts are opinions of professional education contributors and do not necessarily represent the position of the Art of Education University (AOEU) or its academic offerings. Contributors use terms in the way they are most often talked about in the scope of their educational experiences.


