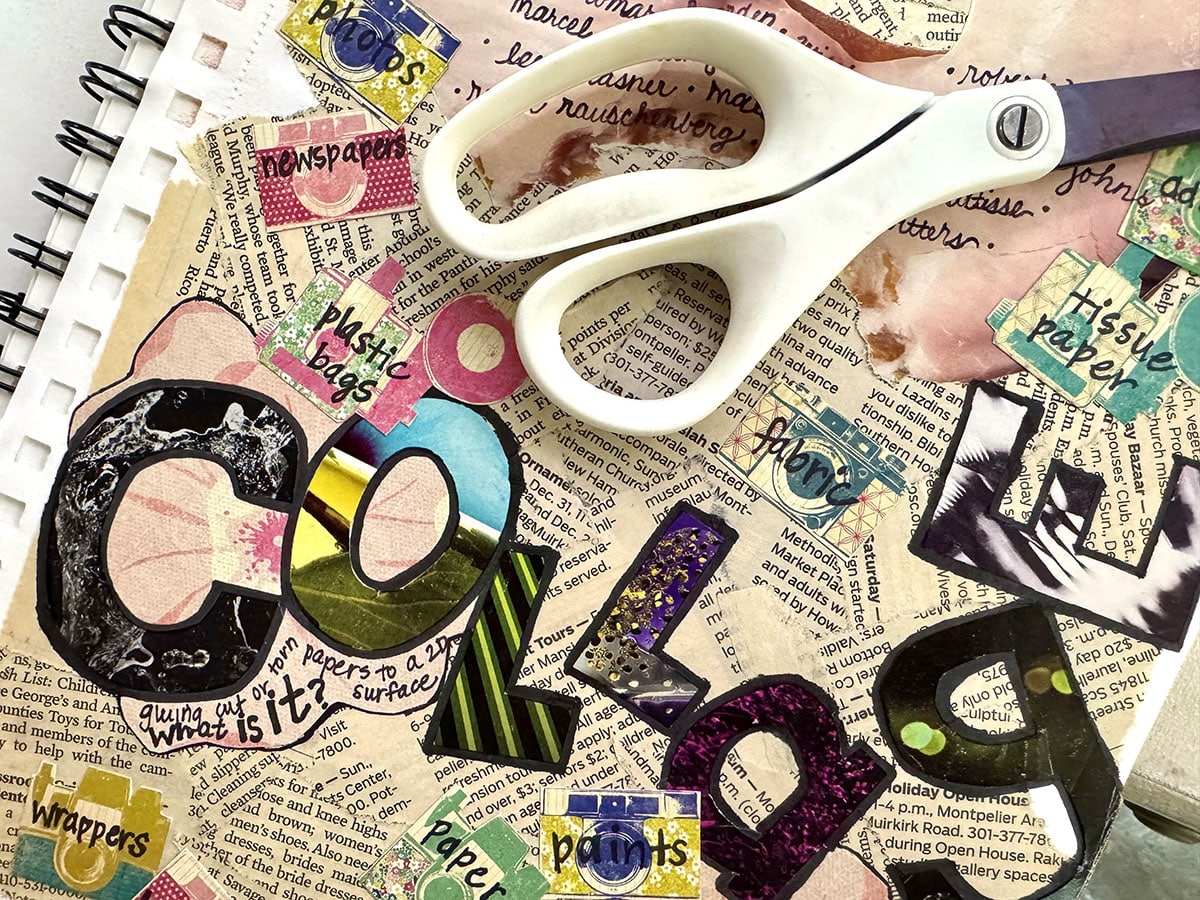
Collage is one of those art mediums that you love to hate and hate to love. It’s relatively inexpensive, it gets students hands-on, and there are so many ways to do it. However, we all know it has its challenges. After a college day, bits of paper cover your room, and you have a lot of pictures haphazardly glued together. How do you corral the chaos? How do you challenge students to push the limits of collage? How do you elevate the medium of collage on a budget? What are your best collage hacks?
Stick with it—we have a guide full of collage tips and hacks for you!
If you love a good hack as much as we do, there’s more over on YouTube! Visit different art teachers and dive into hacks from printmaking and drawing to ceramics and sewing. Catch up on previous Art Room Hacks episodes and subscribe so you don’t miss the next ones!
Paper Hacks
One of the main materials for collage is every art teacher’s best friend—paper. The key is to provide a variety of colors, textures, and sources to create visual interest. Collect discarded artwork instead of tossing it in the recycle bin, or make painted paper as a “free day” or early finisher activity. Provide small envelopes with a clasp enclosure for students to glue onto the inside cover of their sketchbook. This is a great place to store those extra little papers that haven’t made it onto the final artwork yet!

Here are some tips and hacks for everything paper:
- Source newspapers, books, and magazines.
We all know these items are staples for collage. However, as the world is going digital, it’s harder than ever to collect paper copies. Stop by retirement homes, doctor’s offices, and the library. Many of these places still receive newspapers and magazines and are more than happy to donate old copies to your program! The library often has free books up for grabs, too. Offer to display the finished collages in their space for a meaningful way to say “thank you.” Another clever spot to grab newspapers is to call your local newspaper. They often have extra copies or rolls of newsprint. - Ask to repurpose outdated textbooks.
Many large districts have warehouses where they house outdated equipment and supplies. Call around and see if there are any old textbooks they are willing to drop off for you. Many textbooks have excellent photographs and thicker, glossier pages. - Collect sheet music.
Reach out to your music department or local music stores. They can donate old books of sheet music and start collecting discarded pieces of sheet music. These make really fun elements in collage work! - Snag brochures and maps.
Anytime you’re at a restaurant, museum, or travel stop, grab a few! The pages are often thick with colorful images. - Think out of the box for unexpected papers.
There are so many papers we use every day that we may not think of as collage paper. Walk around your home and classroom and put aside gift wrap tissue paper, worn sandpaper, wallpaper, wrapping paper, contact paper, or even wax paper. Printed napkins even have super fun patterns, so don’t forget to bring in extras after your next dinner party! - Make a call for holiday catalogs.
As November nears, email parents asking them to send in their seasonal gift and toy catalogs. While most shopping is digital, many larger companies still send out catalogs at this time of year. Students love flipping through to find images of products they love.
Substrate Hacks
The surface you choose for students to create collages on matters. Thick paper or matboard can get pricey and warp. One way to minimize warping is to paint the back to encourage the board to bend the other way. Press dry paper collages under stacks of heavy books over the weekend to get them to lie flat.
Take a look at these tips and hacks for materials to create your collage on:
- Scout scrap wood at the hardware store.
Many hardware stores will donate marred sheets of plywood or luan to your program—and often, they’ll cut it down to size for you too! If your hardware store offers a cutting service, there is usually a pile of scrap wood nearby that’s up for grabs. - Gather old canvases.
Keep canvases that your students no longer want. Rummage through yard sales or the thrift store for cheap home decor canvases. Collage right on top! Be sure to remind students to wrap their image around the sides as they collage for a seamless piece. - Recycle food packaging.
Heavy-duty cardboard boxes make for a sturdy substrate, but cereal boxes work perfectly too! Ask each student to bring in a cereal box. Carefully open them up so they lie flat and cut them down with your paper cutter. Each box will give you two large surfaces for a collage. - Reimagine your pinch pot unit.
Pinch pots are a foundational clay unit and skill. Before you know it, you end up with hundreds of identical pinch pots! Reimagine your pinch pot lesson and require students to collage on top of their bisqueware. It’s a fun way to finish their pots, use up collage material, and merge two art forms into one!
Adhesive Hacks
Speaking of sticking with it, adhesive is an important part of collage. It can be easy to assume all students know how to use a glue stick. Just like with any medium or supply, it’s important to teach and review how to use the material. A few extra minutes at the beginning of each class will save you headaches (and budget money!) later.

Let’s take a look at some glue tips and hacks:
- Draw happy faces on your glue sticks.
This one sounds silly—but it works! Erin Simpson-Krar, a middle school art teacher, lets her students name the glue sticks and draw faces on them. Students are more likely to take care of their glue stick “friends.” - Assemble glue sponges for younger artists.
This one is virtually mess-free and great for our littlest artists who are still learning fine motor skills. Collect containers with lids (recycled takeout containers work well) and put a cheap sponge in each. Soak each sponge with a 3:1 glue-to-water mixture. Students press their paper shape onto the top of the sponge and then stick it to their paper. - Try a bottle with a brush applicator for older elementary and middle school students.
Order some cheap plastic bottles with brush applicator lids. Pour regular liquid glue into the bottles. A hack for this tip is to use small recycled jars with lids (yogurt jars and baby food containers are excellent) and disposable cotton swabs. Students can apply the glue directly to their collage pieces without damaging brushes or lengthy cleanup. This is perfect for students who aren’t quite ready to use a real paintbrush to apply glue, yet you want to eliminate glue lines under their collage elements. - Coat the final collage for a clean finish.
Taking this extra step really ensures the artwork looks polished and professional. It adds a protective sheen and eliminates pieces getting caught or falling off. Simply brush on a clear sealant in a matte or satin finish. Use two or three very thin layers, moving the brush in opposite directions each time to prevent visible strokes.
Collage Challenges
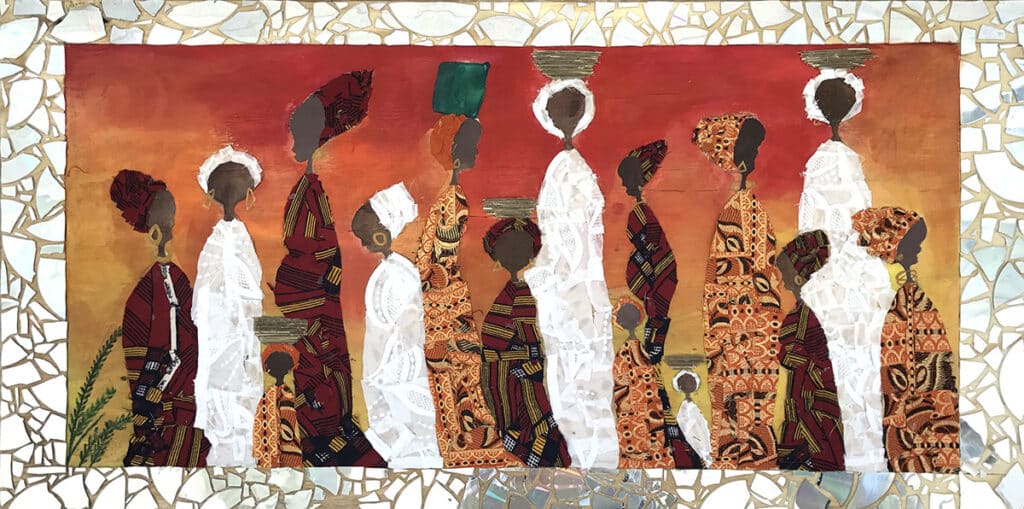
Now that you have several tips and hacks up your sleeve, you need project ideas! A collage can be a quick 5-10 minute bellringer exercise, a short one-day activity, or a longer, more intricate unit. Collage is also a fantastic way to introduce modern and contemporary artists and prompt students to transform a common material, like paper, in a novel way.

Switch your usual collage projects up with these four engaging twists:
- No Scissors Day!
Challenge students to create a collage using only their hands. They can fold or tear paper to create the size, shape, and edge they desire. Show them the work of Fujiko Shiraga and describe the texture of the torn Japanese paper juxtaposed with broken glass. - DITL Collage
This twist on a “day in the life” will get students to examine the world around them in a fresh way. Students collect all the paper they use for one day that they would normally throw away. (Remember to sanitize items.) Examples can include food wrappers, packaging, receipts, flyers, tickets, and doodles. Look at the “Merz” collages of Kurt Schwitters that incorporate similar found items. - Artwork Remix
Students take photos of their artwork (or photocopy them) and print them out. Encourage students to cut, rip, layer, and reposition their copied artworks to make a new one. Lorna Simpson does something similar by incorporating past collages into larger pieces. - Chance Collages
Introduce Jean Arp and how he created “chance collages.” He dropped his pieces on the paper and glued them wherever they landed to explore spontaneity. To unify the artwork, students can pick a color scheme or common shape for their collage.
Collage is a dynamic, versatile, and budget-friendly art medium that belongs in any K-12 art room. It empowers students to transform everyday paper into meaningful, layered works of art. With its tactile nature and endless possibilities, collage keeps students excited about art! Use the hacks above to minimize cleanup and stretch your budget, while also expanding your thinking about paper and substrate sources. It’s not just about cutting and pasting—it’s about seeing the extraordinary in the everyday!
Share your best collage hack!
What’s a collage challenge your students love year after year?
To chat about collage hacks with other art teachers, join us in The Art of Ed Community!
Magazine articles and podcasts are opinions of professional education contributors and do not necessarily represent the position of the Art of Education University (AOEU) or its academic offerings. Contributors use terms in the way they are most often talked about in the scope of their educational experiences.