As the school year winds down, markers are the perfect tool for a one-day art lesson idea. Markers offer more than just coloring—markers add vibrancy and a range of artistic effects. Fill areas with solid, bold colors or create delicate shading and a range of values using techniques like stippling and cross-hatching. Create a painterly effect with washable markers or explore printmaking in a novel way. Beyond their versatility, markers make classroom management easy. They’re quick to distribute, easy to work with, and practically cleanup-free.
Save these one-day lesson ideas that feature markers! They’re easy for you, but engaging for your students.
Markers offer a vibrant and versatile medium for artists of all ages, but what exactly makes a marker? All markers contain a few essential components. They all have a reservoir that holds the ink, a porous nib that delivers the ink to the paper, and a cap to prevent drying. The nib is a felt or synthetic material. While they all have the same basic components, markers can use different dyes, pigments, and solvents.
Here are some common marker varieties that are great for the art classroom:
- Alcohol-Based Markers
These markers use alcohol as the solvent for the dye. They have chromatic colors and smooth blending capabilities. Alcohol-based markers dry quickly and are permanent. They work well on paper, plastic, and even metal. They are a favorite among illustrators and designers. - Water-Based Markers
Water-based markers use water as the solvent. They are typically odorless and non-toxic, making them a great choice for younger artists. These markers offer good color payoff and are blendable when wet. Check out the Painting with Markers Resource in FLEX Curriculum for a handy step-by-step guide. - Paint Markers
Paint markers contain opaque, pigment-based paint instead of dye. They deliver bold, vibrant lines that resemble traditional paint. Paint markers work on a wide variety of surfaces, including paper, wood, glass, and ceramic. They are excellent for creating posters or adding embellishments to paintings, drawings, and sculptures. - Chalk Markers
These markers have a liquid chalk solution that produces opaque, colorful lines. Use them on non-porous surfaces like chalkboards, glass, and metal. Chalk markers are erasable with a damp cloth, making them great for temporary signage, window art, and chalkboard designs.
Take time to teach techniques so your students know how to get the most out of their markers.
One of the first rules of teaching is to never assume your students know anything. Take time to show them the different parts of a marker. Explain how they can hold the marker at different angles. For example, they can use the tip for thin lines or the edge of the nib for broad lines. Demonstrate techniques like carefully smudging or using water to create an ink wash. Show how to mix colors without ruining the nibs with stippling and layering. The Marker Techniques anchor chart in FLEX Curriculum is a nice visual reminder!

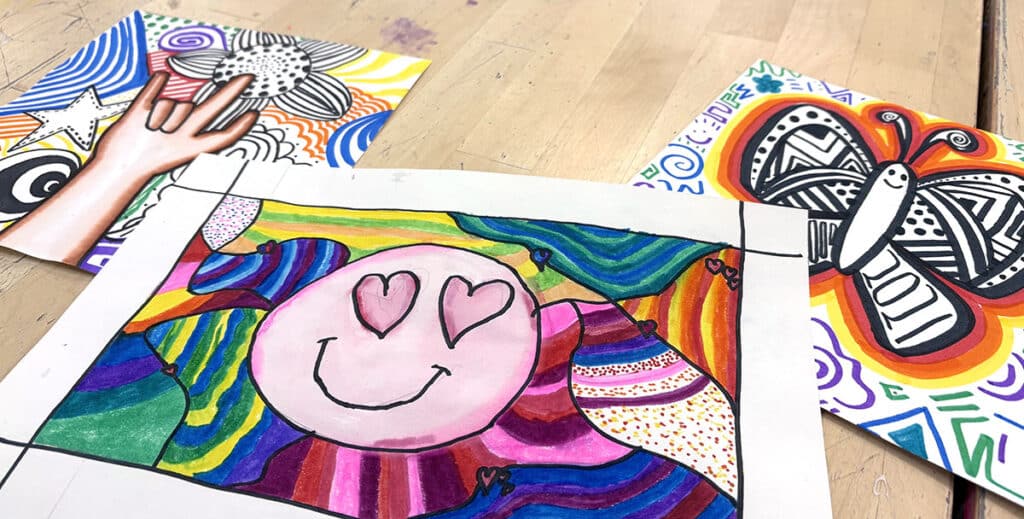
Introduce your students to the vibrant world of Romero Britto.
Romero Britto is a Brazilian-born artist known for his bold, optimistic style that blends Pop Art, Cubism, and graffiti influences. Britto’s work is instantly recognizable for its use of bright, contrasting colors, thick black outlines, and playful patterns. He often depicts everyday objects, animals, and figures in a simplified, almost cartoonish manner that students can easily replicate. Britto is an artist who can bridge two art movements in one lesson! Compare and contrast his different approaches and discuss how they combine to make something fresh.

Create a still life drawing with a limited palette inspired by traditional blue and white porcelain.
China has a rich tradition of creating blue and white porcelain, known as Qinghua. Chinese artisans perfected white porcelain during the Tang dynasty (618-907 CE). The iconic blue and white style emerged later, in the Yuan dynasty (1271-1368 CE), as trade along the Silk Road brought cobalt from Persia. During firing, the cobalt transforms into a vibrant blue under the glaze. Importing the cobalt was expensive, but artists were happy with the reliable color. The blue and white color scheme is both striking and elegant.
Early Qinghua pieces displayed strong Islamic influences with dense floral and geometric patterns. Later, during the Ming and Qing dynasties, artists developed a distinct Chinese style with dragons, phoenixes, florals, and symbolic scenes from folklore.
Teach your students the history of this famous pottery. Then, have students design their own version. Play soft music and encourage students to enjoy the soothing process of filling their vase with symbols and patterns. Focus on simplicity in the composition and use markers to capture the bold colors and clean lines.

Make prints using markers.
Surprisingly, markers offer multiple ways to innovate printmaking. Perhaps the most common method is inking a styrofoam stamp by coloring it with washable markers. Then, simply press the stamp onto a wet paper. The water draws the ink into the fibers of the paper for a beautiful print with less mess. Encourage early finishers to sharpen their prints by drawing on top after they dry.
If you don’t have styrofoam blocks, try making monoprints by coloring on a non-porous surface. Students can color on a piece of aluminum foil and then spray it with a little bit of water. Organic shapes will spread, delighting and amazing the students every time they pull a print. Depending on the material of your work stations, consider letting students draw directly on the table. The ink washes off easily, but the transgressive act of drawing on the table is always a thrill. Add representational elements with permanent markers, crayons, or oil pastels as a resist.
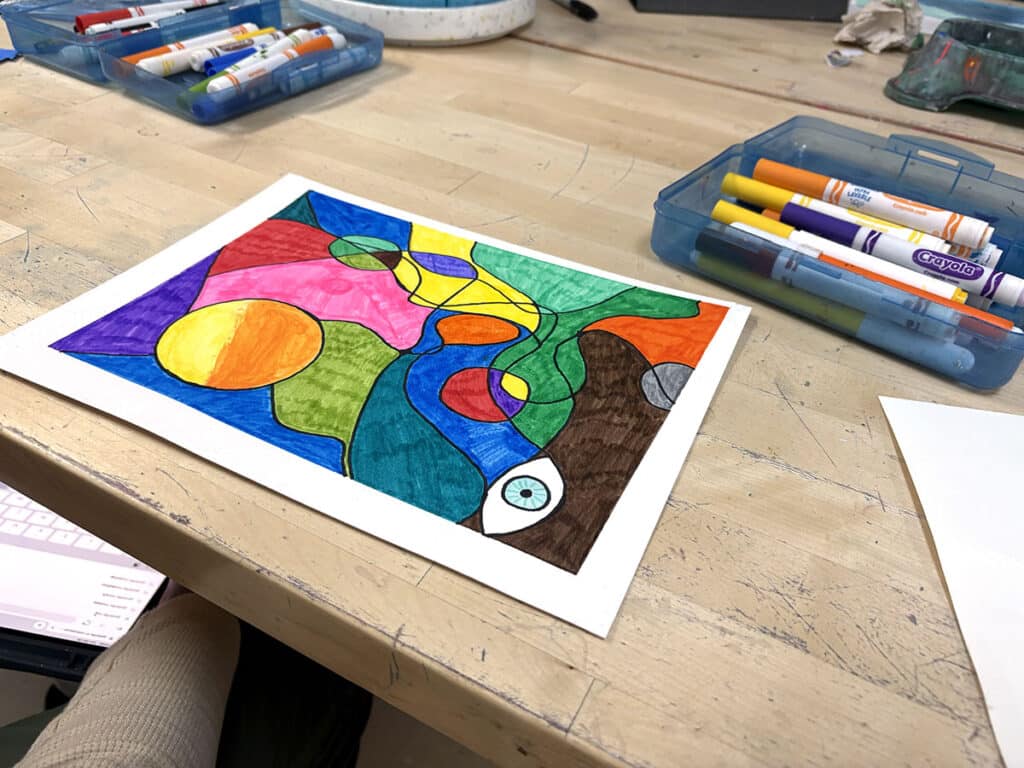
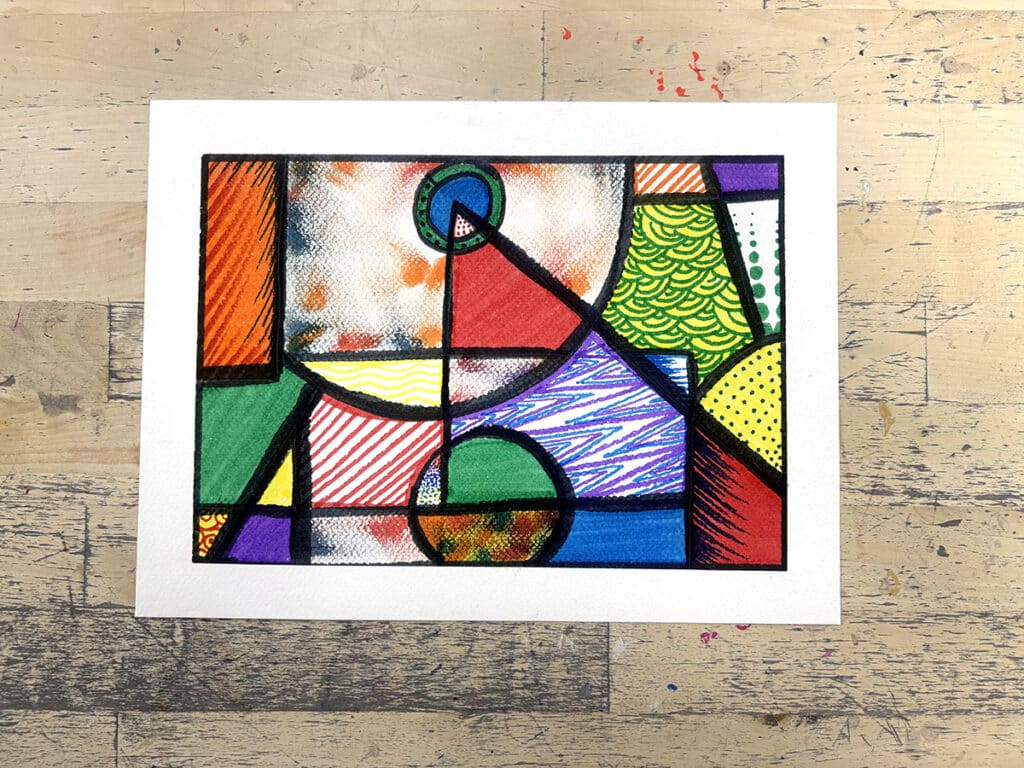
Experiment with marker techniques in an abstract composition.
Abstract and non-objective art provides a great opportunity for students to focus on the principles of design without the distraction of recognizable subject matter. Start with an overview of the principles of design. FLEX Curriculum has wonderful videos and anchor charts to help students visualize these concepts. Give them objectives such as the number and size of shapes to draw, the amount of line weight variation, and more. Next, take time to focus on craftsmanship. Walk students through basic steps like marking an area for a clean margin around the perimeter of their drawing. Require students to use a specific number of Marker Techniques and watch the compositions unfold!
Markers offer a low-prep and high-impact artmaking experience. With their ease of use, vibrant colors, and diverse range of techniques, markers empower students! Markers encourage students to explore creativity, develop new skills, and produce impressive works of art. Use these one-day lesson ideas to streamline your time and resources while keeping your students productively making quality art. Lean in and enjoy every last moment with them before summer break!
What is your favorite art lesson using markers?
What is your go-to medium for easy prep and less mess?
To chat about markers with other art teachers, join us in The Art of Ed Community!
Magazine articles and podcasts are opinions of professional education contributors and do not necessarily represent the position of the Art of Education University (AOEU) or its academic offerings. Contributors use terms in the way they are most often talked about in the scope of their educational experiences.