Do you remember the first time you stepped foot into the art room? The smell of crayons, the feel of the clay, experiencing your first painting? The art room is simply a magical place! But it’s not always exciting for all students. Some feel self-conscious about their drawing skills. Others believe they are “not creative.” Even the most dedicated art students will have days or weeks where their enthusiasm for the subject may wane.
Never fear! When the art room air feels a little stale, pull out these 13 magical media to bring the awe and wonder back to those glimmering faces.
Cool Tools
1. The thrill of the potter’s wheel.
It doesn’t matter how many lumps of clay go flying off the wheel across the room. This tool will never, ever get boring. Most schools only have the budget for a few wheels. Even if you have to do the legwork to get one wheel in your room, it will give back tenfold.
Teaching students to center, pull up walls, or make any form captures their attention for hours. While this is a difficult skill, students view their time on the wheel as precious. They will build perseverance by trying and trying again despite the outcome.
2. Torches, hammers, and saws—oh, my!
Something dangerous in class? Yes, please! Students might be less than thrilled to sign up for a jewelry class until they find out they will be making lots of noise and using fire. Now we’re talking! Metalsmithing is a lot of fun, and even an introduction will get students out of their funk.
Safety is a must in the art room. Students are often extra nervous, hyper-cautious, and highly aware of what their peers are working on and with when danger is involved. Students grow confident as they build their skills using these specialized tools. They are aware of how few classrooms offer these experiences.
However, with these tools, students can start working with their hands on day one. Bang on some metal wire with a hammer, load a tiny saw blade into a frame, and practice lighting the torch. Even the most apprehensive of artists will line up to give it a try!
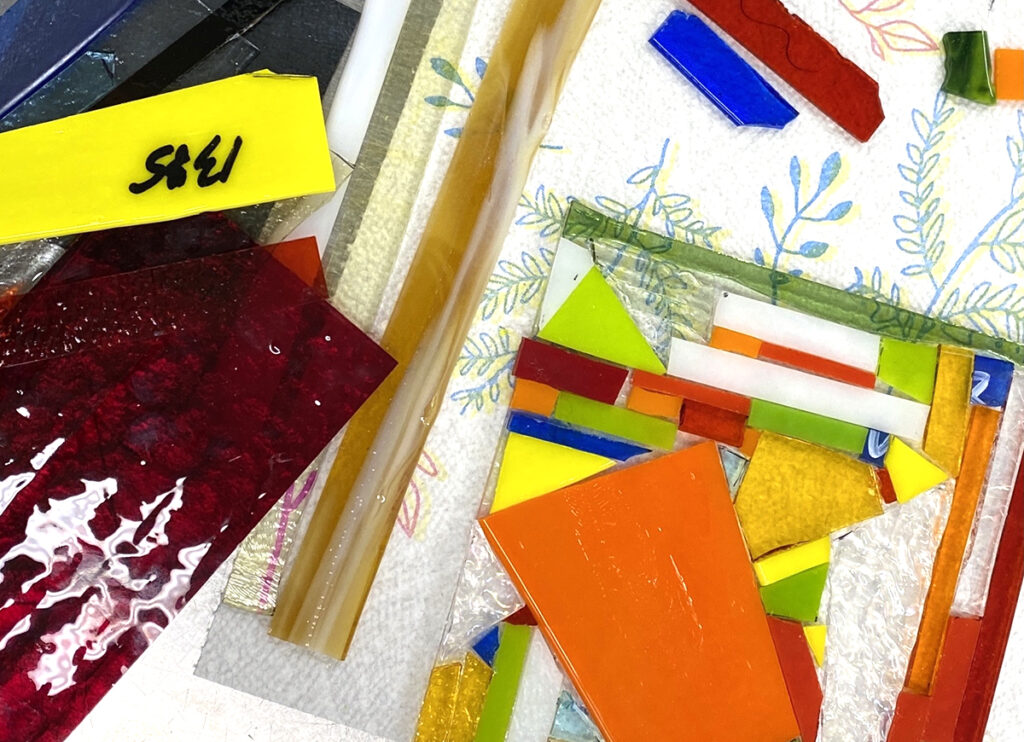
3. Introduce fusing and glassworks.
Did I mention danger? Glass is another medium often omitted due to safety concerns or budget. But, you don’t need to have a forge and blow glass to introduce this beautiful medium.
Students can safely score and break glass sheets with a few extra tools to create a simple, geometric stained glass piece to hang in their room. Mosaics are a great way to use up glass scraps and combine them with other found objects. If you have a kiln (or even a mini microwave fusing kiln), fusing is a great way to introduce glass in the art room. Watching separate glass pieces become one is a captivating experience. Take a look at our PRO Pack, Getting Started With Warm Glass and Lampwork.
Magical Moments
4. Explore ceramic glazing.
Speaking of pottery, what is even weirder is the chemical reaction of glazes! Students dip or brush on layers of brown, red, and gray. Out of the kiln, the colors are transformed into varying hues of celadon, fuschia, and confetti-ed pearl.
A great way to explore glazing is to create a series of textured test tiles. Students explore different texture tools and plates on 1.5″ x 1.5″ clay squares or circles. Make this activity even more meaningful by creating ornaments or pendants. Students roll out a slab, choose a cookie cutter shape, and add a hole for a string. After bisque firing, students can select glazes to test. Share the results with the class post-firing. Make a test tile board by taking photos of the pieces and arranging them on a chart.
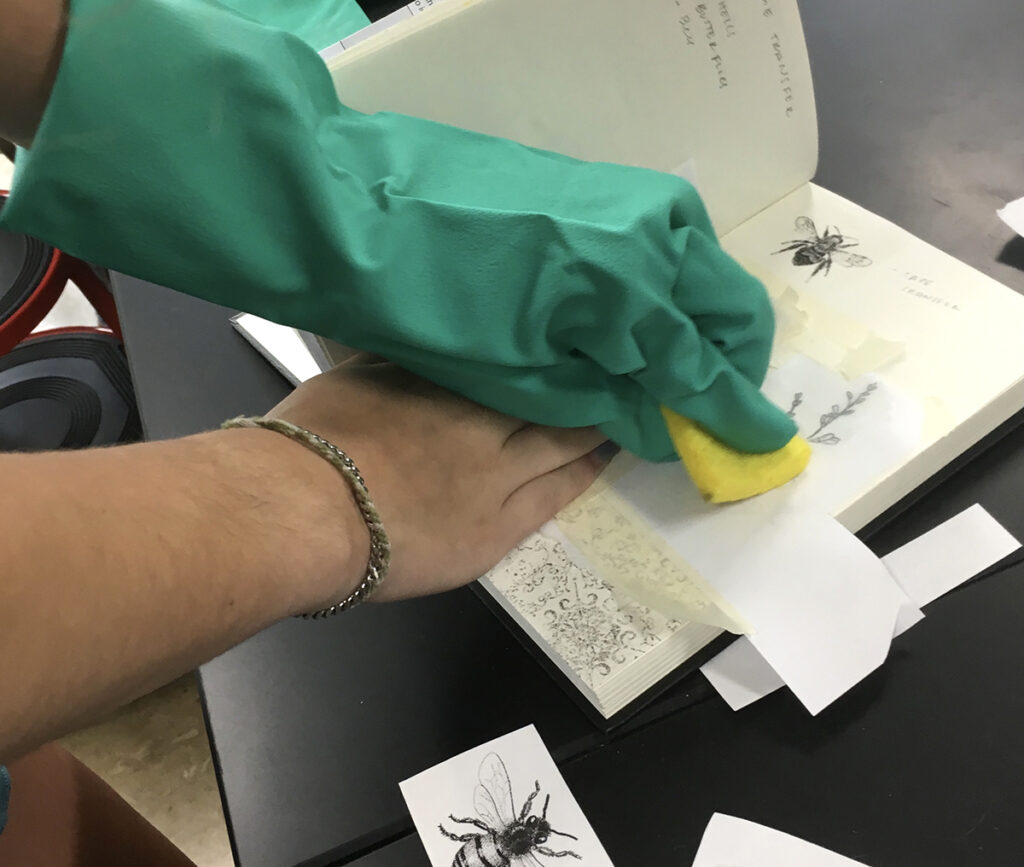
5. Enter the darkroom.
Every year, students crowd into the darkroom as you demonstrate the magical appearance of an image on light-sensitive paper. You expose white paper, and it stays white. But wait! You gently agitate it in “magical” chemicals and voilá! The image slowly appears. The gasps, ohs, and giggles immediately ignite excitement.
If you don’t have a darkroom, cyanotypes work just as well for sparking the same thrill. Plus, spending time outside is always a bonus. Stretch those legs and get some vitamin D while making art.
6. Introduce image transfer techniques.
Transferring a printed image onto an artwork or journal page opens the world for our students. Packing tape transfers are a low-budget and non-chemical-based option. Print an image using a laserjet printer and “laminate” the image side with a layer of packing tape. Then soak in water for a minute and rub the paper off the tape. Ta-da! The ink will be left behind.
There are other ways to transfer images, such as using gel medium, acetone, or blending markers. However, what really blows their minds is the simplest transfer of them all—the graphite transfer! Students no longer have a clue as to what “carbon copy” was all about. Take their sketch, flip it over, and shade graphite on the back. Then flip back over, so the sketch is right side up, and place it on top of the final surface. Trace the image with a good amount of pressure and remove the paper. The result is an image transferred with just a pencil!
Hypnotic Hands-On
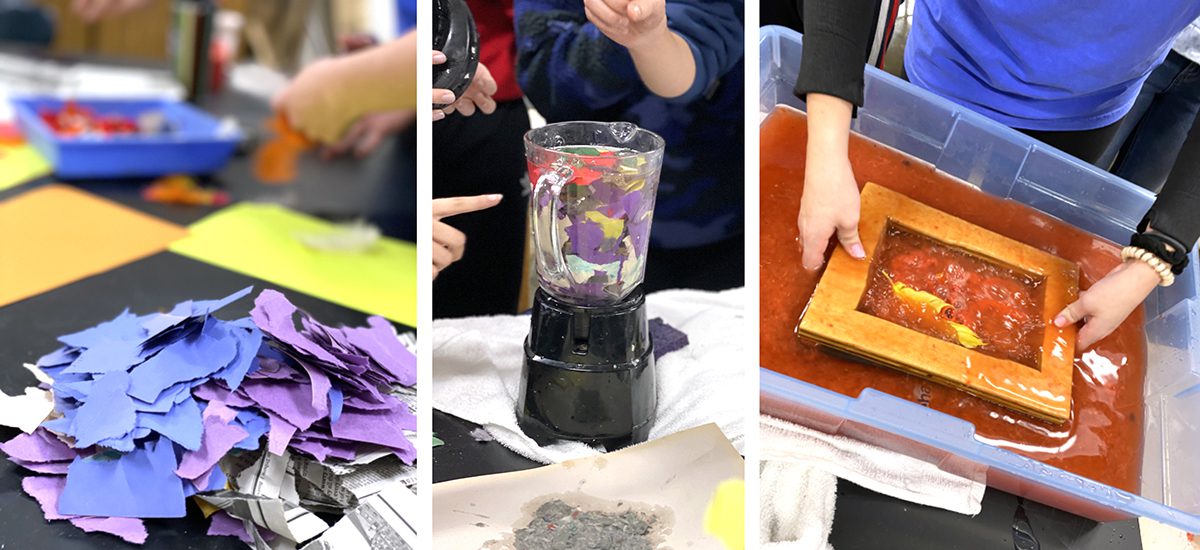
7. Try making homemade paper or marbling.
What’s more fun than using a blender in your classroom? How about dumping a bunch of recycled paper materials into it to make your very own homemade paper?
Marbling is another magical experience for students. Swirl some paint onto a bed of shaving cream or a tub of water. Place the paper face down on the swirled paint. Gently lift the paper and watch students gasp in awe as they pull those gorgeous decorative surfaces onto the page. Turn your homemade or marbled papers into collage papers or use them as book pages to create a mini-journal.

8. Introduce sewing, stitching, and stuffing.
Talk about hearing a pin drop—and when you are sewing, you might hear a few! Students will spend hours in hushed concentration working on their sewing projects, whether sewing by hand or machine.
Simple sewing projects include sewing a small pillow or a soft sculpture. Students can design an interactive piece with pockets or add furry textures based on a kindergartener’s sketch. Once students have a needle and thread in their hands, you will find them unstoppable.
9. Try a little tie-dye.
Is this quite possibly the messiest of options? Probably, yes. But, everyone loves tie-dye, and the experience is always fun and memorable. Students can explore color theory and then wear it around the school to promote your art program. Try a “no wash” technique of using UV paint or explore stencils and spray paint. Or, try out some batik techniques using smaller pieces of fabric.
Transformational Techniques
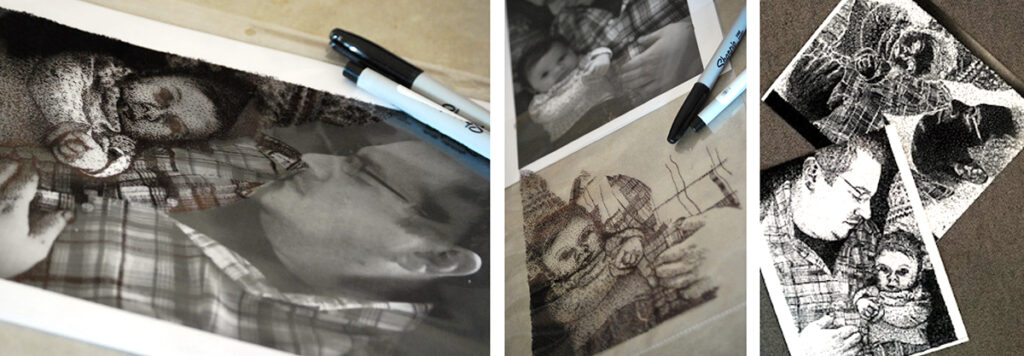
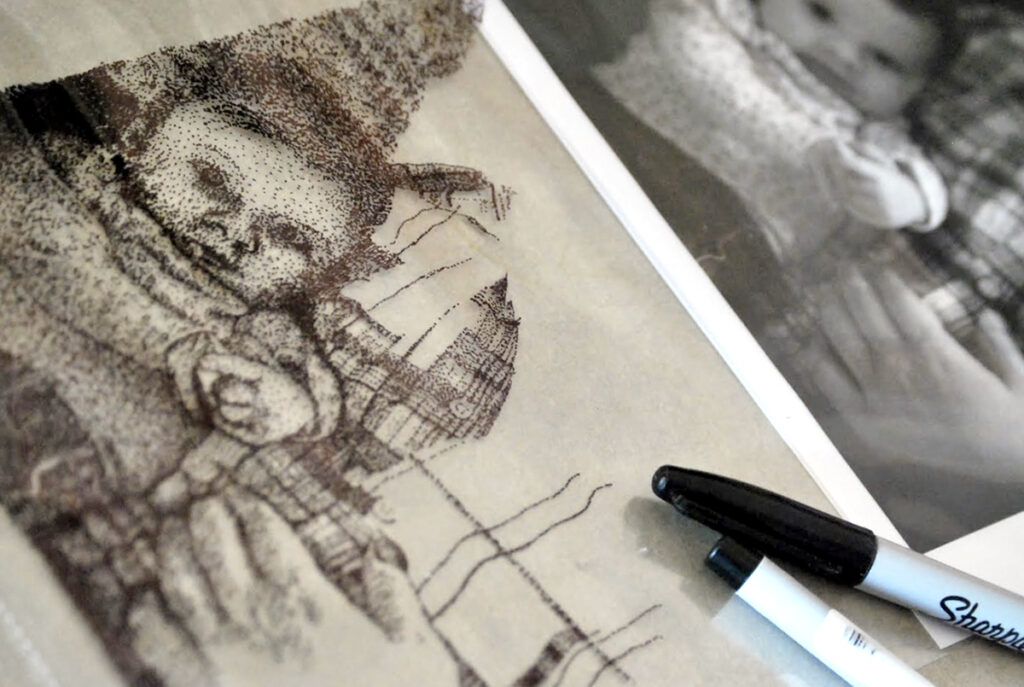
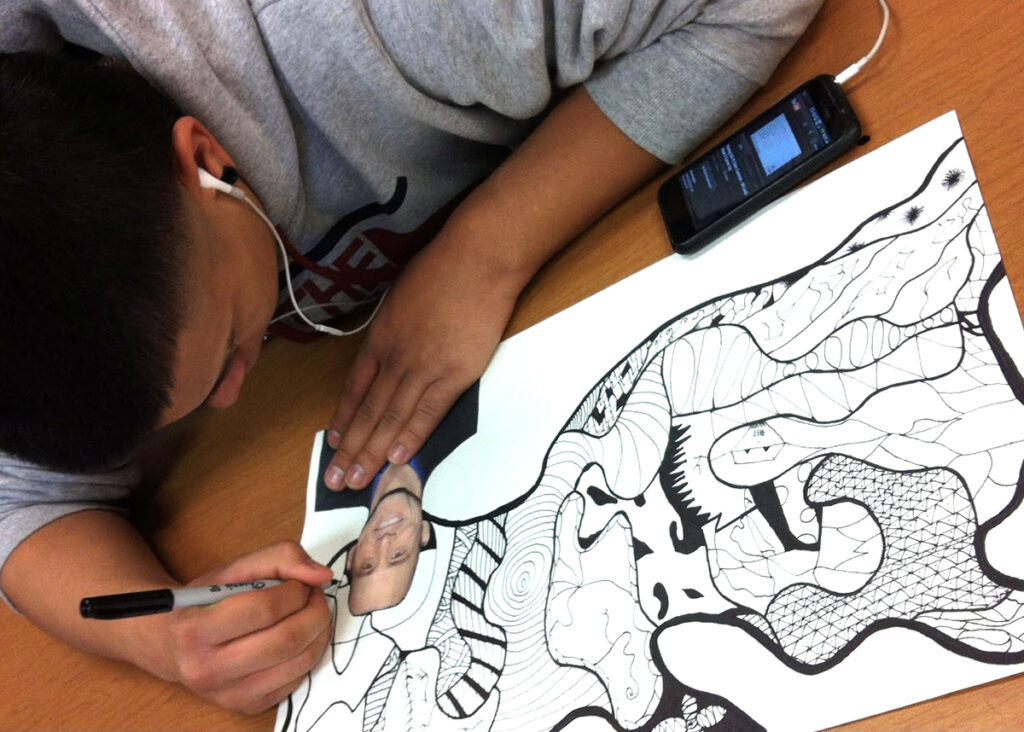
10. Introduce stippling.
Ok, it’s not a magical medium. But it is still a mesmerizing technique! While your room will be filled with the sounds of pens or pencils repeatedly hitting the paper, you won’t find a single student disinterested. Students are always amazed at how a series of dots (or other small marks) can create a full-scale value drawing.
Even better is when you add stippling to the darkroom experience. Students can learn about a film’s negative by creating their own using acetate. Overlay a clear sheet protector on top of a student’s image. Then stipple values with a permanent marker, lay it on top of the photo paper like a photogram, expose, and develop! This is another great connection to printmaking and mass production.
11. Experience pure contour.
Once again, this one is not a medium, but this technique always blows students’ minds. Demonstrate a large-scale, pure contour drawing of a student in class without looking at the paper. As they all closely watch, the silence waiting for you to make silly proportion mistakes is palpable. It’s even more strange when they applaud you when you’re finished. (Crazy but true!)
While this is an age-old skill, it never gets old with your new and repeat students—practice observation skills with everyday objects, hands, or partner portraits. Explore different overlapping media or develop into a more substantial artwork.
12. Try doodling designs.
Anything that uses patterns with line and shape to create doodled masterpieces will have students hyper-focused for days! If you need some quiet time after a chaotic, messy unit, this is the way to go. Give your students a day or two of practice and then collage with portraiture, nature, or develop further with color theory. You are guaranteed to enthrall them with this mindful activity.
Wearable Wonders
13. Accessorize with polymer.
Students LOVE art they can use or wear around school. They get to show off to their peers and other teachers what they made in your class. Making functional art is also a great advocacy tool. There is nothing like receiving a compliment on your latest earrings just to say, “Thank you! I made them in art class!”
Bring out polymer clay for a day or two to change up the pace. Roll, texture, punch, and bake a jewelry set while teaching design and functionality. Students love playing with cardboard, metal can scraps, or anything found to create a one-of-a-kind zipper pull, broach, or belt buckle. Engage in connections with sustainability, business, and marketing. Showcase the pieces in a mini-runway event or display to sell in a school marketplace. Who doesn’t want to wear their art and sell it, too?
If you are new to jewelry making, check out the FLEX Collection, Innovating with Jewelry and Metal, for different ways to incorporate jewelry into your teaching practices.
No matter what media you are teaching, balancing your curriculum with various lessons is a great idea. Digital apps can provide a quick fix but don’t forget how magical and memorable traditional art experiences are. After years of teaching, many of these mediums and tools listed may not feel fresh and exciting to you. But, the wonder and awe from your students who are experiencing these for the first time will invigorate the room, leaving you feeling refreshed, too!
What media or techniques have you taught that leave your students wanting more?
What lessons or media do you like to introduce when the energy falls flat?
Magazine articles and podcasts are opinions of professional education contributors and do not necessarily represent the position of the Art of Education University (AOEU) or its academic offerings. Contributors use terms in the way they are most often talked about in the scope of their educational experiences.