The glazing process is one of the most fascinating things about ceramics. There is a great deal of chemistry involved in the process that our students don’t always get to see. Students are usually shocked to find out the dull, chalky looking substance will eventually turn into a glossy glass-like coating.
I once had a student who, after glazing a ceramic piece in class, placed it in their art bin until the next class. The next day he ran up to me with his chalky glazed piece in disappointment. He simply said, “It didn’t work; it’s not shiny!” It’s hard for students to understand the glazing process because they don’t see the chemical change occurring.
Often, students aren’t able to participate in the firing process because of time limitations and safety precautions. If you can expose your students to the kiln experience, you should! At the very least, let them see the kiln, watch you load the kiln, or even help. By doing so, students will get a better idea of the process and will ask questions out of curiosity.
The best way to illustrate the chemical changes that occur to glaze in the kiln is by creating test tiles. It’s hard for students to visualize what their final glaze colors will look like on their pieces; test tiles can help.
If your classroom is like mine, you might not have wall space to hang a large board of test tiles. Here are four alternative ways you can present test tiles in your classroom.
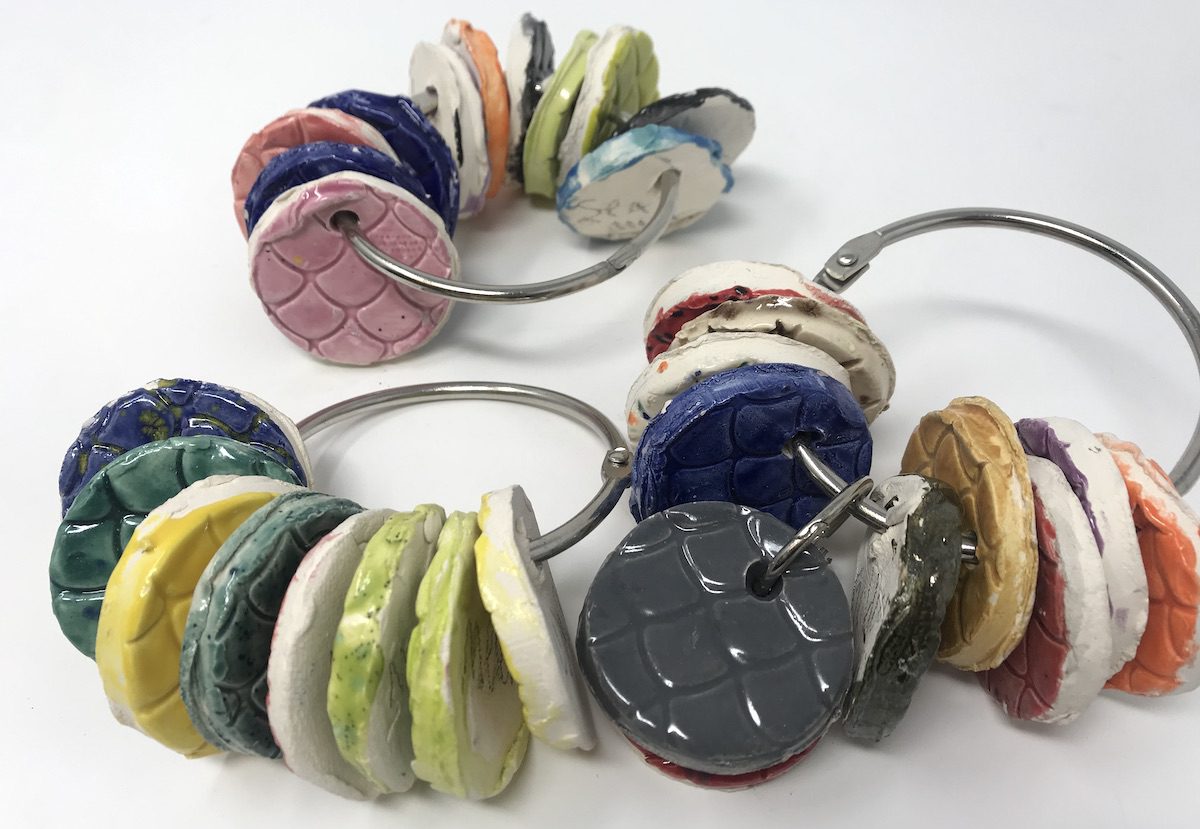
1. Use Binder Rings

Using a large three-inch binder ring is an excellent way to display test tiles. It will save space and condense your display. When you create your clay tiles, make sure to punch a hole through the clay. After tiles have been bisque-fired and glazed, you simply need to slide the tiles onto the binder rings.

Organize your test tiles in a method that works best for your classroom. You might consider placing glaze colors on binder rings by color family, glaze brand, or glaze type.
2. Create Magnets

Maybe you want your test tiles to serve a dual purpose. Because when you’re not doing your clay units, tiles just sit there. If you want your test tiles to serve a functional purpose, try displaying them like magnets. All you need to do is glue a magnet to the back of the tile, and you can use them on your classroom board, but they’ll also be available when it’s time to glaze.
3. Attach Directly to Glaze Bottles
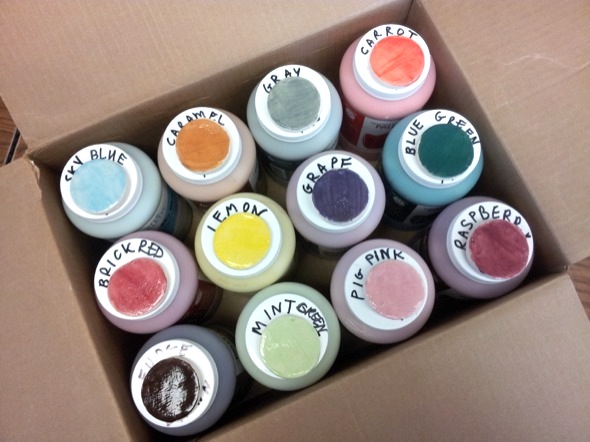
Depending on how you set up your classroom for glazing, you might decide to attach your test tiles directly to the glaze bottle. You can do this by hot-gluing or using velcro on the lid or body of the container. There are some pros and cons to this approach. Some of the advantages are that students can quickly identify which test tile belongs to which glaze without searching. If you decide to attach the tile to the lid, the old lid can be swapped out on a new glaze. Some disadvantages might be that through frequent handling, tiles can fall off easily, and mixing up lids can create confusion.
4. Use Different Shapes
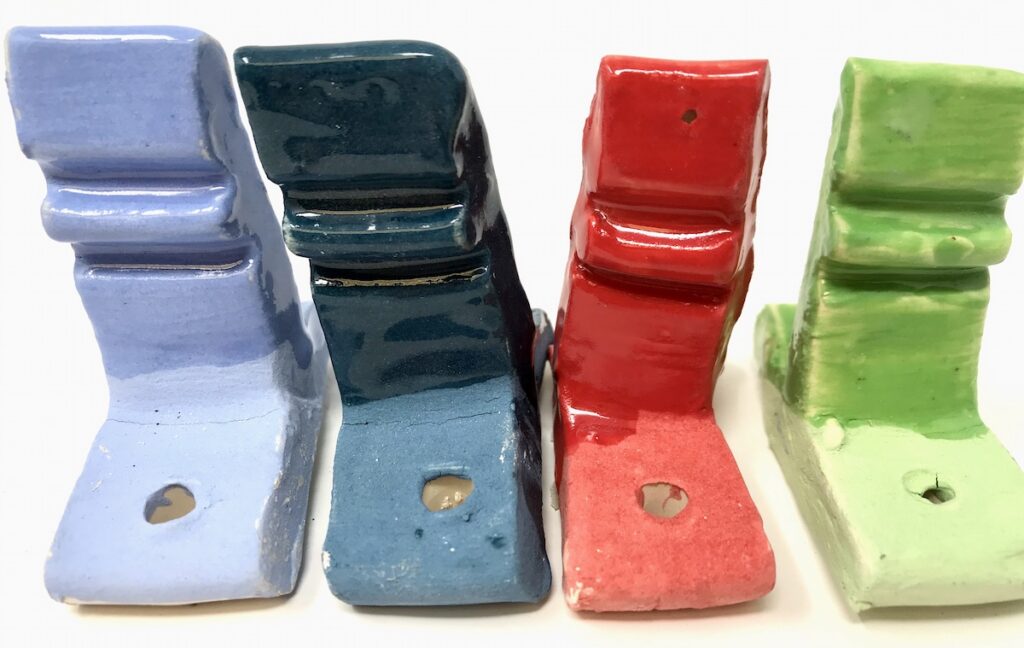
While it’s essential for test tiles to show how glaze looks on both smooth and textured surfaces, it’s also vital to differentiate test tiles by type. Consider using different shapes so students can quickly identify the different types of glaze. For example, try using a different shape for underglaze tiles and an alternate shape for your low-fire glazes. The same can be done for your mid-range or high fire glazes, as well. Doing so will make it easier for students to identify they are using the proper glaze for their clay bodies.
Pro-Tip
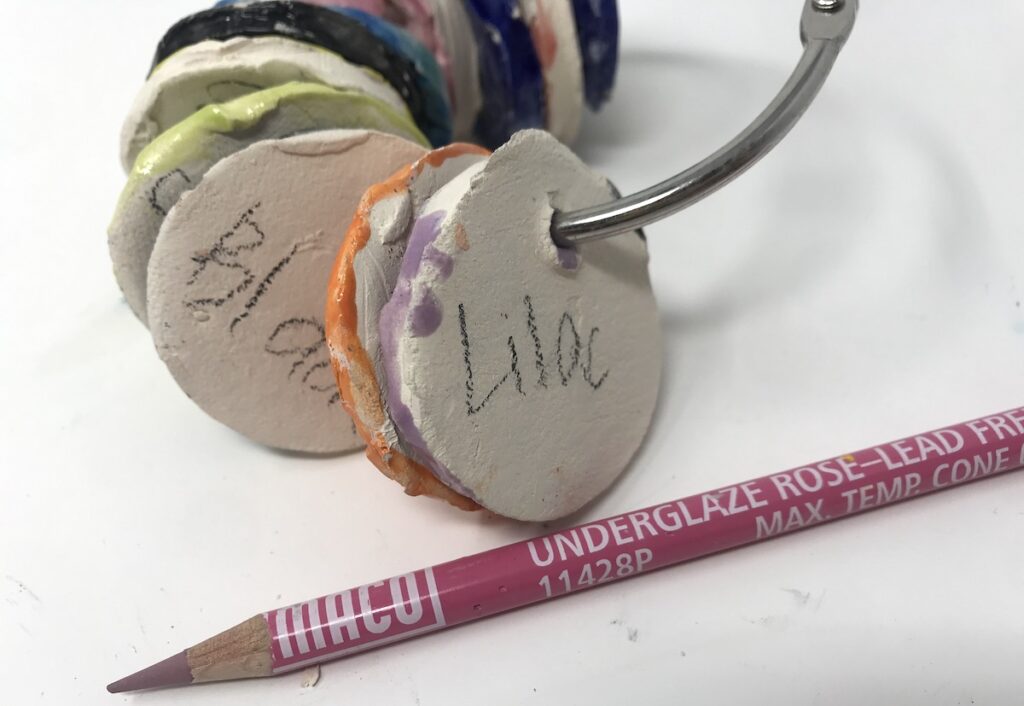
No matter how you choose to display your test tiles or what firing temperature glaze you use, it’s important to properly label them. One of the easiest ways to do this is by using an underglaze pencil. After your clay tiles have gone through the bisque firing, use an underglaze pencil to write the name of the glaze color on the back. Simply glaze the front side, and when the tile comes out of the glaze firing, the glaze name will appear on the back.
Doing the initial work to create glaze test tiles can be time-consuming. But, it is an essential part of ceramics to help students better understand the science of glazing. If your test tile display needs an update, try one of the above methods. You might even be able to enlist your students to help!
How do you display your glaze test tiles in your classroom?
What part of the glazing process do your students have difficulty understanding?
Magazine articles and podcasts are opinions of professional education contributors and do not necessarily represent the position of the Art of Education University (AOEU) or its academic offerings. Contributors use terms in the way they are most often talked about in the scope of their educational experiences.


