
The experience of throwing on the wheel is often a scary, exciting, and memorable experience for students. However, not all classrooms are equipped for a class set of throwing wheels. Even if your classroom can only support one, two, or three throwing wheels, consider this a gift! But, with the lack of equipment, a challenge can present itself by trying to figure out how you can give your students a successful throwing experience. With a little bit of patience and planning, you can make it happen.
Here are 6 things to consider to create the most successful throwing experience for students:
1. Create a throwing calendar.
Creating a throwing schedule for students is one of the first things you need to consider even before showing your students how the process works. Here are two things to consider when making your calendar.
1. How many students will throw a day?
Let’s say you only have three pottery wheels in your classroom; you’ll probably want to have three students throwing a day to maximize your time.
2. How long will it take to give every student the experience?
You might choose to have your students throw on the wheel all year long in a large rotation. Doing this will allow students to practice their craft and get more comfortable with the process. You may also have students opt out of trying it a second or third time. By taking a year-long or semester-long approach, students will need less support from you each time they throw and will eventually be on their own.
On the other hand, thinking about students throwing on the wheel every day for a semester or year can seem overwhelming. Instead, you might schedule throwing to take place one or two months at a time. This way, students experience throwing without having to do it daily.
2. Schedule students for consecutive days.
However you plan your throwing calendar, it’s ideal to give students at least two days in a row. Doing this allows students to find success if they weren’t successful on their first try. It also provides students the opportunity to trim their clay pieces.
3. Record the demonstration process.
Demonstrating the throwing process is an obvious step for students to be successful. However, overloading your students with an excess of information at once is not going to be beneficial. It is crucial to do a live demonstration for students to see where all materials and things are set up, but consider recording the process as well. For those students who might have to wait three weeks for their turn, having a video for them to review will be helpful. Make a five-minute video taking your students through the process and have them watch it the day before it’s their turn to throw. This way, you don’t have to repeat information, and you can be attentive to the other students in your class as well.
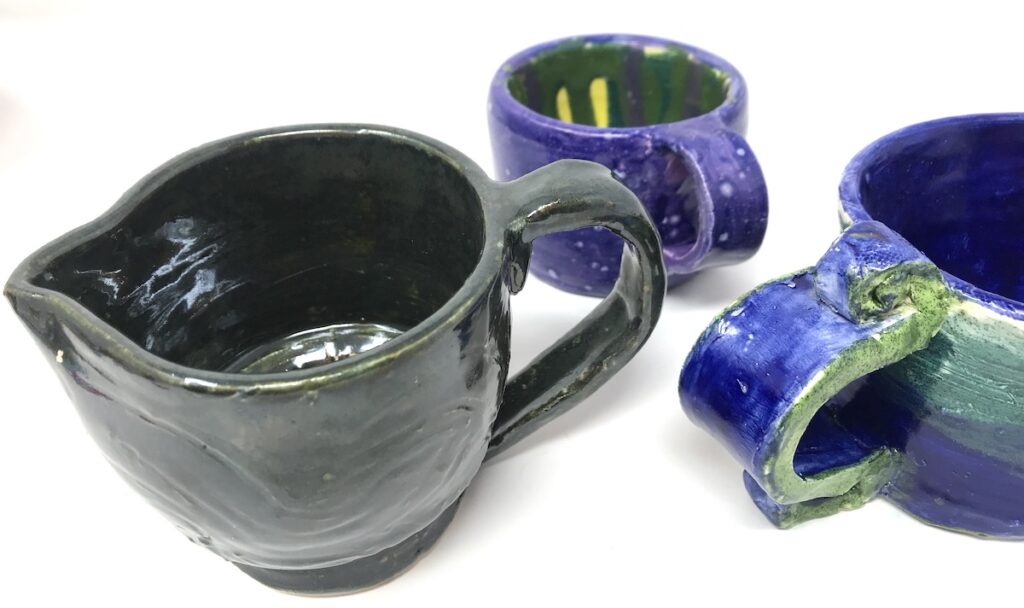
Other things you might consider recording for students to review include how to trim a pot, how to create and attach a handle, and any other design element processes students might want to add to a wheel-thrown piece. For additional tips on what you might want to include in your demonstration process, download these anchor charts.
4. Give your students some assistance.
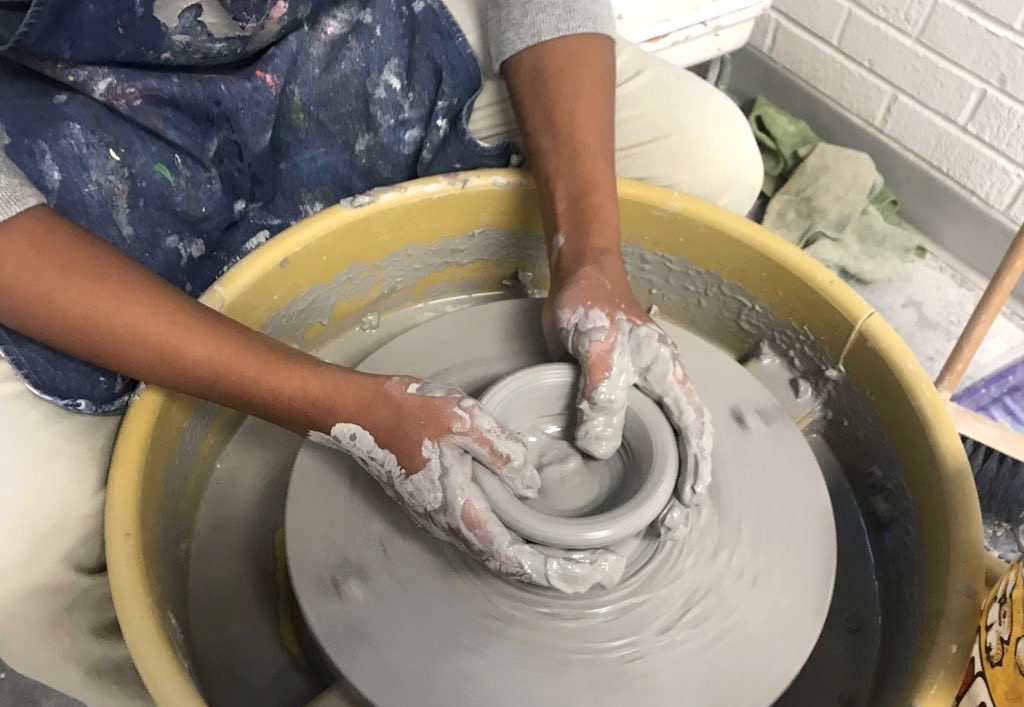
Do you remember your first time throwing on the wheel? Centering clay is by far the most challenging part of the process. It’s often difficult for students to understand how centered clay is supposed to feel until they’ve experienced it. If you want your students to find success with limited exposure to throwing on the wheel, check your students’ piece to see if it is centered. Students will often rush through the process and think it is centered, and as soon as they open and pull the clay walls, they’re in for a rude awakening.
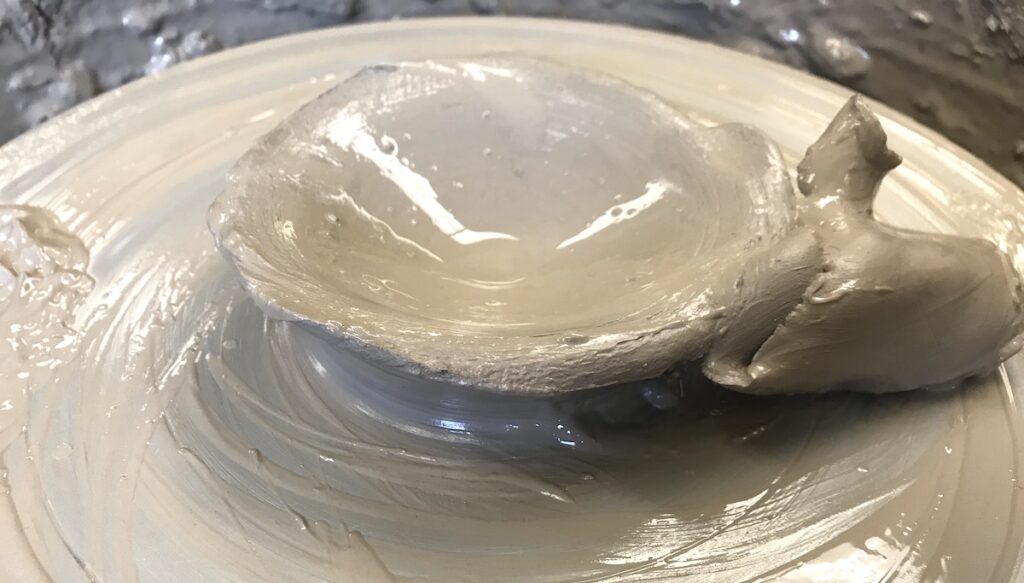
With that being said, students need to learn from their failures, but by providing a little assistance, you will help students find success. You don’t need to open, pull, or shape the clay, but double-checking to see if the piece is centered will go a long way.
Another area you might consider giving your students assistance with their first time is helping them take a finished piece off the wheel. If you have enough clay bats, you don’t have to worry about this. But, using a clay cutter and pot lifters for the first time can be terrifying as students worry if they might ruin their piece.
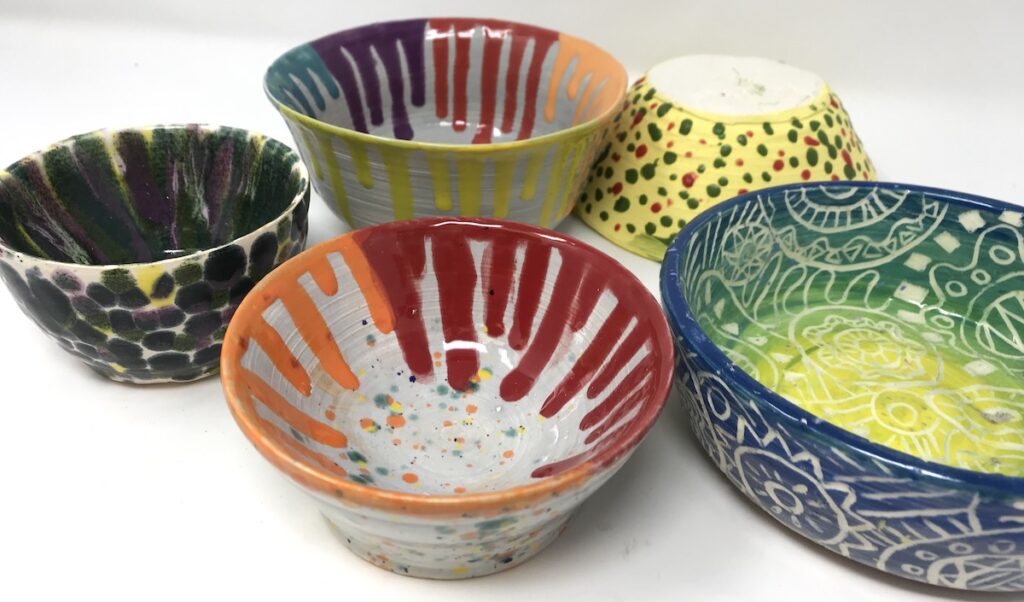
5. Cover clay pieces.
Because you don’t know if your students are going to want to trim or add designs or handles to their wheel-thrown pieces, it’s best to cover them. An easy way to do this is to use small brown paper sacks over the top. They can be used repeatedly and are inexpensive to obtain.
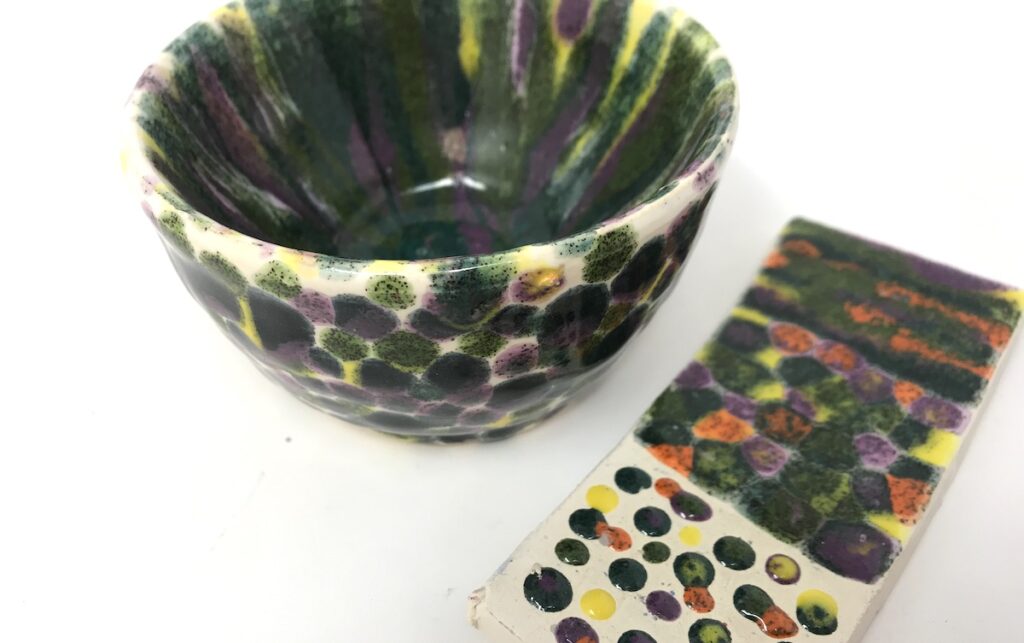
6. Practice glaze techniques first.
Why does it always seem that students rush through the glazing process? There’s nothing more disappointing to a student when their successful wheel-thrown piece turns out less than desirable because of a poor glaze job. Before your students glaze, have them practice on a test tile first. You might even choose to do this before students touch any clay at all. This way, they can practice additional techniques that might need to be done in the leather-hard stage.
Throwing on the wheel is one of the most exciting skills to teach and for students to learn. The opportunity you give your students, even with limited resources, might be the only experience they ever get. We want our students to be successful, and they can be! Keep the above tips in mind as you share the throwing process with students.
What’s your favorite part about throwing on the wheel with students?
What do you find challenging about teaching students to throw on the wheel?
Magazine articles and podcasts are opinions of professional education contributors and do not necessarily represent the position of the Art of Education University (AOEU) or its academic offerings. Contributors use terms in the way they are most often talked about in the scope of their educational experiences.


