Art clubs are amazing ways to galvanize students around art. It helps kids get excited and more deeply invested in what you are teaching as they take ideas to the next level. One of the best ways to unify your art club members is to create art club t-shirts! Students love sporting handmade shirts to show their pride as an art club member.
Here are 5 art club shirts to make with your artists:
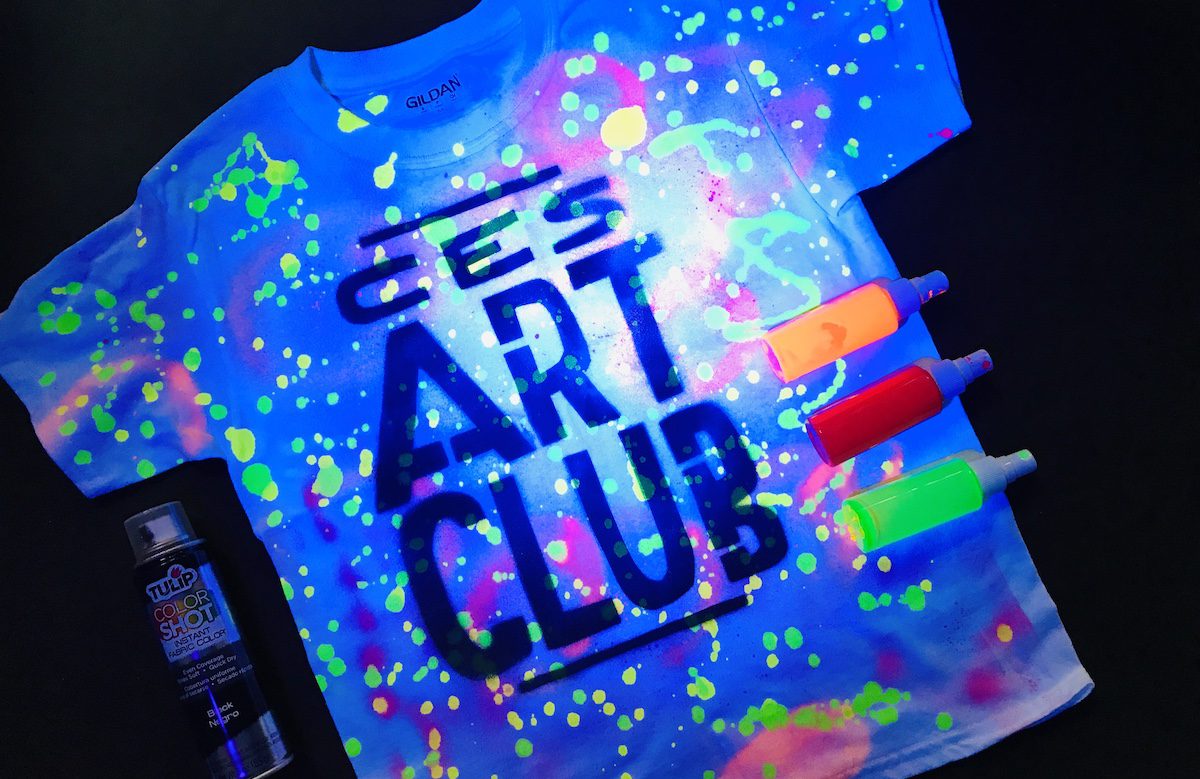
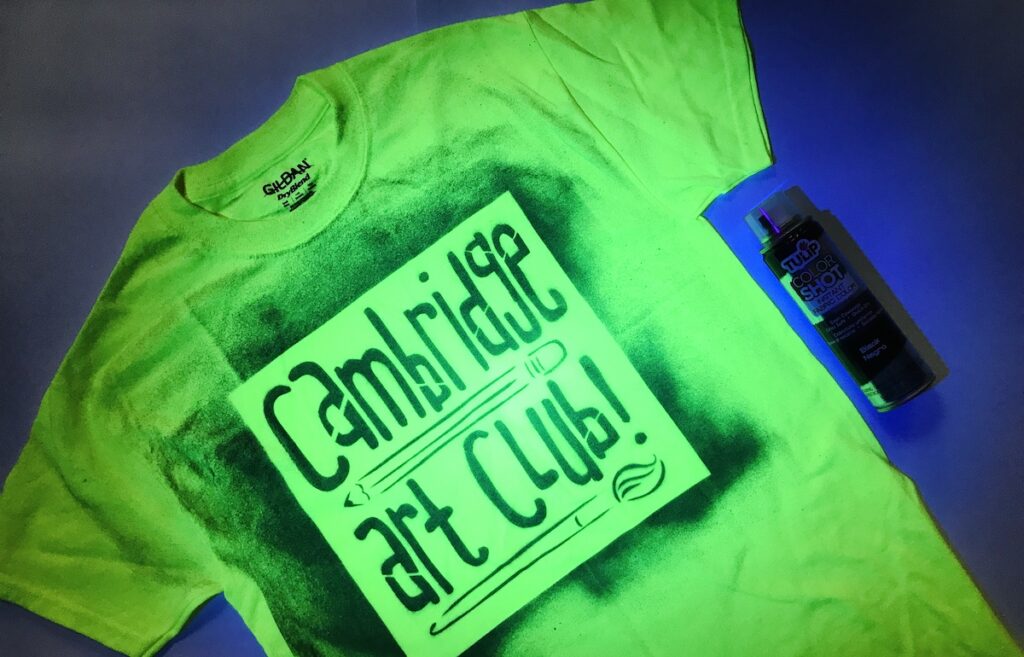
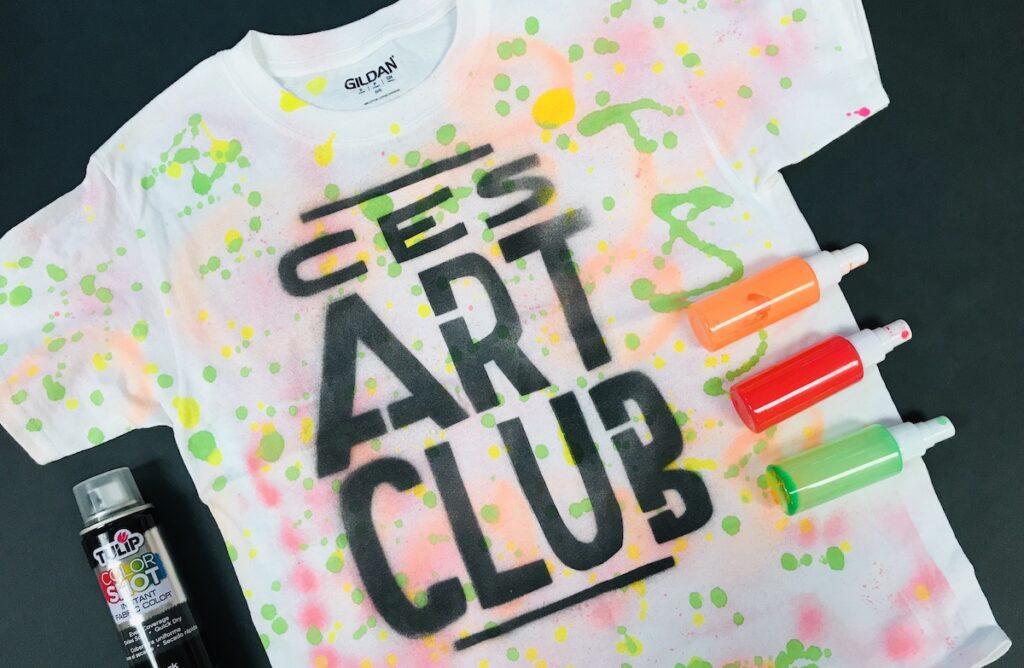
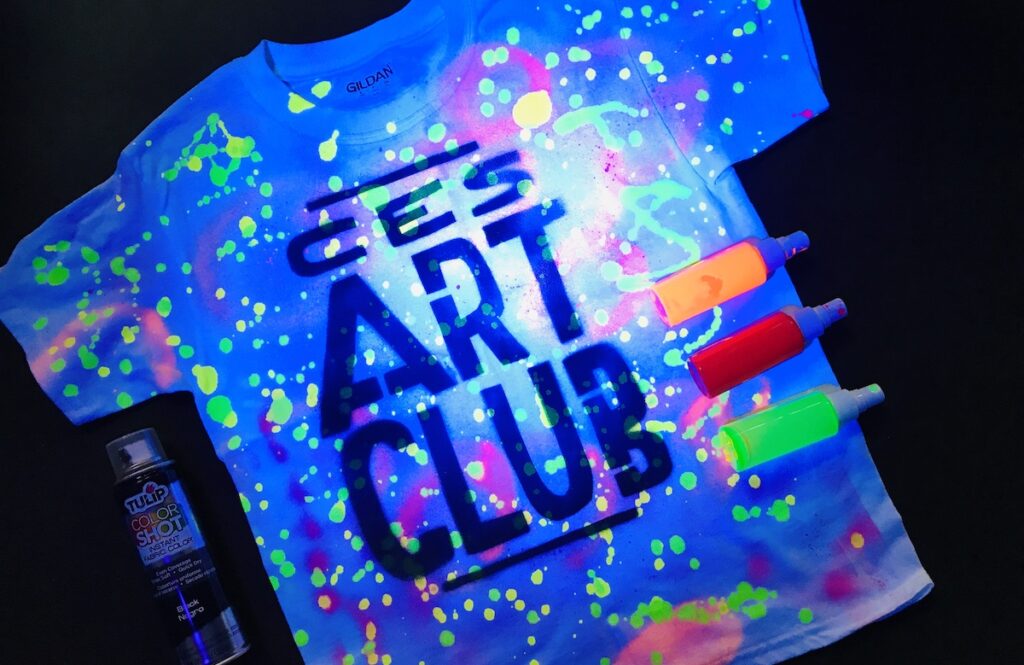
1. Simple Stencil and Blacklight
Materials you will need:
- Neon t-shirt
- Protective paper inside the t-shirt
- Fabric spray
- Tagboard stencil
- Blacklight (optional)
This technique is a tried and true favorite. Anytime a blacklight is involved, you really can’t go wrong. To create this shirt, cut a stencil for your students to lay over the top of their flattened shirt. If you are creating shirts with advanced students, you can have them create their own stencils using tagboard and X-ACTO knives. Make sure to have a protective sheet of paper inside the shirt, so the fabric spray does not leak through to the back. Once the stencil is sprayed with a light layer of fabric spray, lift the stencil gently and keep on creating. Expert tip: If you use neon shirts, like hot pink or lime green, it glows when you shine a blacklight on it!
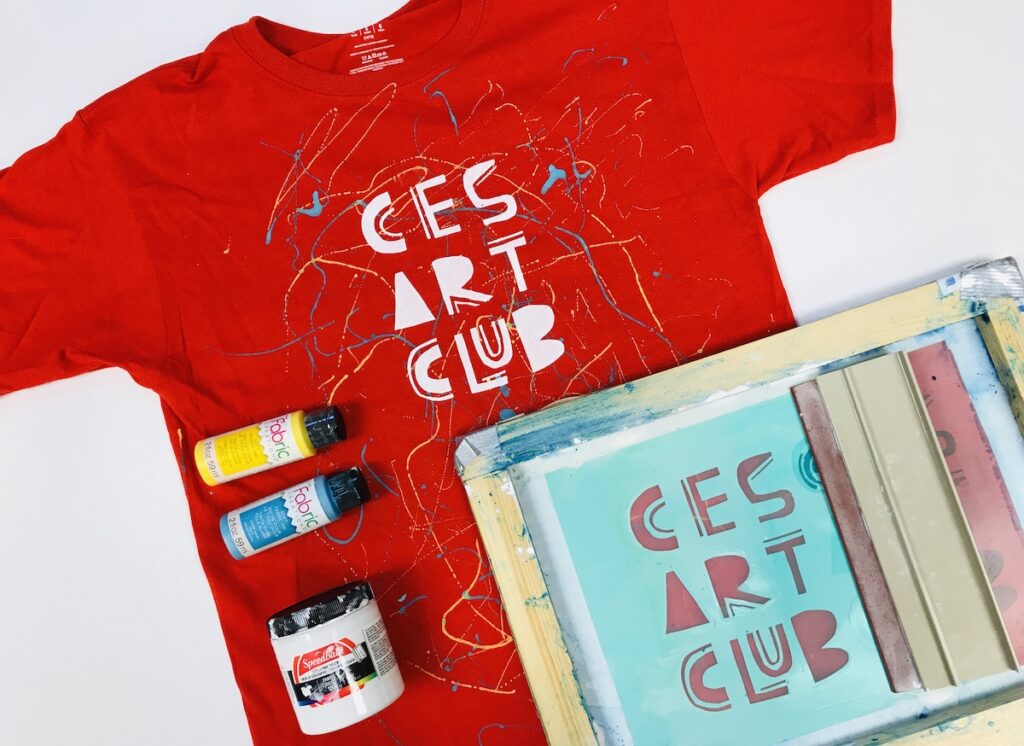
2. Screen Printed
Materials you will need:
- T-shirt
- Protective paper inside the shirt
- Fabric paint
- Fabric screen printing ink
- Screen
- Screen-printing squeegee
- Adhesive vinyl or Mask-Ease
- X-ACTO Knife
This t-shirt technique will deliver the cleanest, most consistent designs. First, our art club students splattered with fabric paint. However, you could certainly eliminate this step if you’d rather have a cleaner design.
To create a screen design without using noxious chemicals, simply cut your desired design out of adhesive vinyl. Remember, if you plan to include text, you will need to reverse the design you cut out, so it shows up correctly when printed. Peel off the protective backing and apply your cut stencil to the front side of a clean screen. Use tape around the edges of the vinyl to cover any exposed screen.
Lay the flat side of the screen down against a flattened t-shirt. Make sure there is a protective paper in between the t-shirt to avoid bleeding your design to the back of the shirt. Lay out a long bead of fabric screen printing ink along the inside edge of the screen at the top of your design. Use a squeegee perpendicular to the screen to evenly drag down the long bead of ink over your design. The ink will press through the screen mesh and the cut parts of your design. After one pass of pulling ink from top to bottom, pull your ink in the opposite direction with your squeegee to ensure that the entire design is evenly filled. Gently pull up your screen to expose your printed design! Check out this step by step video to see it in action!
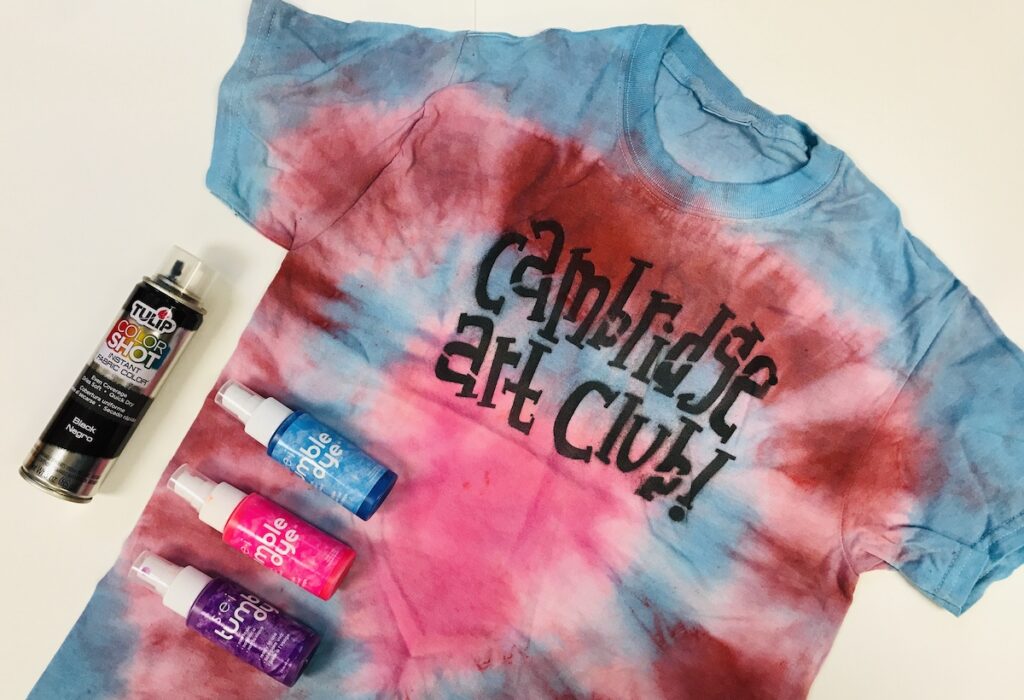
3. Tie-Dye
Materials you will need:
- T-shirt
- Protective paper inside the shirt
- Tie-dye
- Rubber bands
- Ziploc bag
- Gloves
- Tagboard stencil
- Fabric spray
Prepare the shirt and choose a tying technique using these helpful videos for your desired tie-dye design. Apply dye to the shirt using your preferred tie-dye materials. After the shirts are tie-dyed and dry, you can use a cut stencil or screen print your art club design onto the front of your t-shirts!
For a more in-depth look at tie-dye, see Tie Dye in the Classroom at a Glance.
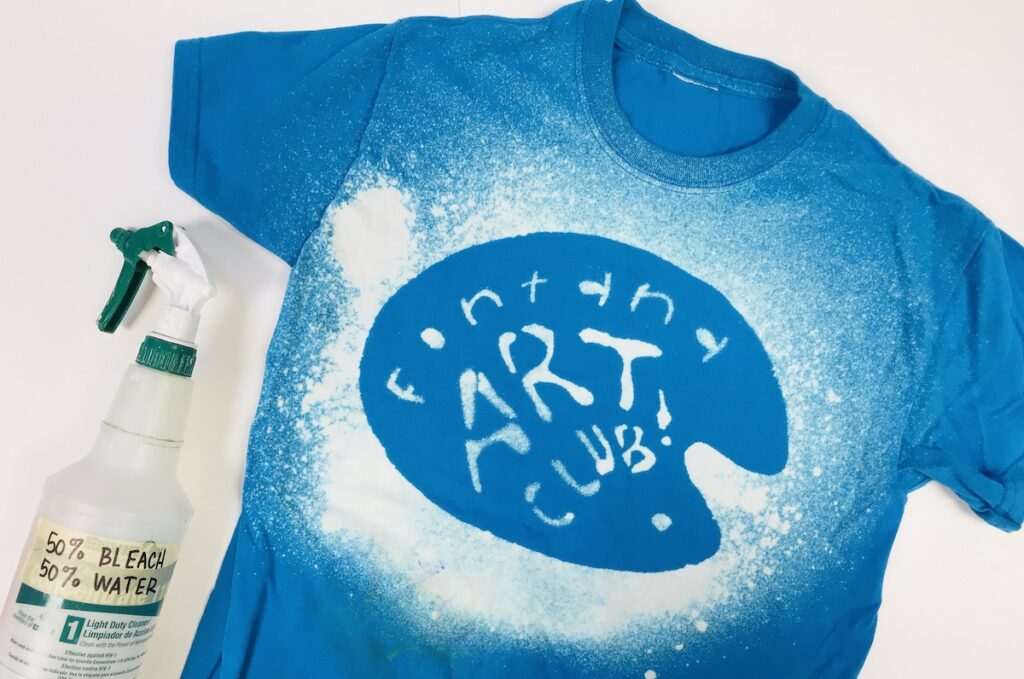
4. Bleach Spray
Materials you will need:
- T-shirt
- Protective paper inside the shirt
- Laminated tagboard stencil
- Spray bottle of bleach (50% water, 50% bleach)
- Messy towels
Get your shirt ready by putting a sheet of the protective paper in between the shirt layers. Cut out your stencil design from laminated paper. Prepare a spray bottle of 50% bleach and 50% water. Lay your laminated stencil on top of the shirt. Spray a light layer of the bleach mixture on the front of the shirt. Carefully lift the stencil off the shirt and place directly into a messy towel and pat the stencil dry. Within a few minutes, you will see the areas with the bleach mixture applied start to fade!
5. Neon Splatter Paint
Materials you will need:
- T-shirt
- Protective paper inside the shirt
- Neon fabric paint
- Tagboard stencil
- Blacklight (optional)
This technique is basically the opposite of technique #1. However, instead of a neon shirt and dark stencil, the materials are reversed! Use neon fabric splatter paint and fabric spray. Top off your design with a stencil to unify all the t-shirts. Finally, shine a blacklight on it to reveal your creation!
Here are a few extra tips:
- Have students wear their art club shirts on meeting dates to encourage community building.
- Have your art club members run stations at your art show while sporting their t-shirts.
- Have students return their permission slips with art club shirt size and small membership fee together to keep better track of shirt payments.
- Remind families to be careful when washing t-shirts, possibly washing shirts separately and inside out for the first wash.
- When managing your art club students, try a specialty call and response attention-getter, just for them! For example, Teacher: “Art Club!” Students: “What’s up?”
Of course, even if you don’t have an art club, you can still use these t-shirt making techniques with any group of students or staff members! Most of all, have fun!
Have you ever made t-shirts with a group of students?
What other t-shirt making techniques would be great to try?
How else can you bring a sense of community to your art club?
Magazine articles and podcasts are opinions of professional education contributors and do not necessarily represent the position of the Art of Education University (AOEU) or its academic offerings. Contributors use terms in the way they are most often talked about in the scope of their educational experiences.